Busy Hands, Happy Heart
|
After the Christmas and New Year holidays pass, I like to transition our décor to a winter theme. Normally, this simply means keeping everything out except for the Christmas tree, stockings, Santa figurines, and most of the sparkly items. Not too much work! I realized last year I didn’t have a good winter wreath to hang, so thought ahead and made one this year! Using old clothing in my DIY projects is something I really enjoy and want to do more of, so I chose to get creative with some Goodwill sweaters in colors matching some of the exterior features of our home.  Here’s what you’ll need to make your very own cozy winter wreath:
I started by attaching the greenery to the frame. The greenery I used was a little unconventional. I found five felt placemats at Goodwill that worked great. I poked the greenery through the frame and attached each one to the wire of the frame with a twist tie, reinforcing the tie with some hot glue. 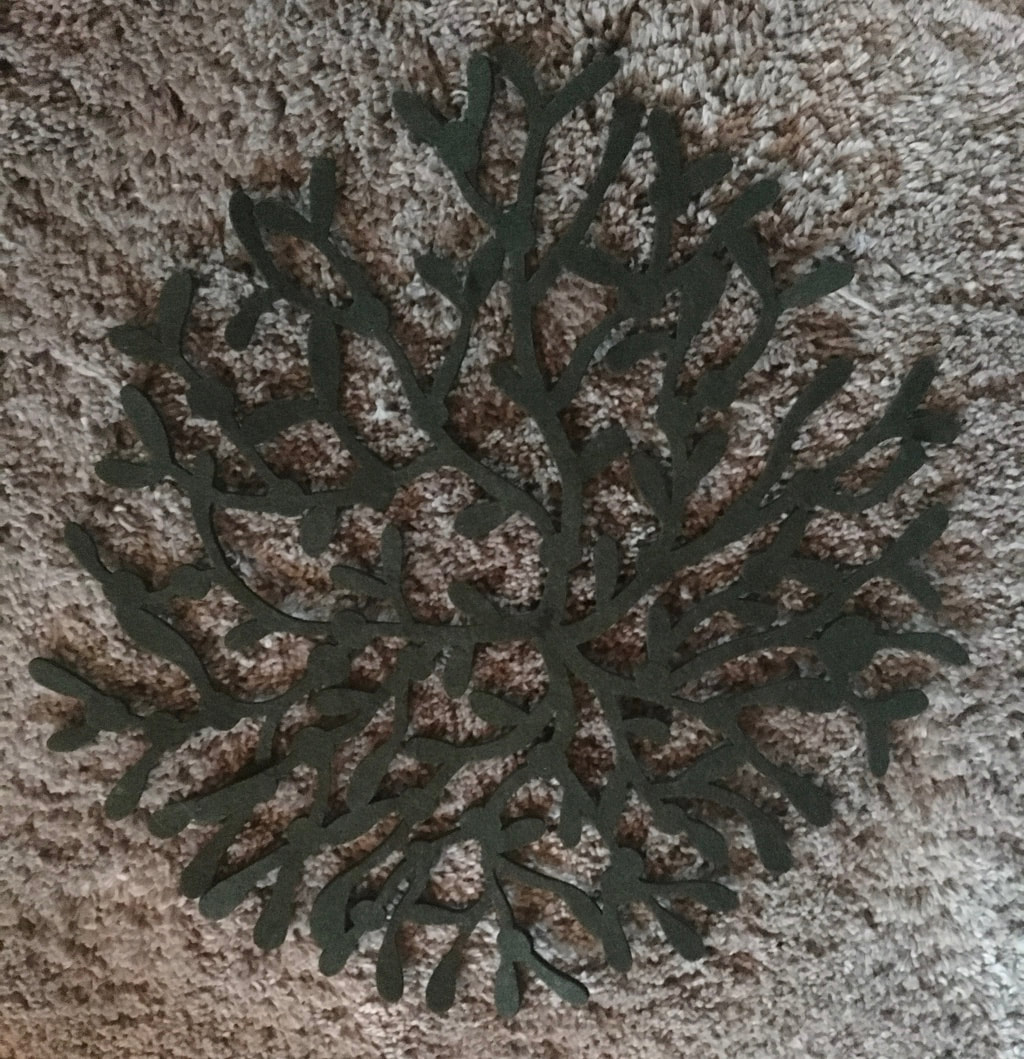 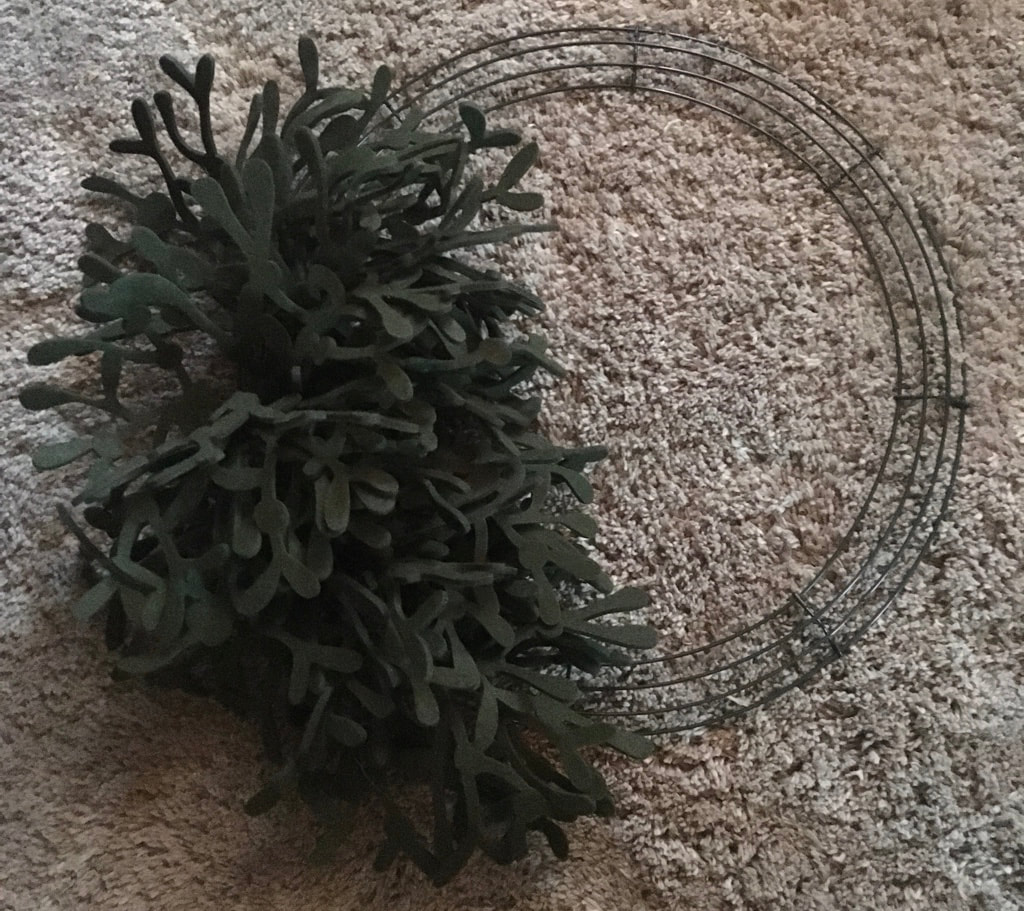 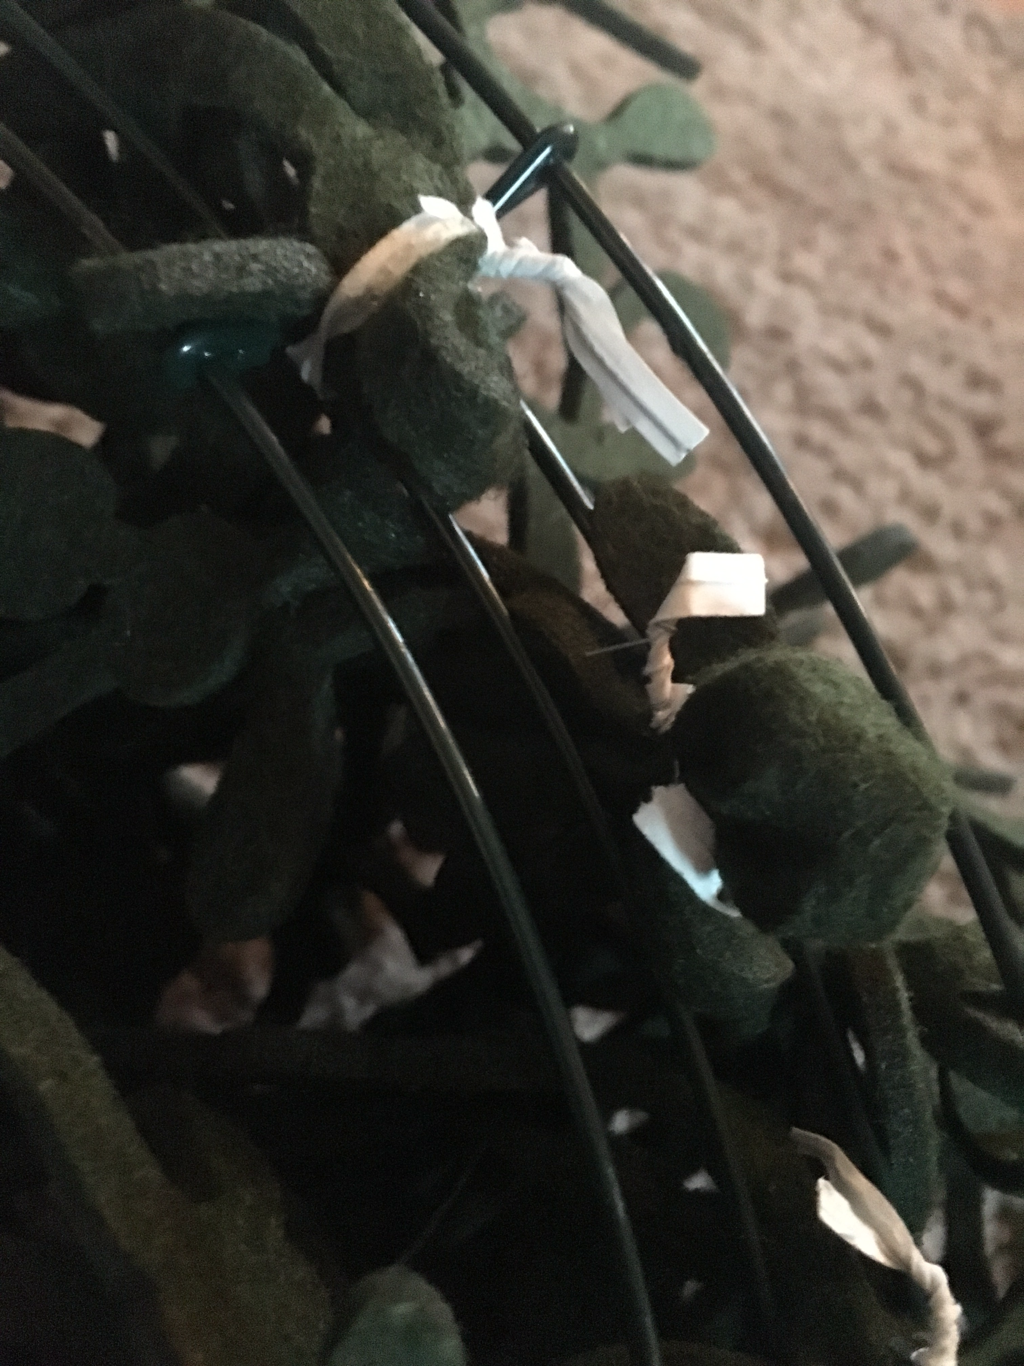 Then I planned out the placement of the ornaments. I only had small and large ornaments to use (I was trying my best to use leftover supplies from the basement), but I’d encourage you to use a medium size ornament as well. I think it would give the wreath more balance, transitioning from large to small a little less drastically! Once I had a good idea of how many ornaments I would need, I began attaching the sweaters to the ornaments. I did this by simply gathering the sweater around the ornament, placing a twist tie around the top, twisting it tightly, and cutting away what I gathered from the sweater. Not very technical…but it worked really well without needing to measure and I had more than enough material to work with. Once the ornament was cut away from the sweater, I reinforced the twist tie all the way around the top of the ornament with hot glue.  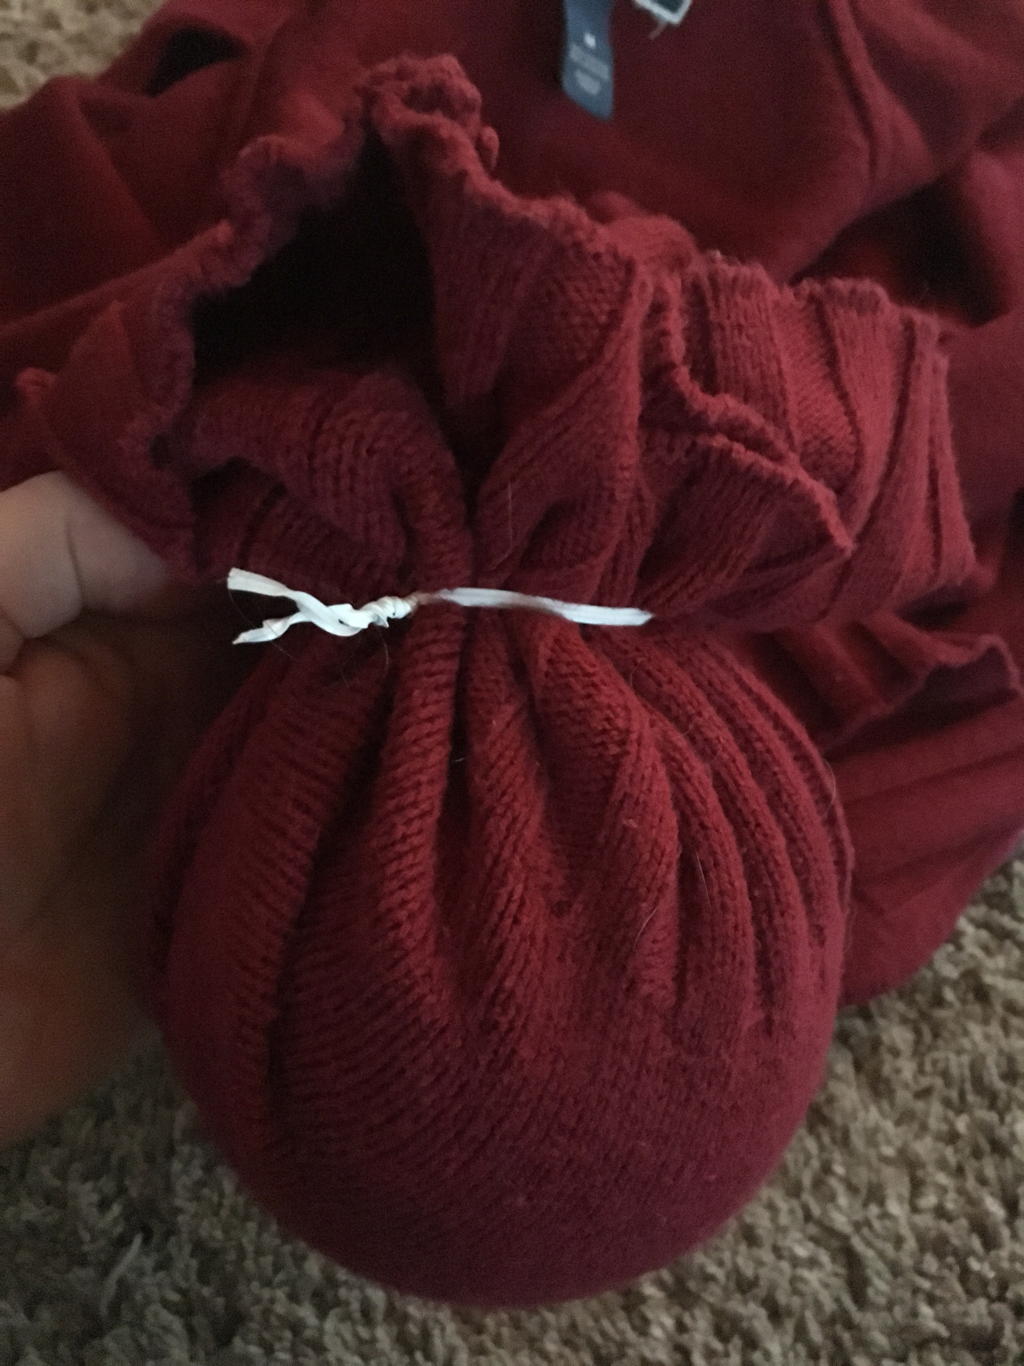  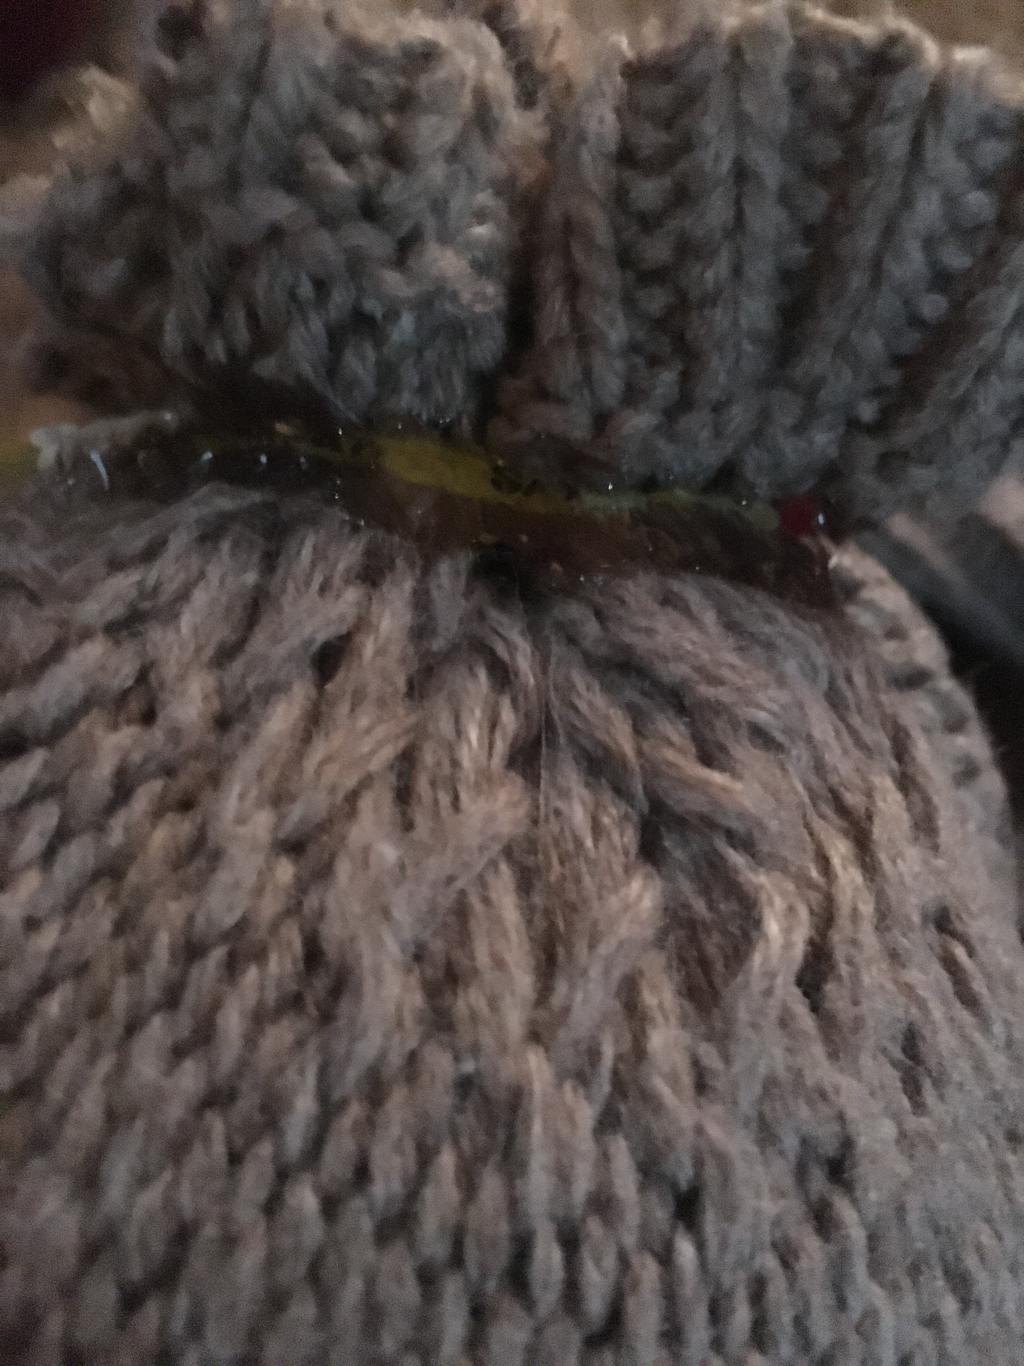 Next was getting the ornaments on the frame. I chose to use safety pins to attach the twist tie end of the ornament to the wreath frame. I made sure to loop the pin through the fabric AND the wires of the frame to make sure they were secure. I attached the large ornaments first and proceeded around the frame with the small ornaments.  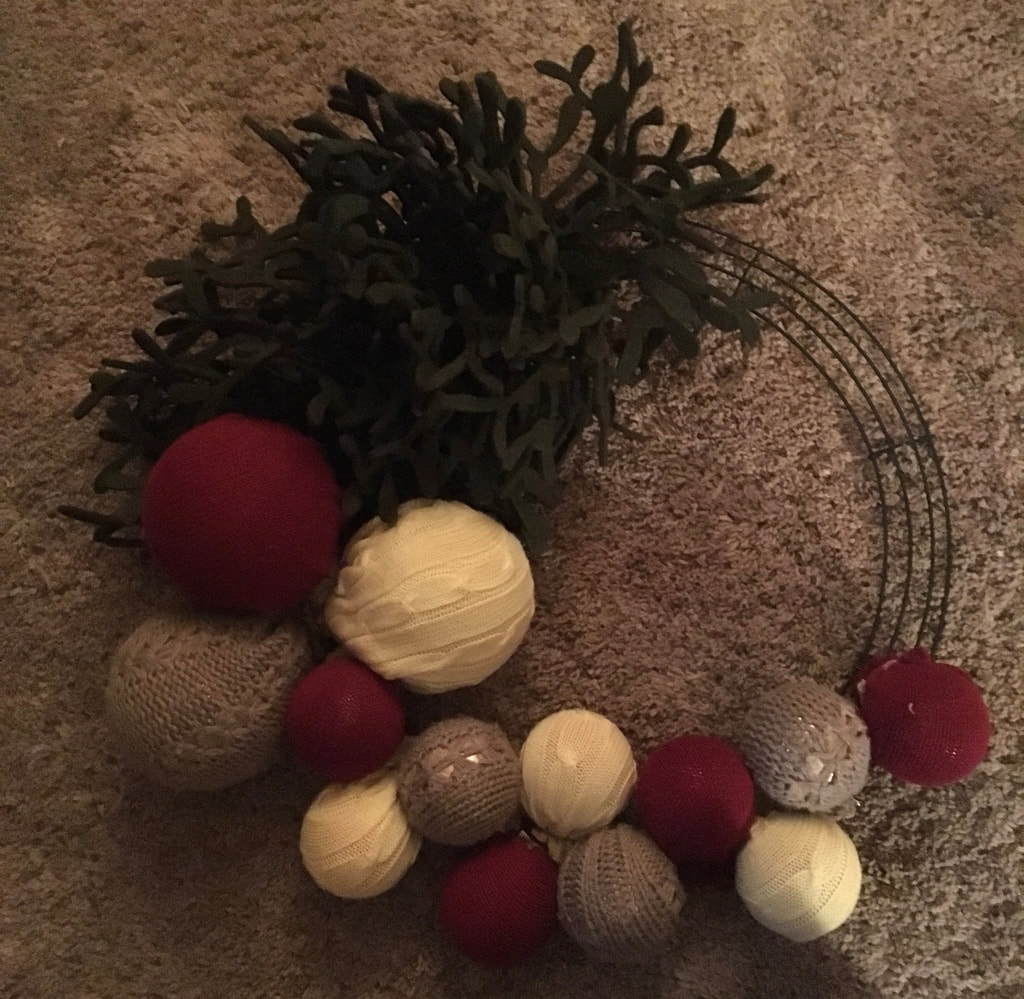 To secure the ornaments even more, and make them fall where I wanted them positioned, I went around the frame with jute. At the very top, I chose to loop the jute around the frame tightly to add a little open space. I dabbed the ends of the jute with hot glue so they would hold strong. 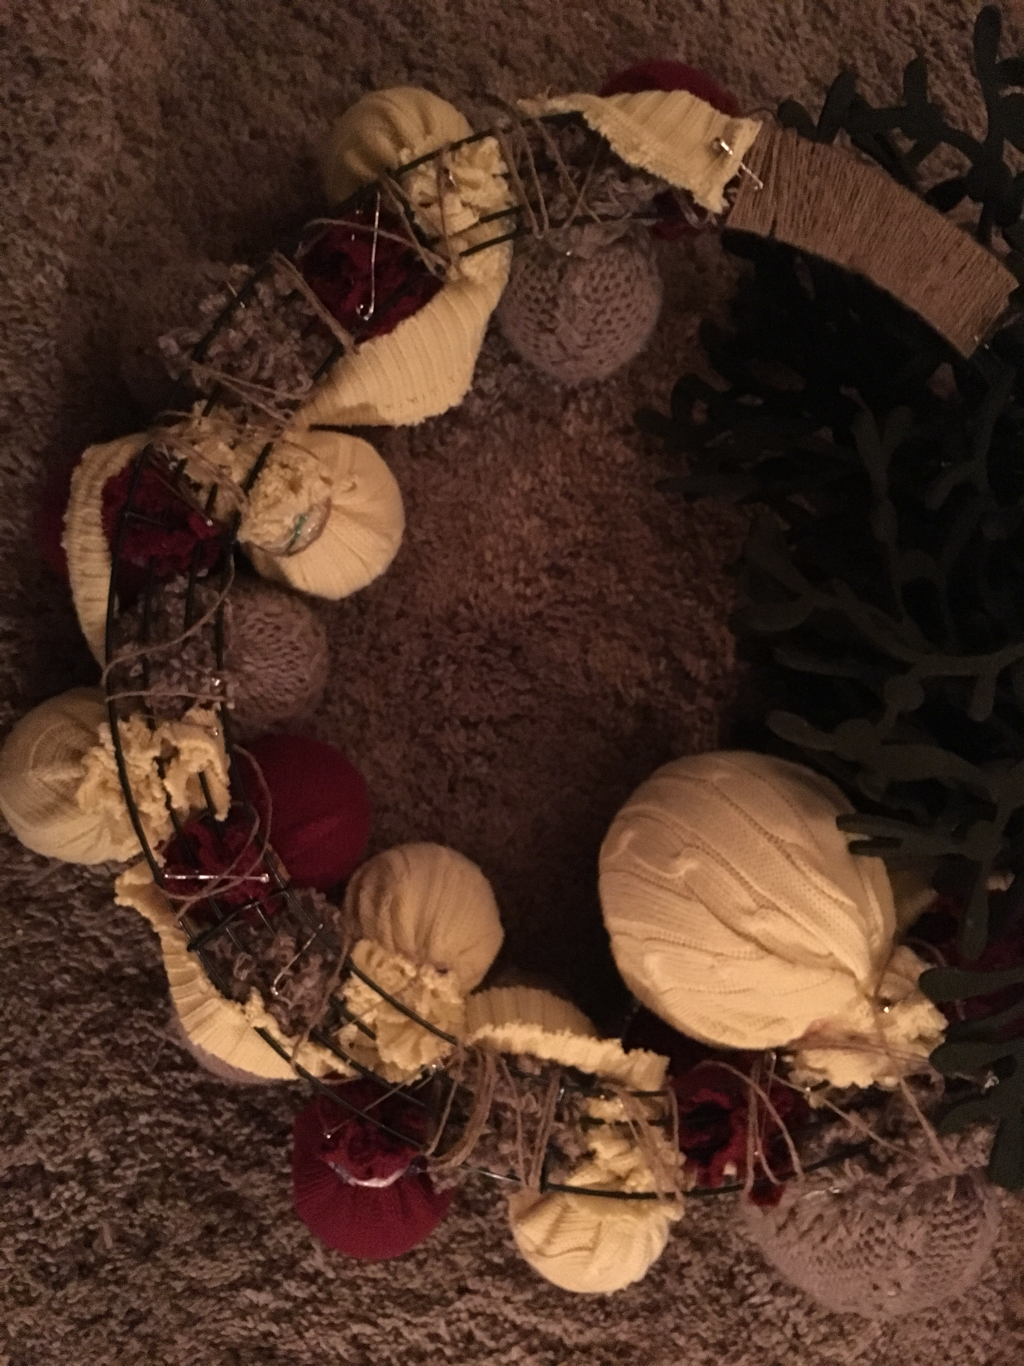 Because with this method you can see the bottoms/twist tie ends of some of the ornaments, I cut off a long strip from one of the sweaters and wove it like ribbon through the wreath. It worked perfectly in covering up what I didn’t want others to see! I attached the sweater ribbon with safety pins on the back side of the frame. 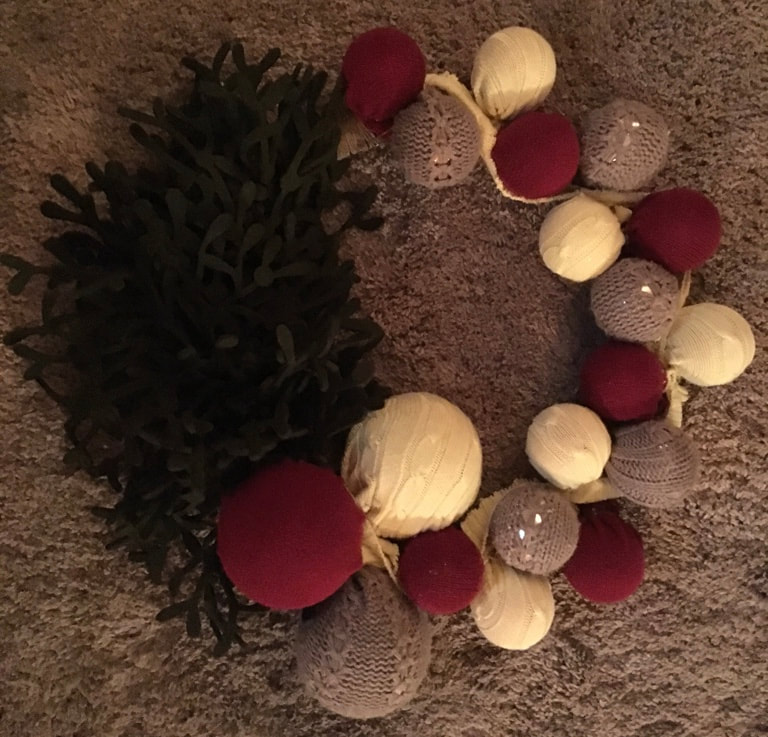 I’m a perfectionist that loves good balance, but there is something about the off balance look of this particular wreath that I really enjoy. Like I said earlier, if you have medium sized ornaments to incorporate, I think that would help with balancing this type of wreath out. Or you could use the same size ornament all the way around! Use what you have and get creative.   If you are interested in other projects I’ve done using old clothing, check out my no sew cloth pumpkins!
0 Comments
 I've been obsessing over kraft paper scroll signs for a year or two now. I don't know why it never occurred to me to make one until this year...I continue to see them in the homes of some of my favorite home décor bloggers and just had to at least give it a try. I'm really glad I did. Here's what you'll need:
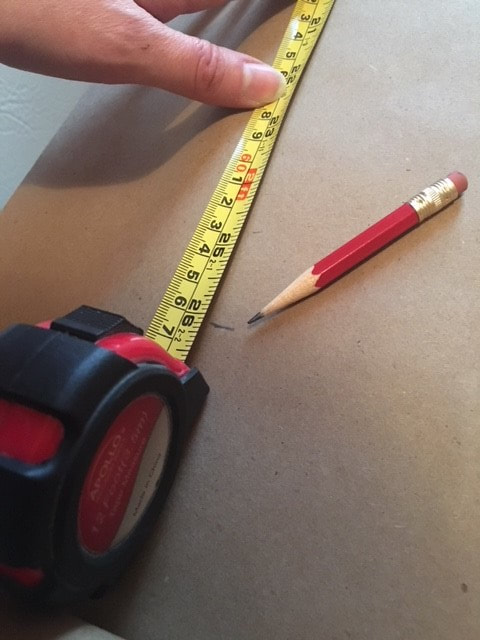 First you'll want to measure the wall space where the scroll will hang. Figure for an extra two inches on both the top and the bottom where the paper will be rolled. I had 30 inches of wall space to work with: two inches for the top roll, 26 inches for the hand lettering area and two inches for the bottom roll. Unroll a section of your paper, allowing the free end to roll up as desired. Measure and mark the area you will do hand lettering on. 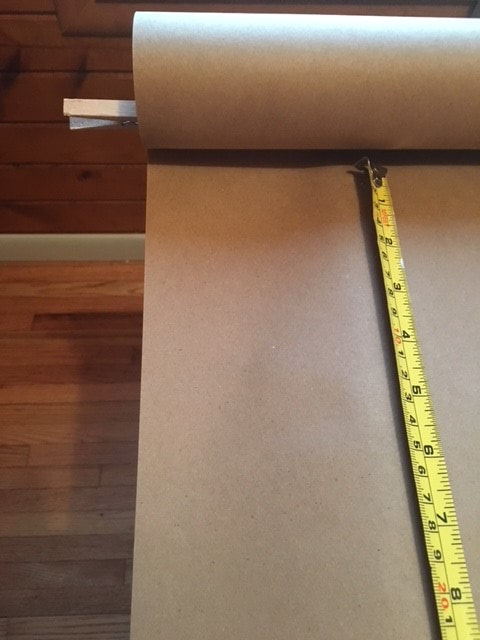 Secure the free end of the paper with clothespins. Determine how much rolled paper you want at the other end of the scroll and cut free from the whole roll of kraft paper. Secure this end with clothespins as well. 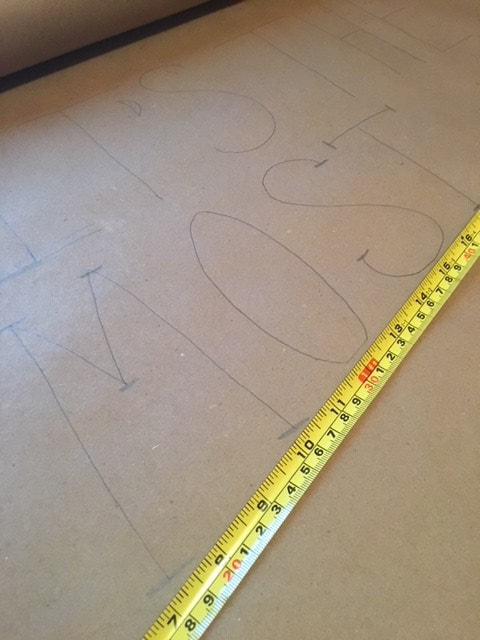 Once I had everything measured and the ends secured, I started hand lettering! I used my pencil to trace out the saying I chose. For the angled lettering, I used my tape measurer as a guide. 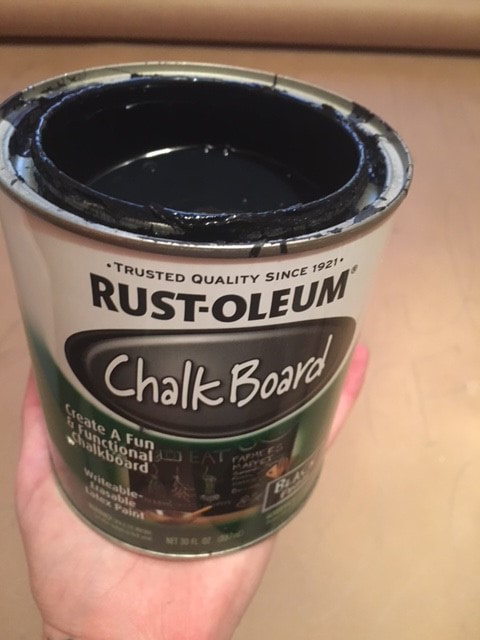 I'm really cheap, so I just used paint I already had. I wanted to do black lettering, so chose to use some leftover chalk board paint that seems to be a bottomless can! 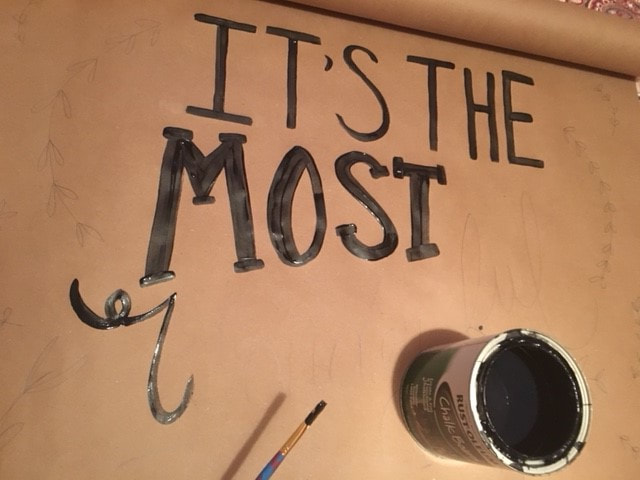 I used a small paint brush to trace over my pencil lines. I mixed fonts and strokes to give it a playful look (and to disguise any mistakes I made!). 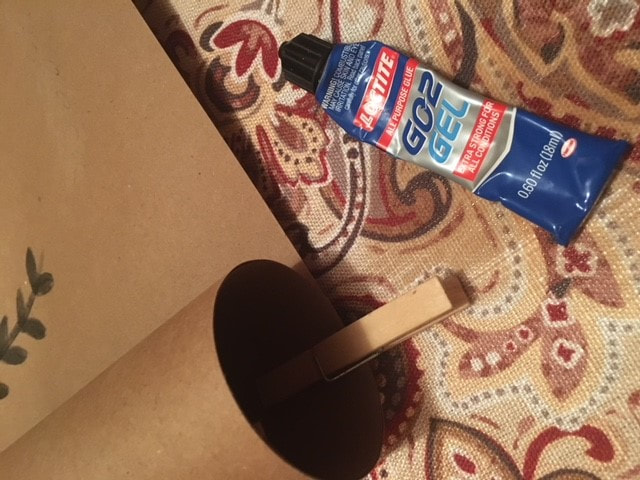 After the paint dried, I placed some glue under the rolled up paper to secure. I also added some staples later on to add extra reinforcement, because - gravity. 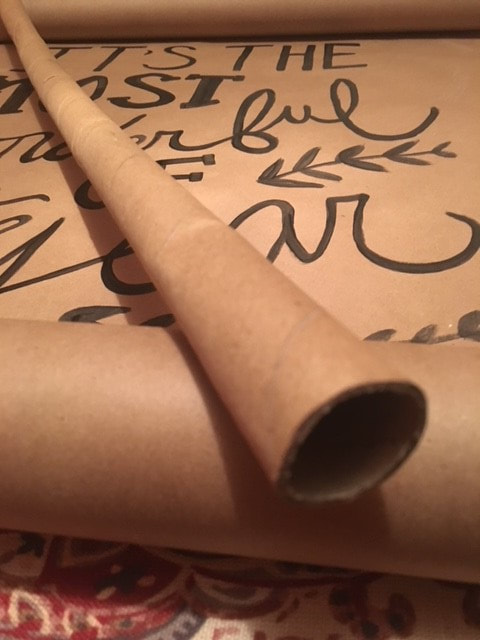 Next came the wrapping paper roll to hang the scroll from. 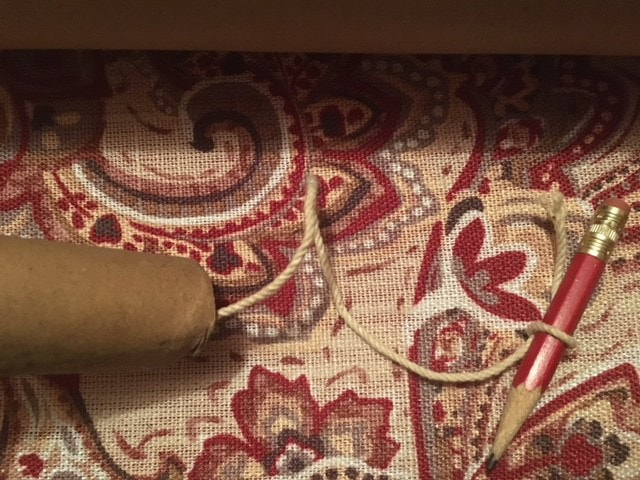 I tied my string to a pencil and looped it through the paper roll. I then inserted the paper roll into the top roll of the scroll.  Once the paper roll was through, I pulled the string to my desired length and tied/knotted the ends.  Here she is, in all of her glory! For being a beginner in hand lettering, I have to say I was pretty proud of myself. And just to give you an idea of what I was working from, here's the image that inspired me!  I went all out this year when it came to Christmas décor. I decked our halls inside and out in a day. I couldn't stop myself. I was that pumped to transition into the most wonderful time of the year! I felt a little silly though, because it was an abnormal 60 degree November day here in Iowa! I splurged a little bit this season and purchased a few new items to add to the decorations we've had for years. Much of what we have we 1) bought when we got married, 2) inherited when we bought our first home, or 3) inherited when we bought our second home! A lot of really great pieces, but many had seen better days... Although I bought some new items, some assembly was required. I rarely buy a completely ready-to-use piece. I normally buy the elements to make a ready-to-use piece. Here are just a few of the items I made or curated to make our home feel magical this holiday season! 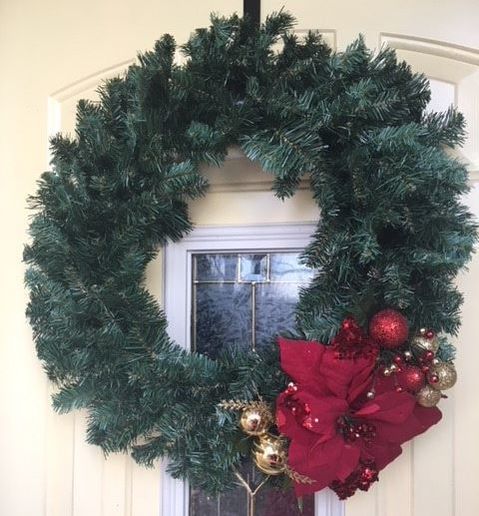 DIY Christmas Wreath I forgot how expensive pre-made wreaths are - $50-$100 plus! I was not willing to pay that much because I wanted a wreath for both our front and back door. I ran across some plain wreaths that were in the $10-$20 range, and they were 50% off. More my style. I then browsed a Christmas accessory isle that had small, festive items that could easily be clipped into or twisted into a wreath. Three small accessories was all I needed to create a simple yet elegant wreath. After discounts, this wreath cost me under $10 to make! I plan to carry this wreath into other seasons by simply swapping out the accessories. 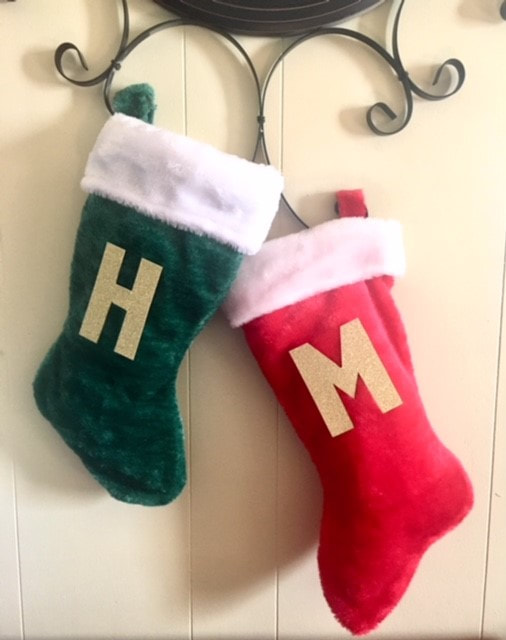 DIY Stockings I don't want to be misleading - I did not make these stockings, I just added the letters! Stockings are another item that can be pretty pricey. I found these stockings at the dollar store. I picked up a single piece of gold, glittery scrapbook paper for the lettering. Using a Sharpie, I drew out the letters on the back of the scrapbook paper. I'm getting better at hand lettering, you could certainly use stencils if needed. I then cut out the letters and glued them to the stockings! Easy as that. And by the way, we don't have kids...these stockings are for...OUR DOGS - Homer and Madison!! You could say we love them a little bit. 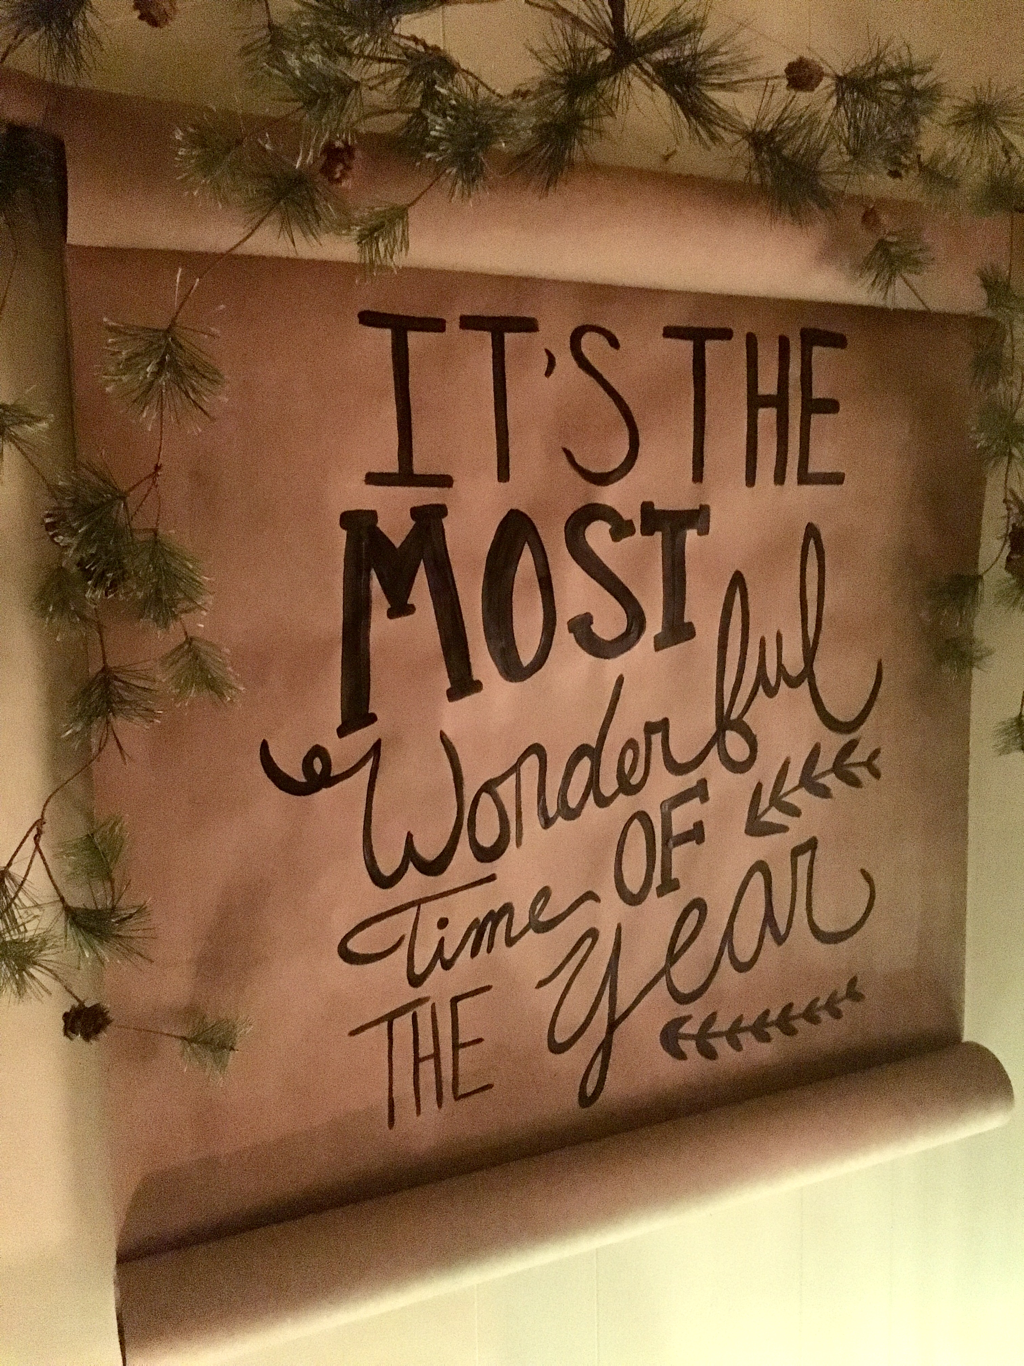  Curated Spaces I absolutely LOVE to shop my house. I shop my house before stepping a foot out the door to go to a store. I believe that if you can take a moment to look at what you have with fresh eyes, there are so many possibilities! The space above and the vignettes below are mostly pulled together from items I had. The only new items are the Poinsettia floral bouquets and the red/gold ornaments.  I upcycled this sled last Christmas. See how here. 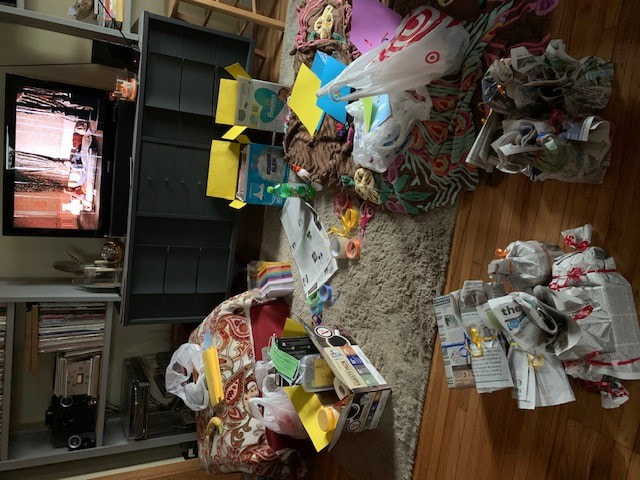 I also tried incorporating natural items from our property, like the branches and sticks in this planter.  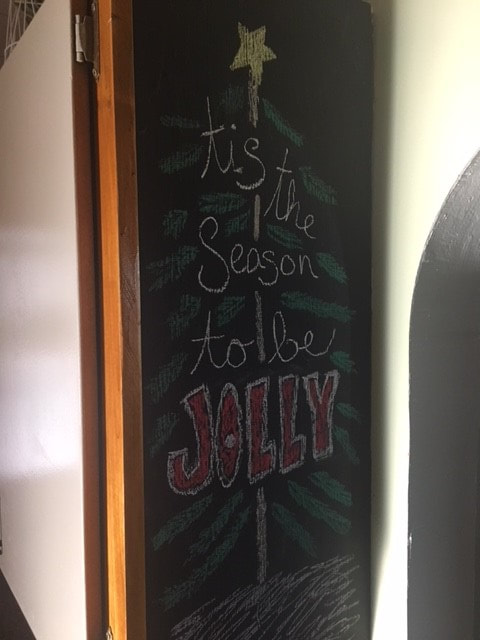 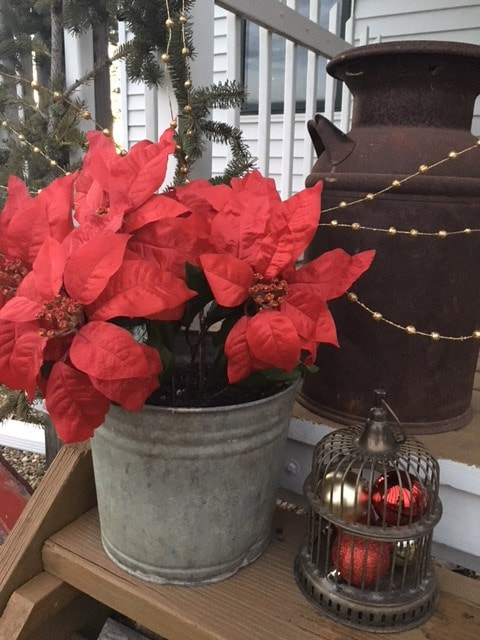  My Christmas decor obsession continues! This time, I upcycled a sled from Stuff Store in Waterloo. Here's what I used on this piece:
Here's what I started with:  It's a great, solid piece that I got for $12.00. Quite a score in my eyes. I used my green exterior paint to cover the blue paint that was on the sled. 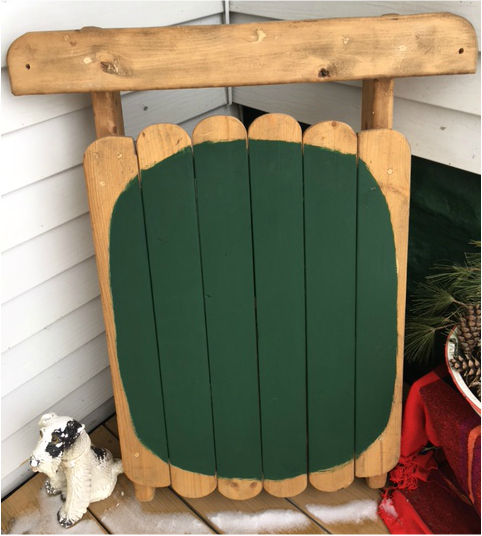 Once I chose the saying I wanted to use, I wrote it out on the sled in pencil. I then traced the pencil lines with my white exterior paint using a fine brush. When I finished the lettering (which I am still learning to do with paint, so be kind!) I had my husband take a look at it. He suggested I add some imagery. After some thought, I decided to add two "happy little trees" (Bob Ross was literally playing in the background) and some star/snowflake shapes. To top it all off, I added a strand of $5 battery powered jingle bell lights from Target for a pop of color. Here's the final product: 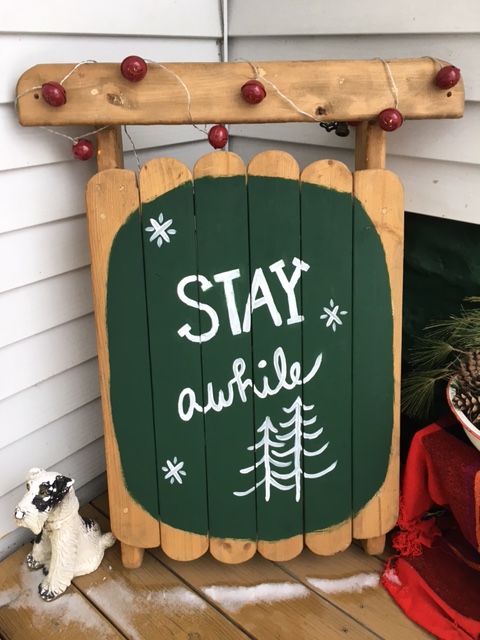 I think it turned out so cute! It only took a couple of hours on a Sunday afternoon to complete and cost under $20 for a piece that is just what I wanted for this corner of our porch.
My challenge to you - when you are at the store, start looking at items for their potential. Just because the item isn't exactly what you want in that moment, think about how you can make it so! My head has been spinning with Christmas decoration ideas since we moved to our new home. For my birthday, we explored one of my favorite places - downtown Cedar Rapids. They have such a great variety of antique, thrift, and re-purposed item shops. At one shop we went to, I was inspired by their greenery arrangement in an antique wash tub. The next day, I had a pretty Christmas-themed wash tub of my own sitting outside our house! I needed the following supplies (but didn't do a good job photographing them):
Assembly doesn't take long. I started by hooking the S-Hook to the edge of the tub and to the bow for hanging. A great place to look for holiday decor right now is at consignment/thrift shops. I got the metal bow I used from the Salvation Army for $4.00! I headed into our yard and cut small branches from two different evergreen trees. I'm hoping this greenery lasts awhile. I've never used live greenery, so it will be a learning experience! I'm sure you can find artifical greenery at the store, but I obviously chose the route of least cost. I have the luxury (and curse) of a backyard full of greenery! I placed my planter pot with rocks in the bottom of the wash tub, right in the center. I then took my greenery and arranged in the tub. I stuck some branches into the pot with rocks for stability. The rocks also made it easier to arrange the branches. I took other branches and placed them around the outside of the planting pot. The end result looks "wild" - which is what I wanted. 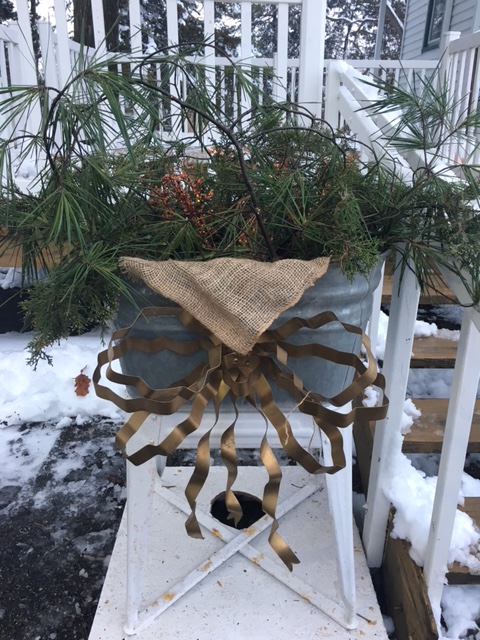 Finishing touches included a square piece of burlap, three sprigs of artificial red berries, and one branch of artificial pinecones and Cardinals. 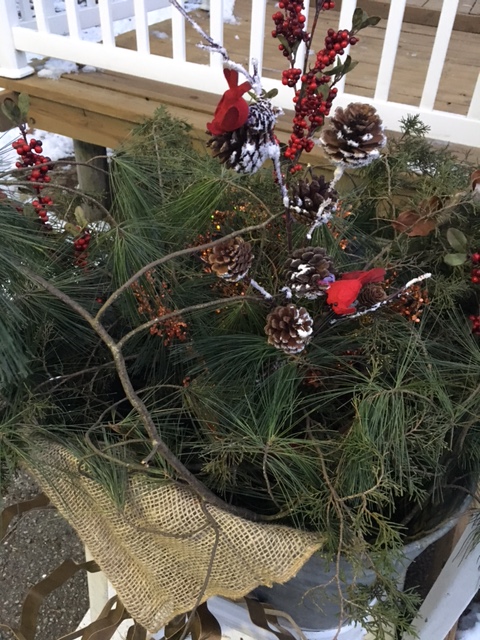 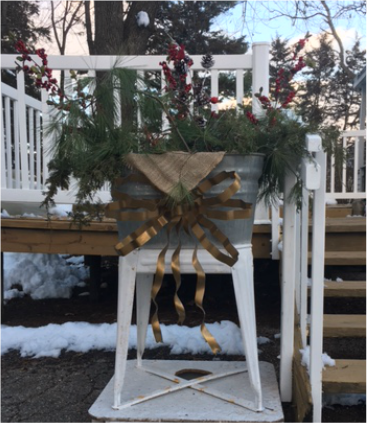 Here are some of the other Christmas touches I've added around our home! I searched and searched for Christmas ideas for the decorative area I have on top of the hill as you turn into our driveway. I didn't find a solution that 100% worked for/spoke to me, so I combined some of the visuals I saw into a project that was the best fit for our space. I ended up drawing inspiration for this project from a pallet Christmas tree I saw and made one out of wood lath instead. Here's what you'll need:
I started out by taking a piece of lath to the space I wanted to put the Christmas tree in and marking the width of how long the bottom piece should be with a pencil. Once I had the bottom piece marked, I planned to mark each piece of lath 1/1.5 inches in from the first mark (and so on) as I worked my way to the top of the tree. I laid out my lath one piece at a time, starting with the bottom and started measuring/marking where my cuts would be. You'll need a good amount of floor space. 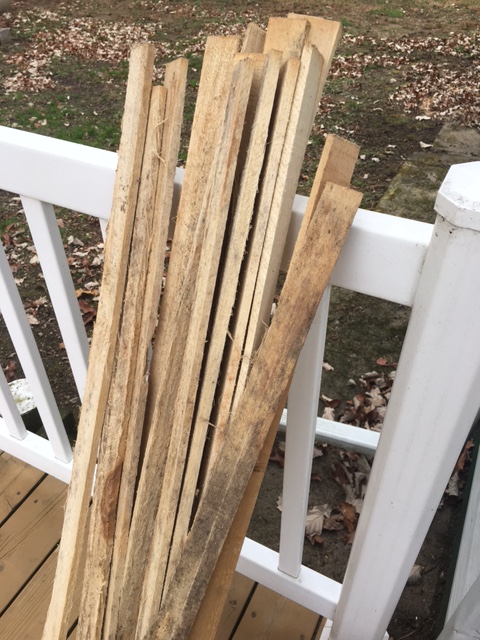 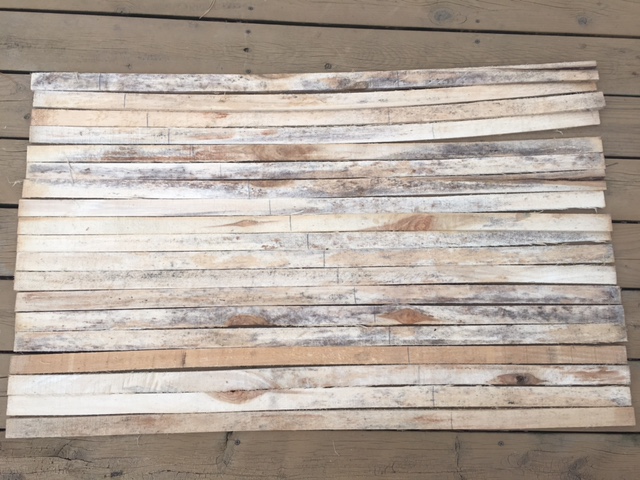 Note the pencil marks on the lath. This is where I made my cuts. Once I had each piece marked, I cut the lath using a circular saw. 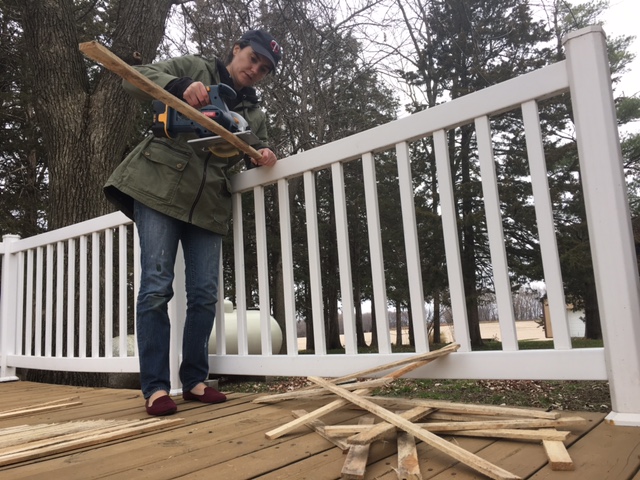 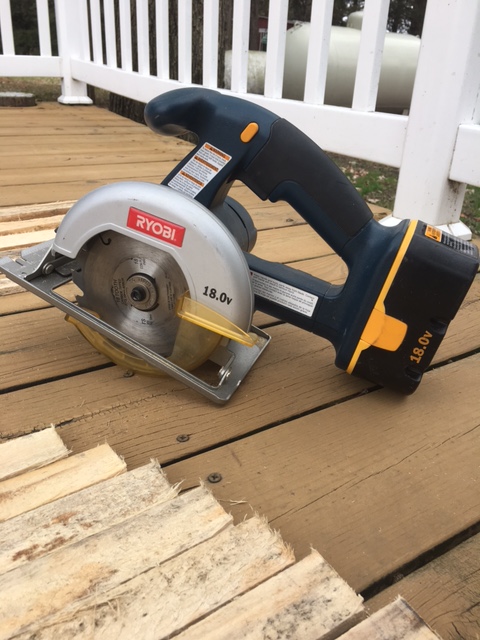 As I cut each piece, I made sure to stack them back in the same order. 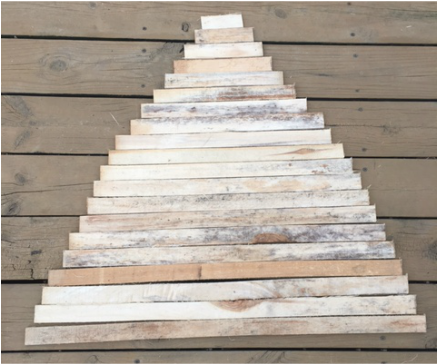 Once I was finished with the "branches" of the tree, I used another piece of lath to create the "trunk." I sawed a point on the bottom of the trunk to help secure it in the ground when it came time. 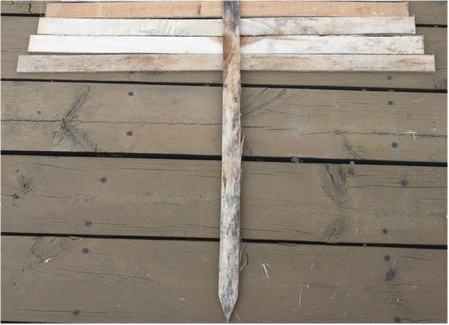 Because lath is pretty lightweight, I chose to simply glue the branches to the trunk. I used Gorilla Glue, which is extremely strong glue. With this type of glue, it is important to get the surfaces that you are gluing together wet first. I used a damp washcloth. 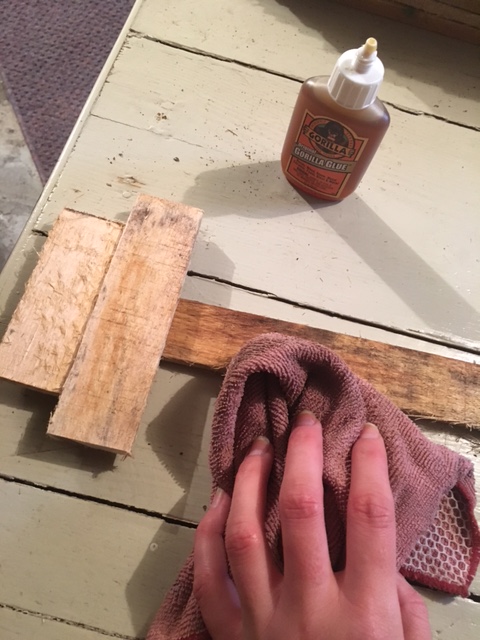 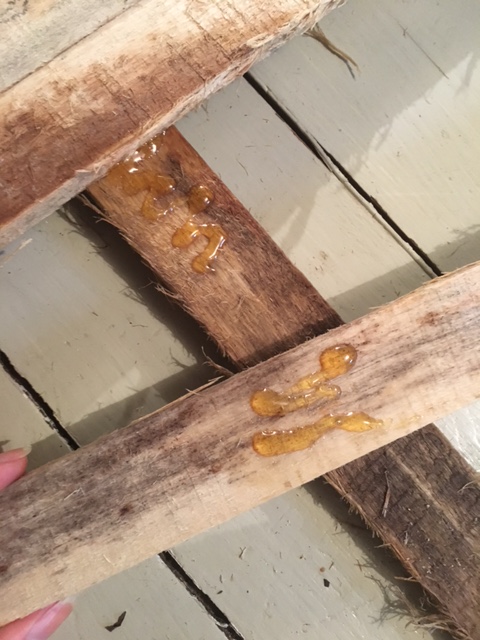 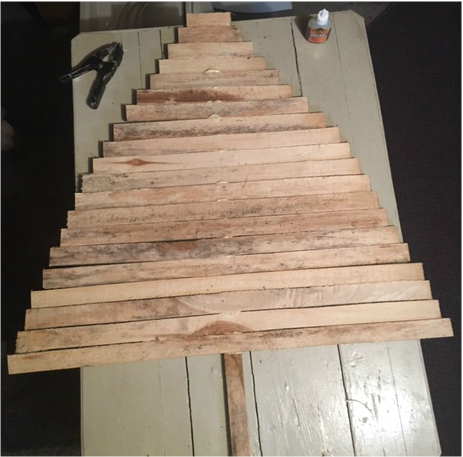 Also, with Gorilla Glue you are encouraged to clamp items together or use another type of heavy pressure to press items together. I clamped the top piece and used full paint cans down the center to press down on the rest of the lath. It worked really well. I let this project dry overnight and painted it the next morning. I used a green, matte, outdoor paint. I dressed it up a little more by adding some dots to mimic lights or ornaments with yellow, high gloss, outdoor paint. 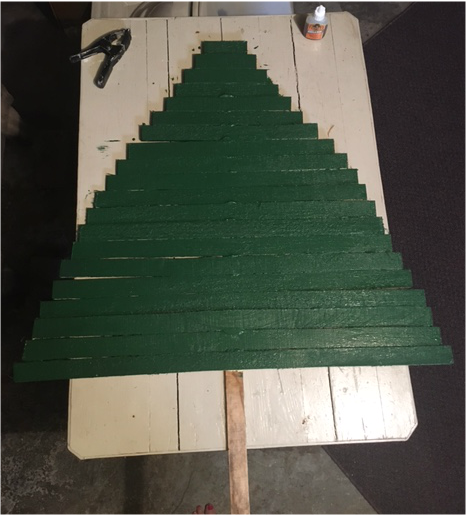 We bought a metal stake to reinforce the tree and used 20 gauge metal wire to attach the tree to the stake. We pounded both the stake and the tree into the ground before connecting with the wire. You can also see in the photo below that the Gorilla Glue expands really nicely to ensure a good bond. 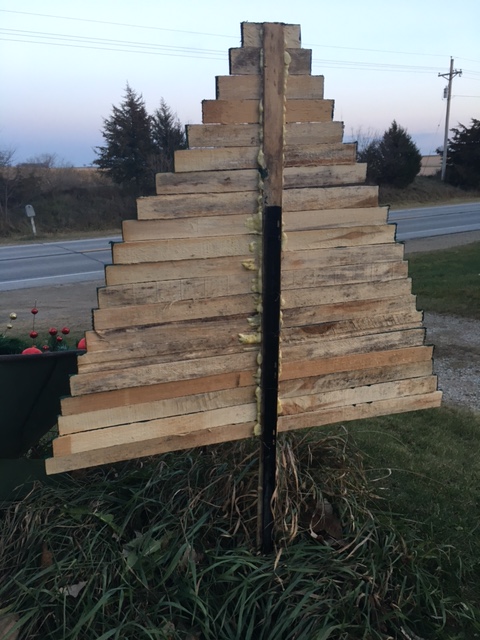 Here's the final product! I ended up adding a red bow to the top for an additional pop of color and to tie it more closely to the decor I put in the wheelbarrow. 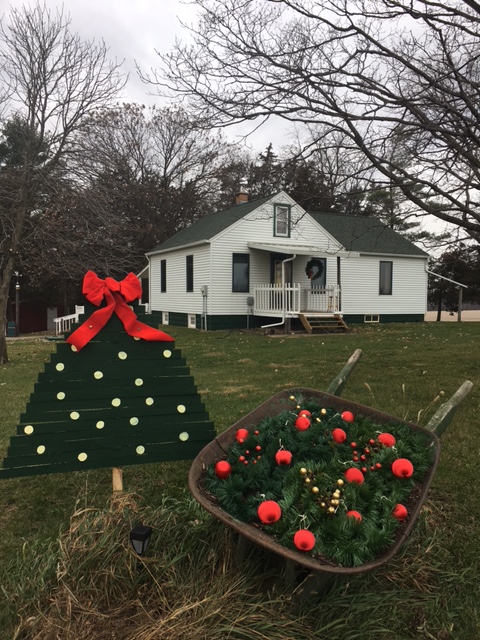 The approaching Christmas holiday inspired a few decor ideas in our household. The project I'll talk about in this post could be used for decorating your home or as a gift for someone else! What you'll need:
I salvaged a piece of wood that is around 36 inches long for this project. 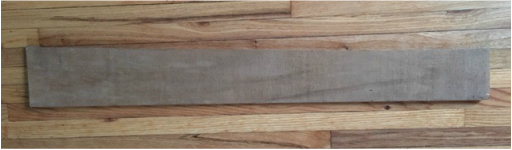 I chose a phrase that was not holiday specific so leaving it up throughout the winter wouldn't be an issue. I like winter decorations vs. Christmas decorations when I can help it to give the decor longer life. I wrote the phrase I chose out with pencil on the piece of wood before I began painting to ensure the spacing and positioning turned out right. 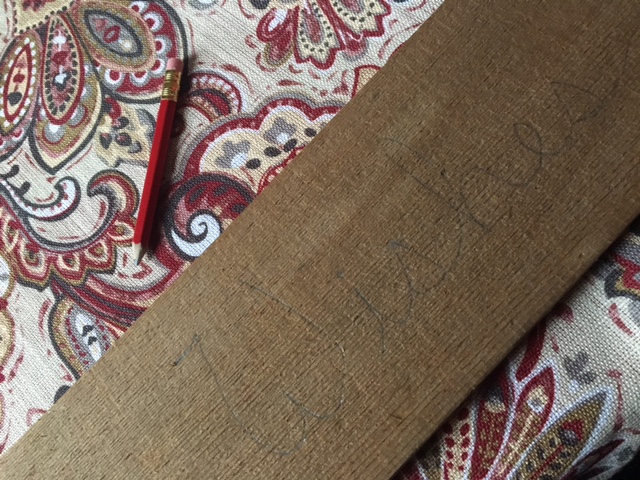 Once I had the phrase as I wanted it on the wood, I used a small paint brush and white paint to trace the pencil lines. After letting the paint dry, I hung the sign up with 3M adhesive strips with Velcro so I didn't damage the wall/create unnecessary holes for something I knew would only be up for a few months. This project took me less than 10 minutes to complete and cost me $0 because I had the supplies I needed on hand. If you needed to purchase supplies, it would easily run under $15, much less than what you would pay for an already completed sign like this in a store. Doing it yourself allows you to choose the saying, create the look, and have a personal connection to the piece - which makes it even more special if you choose to give something like this as a gift to someone you care for! Here's the finished product in its wintertime space, just below the "clothespin line" I will hang our Christmas cards from: 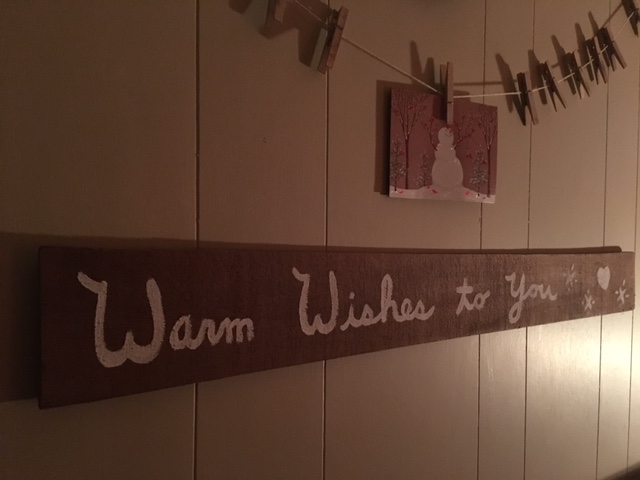 |
Archives
August 2022
Categories
All
|
 RSS Feed