Busy Hands, Happy Heart
|
What you'll need:
We have two stumps at the top of our hill just off the driveway. They're too high to mow over, so the weeds tend to grow tall around them at a rapid pace. Instead of fighting them, I wanted to work with them to create a rustic country floral feature. I have ideas to add to the feature in the future, but for now, I was able to accomplish a simple yet rewarding place holder. With the home we bought, we inherited many "rusty gold" treasures that can be re-purposed as we find spots for them. I dug the wheelbarrow I used out of one of our back buildings. Although it is missing its front wheel, it is a really solid piece. No wheel, no problem for this project. I actually preferred it that way. I placed the wheelbarrow where I wanted it and used rocks to angle it towards the road so the flowers are visible. With $20 in my hand, I was able to buy a large bag of black gardening dirt along with three 8 inch chrysanthemum plants. Fall is just around the corner, so I thought these flowers were the best choice. I'll be able to add corn stalks and pumpkins around the feature when the time comes. 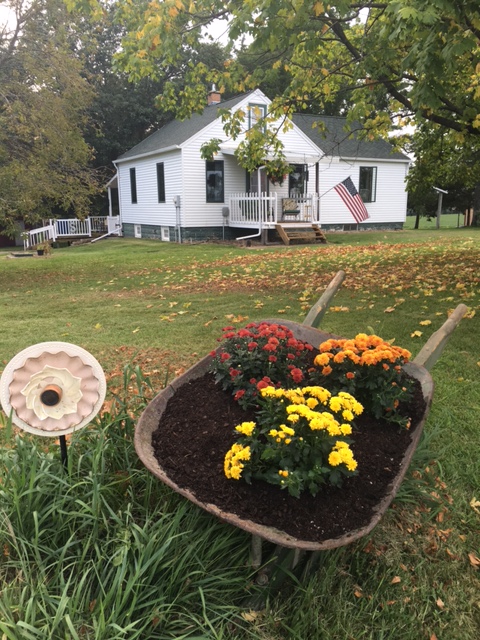
0 Comments
What you'll need:
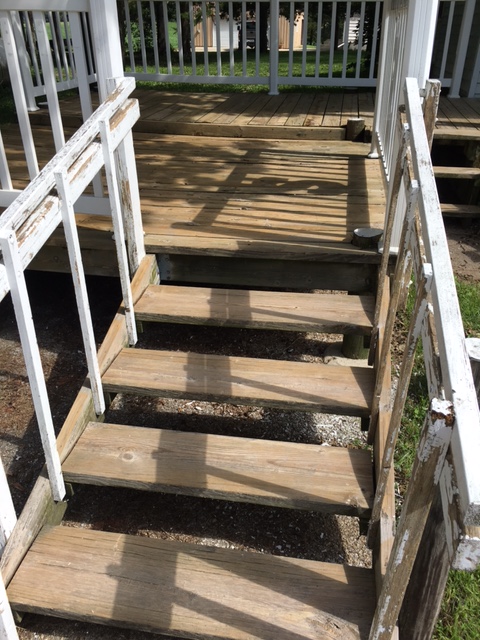
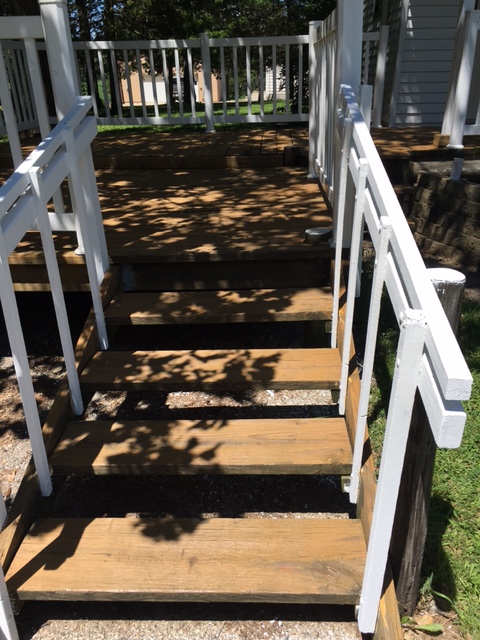
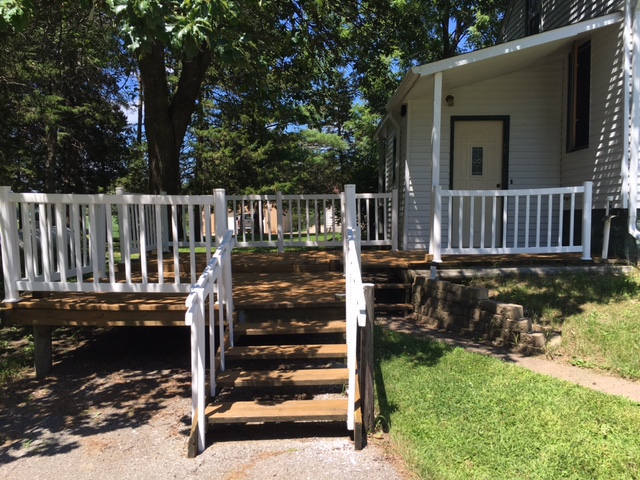
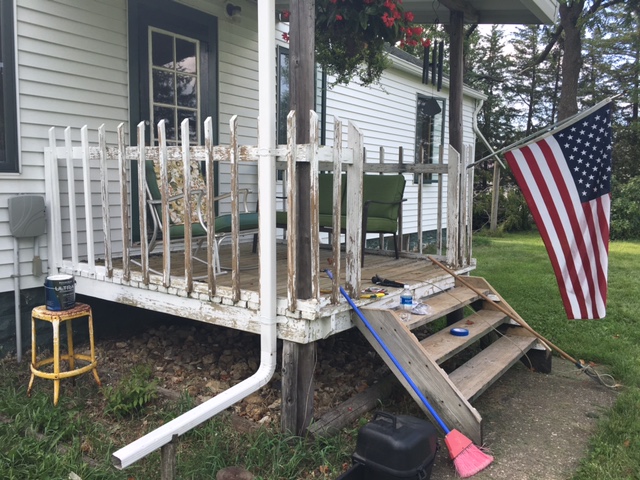
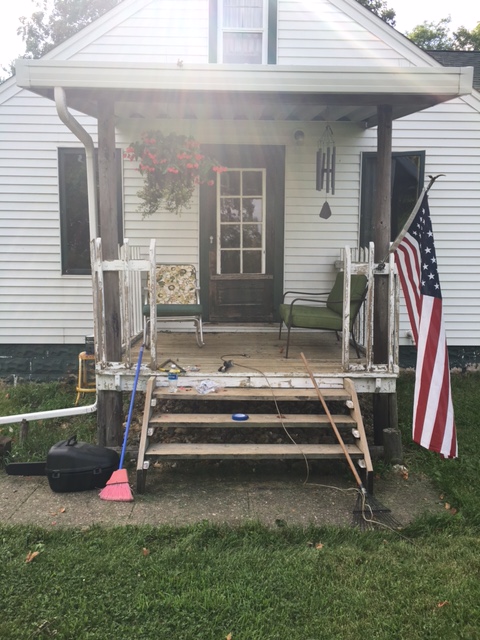
First, you'll want to powerwash the wood of your deck or porch. You'll be amazed at the difference this alone will make. Our wood was black and looked rotted. After powerwashing, the wood looked like new. Let the wood dry for a full week. While you are waiting for the wood to dry, use your paint scraper to get rid of any loose paint. The handrails of our back deck and the outside rails of our front porch were painted white. We chose to scrape them in order to repaint them with a fresh coat of white paint. Once the wood is dry, tape off any areas that you don't want the stain to reach with your painter's tape. Also, give the wood a good sweeping with your broom to clear the wood of anything that might get stuck in the stain. Begin applying the deck stain. I did the detail work along the edges first with a paint brush. I did the large areas with a roller. I only did one coat, and for us, that was enough. Let stain dry for 24 hours before walking on or placing furniture back on the wood. After I was done staining, I painted the railings. I opted for one coat of outdoor paint in these areas as well and touched up as needed. See below for the before/after of our back deck. It rained a day or two after I was finished and seeing the water bead on the wood was a wonderful sight! The first photo shows what the stain looked like (top portion) compared against the raw, powerwashed wood (bottom portion). The rest show side by side results. 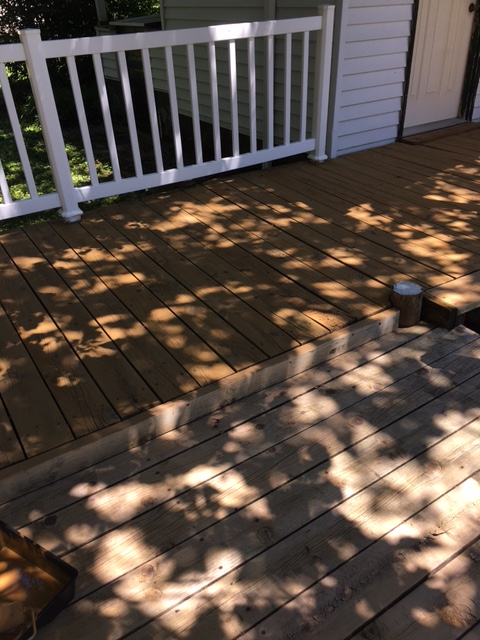 The photos below show the before/after of our front porch. 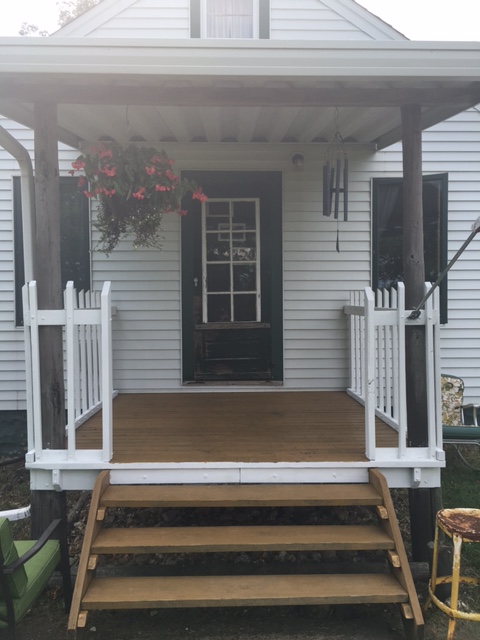 |
Archives
August 2022
Categories
All
|

 RSS Feed