Busy Hands, Happy Heart
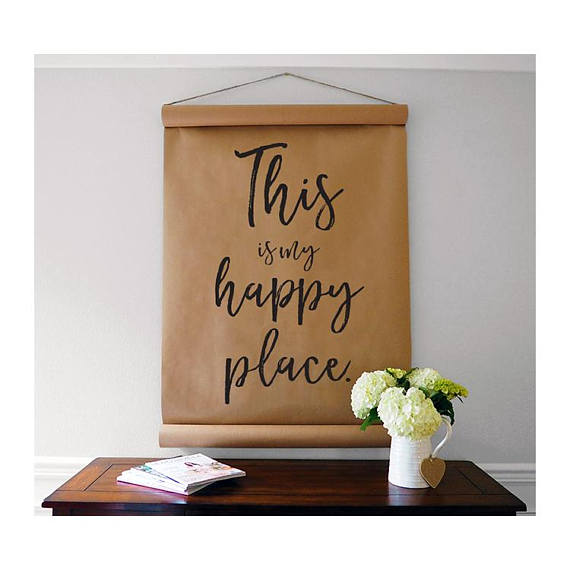 I've been obsessing over kraft paper scroll signs for a year or two now. I don't know why it never occurred to me to make one until this year...I continue to see them in the homes of some of my favorite home décor bloggers and just had to at least give it a try. I'm really glad I did. Here's what you'll need:
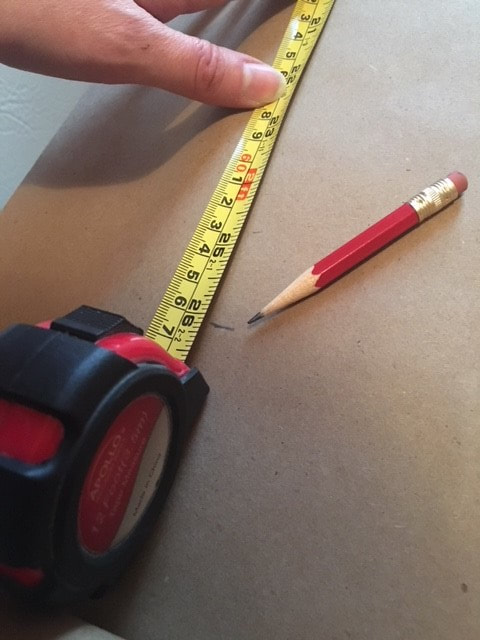 First you'll want to measure the wall space where the scroll will hang. Figure for an extra two inches on both the top and the bottom where the paper will be rolled. I had 30 inches of wall space to work with: two inches for the top roll, 26 inches for the hand lettering area and two inches for the bottom roll. Unroll a section of your paper, allowing the free end to roll up as desired. Measure and mark the area you will do hand lettering on. 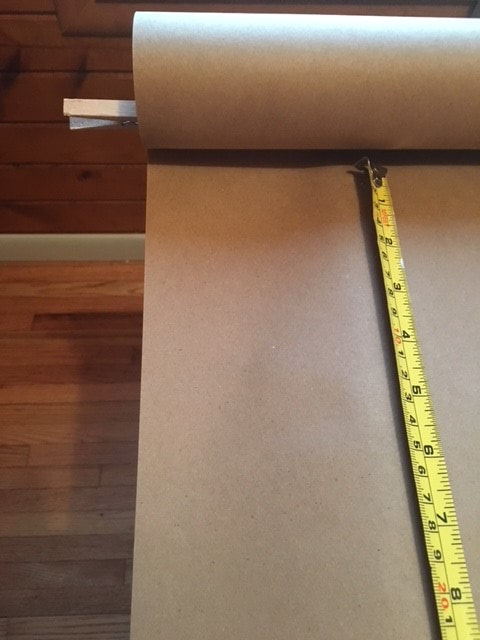 Secure the free end of the paper with clothespins. Determine how much rolled paper you want at the other end of the scroll and cut free from the whole roll of kraft paper. Secure this end with clothespins as well. 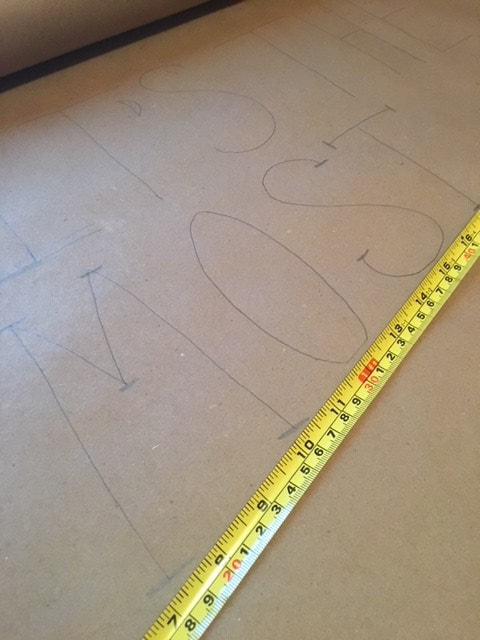 Once I had everything measured and the ends secured, I started hand lettering! I used my pencil to trace out the saying I chose. For the angled lettering, I used my tape measurer as a guide. 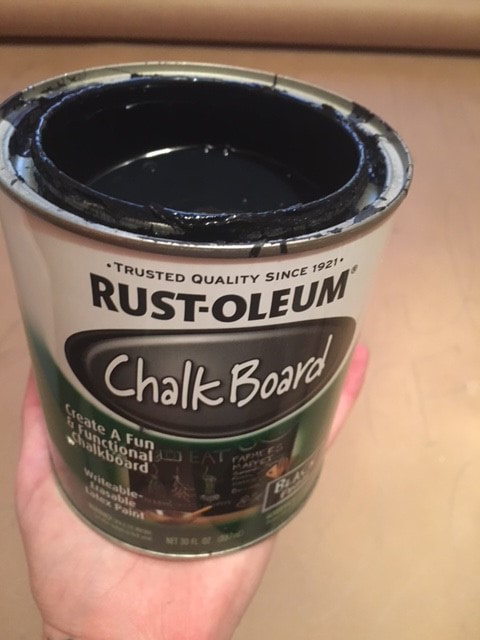 I'm really cheap, so I just used paint I already had. I wanted to do black lettering, so chose to use some leftover chalk board paint that seems to be a bottomless can! 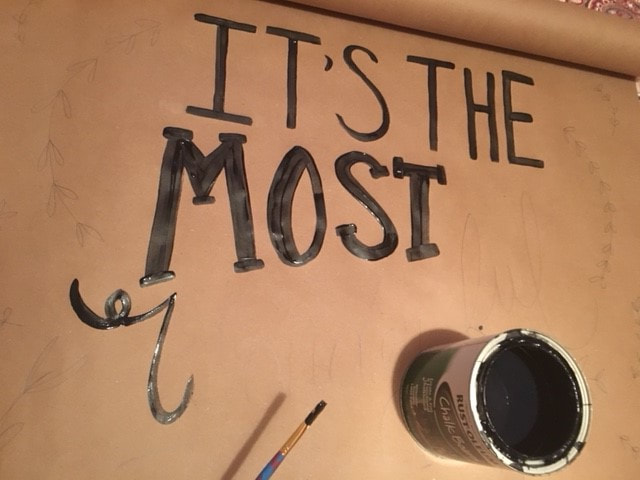 I used a small paint brush to trace over my pencil lines. I mixed fonts and strokes to give it a playful look (and to disguise any mistakes I made!). 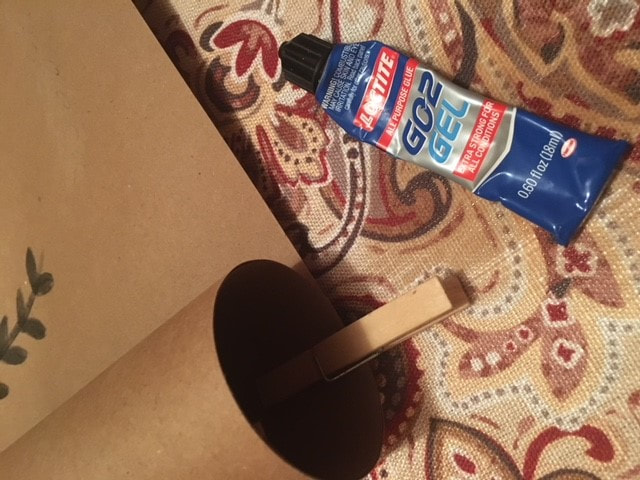 After the paint dried, I placed some glue under the rolled up paper to secure. I also added some staples later on to add extra reinforcement, because - gravity. 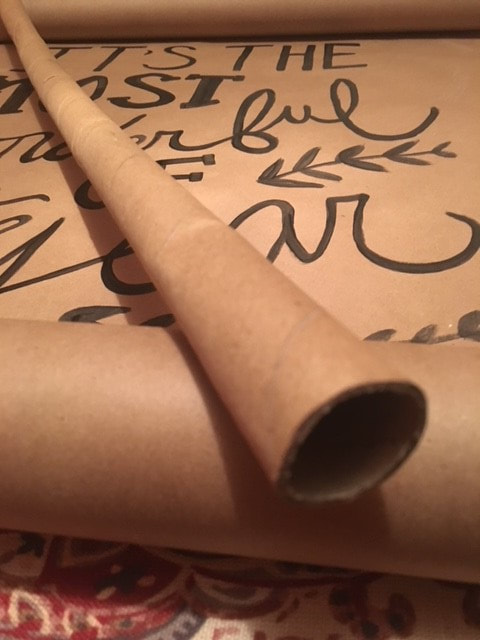 Next came the wrapping paper roll to hang the scroll from. 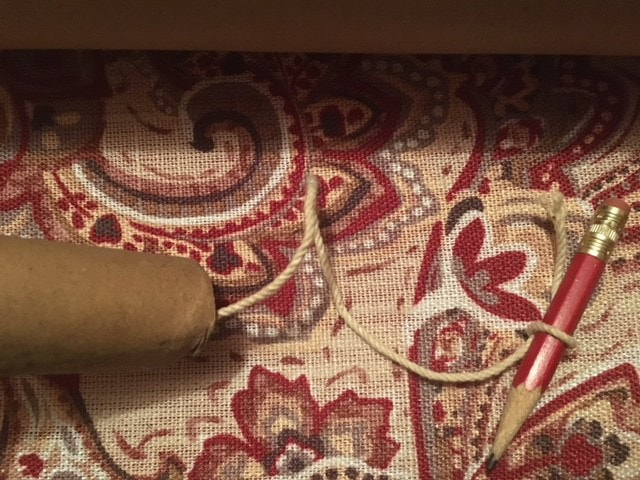 I tied my string to a pencil and looped it through the paper roll. I then inserted the paper roll into the top roll of the scroll.  Once the paper roll was through, I pulled the string to my desired length and tied/knotted the ends.  Here she is, in all of her glory! For being a beginner in hand lettering, I have to say I was pretty proud of myself. And just to give you an idea of what I was working from, here's the image that inspired me! 
1 Comment
I went all out this year when it came to Christmas décor. I decked our halls inside and out in a day. I couldn't stop myself. I was that pumped to transition into the most wonderful time of the year! I felt a little silly though, because it was an abnormal 60 degree November day here in Iowa! I splurged a little bit this season and purchased a few new items to add to the decorations we've had for years. Much of what we have we 1) bought when we got married, 2) inherited when we bought our first home, or 3) inherited when we bought our second home! A lot of really great pieces, but many had seen better days... Although I bought some new items, some assembly was required. I rarely buy a completely ready-to-use piece. I normally buy the elements to make a ready-to-use piece. Here are just a few of the items I made or curated to make our home feel magical this holiday season! 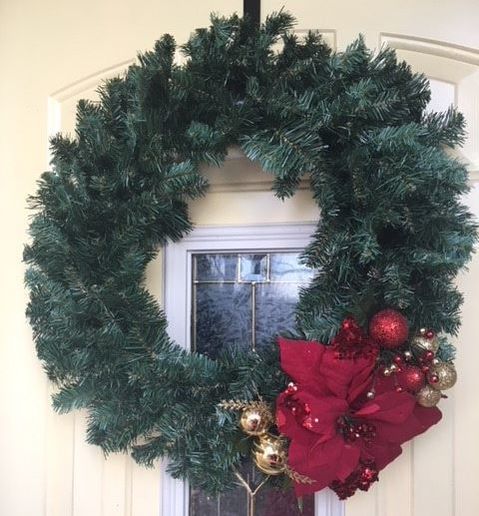 DIY Christmas Wreath I forgot how expensive pre-made wreaths are - $50-$100 plus! I was not willing to pay that much because I wanted a wreath for both our front and back door. I ran across some plain wreaths that were in the $10-$20 range, and they were 50% off. More my style. I then browsed a Christmas accessory isle that had small, festive items that could easily be clipped into or twisted into a wreath. Three small accessories was all I needed to create a simple yet elegant wreath. After discounts, this wreath cost me under $10 to make! I plan to carry this wreath into other seasons by simply swapping out the accessories. 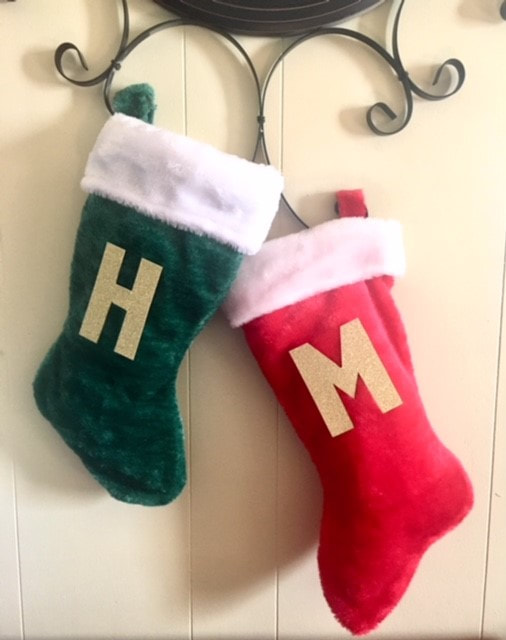 DIY Stockings I don't want to be misleading - I did not make these stockings, I just added the letters! Stockings are another item that can be pretty pricey. I found these stockings at the dollar store. I picked up a single piece of gold, glittery scrapbook paper for the lettering. Using a Sharpie, I drew out the letters on the back of the scrapbook paper. I'm getting better at hand lettering, you could certainly use stencils if needed. I then cut out the letters and glued them to the stockings! Easy as that. And by the way, we don't have kids...these stockings are for...OUR DOGS - Homer and Madison!! You could say we love them a little bit. 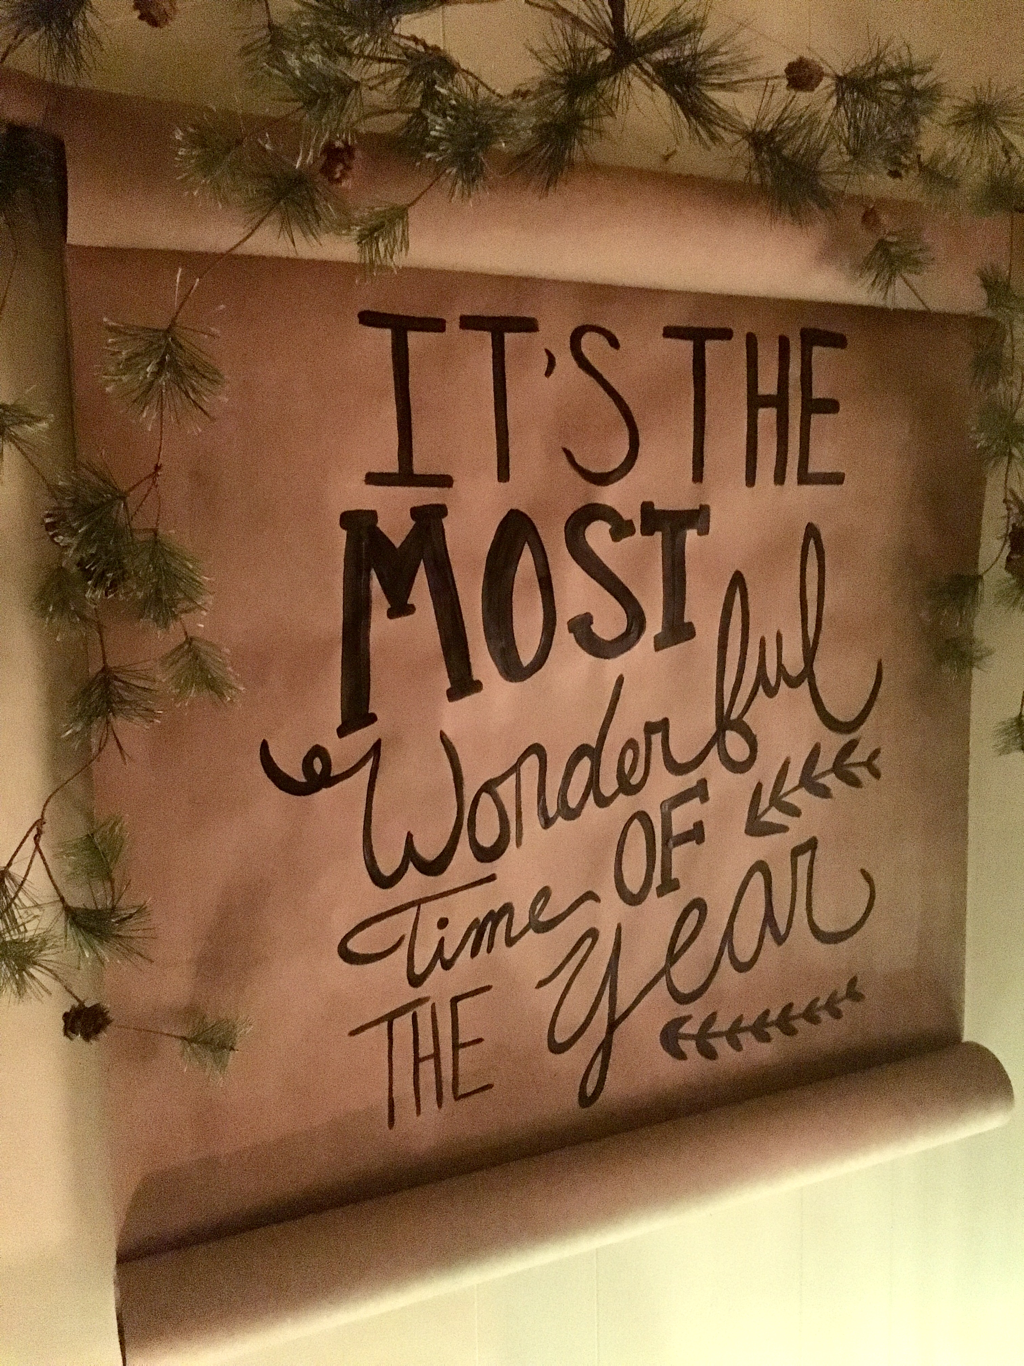  Curated Spaces I absolutely LOVE to shop my house. I shop my house before stepping a foot out the door to go to a store. I believe that if you can take a moment to look at what you have with fresh eyes, there are so many possibilities! The space above and the vignettes below are mostly pulled together from items I had. The only new items are the Poinsettia floral bouquets and the red/gold ornaments.  I upcycled this sled last Christmas. See how here.  I also tried incorporating natural items from our property, like the branches and sticks in this planter.  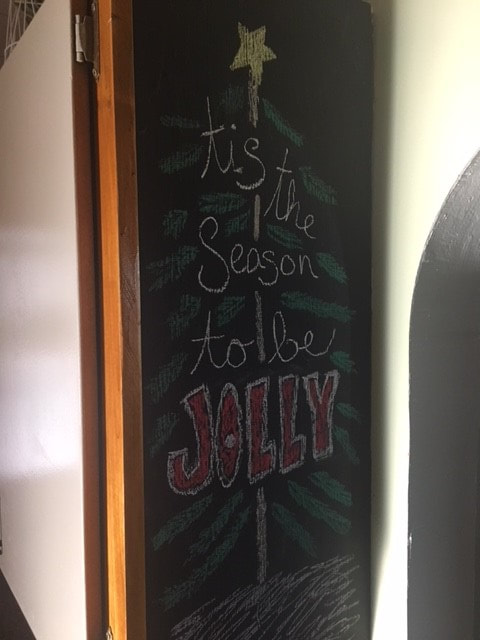 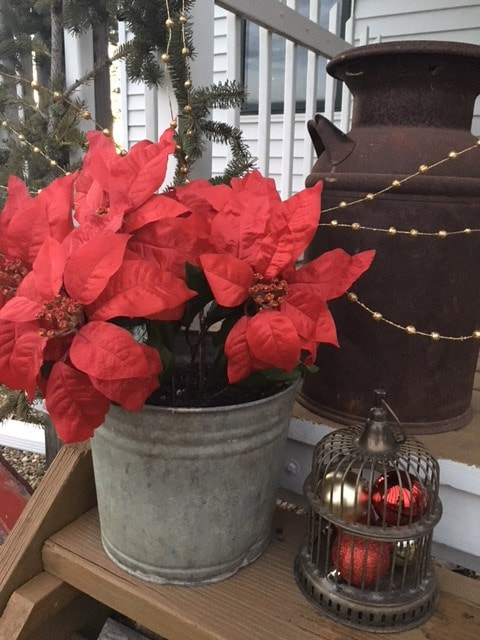  |
Archives
August 2022
Categories
All
|
 RSS Feed