Busy Hands, Happy Heart
|
It has been a minute since I have attended a Do It Herself Workshop at Home Depot! I’ve enjoyed the past classes I’ve been to - creating this two-drawer nightstand, vertical herb garden, and vertical succulent garden. Their latest project, the DIY Pegboard Shelf, caught my eye. These types of shelves are very trendy right now. What I especially like is you can change up the shelves really easily to meet different needs you might have, or if you simply want to restyle it to give a room a different look, you can do it in minutes. 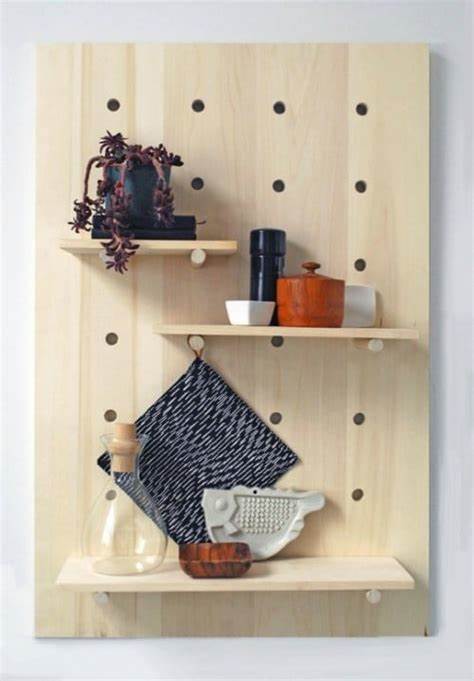 When I arrived, they had everything ready! The plywood, shelves, and dowels were already cut. All we had to do was screw the two plywood pieces together and insert the dowels where we wanted the shelves. I was kind of (really) bummed I didn’t get to use the hole saw to create the holes for the pegs, but I can’t complain. I got a free shelf out of the deal! 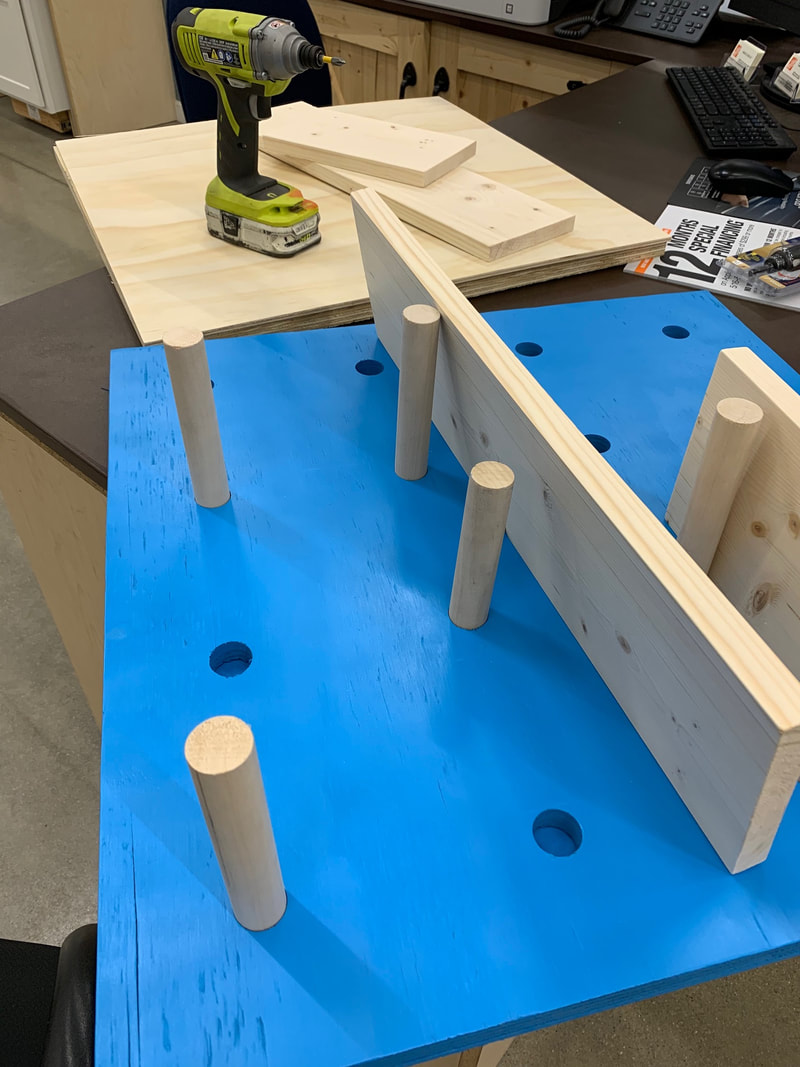 Because we didn’t do much…I couldn’t take step by step photos…so here is their instructional video: I chose to paint my shelf a high gloss grey after getting it home. I wanted it to pop against the wall I was putting it on, which is dark poly stained wood.  After letting it dry completely, Joel helped me screw it onto the wall. I love its versatility and it looks great in our dining room area. I didn’t know I needed something on that wall until I had this in place!  
0 Comments
In my last DIY post, I shared how (with the help of my parents) I reupholstered our dining room table benches. This next project I’m sharing was inspired by our dining nook makeover. I believe I made it very clear that I loved the fabric I found on sale to use on the benches. I’m a paisley princess, can’t get enough of it. And the yellow/grey combo has always appealed to me. To have all of these details come together in a fabric was dreamy. Anyway, I wanted to use the leftover fabric to make throw pillow covers for our mudroom so that when you enter our mudroom and walk up the stairs to our dining nook, the spaces felt tied together. This time with the help of my grandma, together we made throw pillow covers for two pillows I already had and wasn’t crazy about.  She used a basic envelope pillow cover pattern like this one. I am not a sewer, but she did walk me through the whole process and explained what she was doing. I have full confidence I could make a somewhat nice cover if I had to in the future, but for now I’ll lean on her! 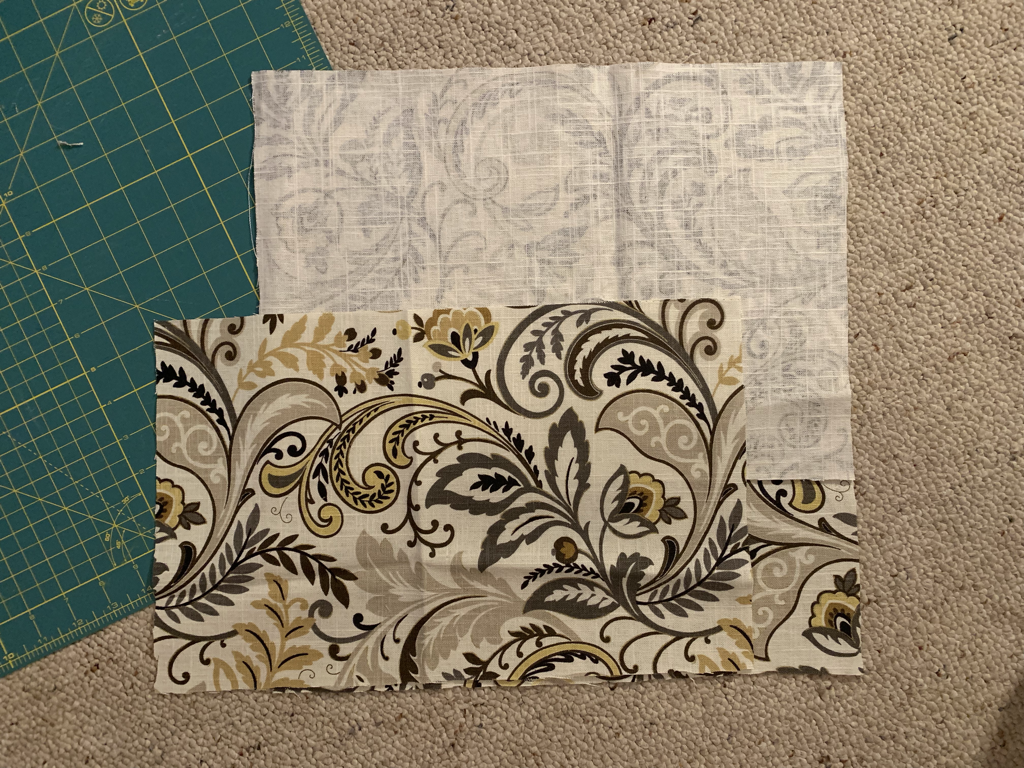 Once I had the pillows ready, I decided I was going to give the mudroom a mini makeover by changing the paint color as well. It was a fine mudroom, but it was missing impact. A good punch in the face when you walked in. In a creative impact sense, not a physical one! It needed a little something extra. My mom helped me pick out the perfect gold color that matched a deep yellow tone in the pillow cover fabric. Butterscotch Ripple. Yummy. Instead of painting an accent wall or the entire room, I ended up creating a faux wainscoting effect around the mudroom and up the stairs leading to the dining nook. To create the effect, all I needed was:
I made my wood cuts one wall at a time, just to see how things fit and if it would affect my next run of wood. I measured up from the floor to the height I liked, leveled the strip, made marks with my pencil where the bottom of the wood strip would be, and then used the stud finder to mark where the studs were. I used the nail gun to secure the strips, being sure to check that they were level along the way. 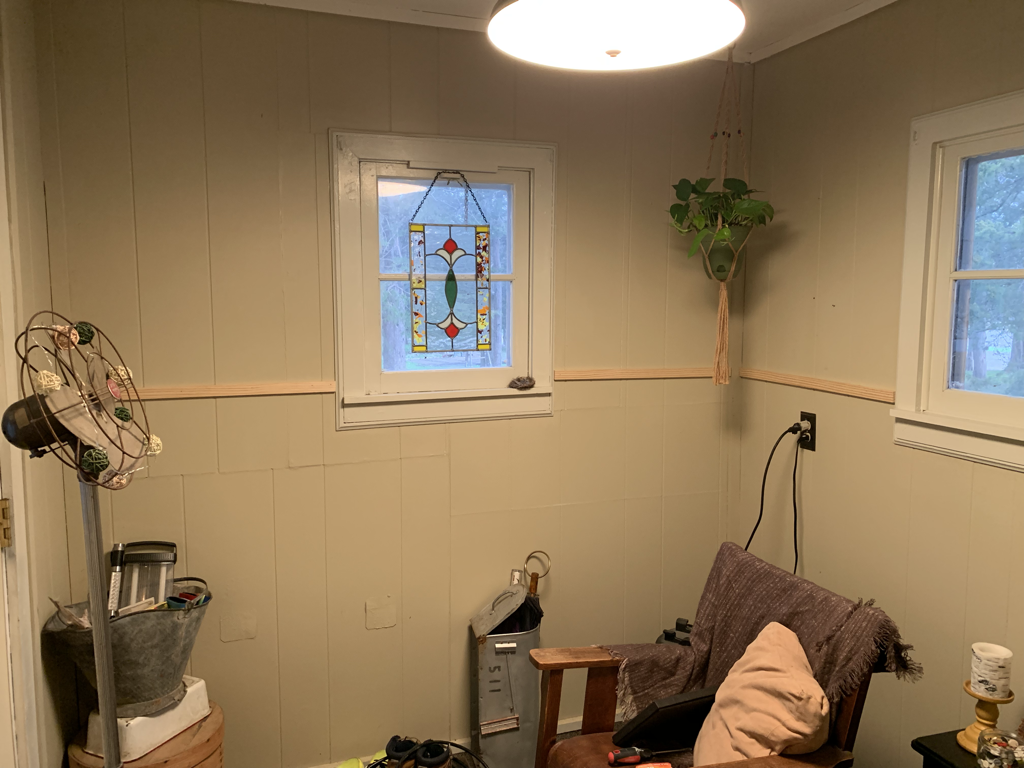 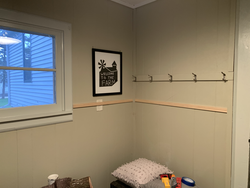 I followed the process above all the way around the room and up the stairs. Up the stairs was a little trickier because I had to cut the ends at angles. I’ve mentioned before that math and I don’t get along – and that includes angles. I actually just marked the angle of the wall on the piece of wood with my pencil by eyeballing it, made the first cut, placed the cut angle against the wall, marked the angle of the other end, and made the second cut. Real professional…but, I got super lucky and it fit perfectly. 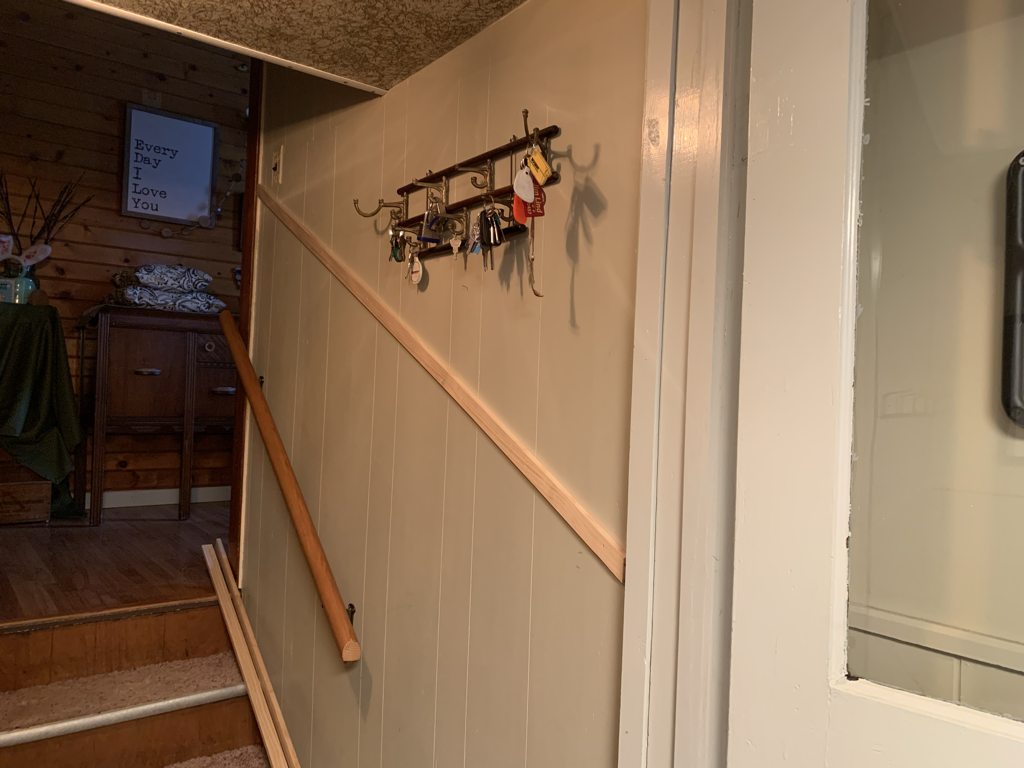 After I had everything nailed in, I went through with the wood filler before painting. I filled in each of the nail holes created by the nail gun and wiped off any excess with a damp cloth. From there, I started to paint! I had to put two coats on, but it’s a really small space, so it didn’t take long. Here is a before of the mudroom when we moved in: 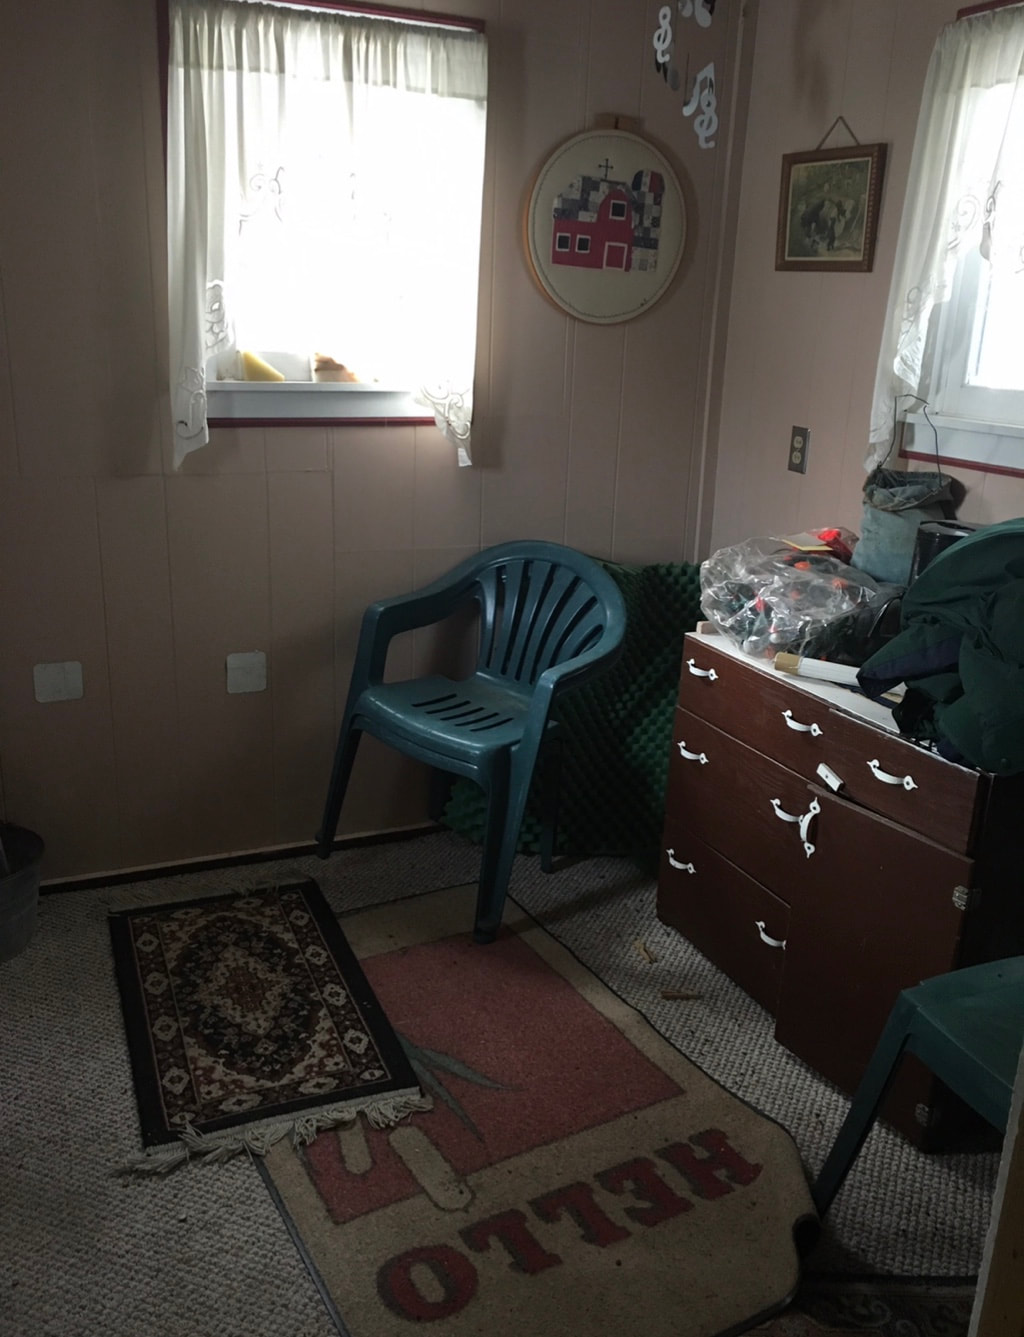 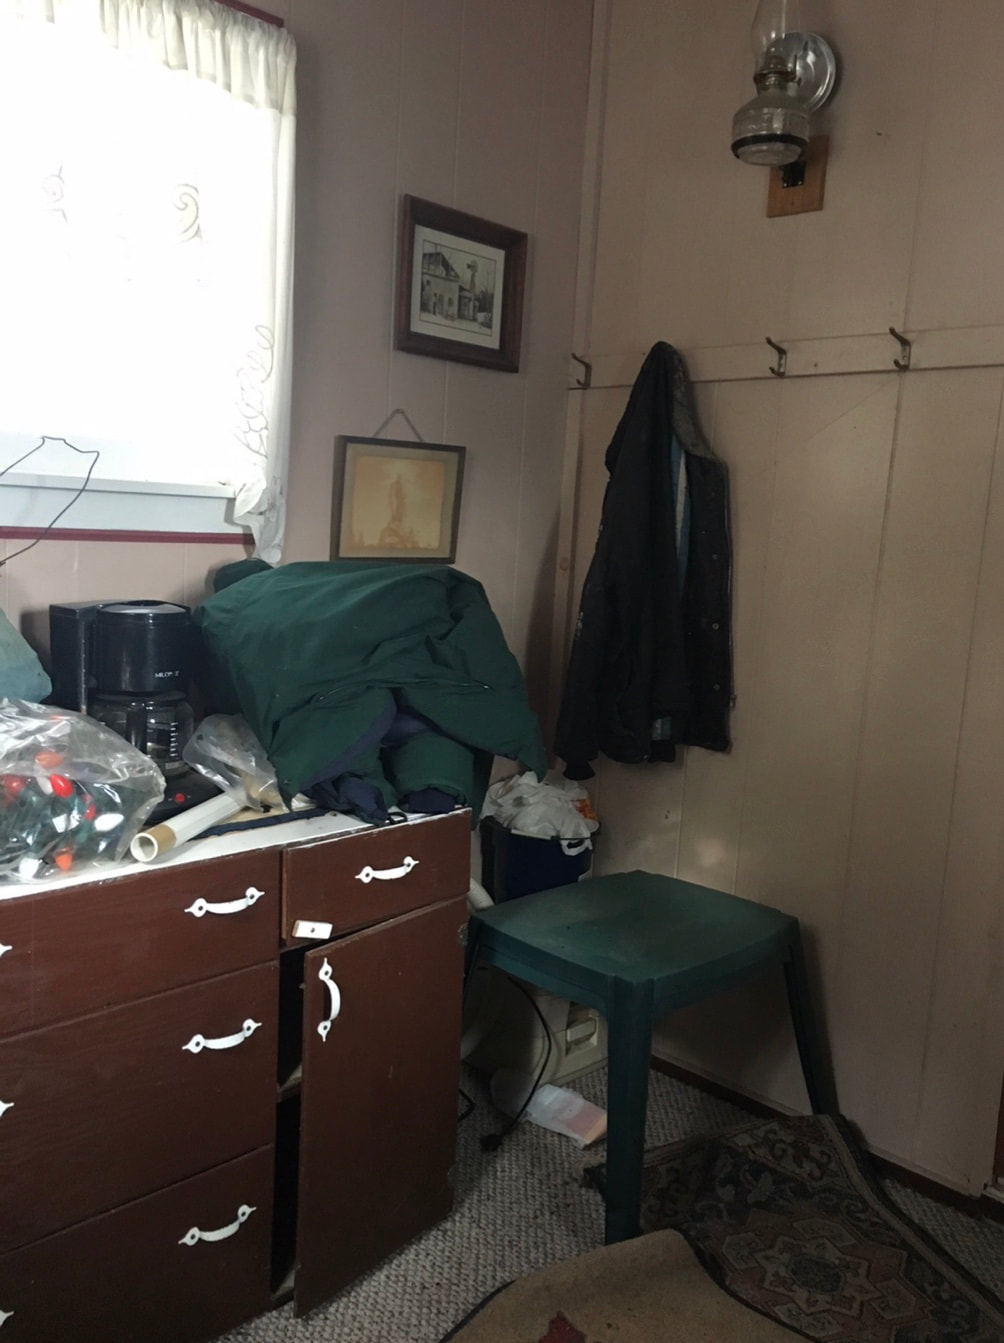 Here is the after following the mini makeover: 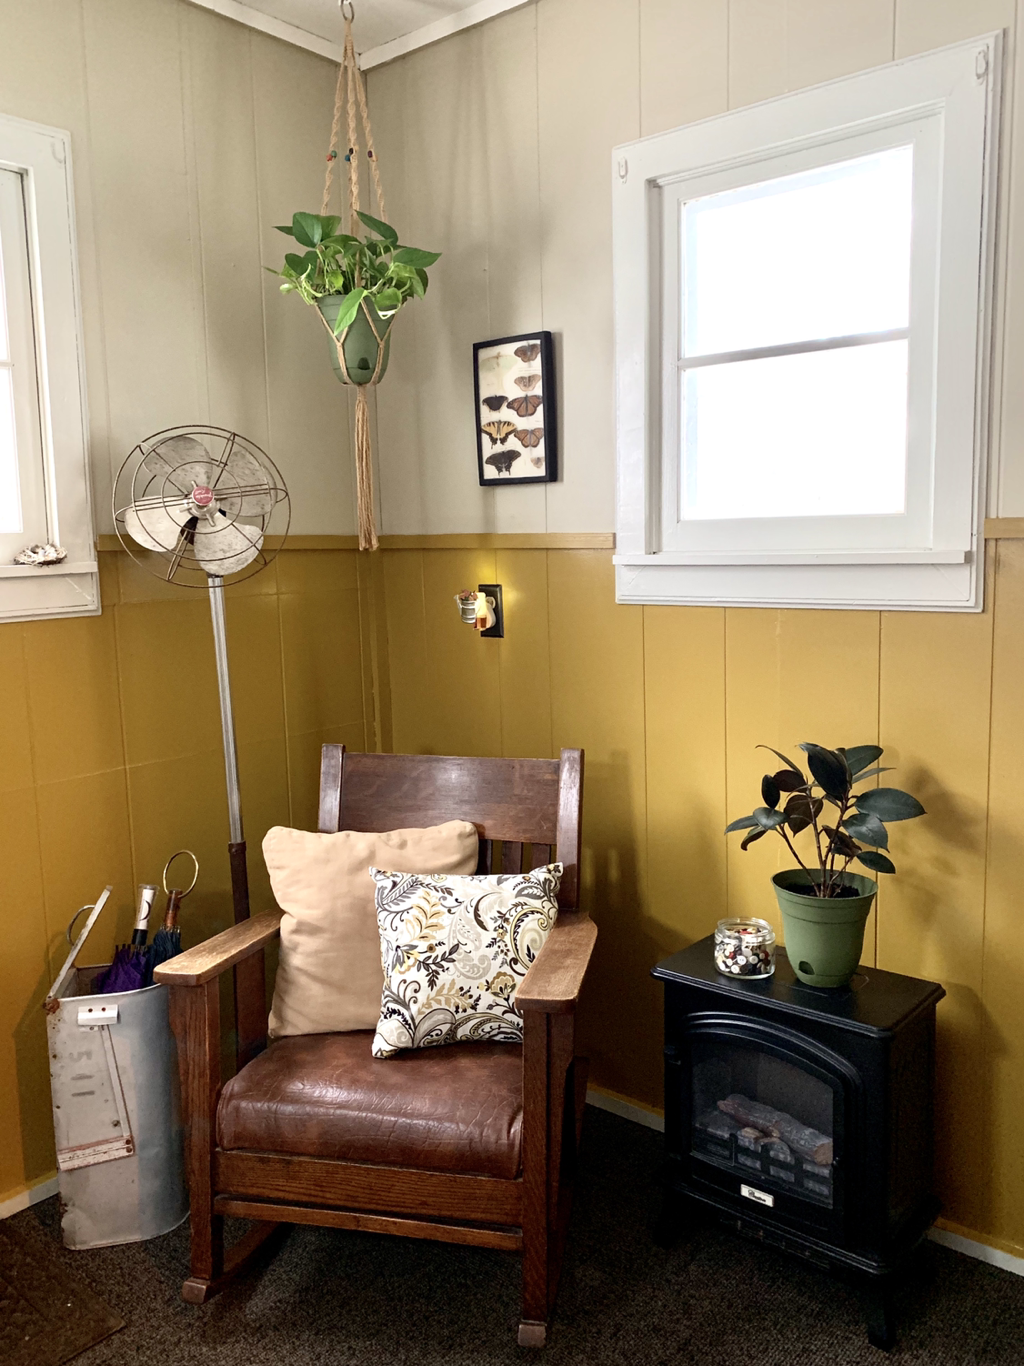 In total, this project took me an evening and part of the next morning to complete. For such a quick project, I couldn’t be more pleased with the impact it has when you walk in our back door (which is our main door)! People will be leaving with black eyes from the punch in the face they’ll get now (LOL). What are you working on lately? Tell me in the comments!
Our dining room has always lacked a little something. It’s nice, but it’s “meh.” It’s typically a catch-all room – a dumping ground for when we are coming and going. I haven’t been inspired enough to add a unique style to it. Until…I ran across my dream fabric. That changed the game! My fantastic friend who has a love for all things old and/or Mid Century Modern (the office of the business he owns is right out of Mad Men) gifted me with a table set when I told him what I wanted for our dining room. It couldn’t have been more perfect. He needed to get rid of it, I wanted it, so it worked out for both of us. I’m terrible at remembering to take before photos…so here are the benches that I reupholstered and the old fabric next to the new (perfect) fabric: 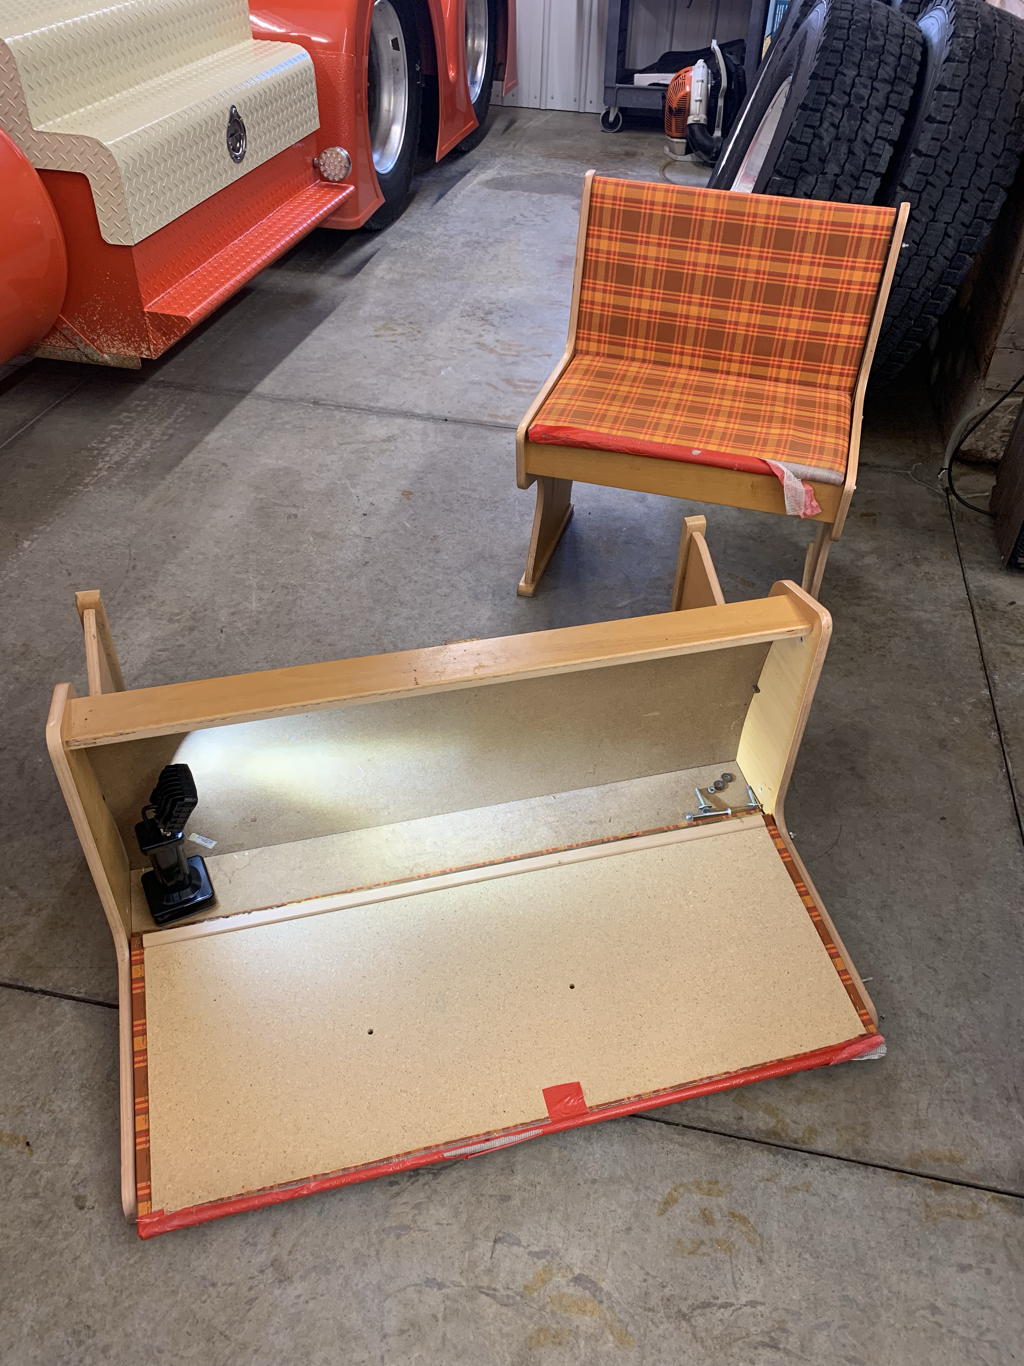  This is what you’ll need for this type of project:
So as I mentioned, deconstruction comes first. I had to take these benches completely apart to do this project. I used the flathead screwdriver and pliers to pull out the staples, utilizing the hammer as needed to get the screwdriver under the tough staples.  After this point, my parents stepped in. My mom is amazing with anything fabric. I couldn’t have done this without her. She did the measuring, I tried to comprehend. Me + Numbers = Disaster. Using the old fabric as the template, we cut the new fabric to size. After she cut, I reinforced the edges of the fabric by ironing them over, applying fabric tape as needed to the areas of the fabric that would get pulled at the most when someone sat down 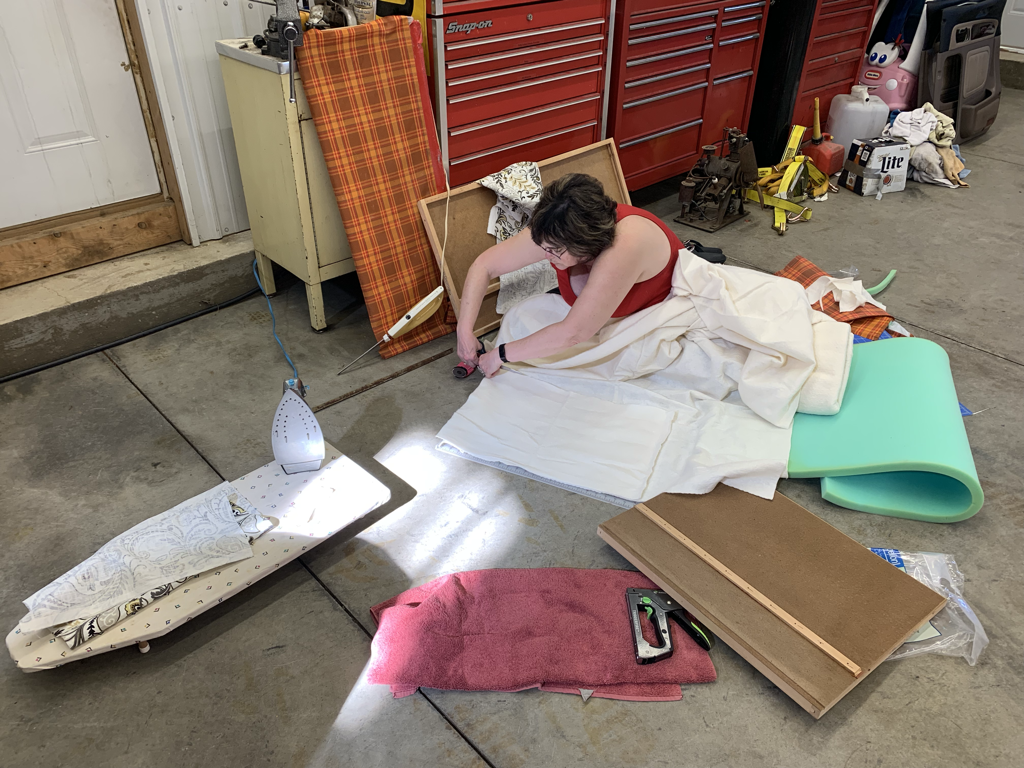 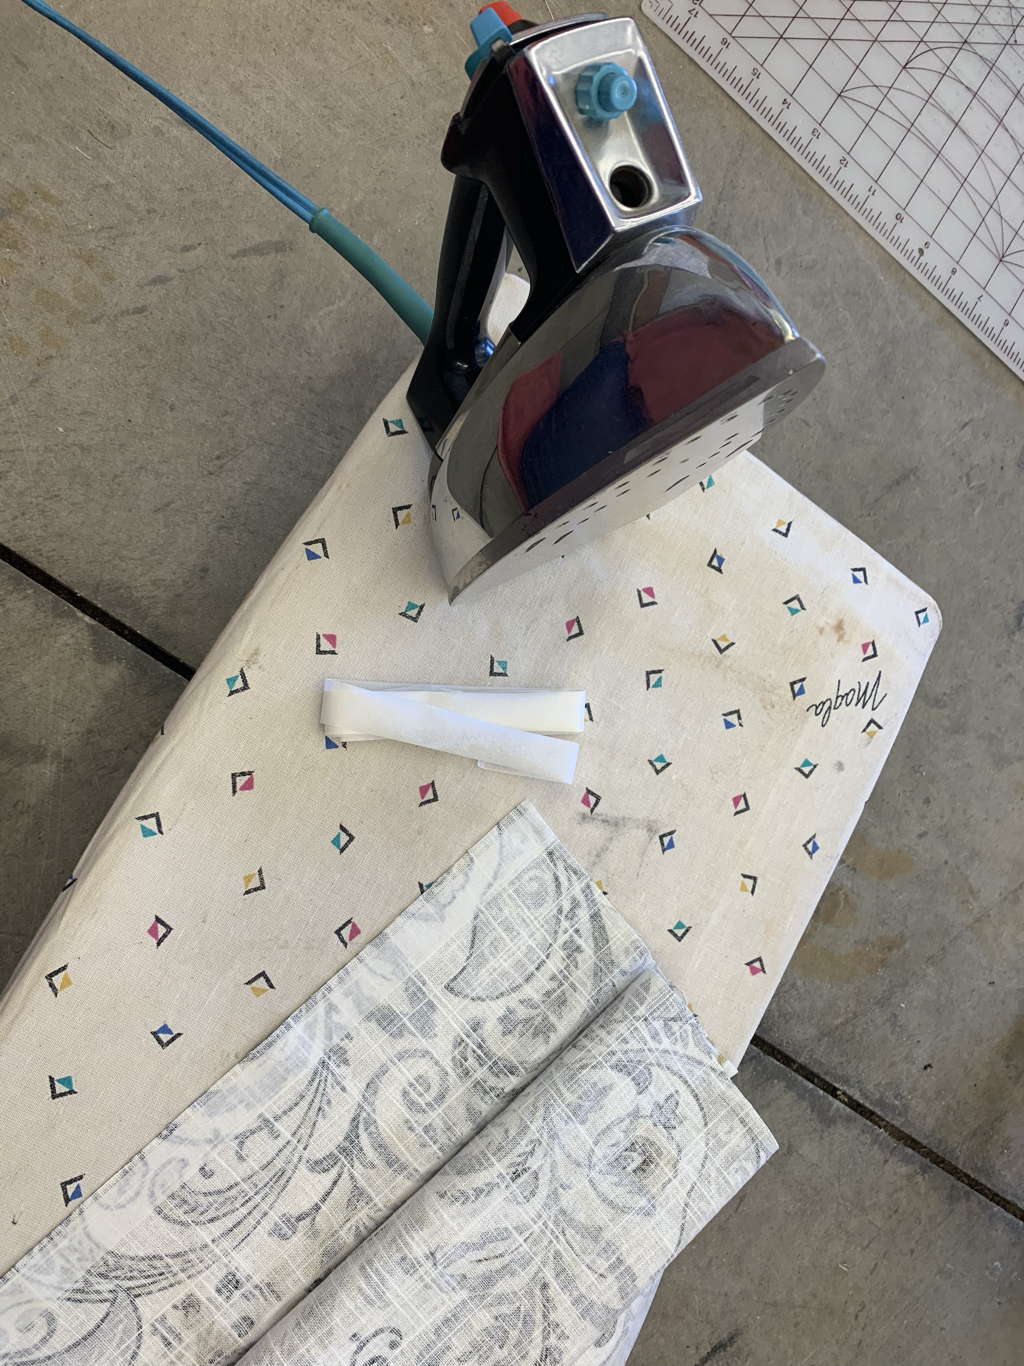 After we had the fabric ready, we measured the back and seat of each bench to cut the batting and foam. Using the electric knife, we rounded the edges of the foam all the way around.  Then it was show time! As my mom held everything together securely (bench back/seat, batting/foam, fabric), I came in with the staple gun to secure the fabric to the back/bottom of each piece. That was by far the easiest and fastest part of the project! After we stopped to admire our work, my dad jumped in to help me reassemble. It was tense, we had to get creative (because I didn’t take very good photos ahead of time…surprise, surprise), but we did it! Also could not have done this without my dad because he has the patients and tools to help get the job done. He helped me put better screws in the outsides of the benches as well so they feel completely solid when you sit down. 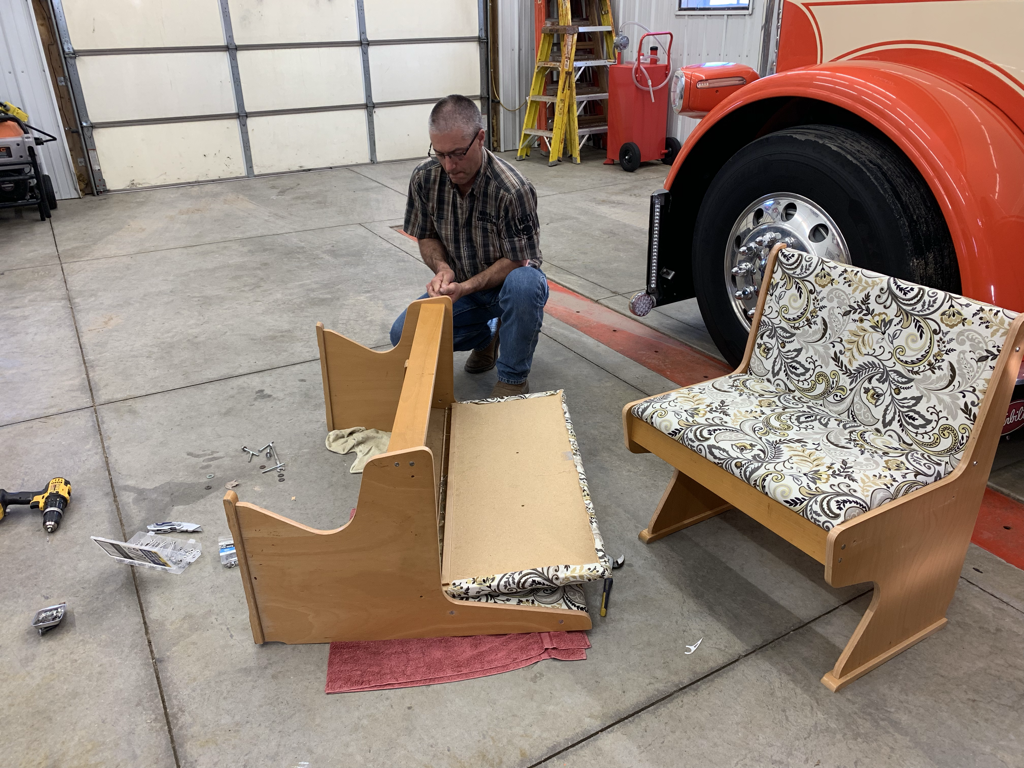 Here they are in our dining room, back with the table they came with! I’m. In. Love. The fabric was everything I needed to move forward with creating a specific feel for that space. It also inspired me to revamp our mudroom around the corner, which I’ll share in my next DIY post!  Check out my past DIY project to see the mattress spring frame light fixture I made to go above our dining room table. It goes together great with the new fabric and is just another piece that is helping me achieve a cohesive look in this room.
From the moment I bought an old baby crib last year at an estate sale, I’ve been dreaming about the light fixture I’d make out of the mattress spring frame. I used the sides of the crib right away as a cucumber trellis, I’ve now got the mattress spring frame hung, and still have a couple of pieces left to use for some home décor signs. One item, three different types of projects! Always consider the possibilities for what may appear to be “junk.” Here’s what you need for this project:
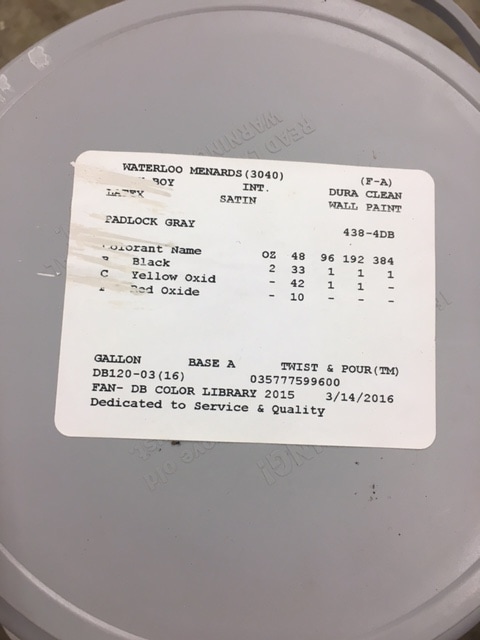
First, I sanded down any bubbling rust spots and other imperfections on the mattress spring frame. I then wiped it down with a wet cloth and let it air dry. Once it was dry, I spray painted two coats over the entire frame. I didn’t hang the frame for a few days after I painted it, so it had more than enough time to dry.  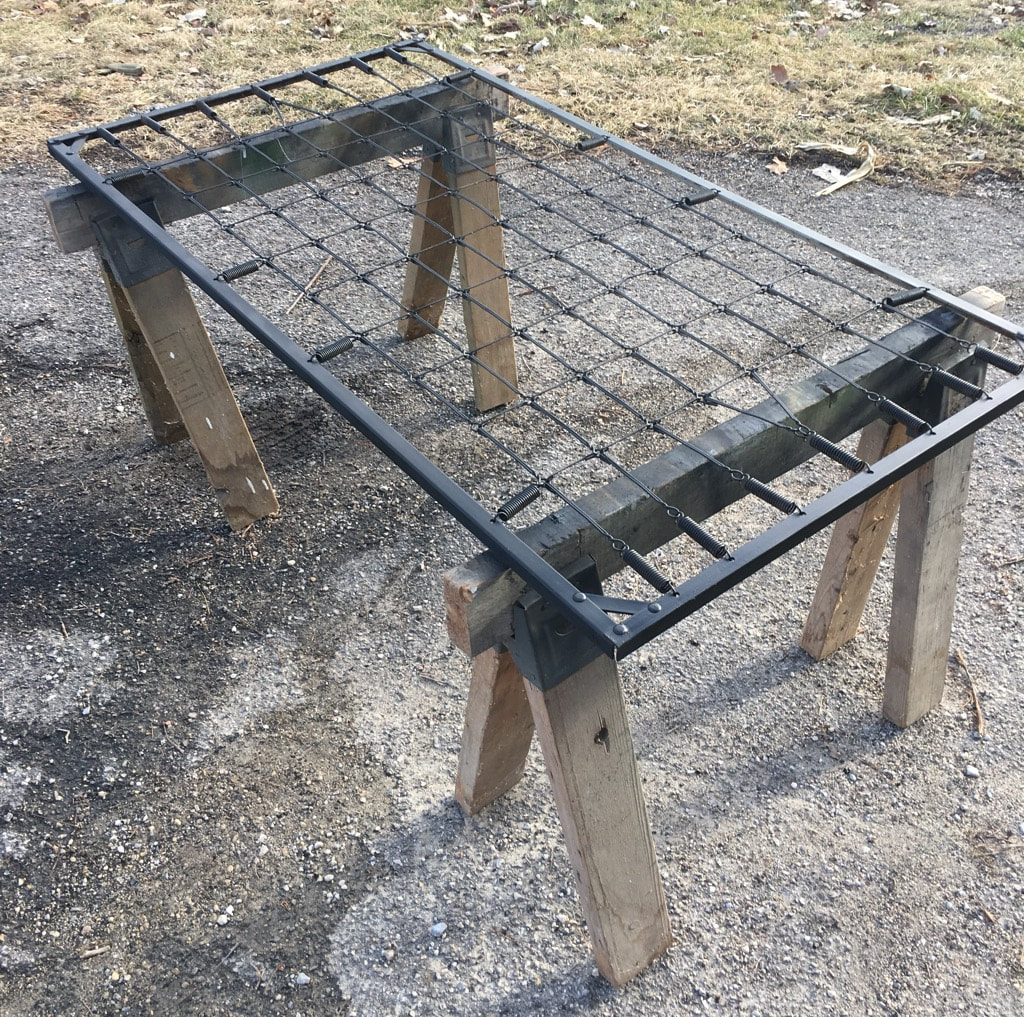 While I thought through the ideas I had for the full light fixture, I installed the light pendant. Unfortunately, the existing light fixture was placed in a poor spot that is very off center in the dining room, but this light fixture idea ended up working out well for where it was placed. Once I had a final plan in mind for where and how I’d hang the mattress frame, I measured out and marked where the swag light ceiling hooks would go. I determined where the marks would go by measuring the frame corner to corner. I didn’t have fancy tools like a laser level to guide me, so I did my best to eyeball my lines. My husband was there as a second set of eyes and we did pretty well! When my lines were marked, I placed the ceiling hooks by simply twisting them into our ceiling panels. 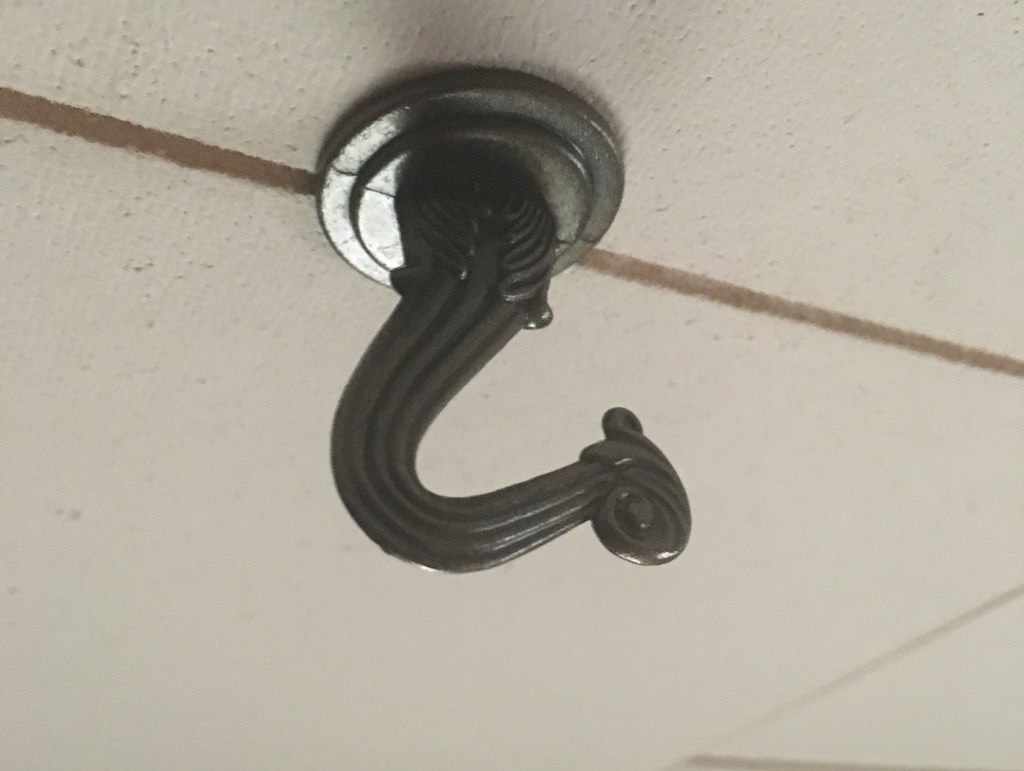 From there I attached loops of wire to the corners of the mattress frame and placed each corner loop over the ceiling hooks. You could also use small link decorative chain in place of the wire for a different look. I was in a hurry to do this (because I was excited) and strong wire was the only thing our small town hardware store had. I may replace it down the road. 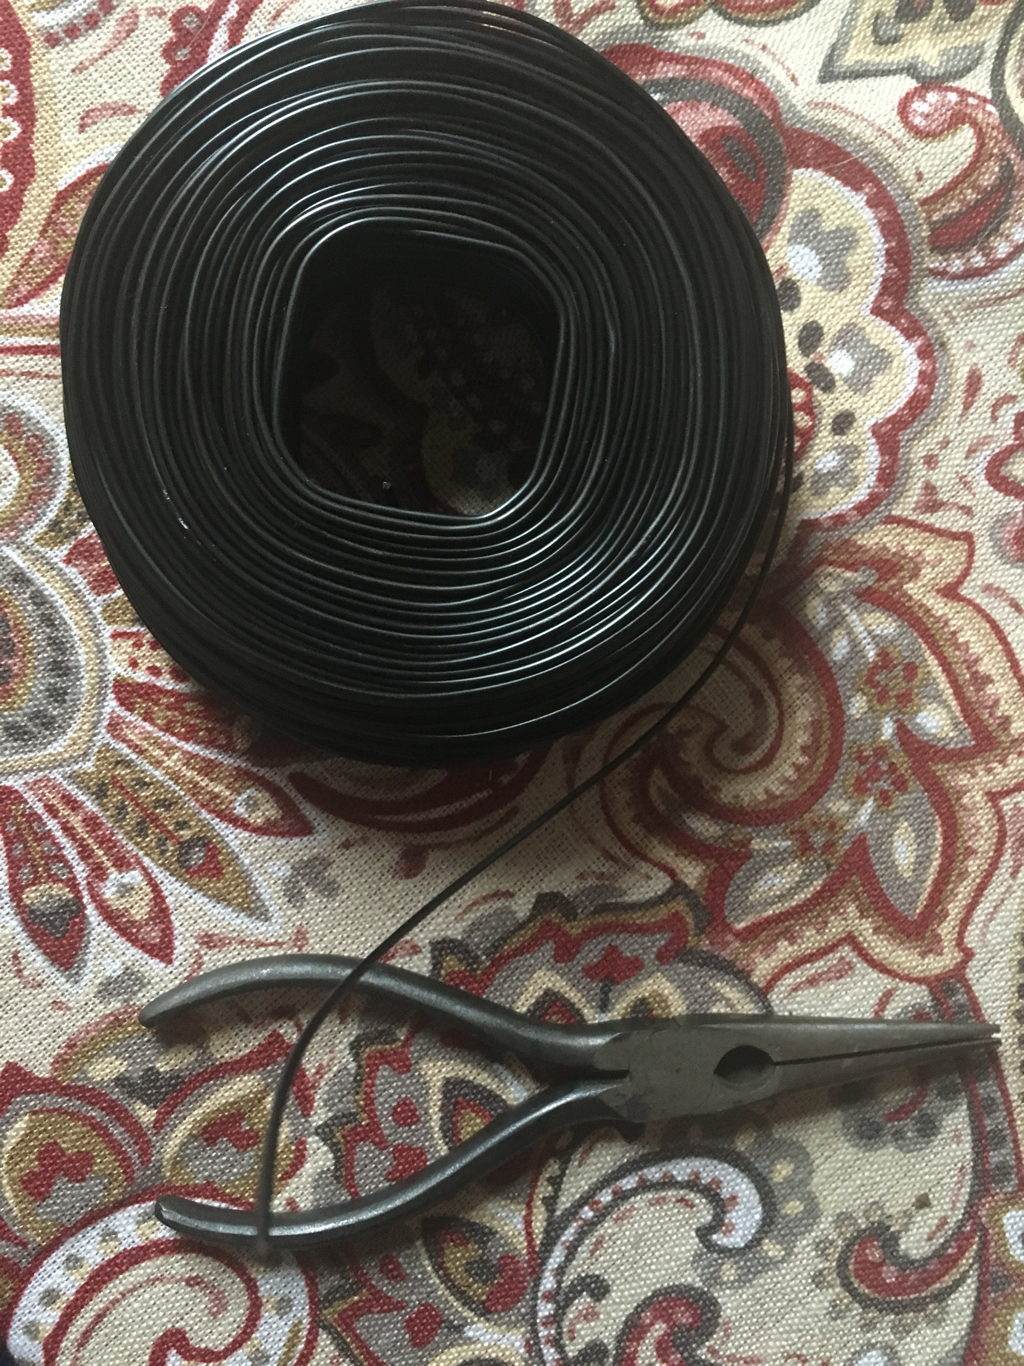 When the mattress frame was securely in place, I “styled” the light bulbs by stringing them through the frame.  The last step was to add Edison bulbs. I used three different styles of bulbs because I love Edison bulbs and couldn’t choose just one style when I had eight lights to fill! I love how this light fixture looks industrial and rustic at the same time. I plan to completely redo the seating in the dining room which will make the space come together even more.    The project I'm sharing today may be my favorite DIY project so far! Creating faux built-ins in our living room completely changed the look and feel of our home. Our house is small, so storage is key. We have a large living room that we weren't utilizing to its full potential. We pieced some items together as temporary filler, but I knew we could do better. After several months and three different design plans later, I completed the project outlined below. The built-ins give us the additional storage we needed and look 100% better than what we had going on before! Step 1: Find, prep and paint shelving. Originally, I planned to buy shelving. Then I wanted to build shelving. Then, by talking to the right people, I found a balance between the two - prefab shelving that could be assembled in whatever way I wanted. My dad had two large shelves he wasn't using that were from a medical office. They held medical charts so are very solid shelving units (which I needed, especially for Joel's records). 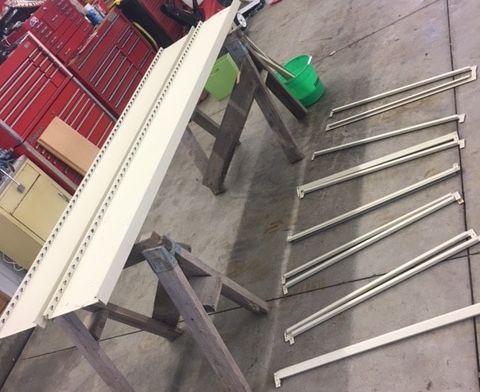 The shelving consists of a metal frame with compressed wood panels for the shelves. I did some online research and decided I'd paint the metal and leave the compressed wood panels as they were. First, we sanded the frame and the bars that hold the wood shelves. We then washed the metal materials with warm water and household cleaner. 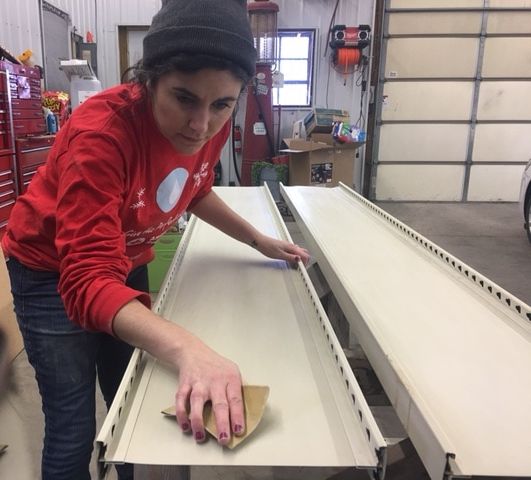 After the metal was sanded and cleaned, I painted everything with two coats of latex paint. I used a roller for the large parts and a brush for the nooks and crannies. I had half a gallon of medium dark gray (called "Padlock Gray") paint left over from painting our guest room that I wanted to use up vs. going out and buying more. 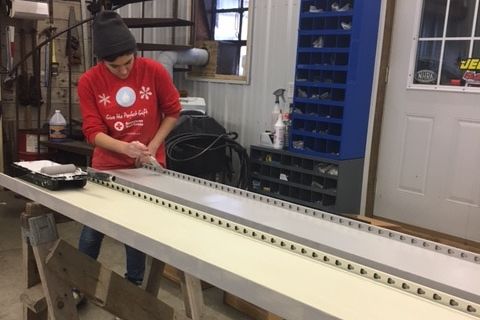 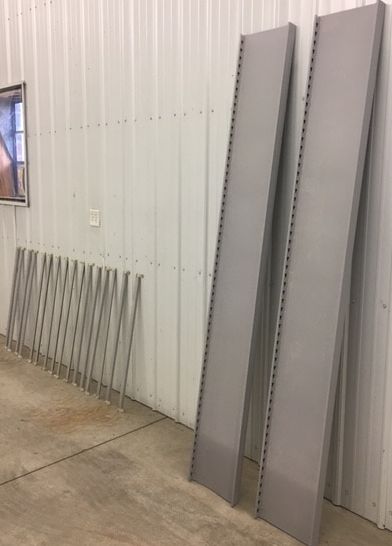 The last thing we did on the shelving was cut 30 inches from the bottom of the "inside" panels. We didn't have enough wall space to put a shelf, dresser, shelf - so our solution was to have the inside of the shelves braced on top of the dresser. Step 2: Find, prep and paint dresser. In total, this project only cost us $75. The one thing I paid for was the dresser that we used as the centerpiece of our built-in. I found a great vintage dresser on the buy/sell app "Let Go." I bought it from a nice woman who was not creepy in any way. It was a positive buying experience! She had already painted it with black chalk paint, which I liked. The only thing I did was paint the top of the dresser with the same gray as the shelves to make the separate pieces look like one unit. 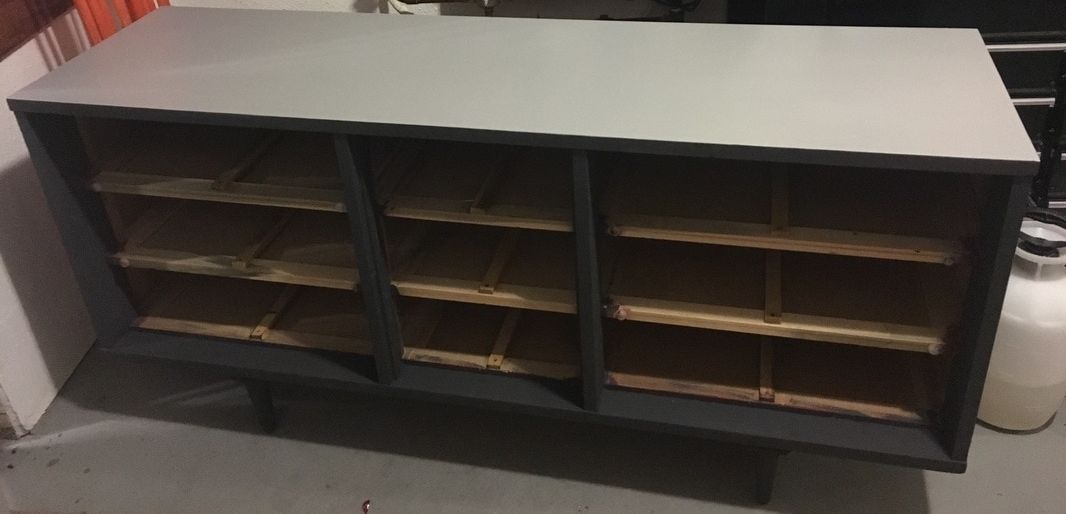 Step 3: Installation! I was anticipating installation day like a kid anticipates the arrival of Santa. Projects are life in my world. Before I could start putting the pieces together, I needed to add some protection to the bottom so they didn't scrape our hardwood floors. I used adhesive felt squares for the bottom of the dresser legs. For the shelves, we used an industrial tubing used on semis to protect various parts from damage. See below for what this tubing looks like. 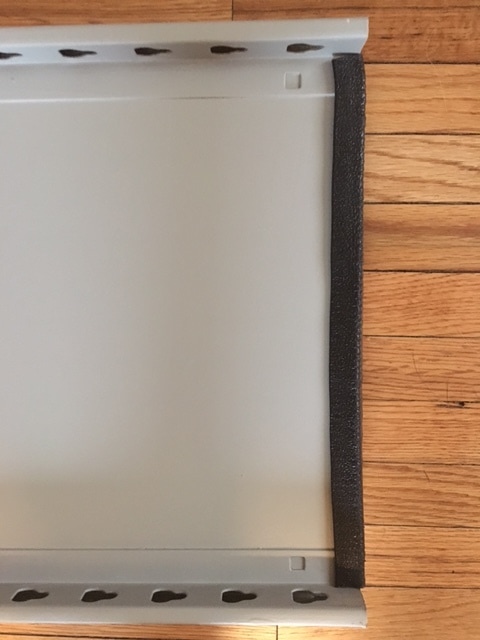 After I knew my precious floors would be protected...we started putting the pieces together! 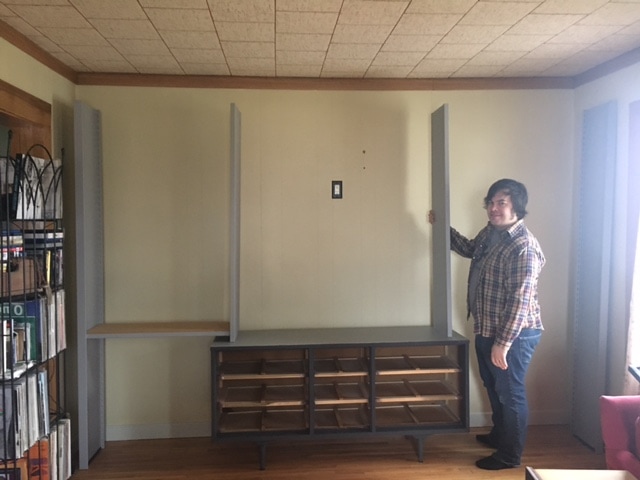  The shelves were super easy to put together. No tools necessary. The bars snapped easily into the sides. From there, we simply set the compressed wood panels onto the ledges of the bars. 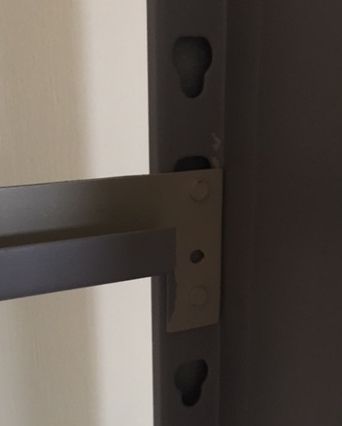 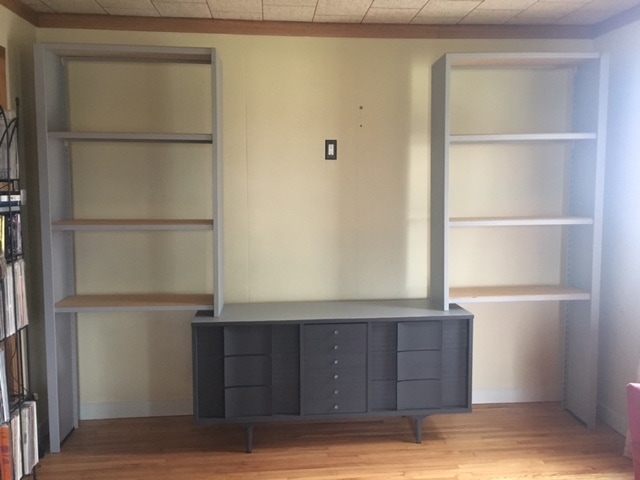 I was thrilled with everything once it was all in place. It was very sturdy, looked attractive, and was going to help solve some of our storage issues! I loved it even more after I took a look at what the space looked like before. I'm a little embarrassed that we had people over with the space looking so disheveled...Take a look for yourself! 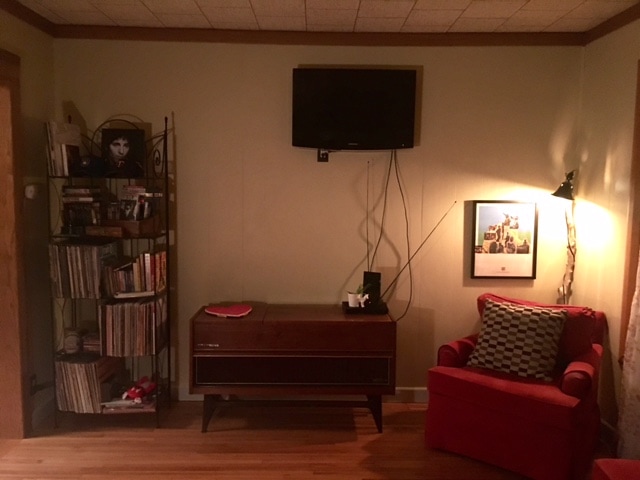 Before (so embarrassing!!) 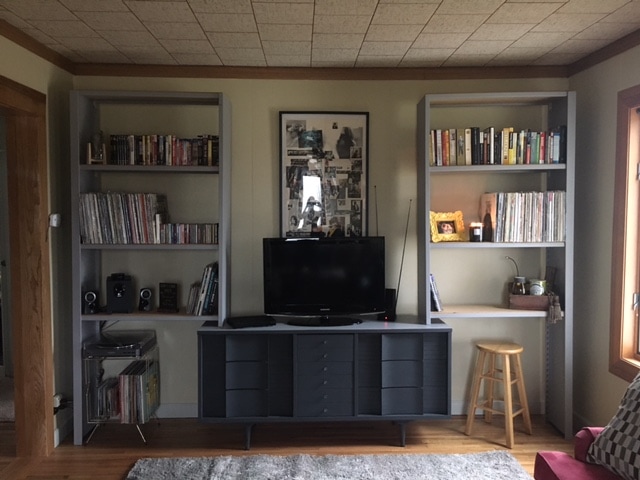 After (so much better!!) I was able to add storage for DVDs, books, CDs and records. I dedicated a space on the left to Joel's record player (it is hard to believe that we went almost one year without having this baby set-up) and a space on the right for a little desk to keep my planner/laptop.
You can do this! All you need is two bookshelves, a dresser, and a little imagination! |
Archives
August 2022
Categories
All
|


 RSS Feed