Busy Hands, Happy Heart
|
The COVID “quarantine” period has been a dream for me. I have been able to focus time and energy on projects that truly bring me joy. Giving our family cabin a facelift was one of those projects. For years I have wanted to tackle updating the mobile home style cabin my grandma has on the Mississippi River in Lansing. She had made major improvements to the exterior (siding/roof), plumbing, electric, completely renovated the bathroom, and had new ceilings and light fixtures installed. Huge things checked off the list, all worth it. The thing was, the décor throughout the rest of the cabin wasn’t matching with the updates that were made – distracting from all of the great work that had been done. Because I didn’t have to work every weekend this summer due to the pandemic, I had time to knock out the work I did over the course of a few consecutive visits up there. I knew that when I did it, I wanted to do it all of the way, all at one time. I didn’t want anything to be partially done – because when I do that – I have a tendency to leave it partially done…I’m also a control freak so I wanted to make sure the way everything was finished was the way I envisioned it! I ended up doing most of the work on my own, working 12+ hour days. My grandma jumped in to help me with removing wallpaper and final touches. Working on my own knowing I had full days with no interruptions to check things off my list made me very happy! I was focused and fueled by soda, sugar, and Mexican food. Heaven. All work was done on a tight budget. I used as many items I already had or from the cabin as possible, like paint and décor. I started with the guest bedroom. It had been wallpapered a VERY long time ago and was fully taken up by a set of huge, solid bunk beds. The mood was dark and dingy. The bunk beds were used quite a bit when we were younger, but as everyone got older, the person who drew the short straw got to sleep in that room. The beds needed to go. I was able to sell them on Let Go to a super sweet family who really needed the beds for their growing family. We said goodbye to them and got to work. Luckily, the wallpaper was done over wood paneling. In this room, removing it was pretty easy for the most part. I removed all paper and glue, filled holes, and caulked some big gaps in the paneling where water had gotten to it (making sure the cause was addressed beforehand – it was). To brighten things up, I taped everything off and painted it a very light grey and navy blue. Here are some before and after photos: 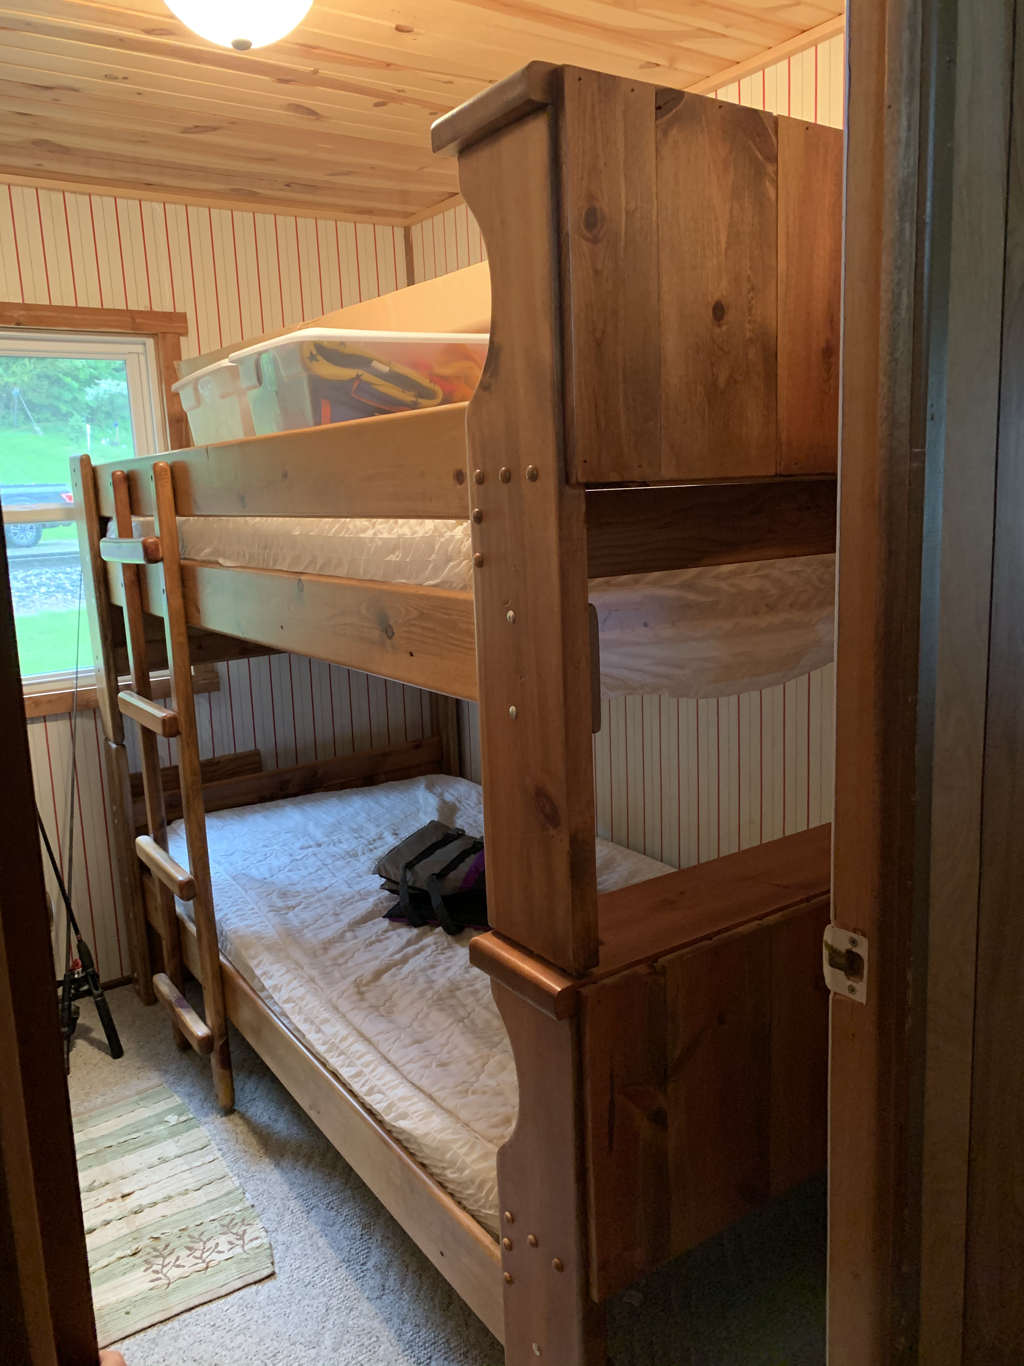  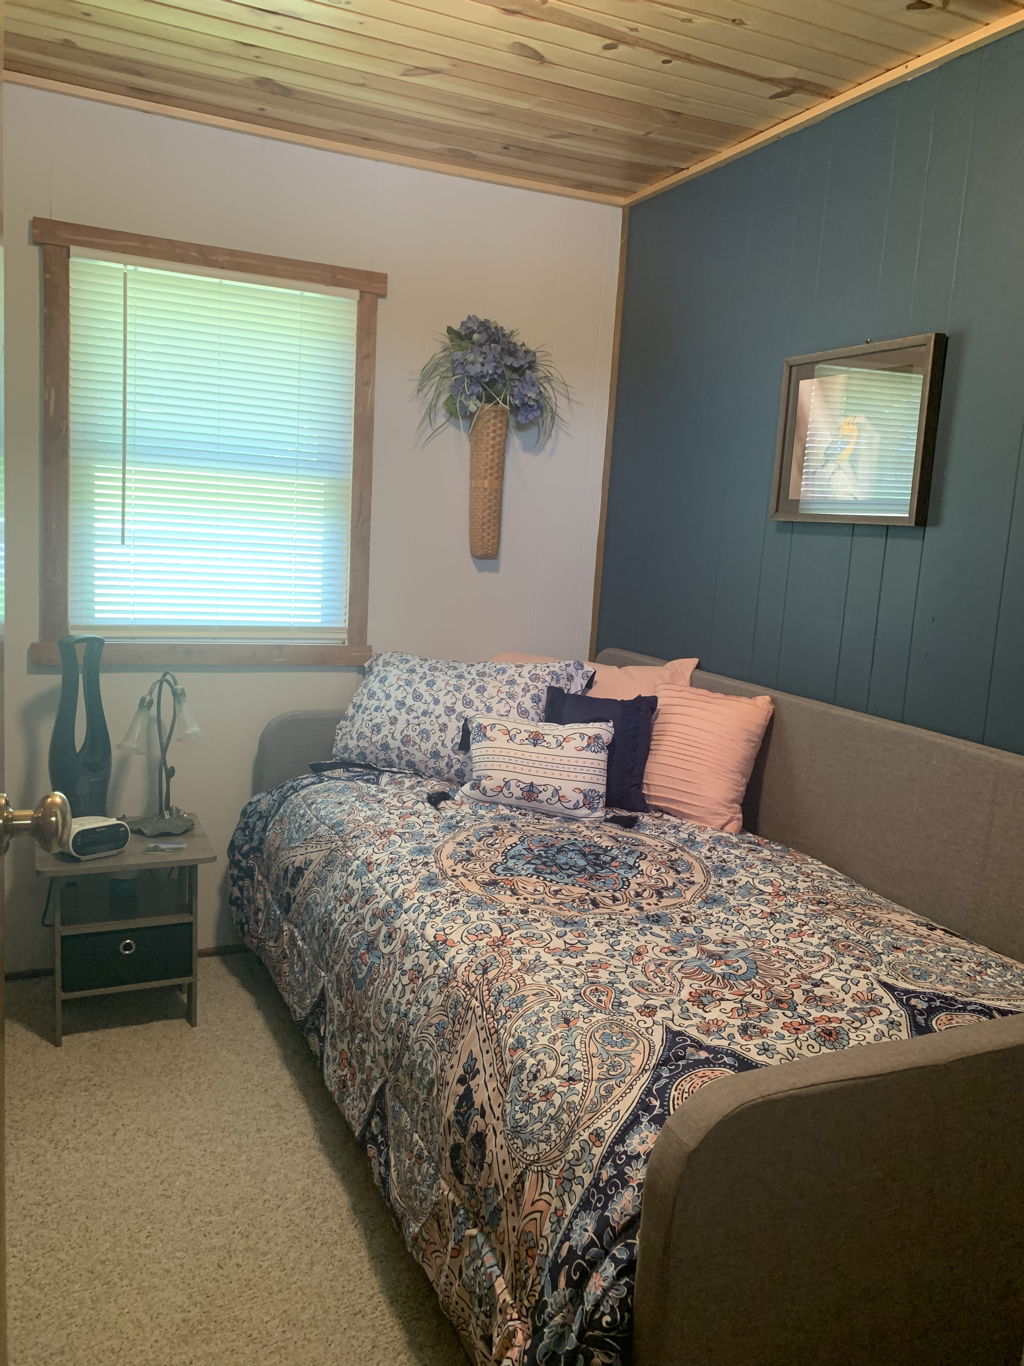 Much more welcoming now. Everyone, myself included, is in love with how it turned out. On a side note – all of the things I did really freshened things up as well because as I was making cosmetic changes, I was deep cleaning along the way. Next, I moved on to the master bedroom. This room was really just a mish mosh of random things. One of my goals was to give each room a “theme.” Grouping like items together so instead of looking messy/cluttered, the cabin looked clean/curated. It made a HUGE difference. This room became the “fishing room.” I took down wallpaper here as well, patched things up, and painted with a pretty light green. You’ll see in the photos below that we have fishing poles hung on the wall I painted. There was a rack on one side, not the other, so once the paint dried, I added a second rack so I could hang all of the fishing poles. I was able to use scrap wood I found in the cabin and bought some cup hooks to screw in. I then attached a fishing net to the wall behind the bed and assembled a nightstand to add. Here are some before and afters of this room: 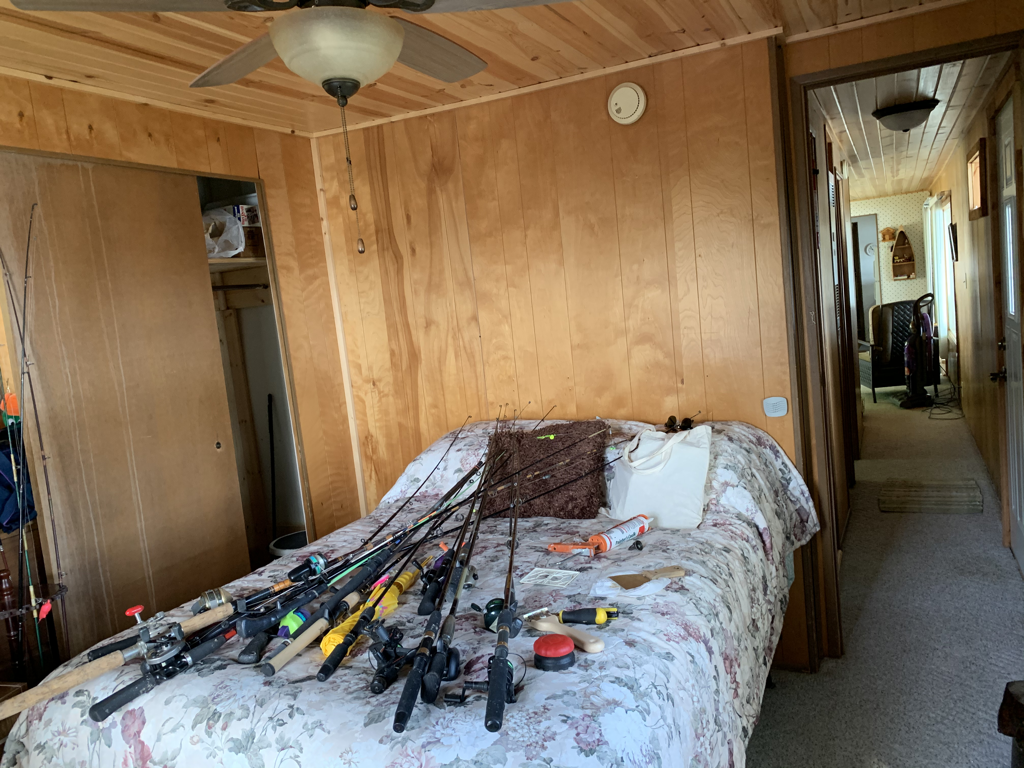 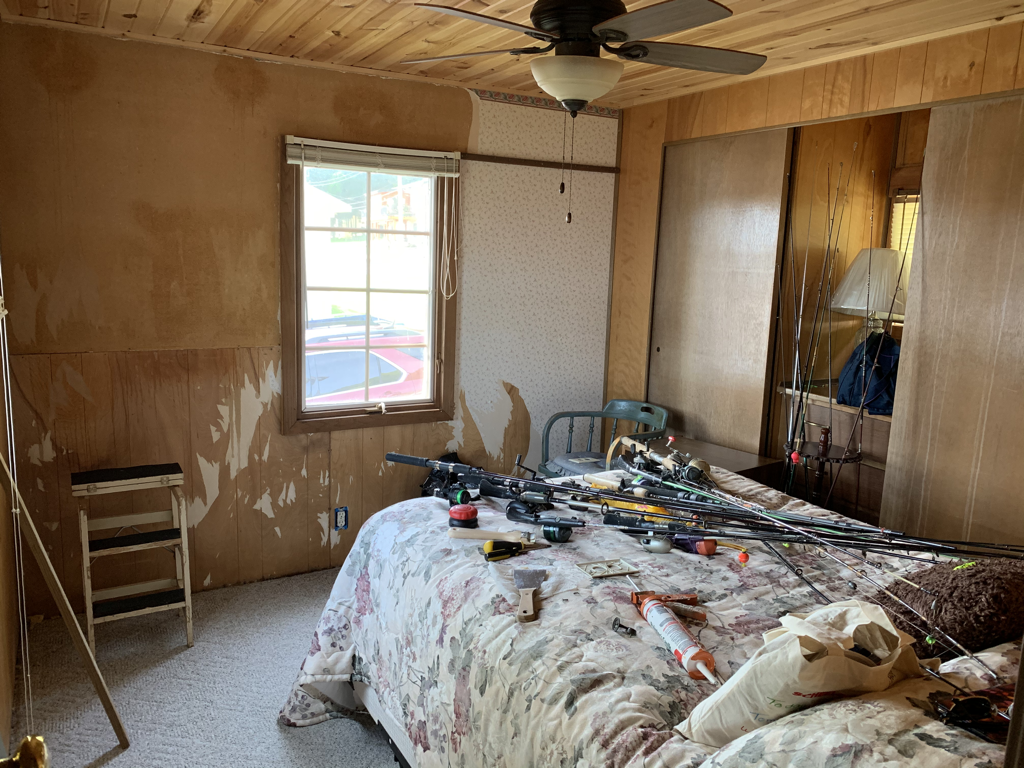 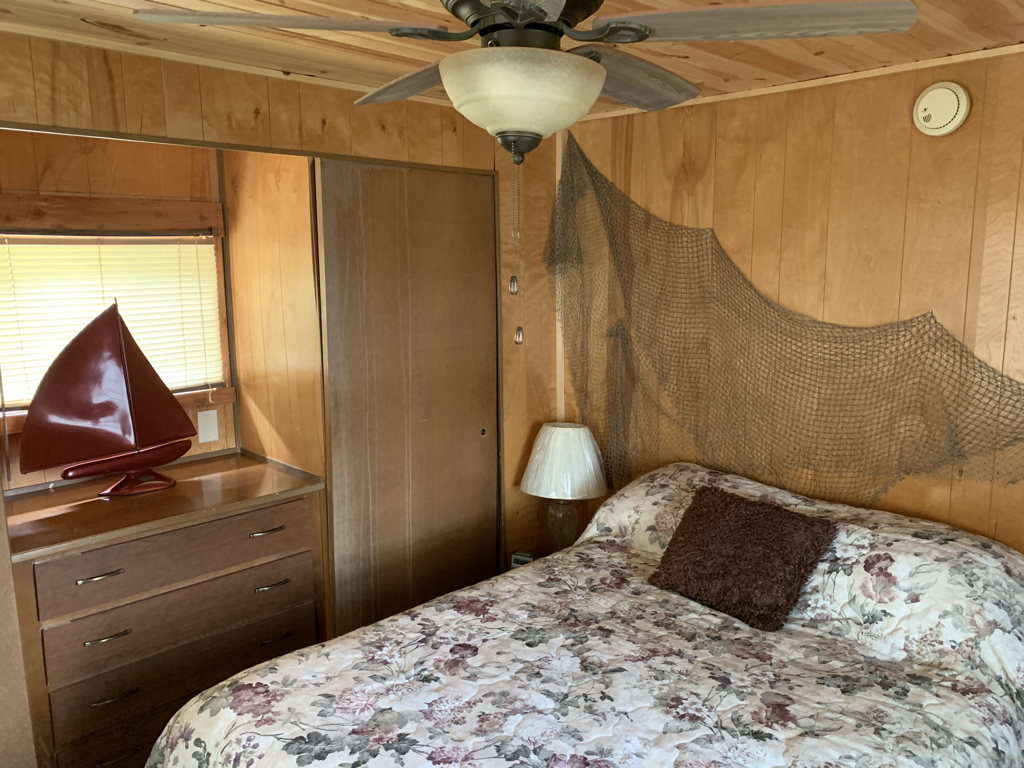 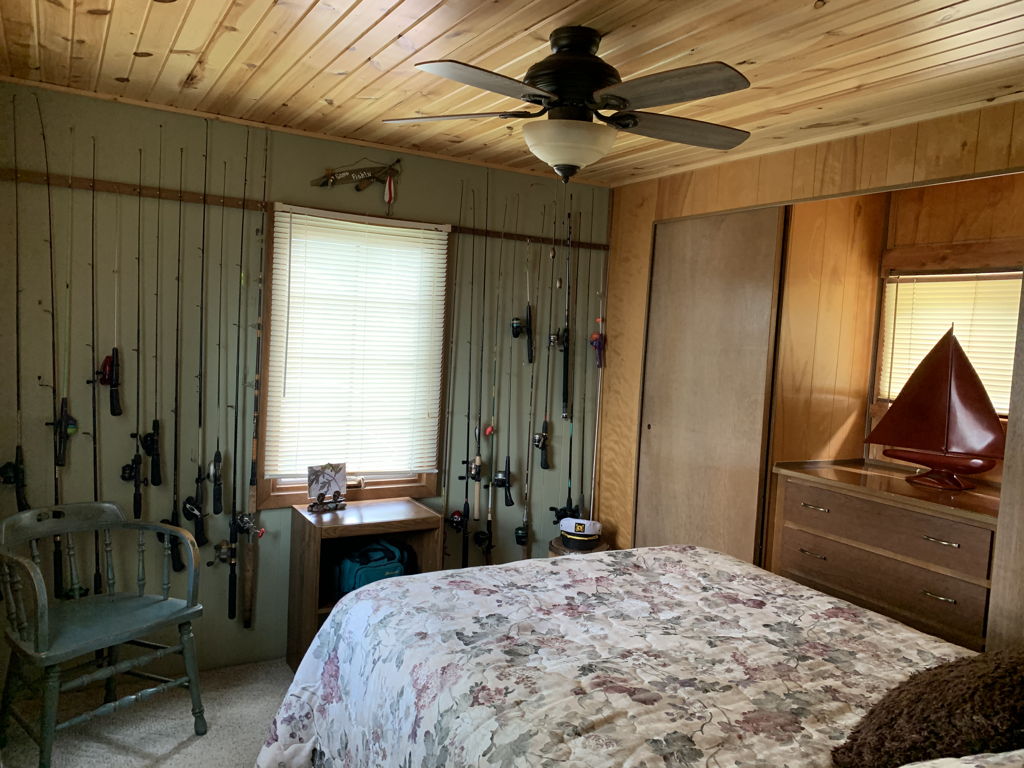 Wow – right?! The vibe is now much more welcoming and it definitely feels more cozy. The last place I did big changes in was the kitchen. Unfortunately…I’m terrible with before photos and forgot to take some of the kitchen! Please use your imagination to picture an outdated, grimy space with peeling wallpaper that was powder blue and white with a teapot pattern everywhere you looked. Some of the walls were partially painted white over the wallpaper – but it never got finished. This is the room I’m most proud of because it was the first time I used removable wallpaper. It was definitely the biggest challenge. I was extremely nervous to do it and of course, my grandma wanted to help that day, so I had an audience! But once I had the first piece up, I rejoiced, knew what do to, and was able to get it all done in a day. I applied a weathered wood wallpaper to the backsplash area of the counters and behind the sink. I painted the rest of the walls the same light grey as the extra bedroom. Cleaning was key in this area. I magic erasered every surface several times! It made an amazing difference. I also rearranged how some of the items were on the counters and bought grey kitchen rugs to bring the grey from the wallpaper into the room a little more. Here is an after photo of the kitchen: 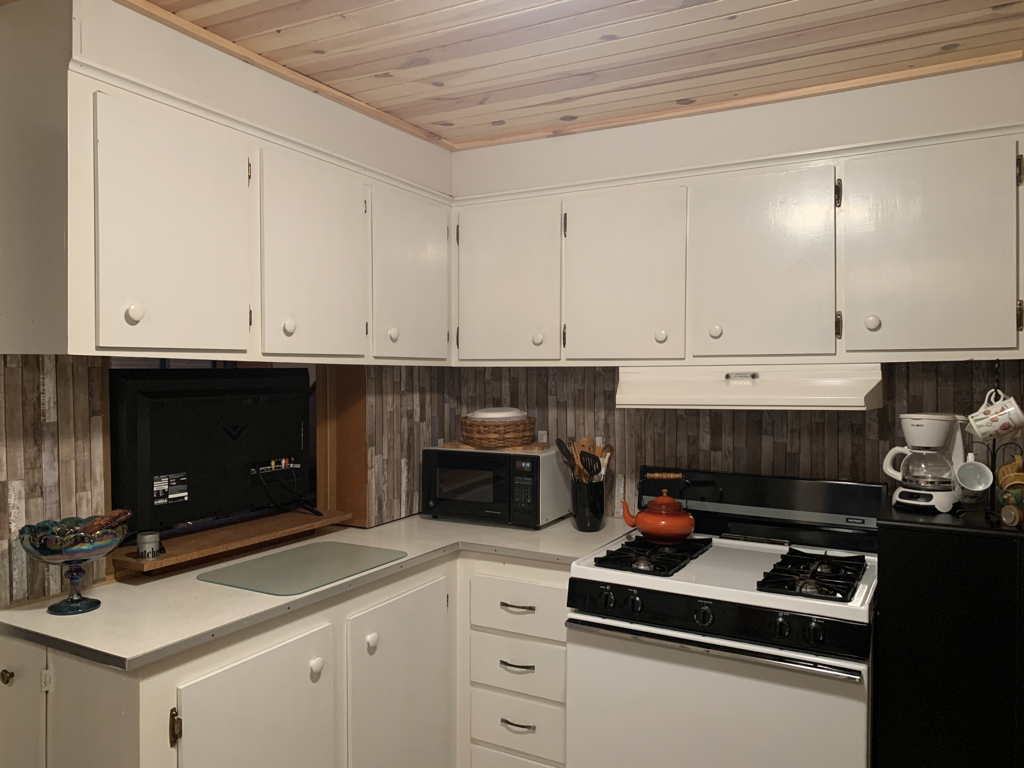 In case you are wondering, I found the wallpaper at Menards. I bought 3 rolls but only needed part of one. It cost around $30.00 – well worth it. I did a little facelift to the living room. Removed wallpaper, patched holes, rearranged the wall décor, and bought a new cover and throw pillows for the couch. Little things, but the room is now cohesive. 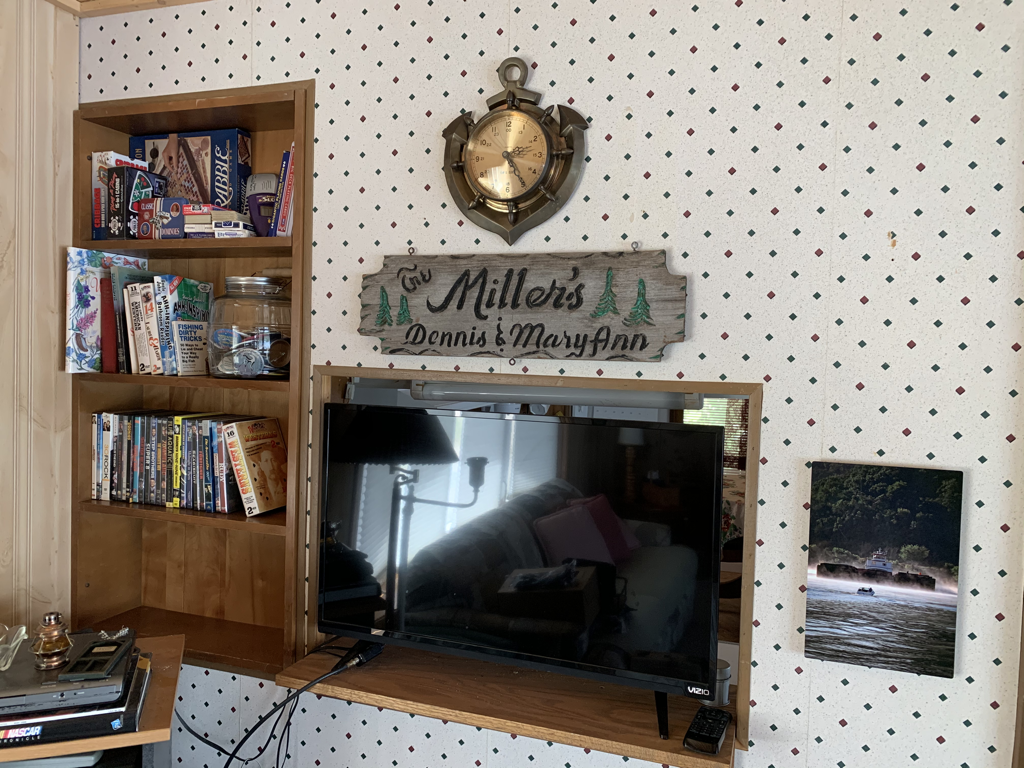 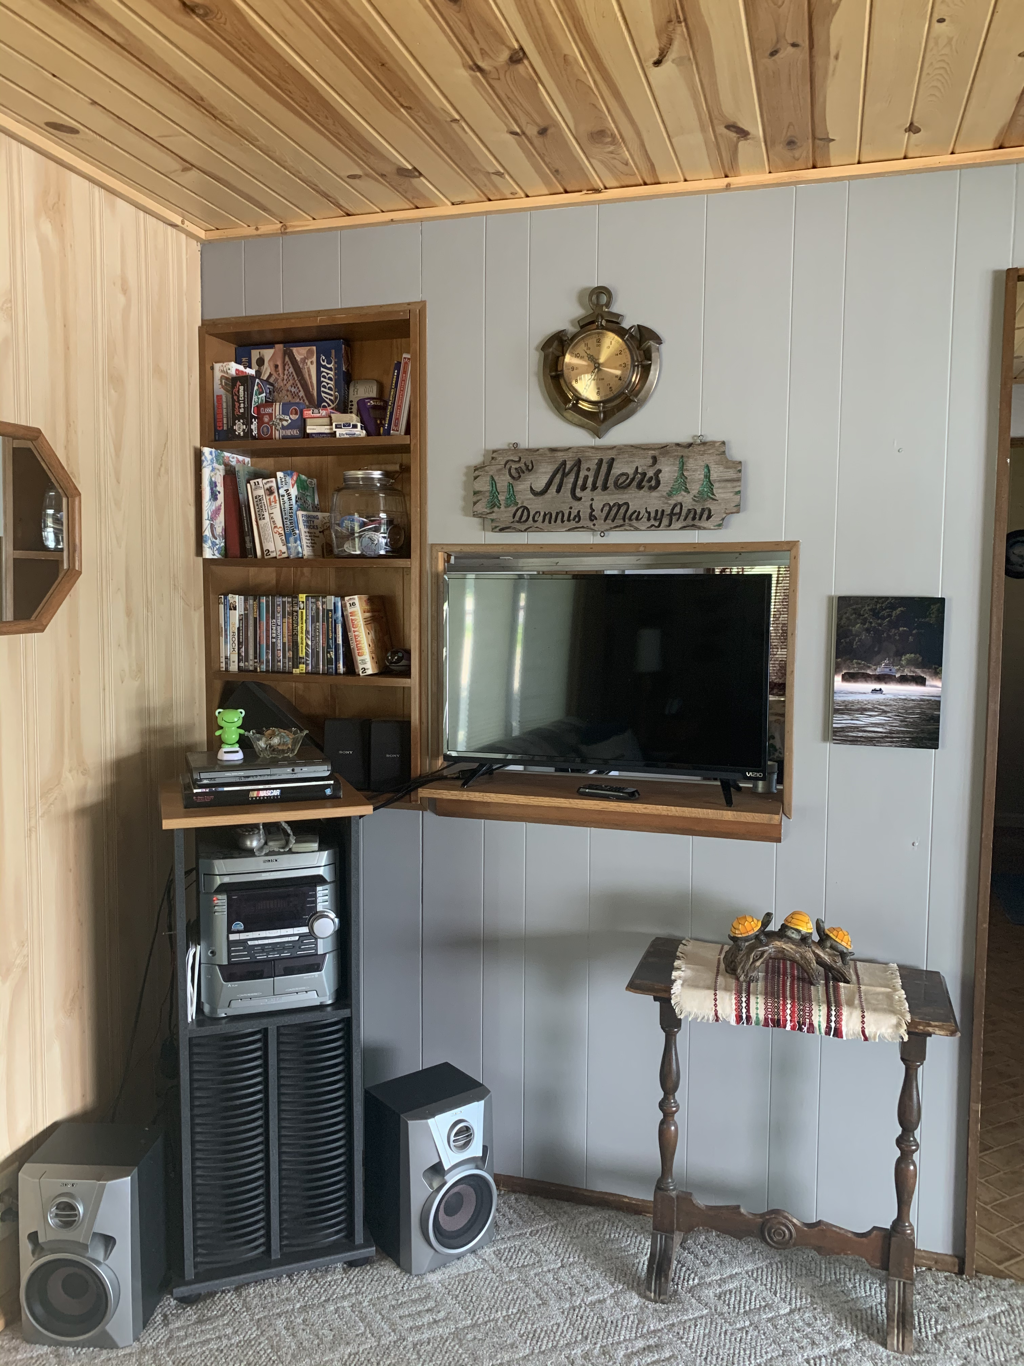  And lastly, I organized the crap out of the dining room. There is a buffet in there that has always been piled with miscellaneous items from years ago. My goal was to at least clear off the top and make room in the cabinets. Mission accomplished! I added a bright tablecloth to the dining table to inject some energy into this area and made the theme “bald eagles and wolves" using décor from throughout the cabin. I also displayed all of the buttons we’ve collected from past “Fish Days” (Lansing's town festival) we’ve been around for. We take a lot of pride in those.   For a quick, cheap update, I'm pleased with how everything turned out! I ultimately did it for my grandma. We are very fortunate that she allows us to enjoy the cabin, so it felt good to show her my gratitude through this work. She was extremely pleased with the results and that makes my heart feel so full. There are a lot of memories in that cabin, many tied to my grandpa. Seeing the cabin change from what it was when he was alive was hard for her, I know, but breathing new life into it has given her a renewed interest in spending time there. I'm so glad I could give her that gift. 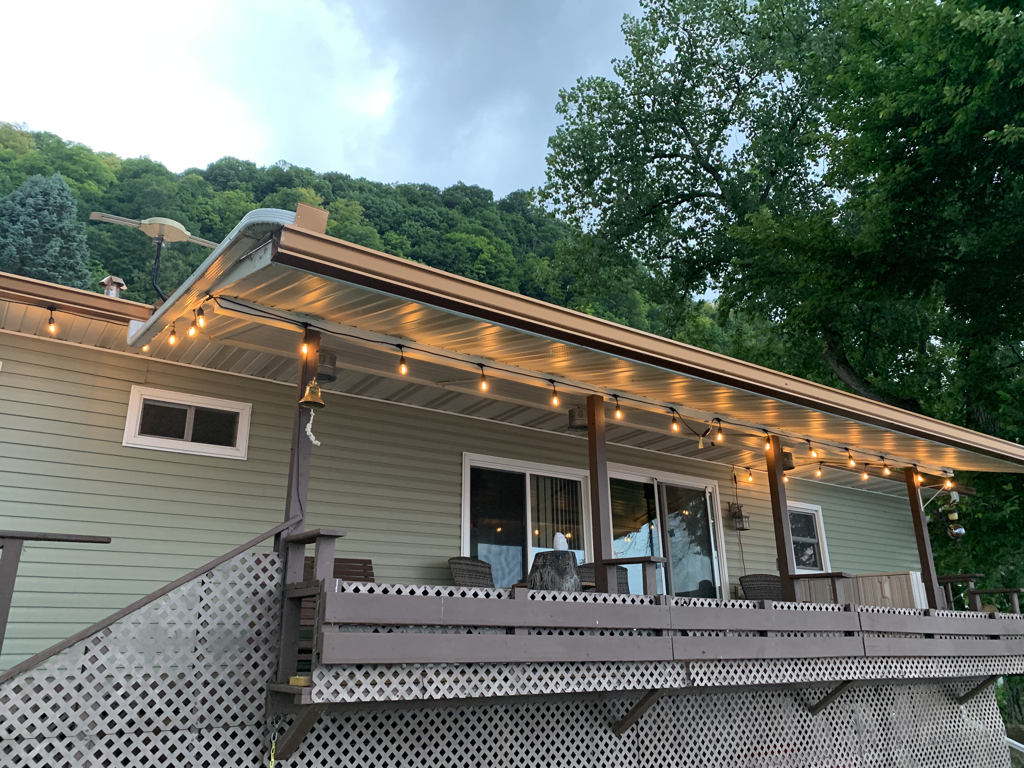
3 Comments
In my last DIY post, I shared how (with the help of my parents) I reupholstered our dining room table benches. This next project I’m sharing was inspired by our dining nook makeover. I believe I made it very clear that I loved the fabric I found on sale to use on the benches. I’m a paisley princess, can’t get enough of it. And the yellow/grey combo has always appealed to me. To have all of these details come together in a fabric was dreamy. Anyway, I wanted to use the leftover fabric to make throw pillow covers for our mudroom so that when you enter our mudroom and walk up the stairs to our dining nook, the spaces felt tied together. This time with the help of my grandma, together we made throw pillow covers for two pillows I already had and wasn’t crazy about.  She used a basic envelope pillow cover pattern like this one. I am not a sewer, but she did walk me through the whole process and explained what she was doing. I have full confidence I could make a somewhat nice cover if I had to in the future, but for now I’ll lean on her! 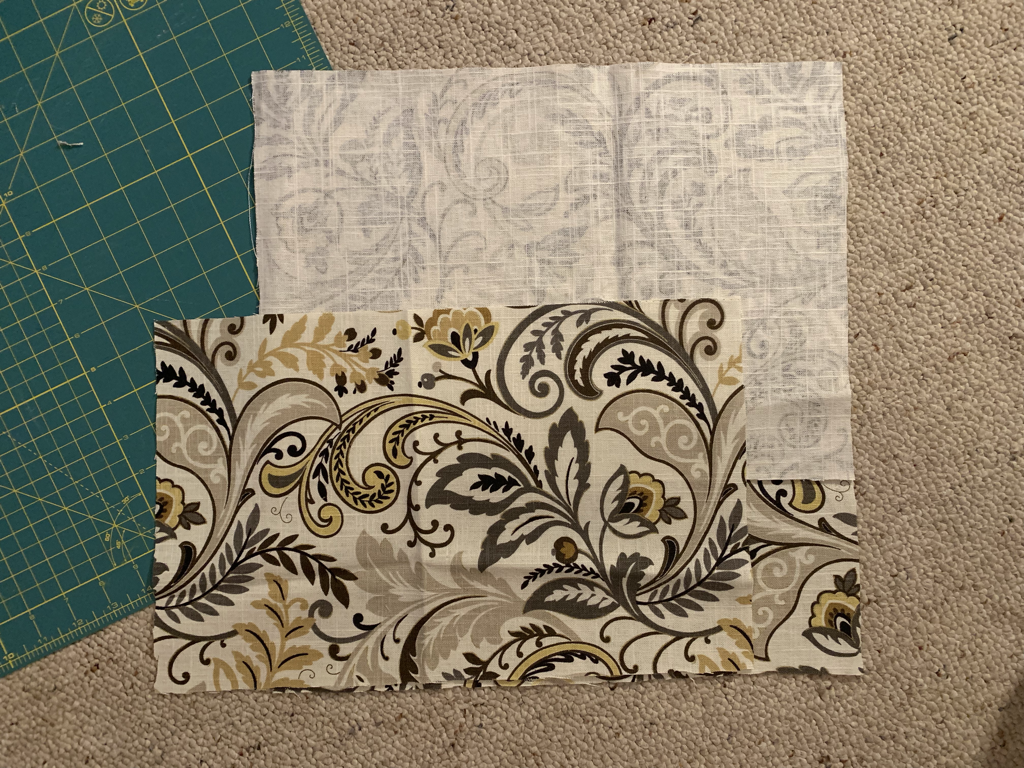 Once I had the pillows ready, I decided I was going to give the mudroom a mini makeover by changing the paint color as well. It was a fine mudroom, but it was missing impact. A good punch in the face when you walked in. In a creative impact sense, not a physical one! It needed a little something extra. My mom helped me pick out the perfect gold color that matched a deep yellow tone in the pillow cover fabric. Butterscotch Ripple. Yummy. Instead of painting an accent wall or the entire room, I ended up creating a faux wainscoting effect around the mudroom and up the stairs leading to the dining nook. To create the effect, all I needed was:
I made my wood cuts one wall at a time, just to see how things fit and if it would affect my next run of wood. I measured up from the floor to the height I liked, leveled the strip, made marks with my pencil where the bottom of the wood strip would be, and then used the stud finder to mark where the studs were. I used the nail gun to secure the strips, being sure to check that they were level along the way. 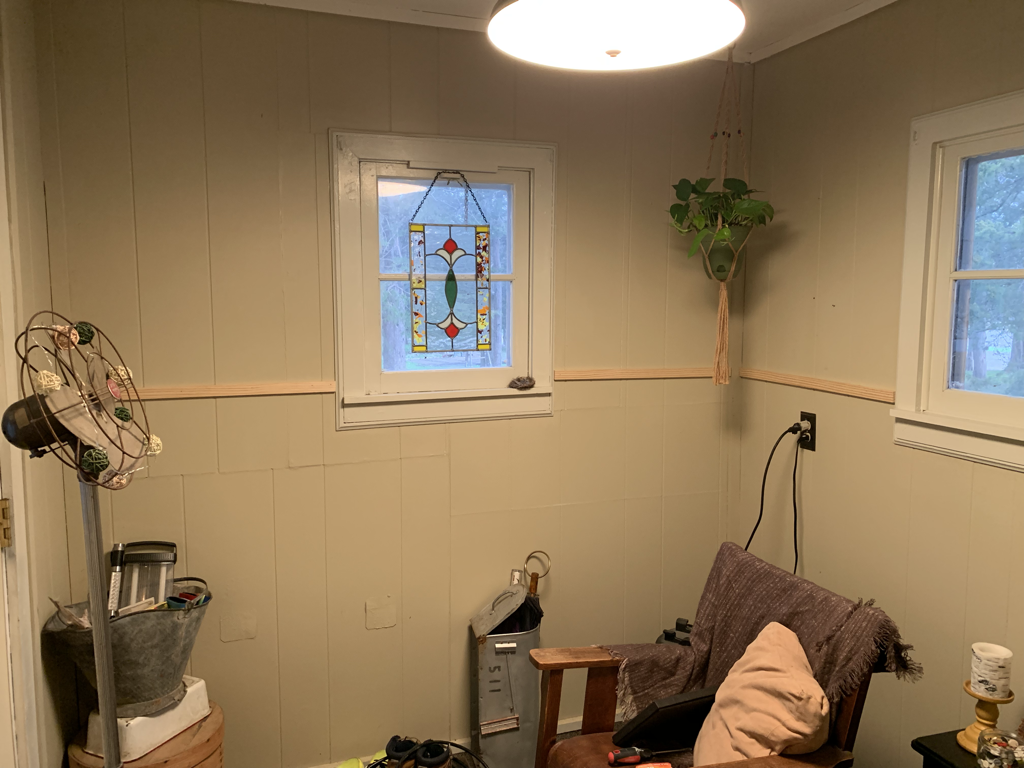 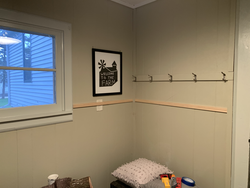 I followed the process above all the way around the room and up the stairs. Up the stairs was a little trickier because I had to cut the ends at angles. I’ve mentioned before that math and I don’t get along – and that includes angles. I actually just marked the angle of the wall on the piece of wood with my pencil by eyeballing it, made the first cut, placed the cut angle against the wall, marked the angle of the other end, and made the second cut. Real professional…but, I got super lucky and it fit perfectly. 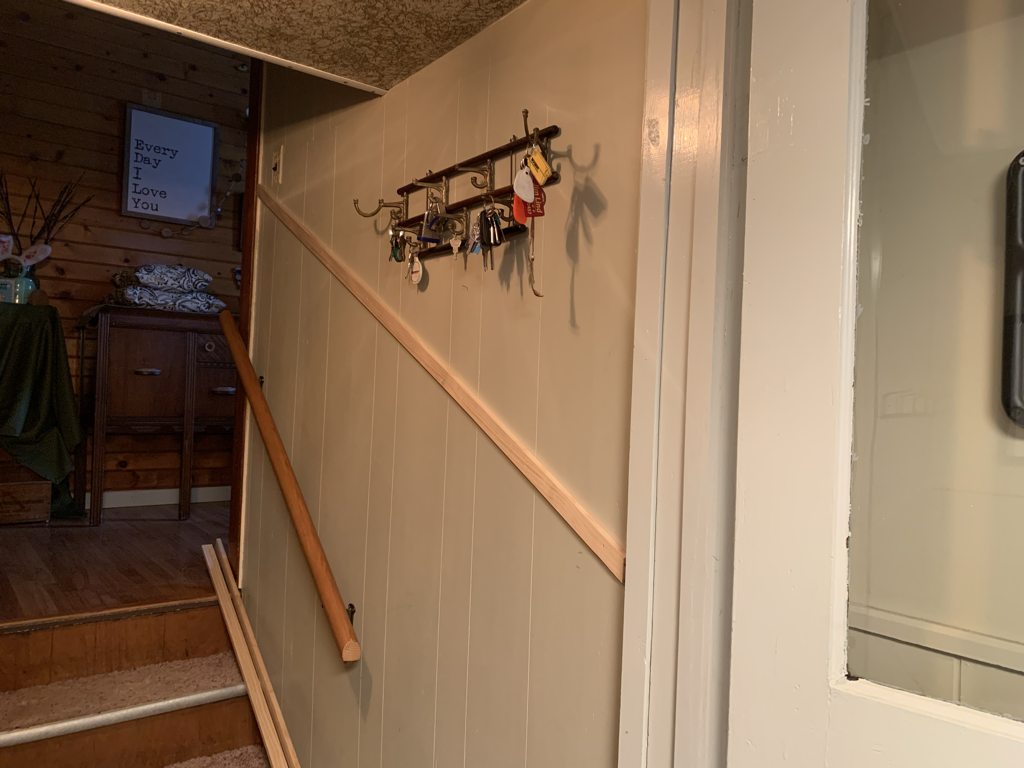 After I had everything nailed in, I went through with the wood filler before painting. I filled in each of the nail holes created by the nail gun and wiped off any excess with a damp cloth. From there, I started to paint! I had to put two coats on, but it’s a really small space, so it didn’t take long. Here is a before of the mudroom when we moved in: 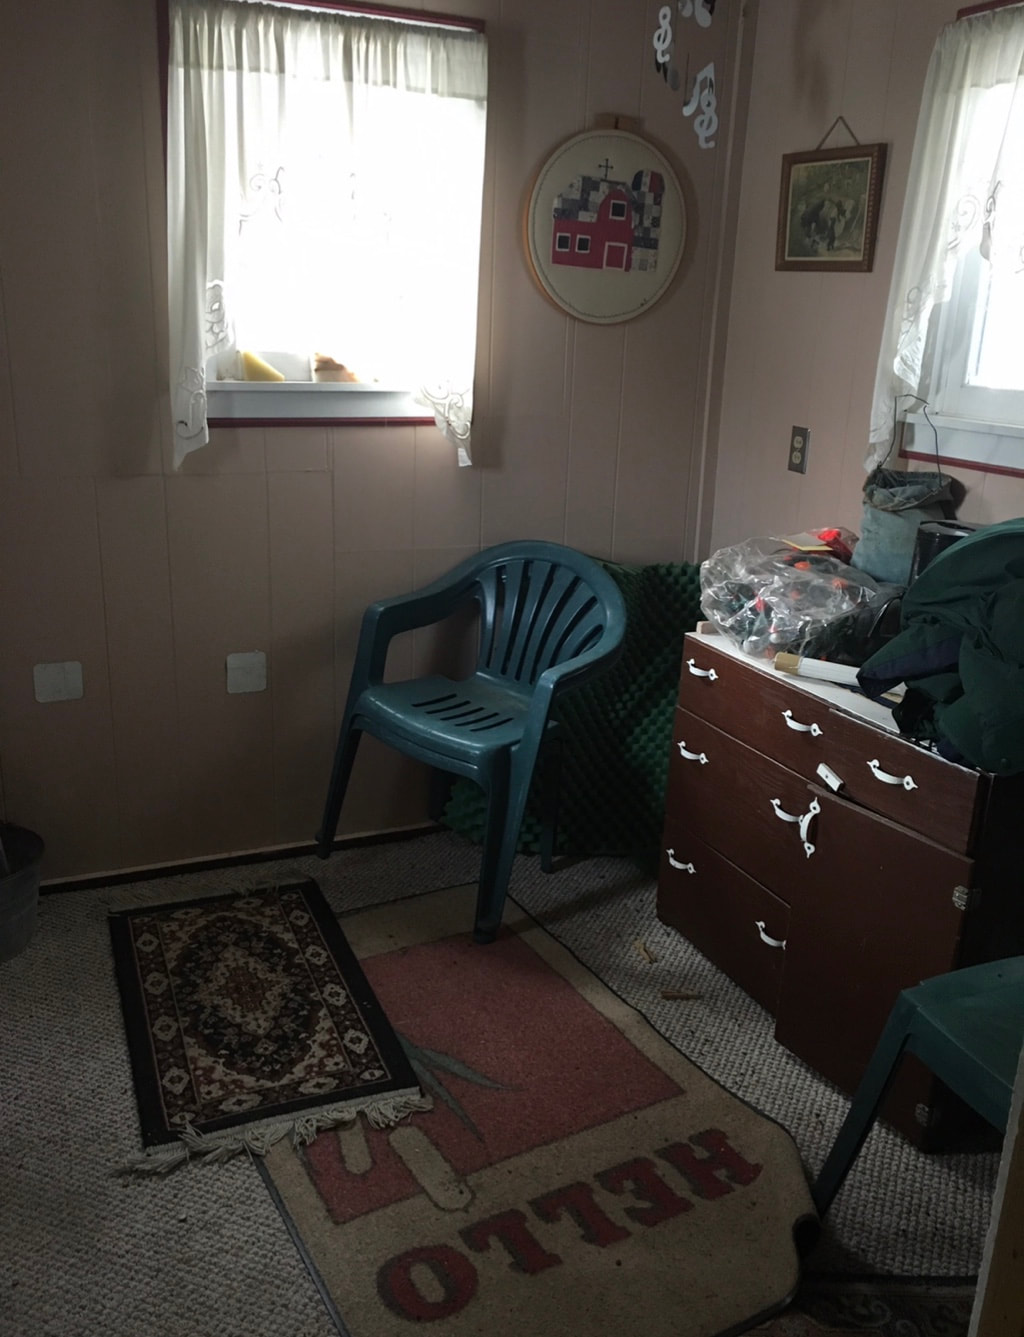 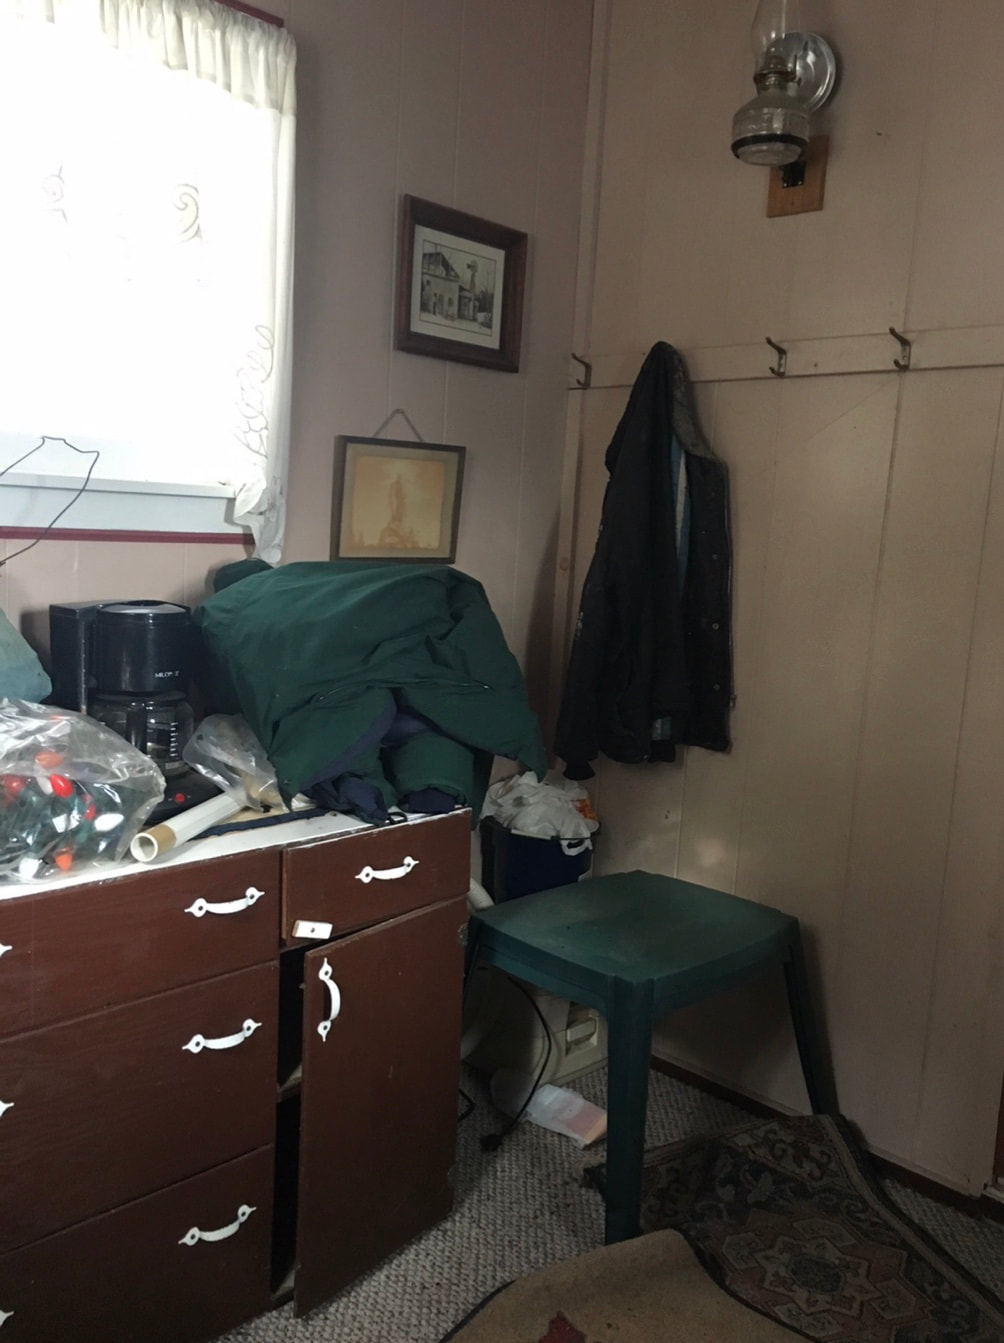 Here is the after following the mini makeover: 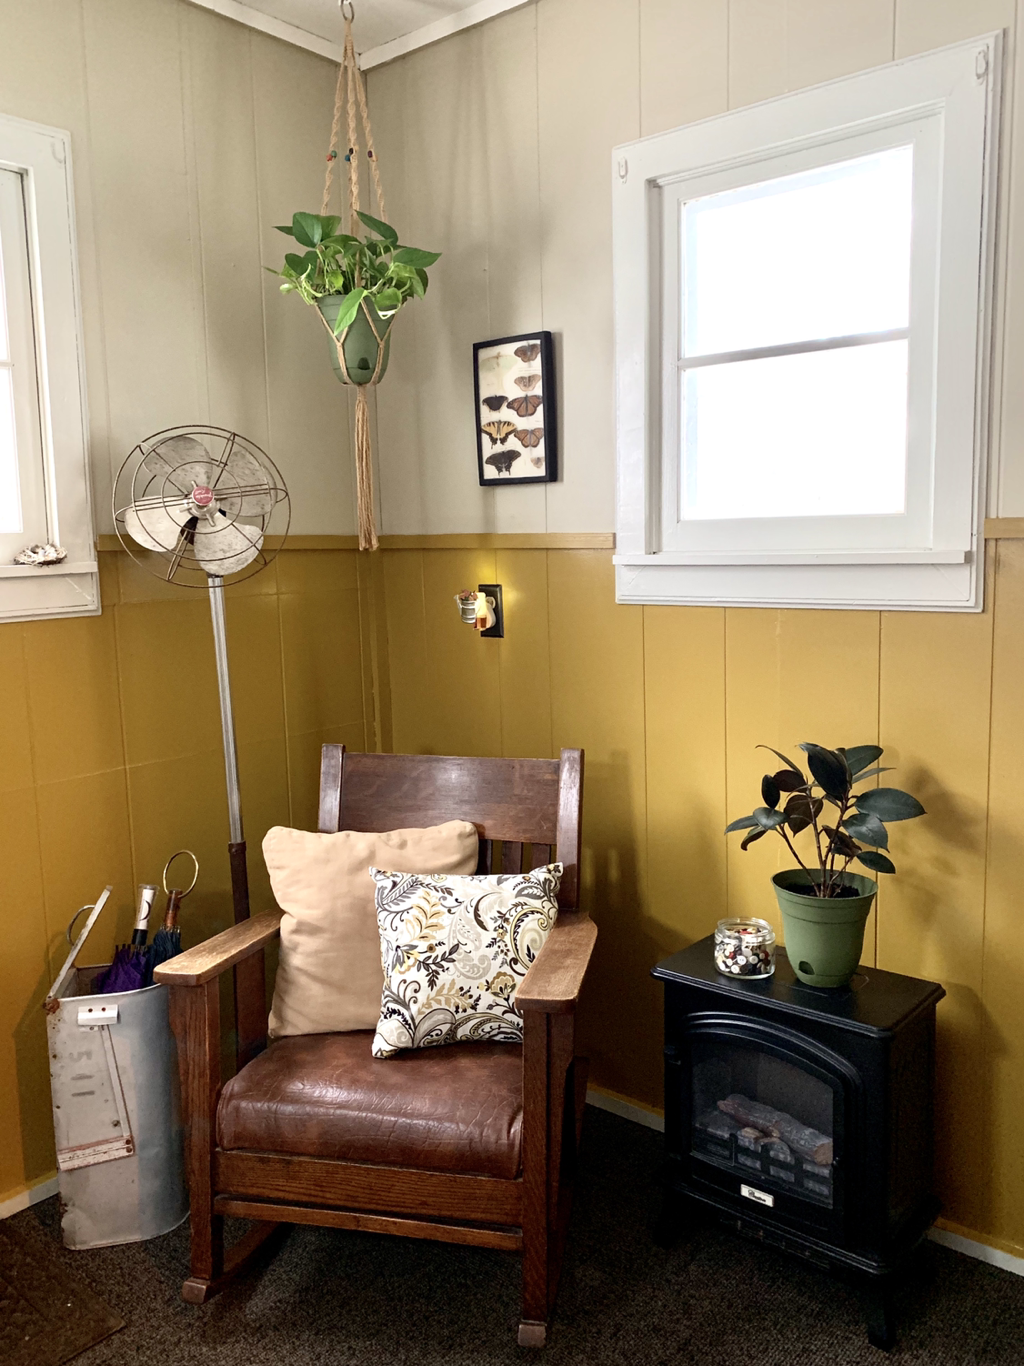 In total, this project took me an evening and part of the next morning to complete. For such a quick project, I couldn’t be more pleased with the impact it has when you walk in our back door (which is our main door)! People will be leaving with black eyes from the punch in the face they’ll get now (LOL). What are you working on lately? Tell me in the comments!
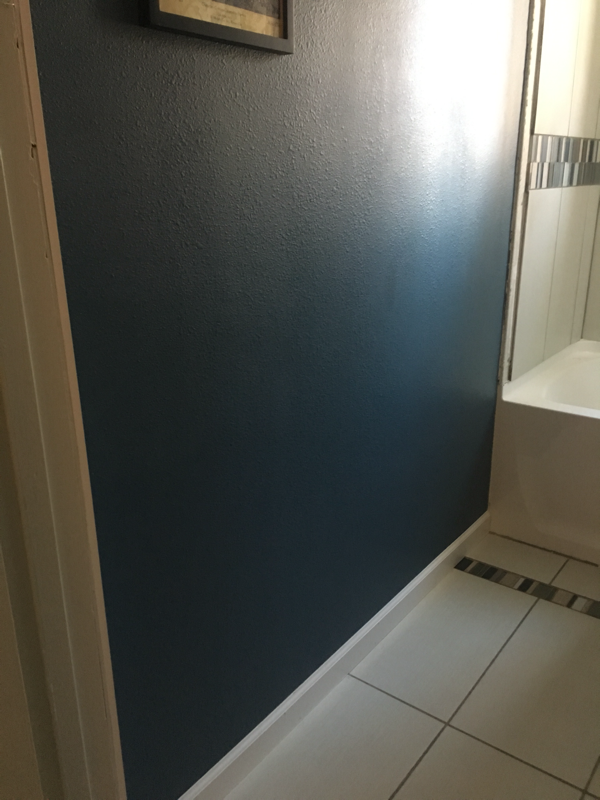
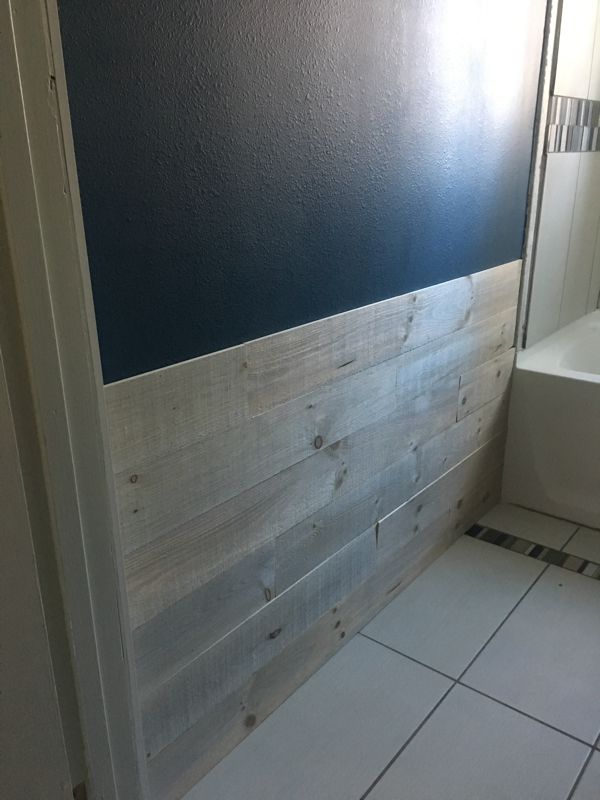
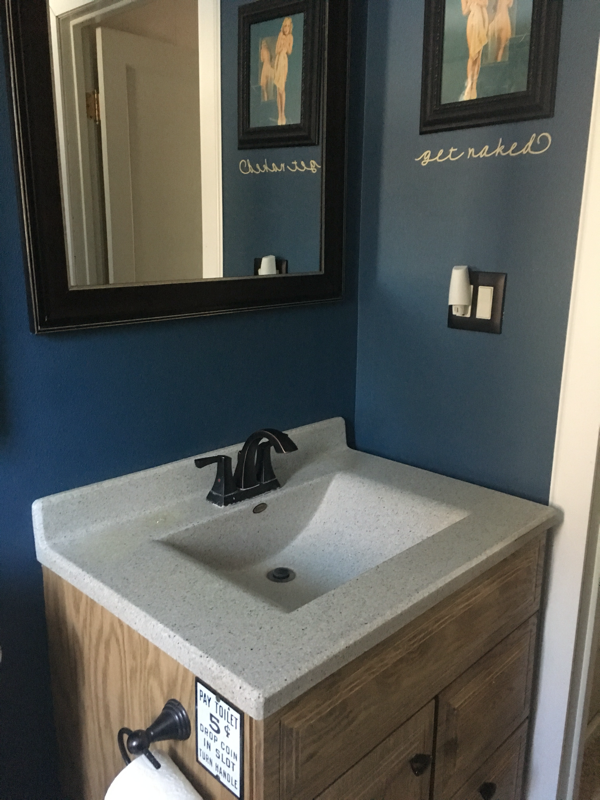
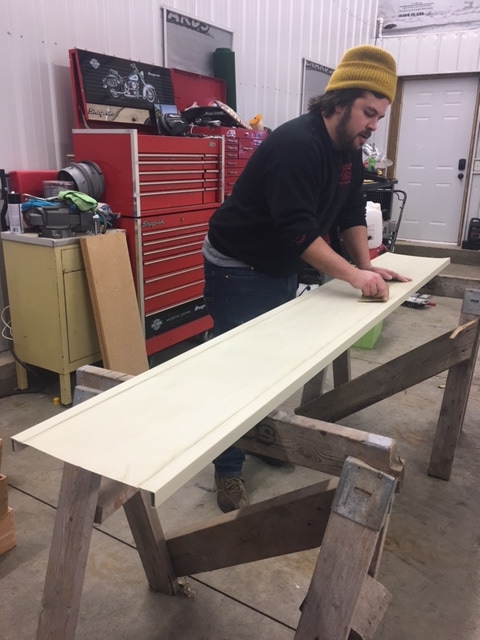
I’m a big picture person. When it comes to envisioning a space, pulling everything together, and setting the wheels in motion, I’m your girl. But when it comes to the finishing work, the small steps needed to complete a project, I’m the biggest procrastinator! I want to see the big parts of a project DONE. I don’t have patience for the little things. Case in point – our bathroom. Our beautiful bathroom that we completely gutted and redid just a little over a year and a half ago. Although at first glance it was wonderful and shiny and new, there were still things to do. Like trimming the tub/shower tile out with bullnose tile. And finding a solution to disguise the water marks that were appearing on our deep blue paint under our hanging bath towels and around the sink. Oh, and fixing the vanity drawer knob that fell off months ago. I finally decided that I was not allowed to start another project until I finished the little things still looming over me in our house. Such a painful decision, but I didn’t want to be the girl who had a hundred partially finished projects to her name. I want to be the girl that gets it DONE! We got moving on all of the lingering projects in the bathroom. Bullnose tile is ordered. Vanity drawer knob is fixed. And we found a solution to make visible water marks on our walls a thing of the past. In this post, I’ll show you how we installed wood planks in our bathroom to act as a rustic feature on the wall underneath our hanging bath towels and a backsplash for our sink. What you’ll need:
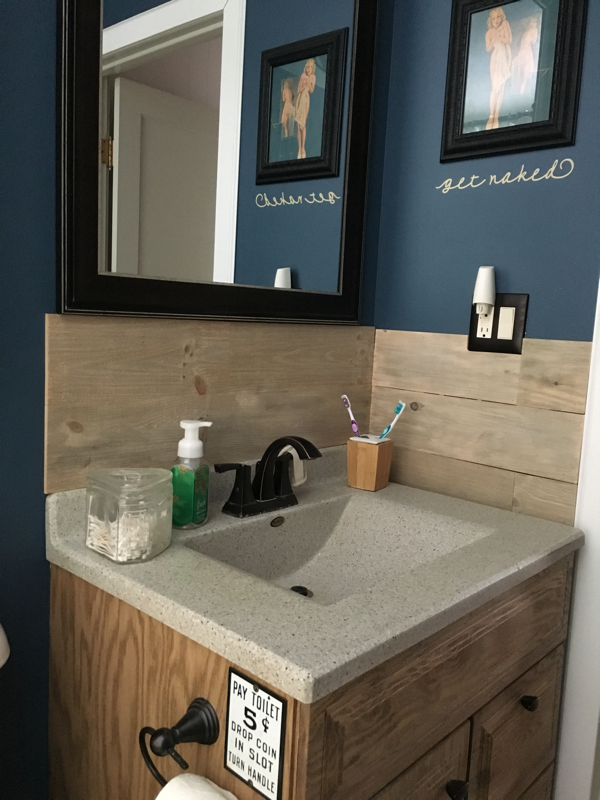
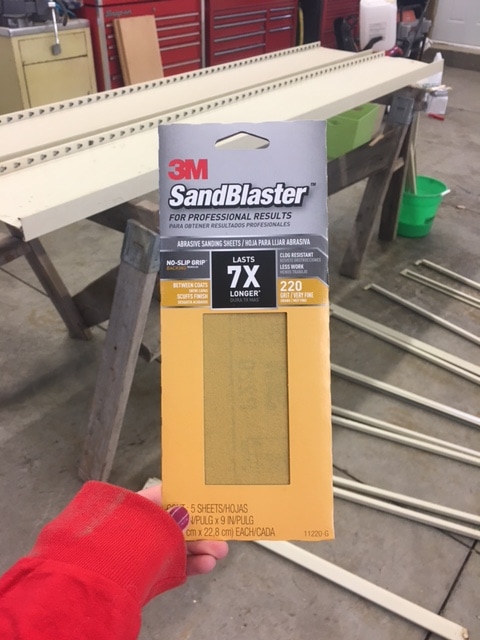
You’ll start by measuring the surface area you want to cover to purchase the amount of wood planks you need. We bought over because we knew there would be a boo-boo here and there!   We had floor molding that needed to be removed from the area before we could start, so Joel took care of that with a screwdriver and hammer.  Next, you’ll plan how you want your planks to look. We started with a full plank in the bottom left corner of the wall, measured the gap left between the full plank and the tub, and cut a piece to fit that area. We used the rest of the plank we cut to start the next row, continuing to rotate full planks with cut planks to create a non-uniform look. 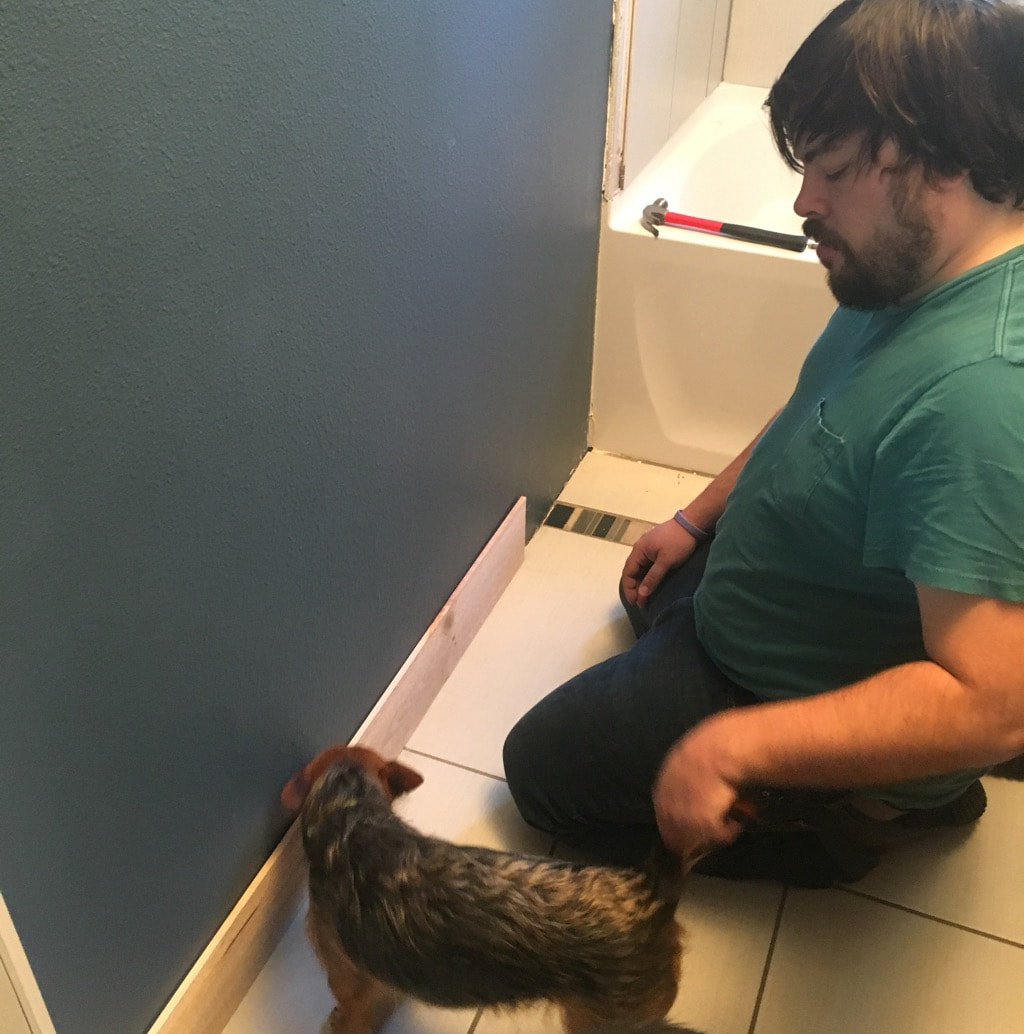  If we experienced any issues fitting the boards flush with the wall or each other, we either sanded them down just a tad or tapped them in with a hammer. 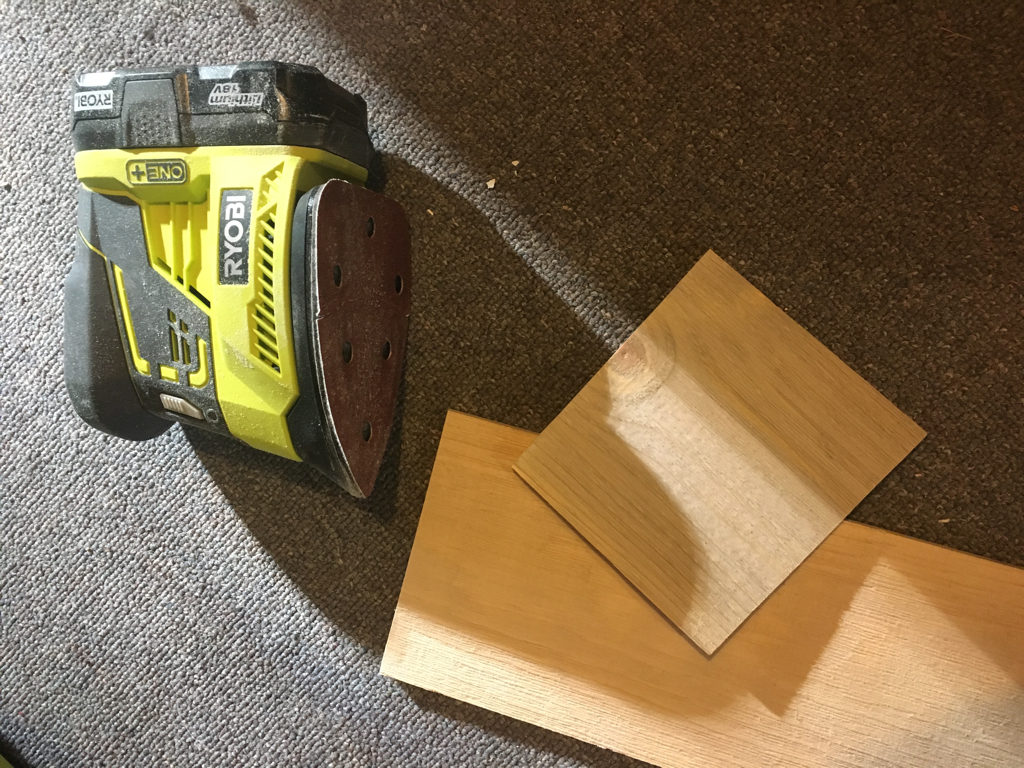 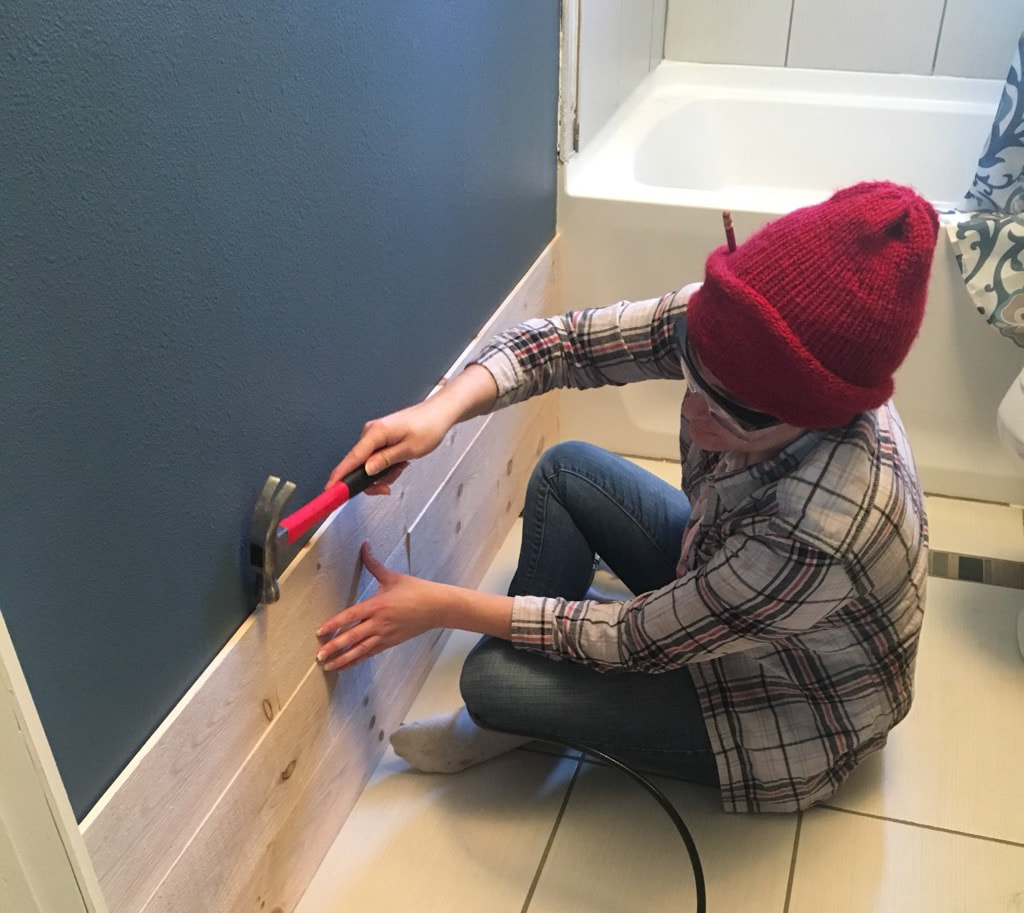 To secure the boards, we used an air brad nailer with 1 ¼ inch nails. This nail size worked well because the planks were less than 1/2 inch thick. 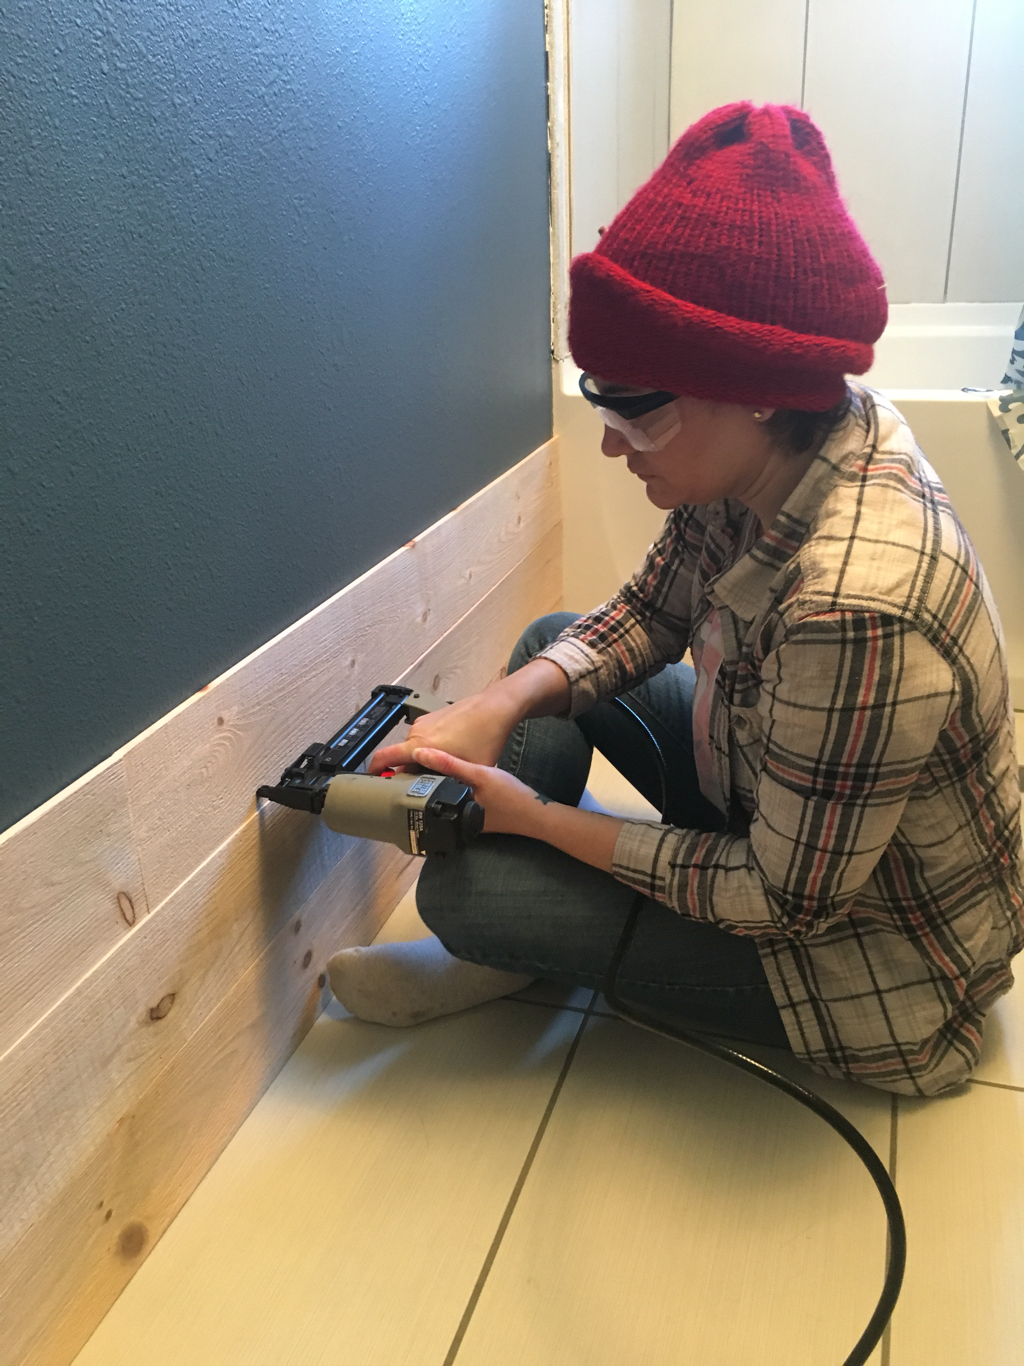 The circular saw blade we used worked perfectly, because again, the planks were pretty thin.  We chose to do the wall first because we could usually use at least one full plank in each row, which made it easier, and we didn’t exactly know what we were getting ourselves into! It was good practice for us. Around the sink was a little more intricate. Every piece needed cut, measuring had to be precise, and we had both a corner AND an outlet to figure in. With come creative thinking and teamwork we figured it out and I’m so proud of Joel for his work around the outlet! 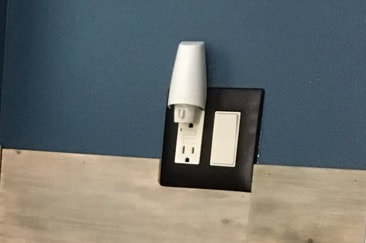 To finish everything off, I coated all planks with three layers of polyurethane to prevent any water damage. I chose a satin finish because I’m not a huge fan of high gloss and I wanted the planks to maintain their rustic look. I may eventually use some clear caulk around the edges to further protect the wood. 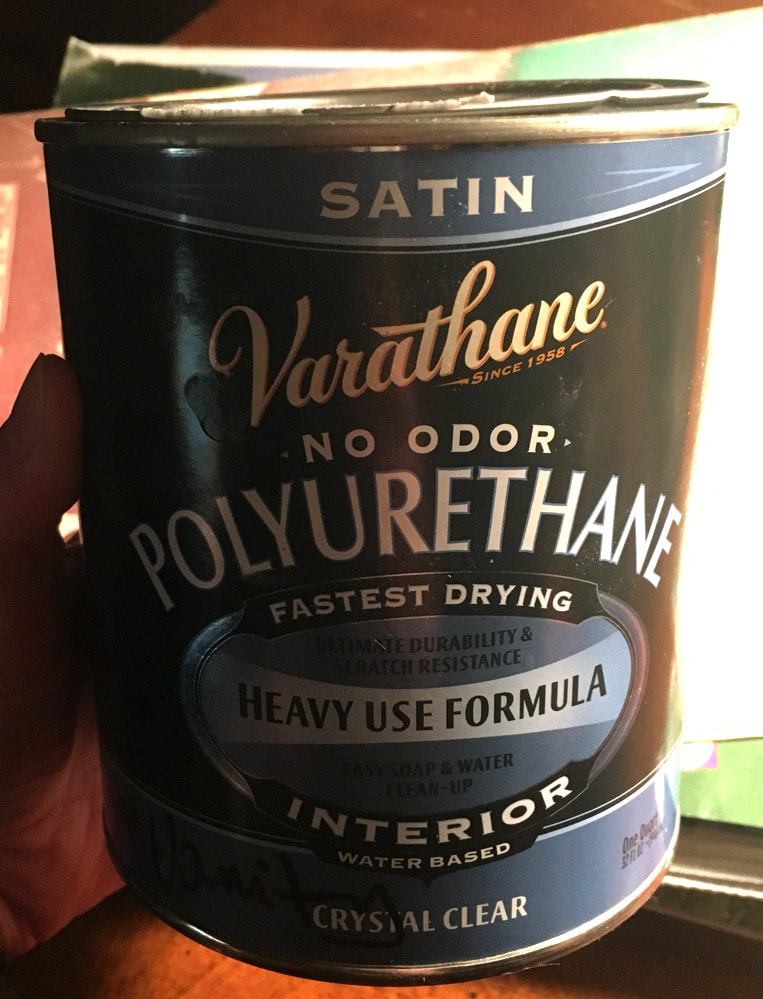 Here it is, in all its glory! Very proud of us because this is the first woodworking project we’ve attempted together and it went so well. It really was an easy project that made a huge difference in our bathroom. We both absolutely love how it turned out. Once the bullnose tile is installed (I won’t do a tutorial on that because I already did one on tiling here) the bathroom will be DONE and then I can pick something new to work on! I'm preparing myself for the day frost kills off my flowers and garden, which will be sooner than I think, and a sad day...So to fill the space my outdoor plants took up in my heart this year, I'm attempting to hoard a few house plants to hold me over until next Spring. I've always wanted to start a terrarium, so gave it a shot. It was super simple and turned out so pretty. I now understand why they're such a popular way to grow and display plants. Here's what you'll need:
Start by cleaning the inside of your terrarium. 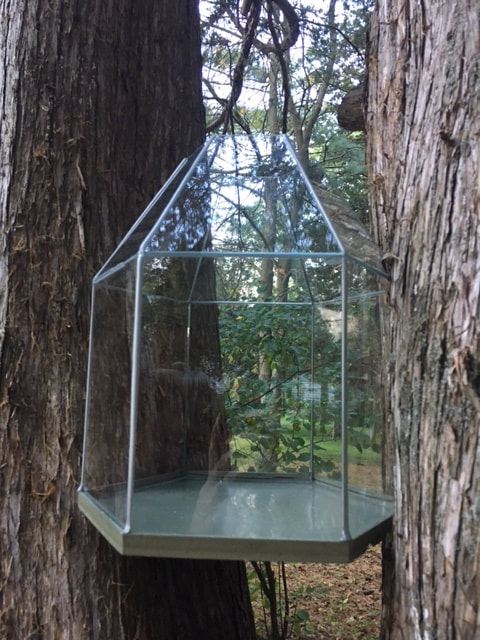 Next you need to establish your drainage layer, filling the bottom with small rocks. I laid down a little over an inch of rock.  I then put in a thin layer of activated charcoal. This helps ensure excess water doesn't stay in the soil and cause root rot. 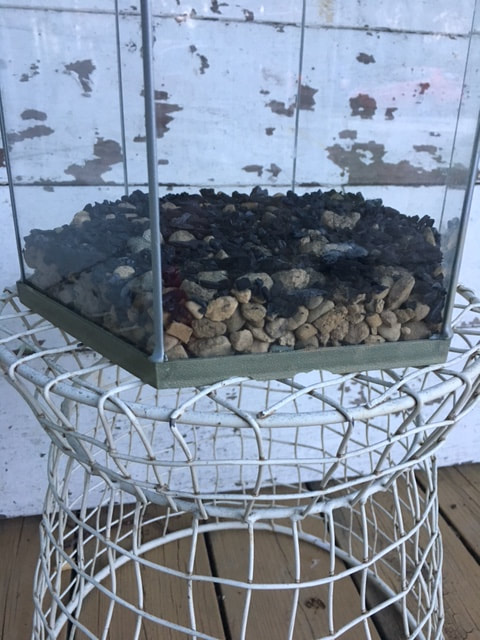 Once I had the drainage layer in place, I started adding potting soil. I put a think layer in, a little over 3 inches, expecting it to settle as I began to water the plants. I also wanted enough dirt to place the plants into! 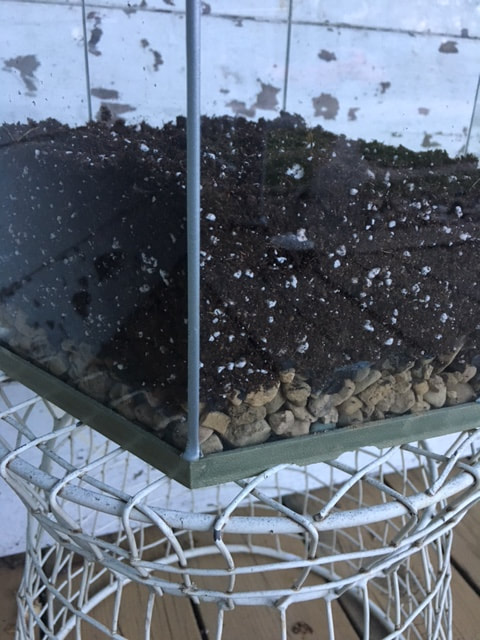 The final step was adding the plants! I selected four small plants of different varieties from Treasures on Main in Westby, Wisconsin. Three will be a little taller, one is more of a ground cover. 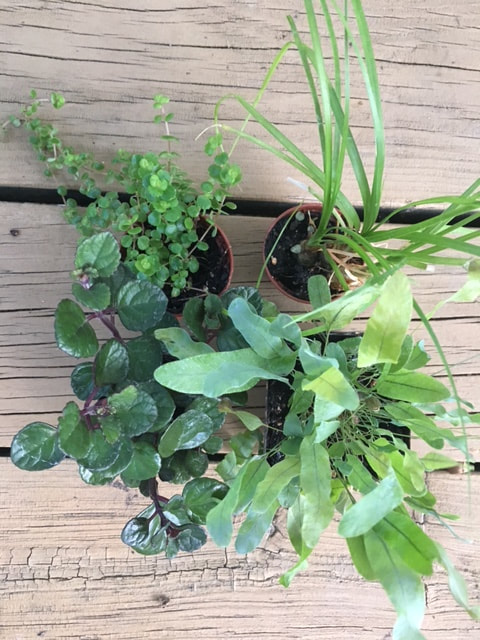 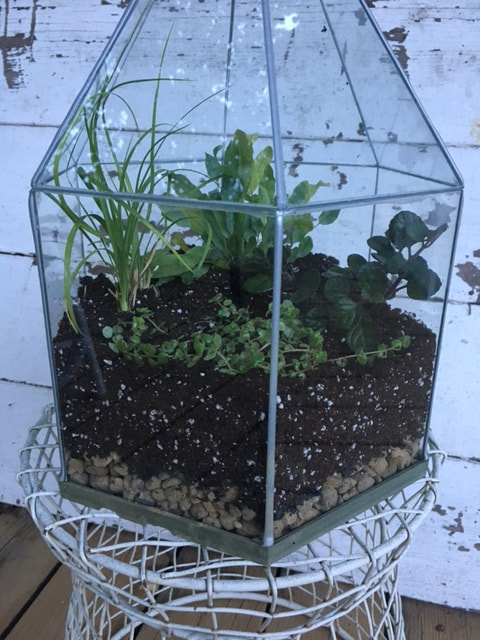 There are so many things you can do with terrariums. A quick search on Pinterest will reveal image after image of cool ideas! Get creative! I plan to add some colored rocks and small figurines to mine once I see how the plants grow in.
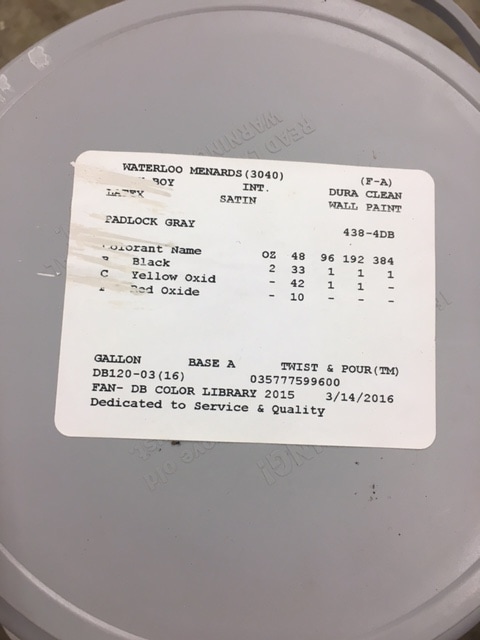
Playing with electricity, especially in an old house, can be a little nerve wracking. But that didn't stop us from swapping out the light fixture in our kitchen! Expert details on how to install a light fixture can be found here. Who better than Bob Vila to walk you through this? We're definitely not experts, but I'll show you some visuals and a life hack we learned from our installation below. The first and most important step is SHUTTING OFF THE BREAKER TO THE AREA YOU'LL BE WORKING ON! Next, start to carefully remove the existing light fixture.  We chose to take out the plate that extended across the electrical box and utilize the new one. We did recycle the old screws because the depth of the electrical box was more than the length of the screws that came with the new fixture.  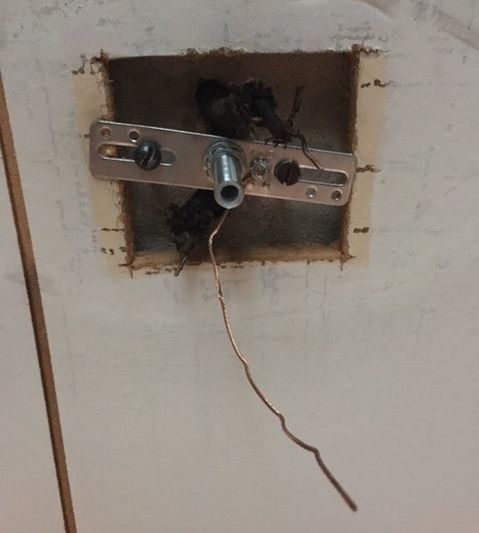 Before we began to install the fixture, we needed to trim and strip the wires at the top of the fixture where it would hang. We did not have wire strippers, so here's a life hack: You can use scissors (as long as you use them gently). I applied light and consistent pressure with the scissors on the casing of the wires until I was able to slide it off. The goal is to remove the casing without severing any of the wire. 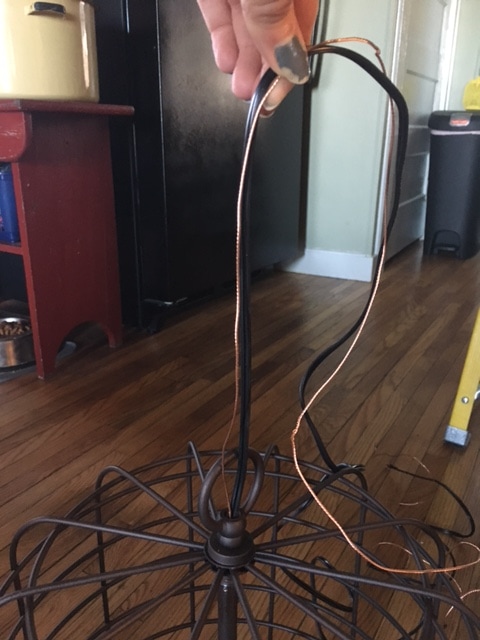 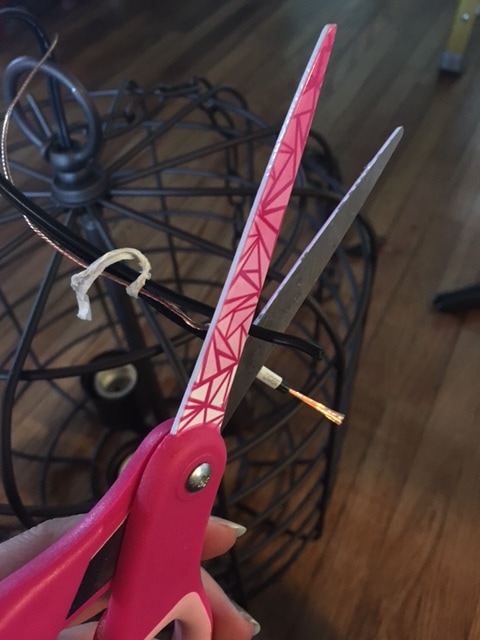 Once that was complete, we cut the chain to the desired length and wove the wire through it. 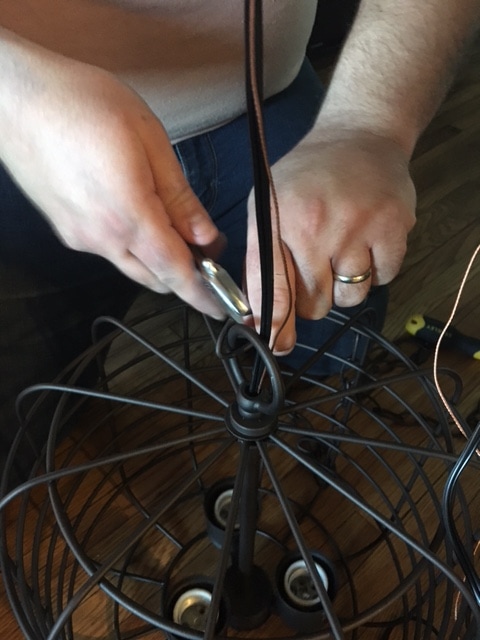 Following the instructions in the box, we connected the electrical box and fixture wires accordingly, securing them with wire nuts. The final step included fitting the fixture's base over the electrical box and securing it. 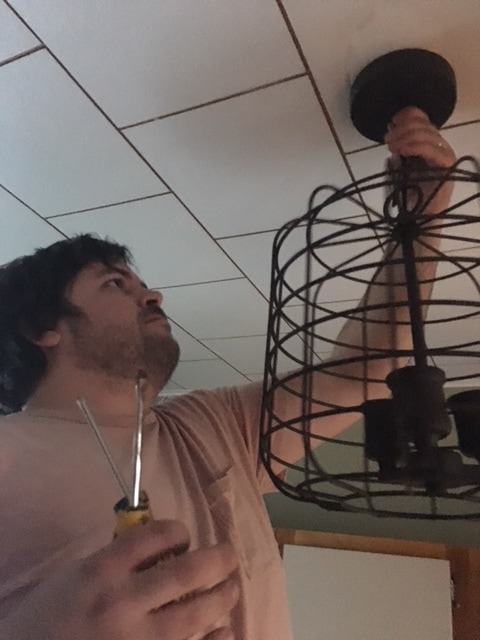 We love the warm glow of this fixture's Edison bulbs and its farmhouse style. We got this one from Menards if you're interested! 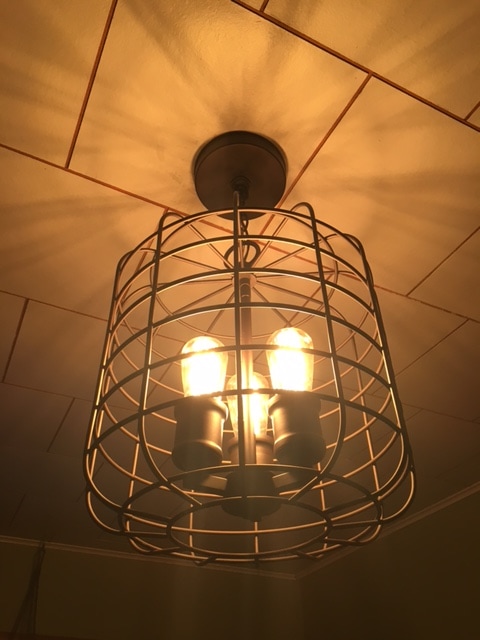  The project I'm sharing today may be my favorite DIY project so far! Creating faux built-ins in our living room completely changed the look and feel of our home. Our house is small, so storage is key. We have a large living room that we weren't utilizing to its full potential. We pieced some items together as temporary filler, but I knew we could do better. After several months and three different design plans later, I completed the project outlined below. The built-ins give us the additional storage we needed and look 100% better than what we had going on before! Step 1: Find, prep and paint shelving. Originally, I planned to buy shelving. Then I wanted to build shelving. Then, by talking to the right people, I found a balance between the two - prefab shelving that could be assembled in whatever way I wanted. My dad had two large shelves he wasn't using that were from a medical office. They held medical charts so are very solid shelving units (which I needed, especially for Joel's records). 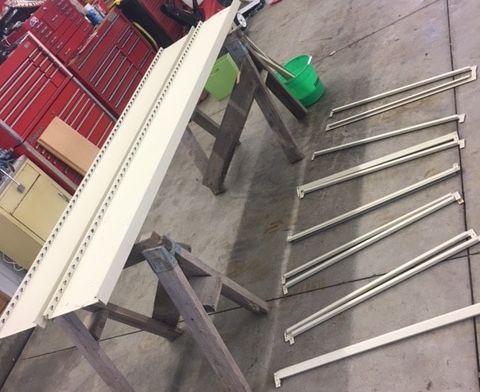 The shelving consists of a metal frame with compressed wood panels for the shelves. I did some online research and decided I'd paint the metal and leave the compressed wood panels as they were. First, we sanded the frame and the bars that hold the wood shelves. We then washed the metal materials with warm water and household cleaner. 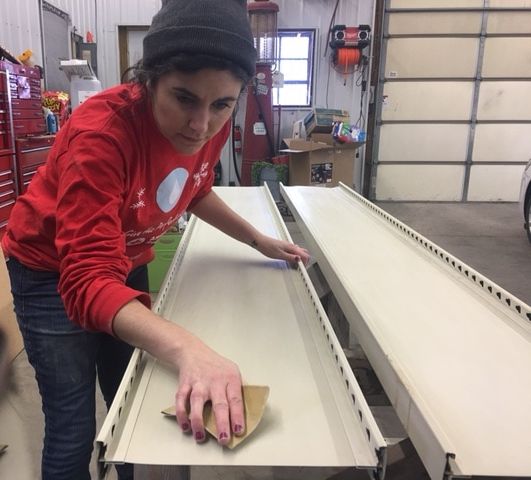 After the metal was sanded and cleaned, I painted everything with two coats of latex paint. I used a roller for the large parts and a brush for the nooks and crannies. I had half a gallon of medium dark gray (called "Padlock Gray") paint left over from painting our guest room that I wanted to use up vs. going out and buying more. 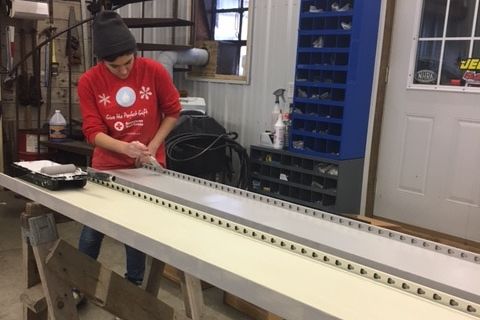 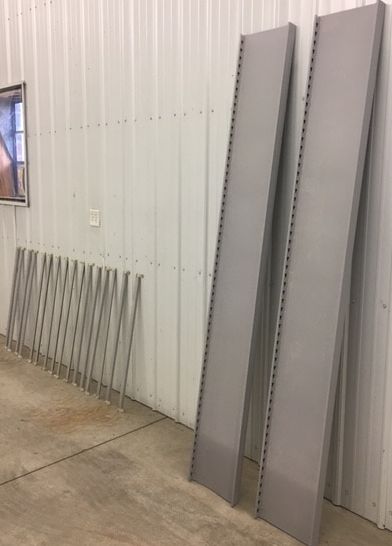 The last thing we did on the shelving was cut 30 inches from the bottom of the "inside" panels. We didn't have enough wall space to put a shelf, dresser, shelf - so our solution was to have the inside of the shelves braced on top of the dresser. Step 2: Find, prep and paint dresser. In total, this project only cost us $75. The one thing I paid for was the dresser that we used as the centerpiece of our built-in. I found a great vintage dresser on the buy/sell app "Let Go." I bought it from a nice woman who was not creepy in any way. It was a positive buying experience! She had already painted it with black chalk paint, which I liked. The only thing I did was paint the top of the dresser with the same gray as the shelves to make the separate pieces look like one unit. 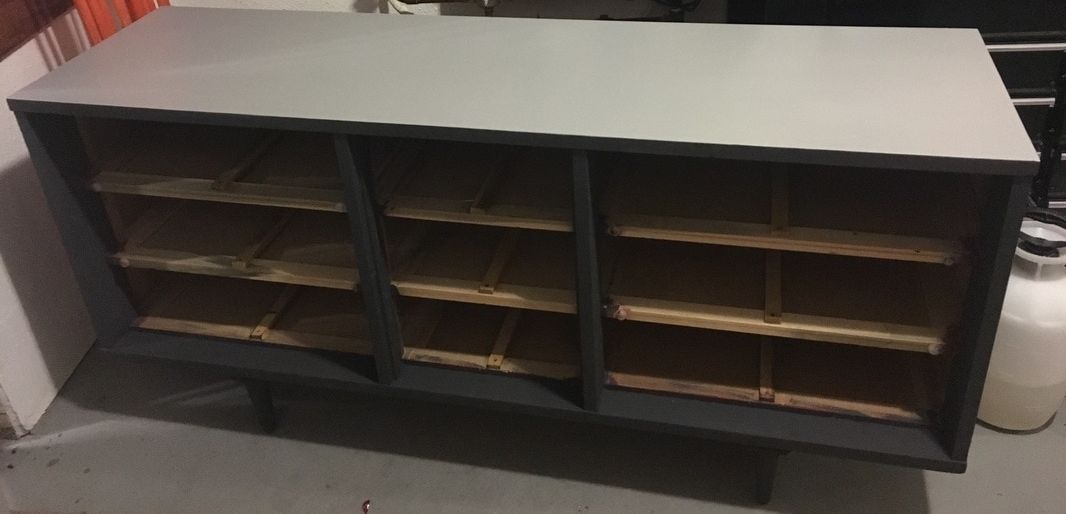 Step 3: Installation! I was anticipating installation day like a kid anticipates the arrival of Santa. Projects are life in my world. Before I could start putting the pieces together, I needed to add some protection to the bottom so they didn't scrape our hardwood floors. I used adhesive felt squares for the bottom of the dresser legs. For the shelves, we used an industrial tubing used on semis to protect various parts from damage. See below for what this tubing looks like. 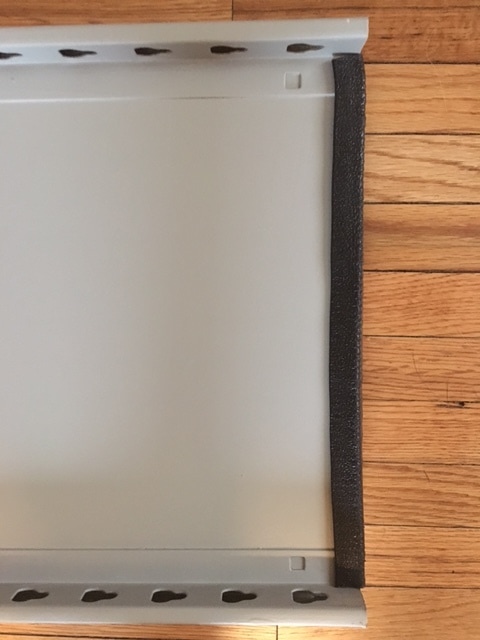 After I knew my precious floors would be protected...we started putting the pieces together! 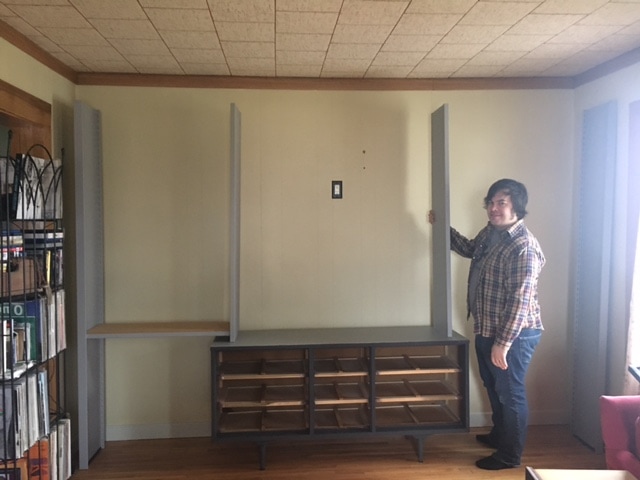  The shelves were super easy to put together. No tools necessary. The bars snapped easily into the sides. From there, we simply set the compressed wood panels onto the ledges of the bars. 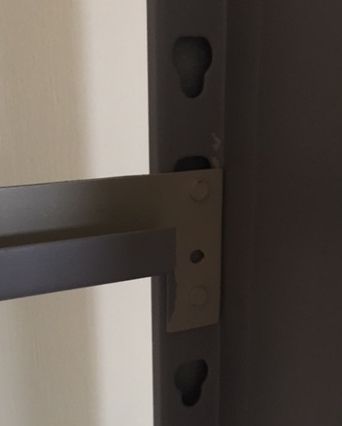 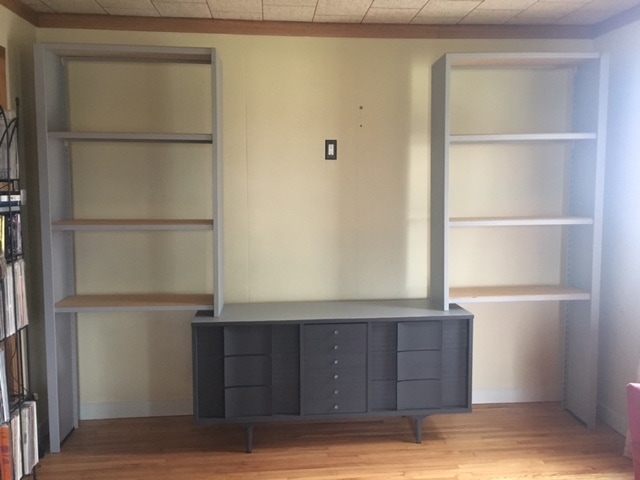 I was thrilled with everything once it was all in place. It was very sturdy, looked attractive, and was going to help solve some of our storage issues! I loved it even more after I took a look at what the space looked like before. I'm a little embarrassed that we had people over with the space looking so disheveled...Take a look for yourself! 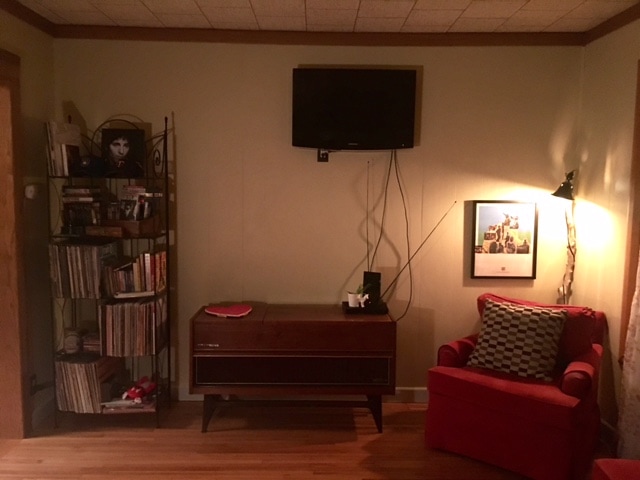 Before (so embarrassing!!) 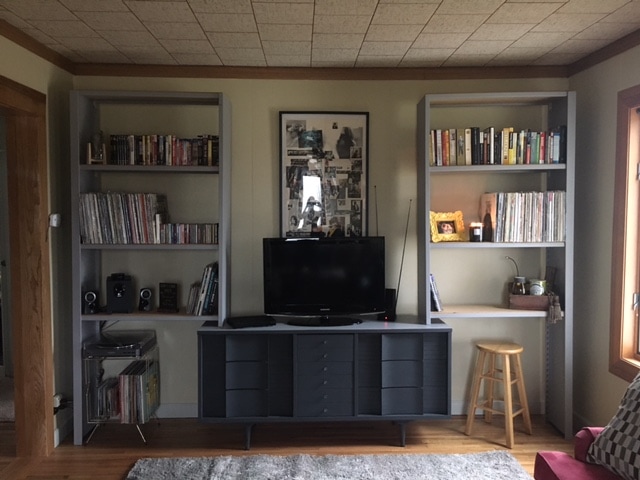 After (so much better!!) I was able to add storage for DVDs, books, CDs and records. I dedicated a space on the left to Joel's record player (it is hard to believe that we went almost one year without having this baby set-up) and a space on the right for a little desk to keep my planner/laptop.
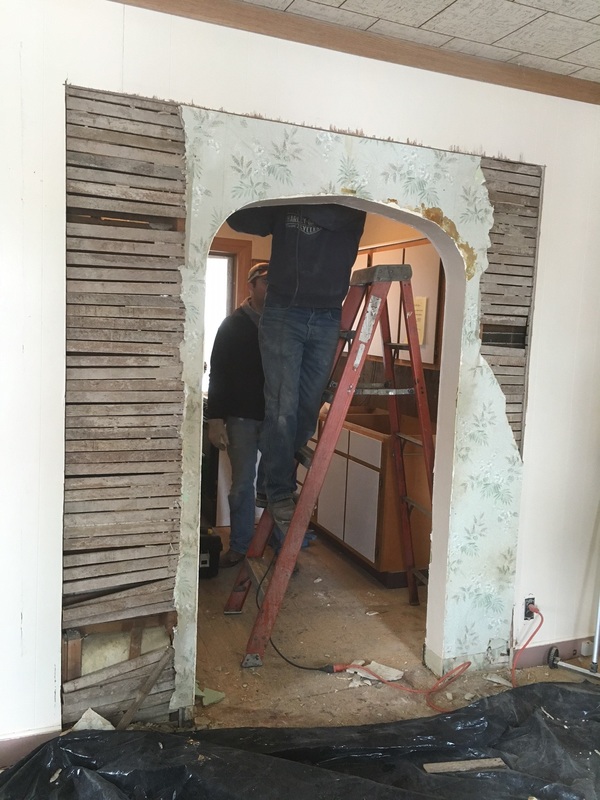
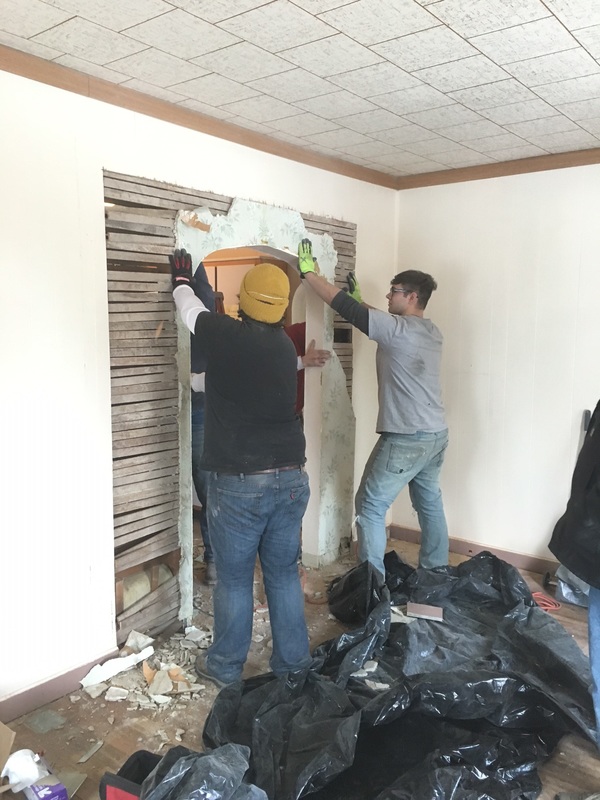
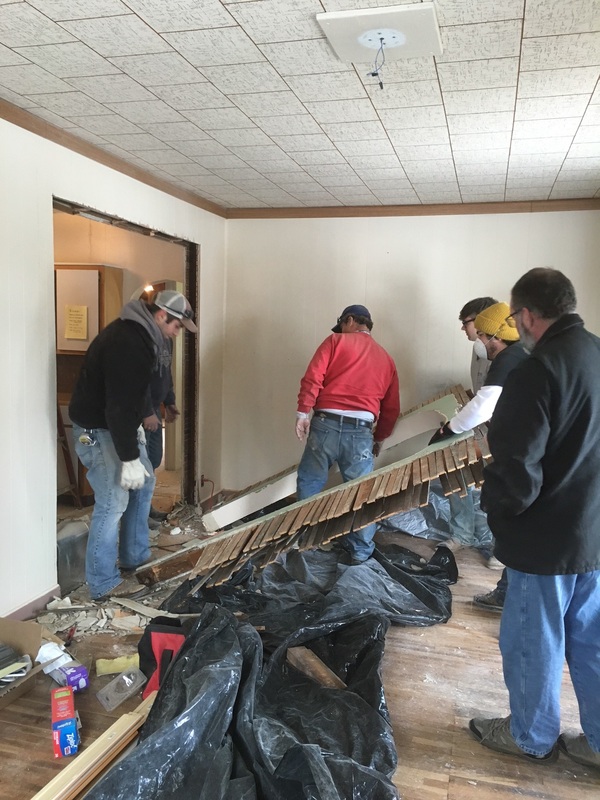
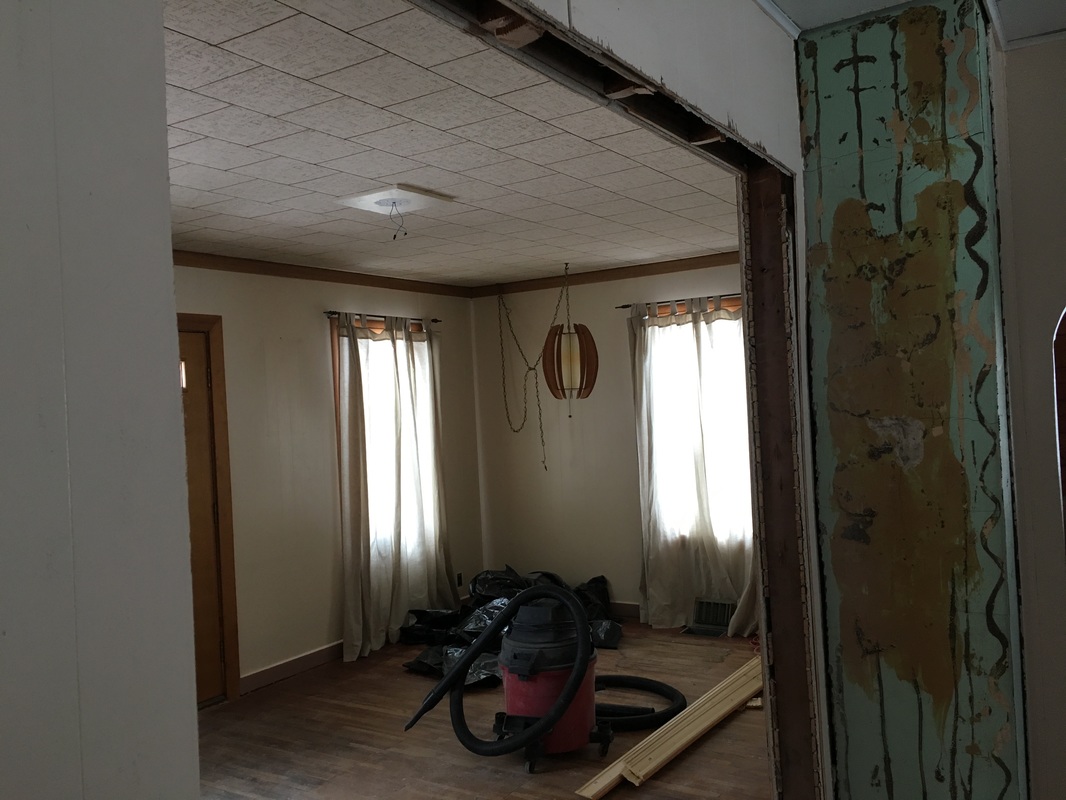
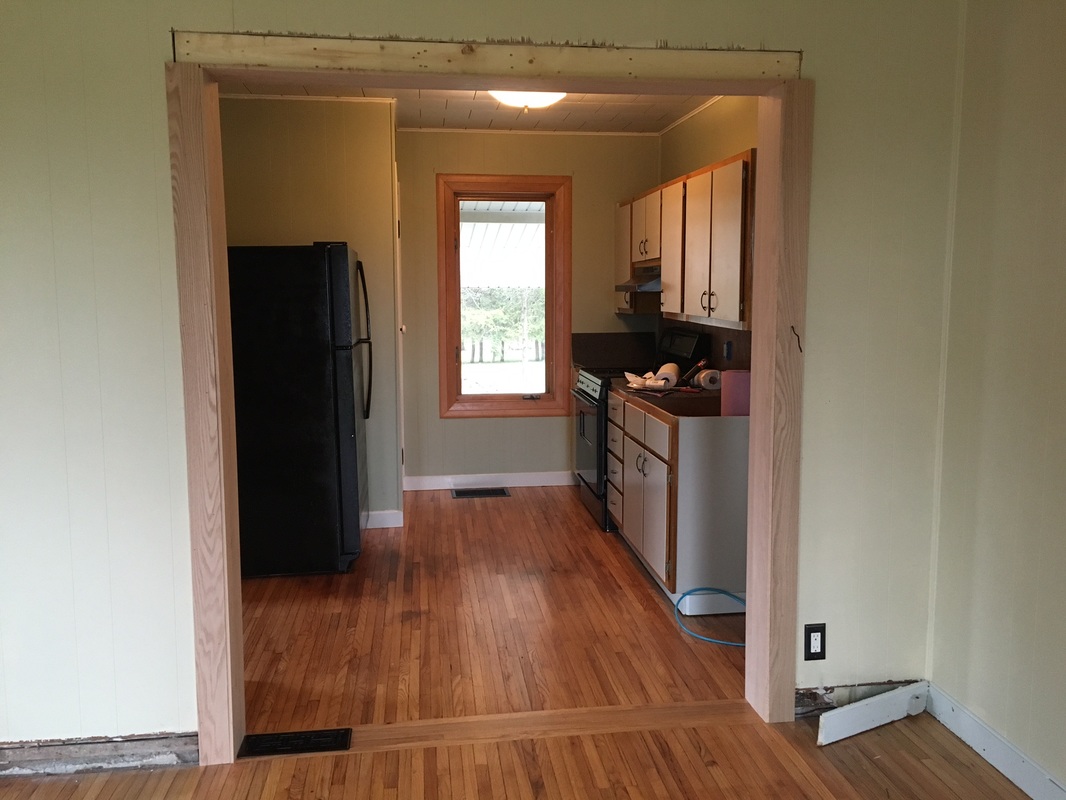
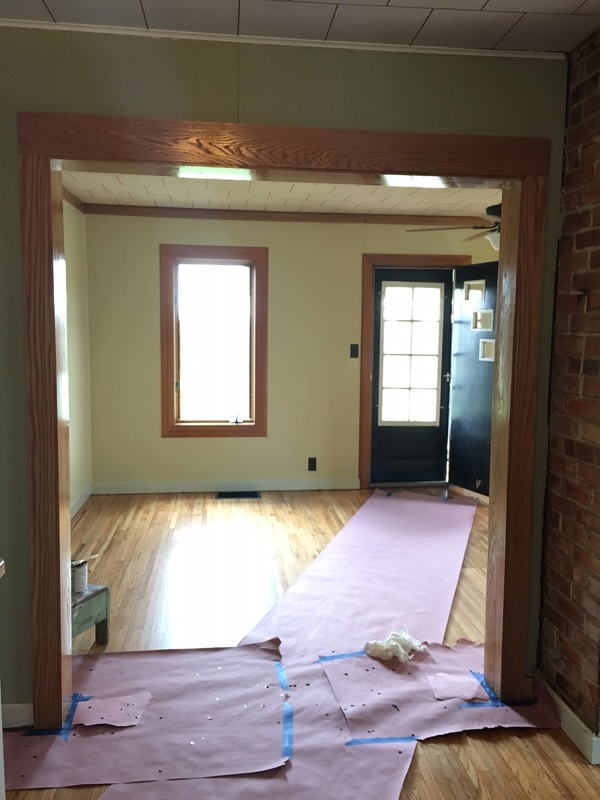
You can do this! All you need is two bookshelves, a dresser, and a little imagination! Over the past few weeks I have been working on some exterior painting projects as I've had time and as the weather has cooperated. I really didn't want to wash out trays, brushes, and rollers each time, not knowing if I'd pick up the project again the next day or in a week from then. Here are some helpful painting supply storage tips if you have a project that is ongoing. Both of these tips came in very useful during our renovation and continue to be part of my painting process. Store paint brushes and/or rollers in Ziploc baggies in the refrigerator until next use: 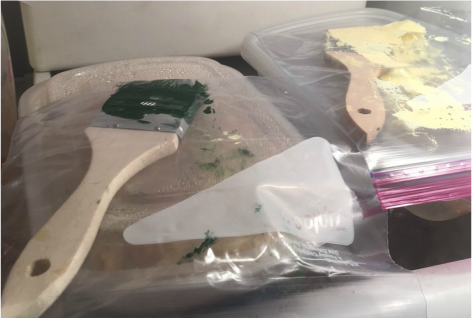 Place paint tray (I also keep rollers with the tray) into a plastic garbage bag and close: 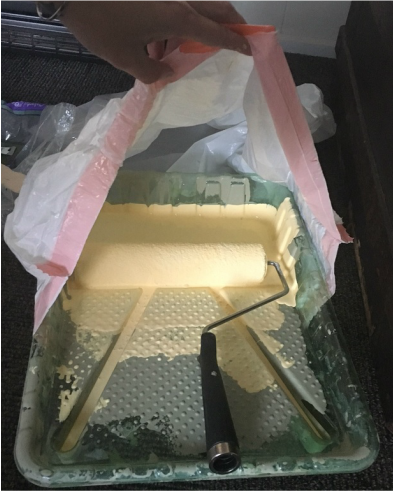 These methods preserve both the supplies and the paint for quite a long time. It's really a handy go-to when you don't want to keep cleaning, putting away, and then bringing back out your painting supplies. Here's what we've been working on. We finished painting the exterior trim, doors, and foundation of the house. We're ready for winter...and for focusing on landscaping next year! 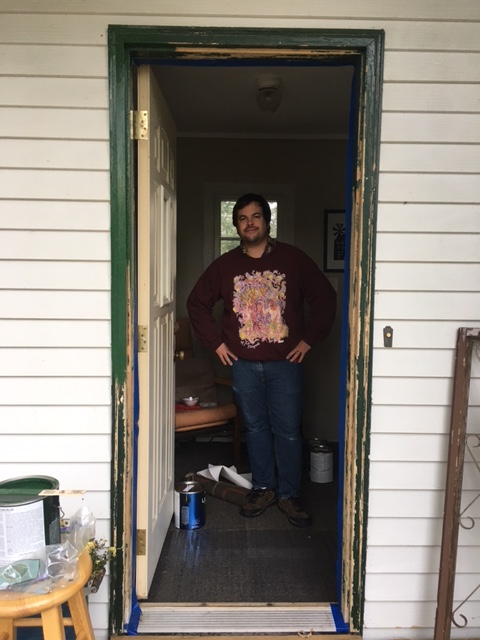 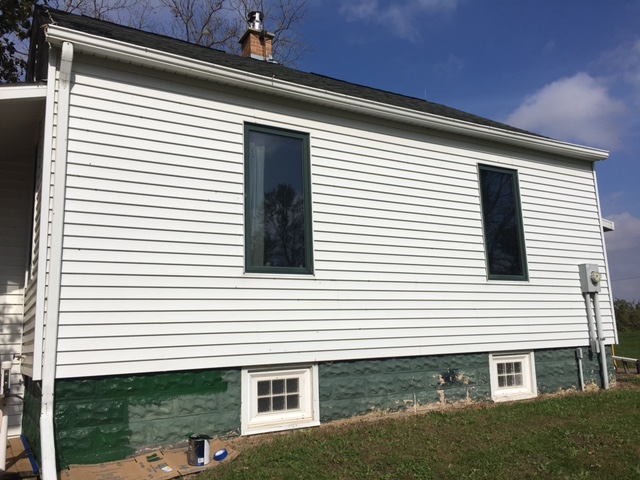 At some point in the life of our house, the owners made three of our small door openings even smaller by rounding off the top (pictured below). I'm sure it was very "of the time" and deemed a good idea at the moment, but for us, one opening in particular was a little too small. I wanted a clear sight line from the kitchen into the living room. The existing door opening would not have worked...so we knocked it out! 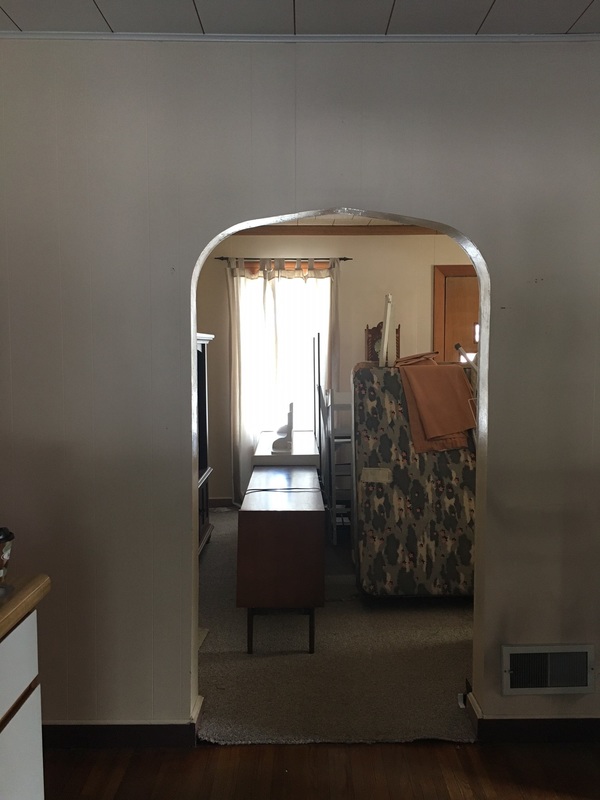 The first thing we did was tear away the wood paneling and floor molding to see what we were dealing with underneath. Luckily, there was no electrical running in this area. The only item we had to address later was the heat vent that you can see in the photo above. This vent became a floor vent vs. a wall vent. Once we knew we were in the clear and had drawn out our lines for the opening, out came the Sawzall! From there, it was a pretty fast process. Once we had the larger hole in the wall, and after a few more things in the house progressed, we reinforced the vertical edges of the opening because this is a load bearing wall. We then wrapped the edges of the new opening with oak wood trim. My final step was sealing the oak wood trim with a stain/poly finish. The end result was magnificent. The finish on the trim ended up matching exactly with our newly finished hardwood floors, the sight line is much improved, and it really makes the whole area feel bigger! Below are photos from both angles of the finished opening - first, looking into the living room; second, looking into the kitchen. The photo below gives you a closer look at how well the trim matched our hardwood. You can also see where we relocated the wall vent into the floor. That process was also easily done by disconnecting the existing section of duct work and (after the floor was patched in/finished) placing a new vent cover over the trimmed down duct. 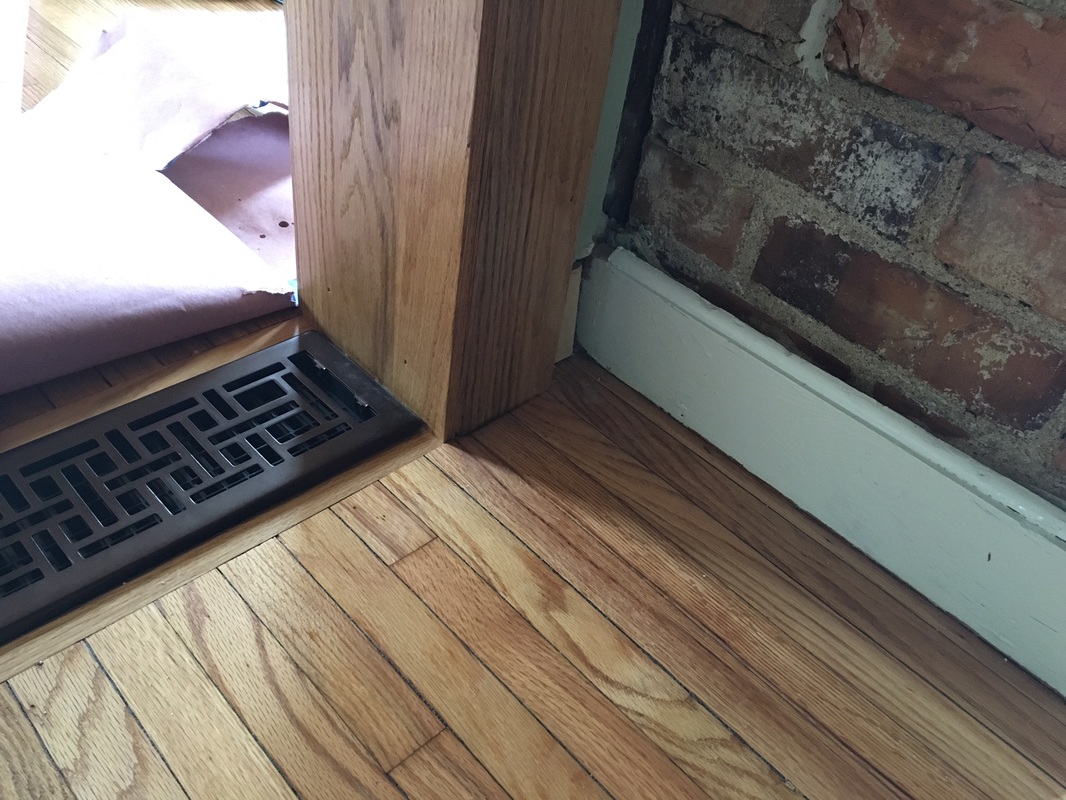 Because I like side by side comparisons...below is the before and after! |
Archives
August 2022
Categories
All
|


 RSS Feed