Busy Hands, Happy Heart
|
Our dining room has always lacked a little something. It’s nice, but it’s “meh.” It’s typically a catch-all room – a dumping ground for when we are coming and going. I haven’t been inspired enough to add a unique style to it. Until…I ran across my dream fabric. That changed the game! My fantastic friend who has a love for all things old and/or Mid Century Modern (the office of the business he owns is right out of Mad Men) gifted me with a table set when I told him what I wanted for our dining room. It couldn’t have been more perfect. He needed to get rid of it, I wanted it, so it worked out for both of us. I’m terrible at remembering to take before photos…so here are the benches that I reupholstered and the old fabric next to the new (perfect) fabric: 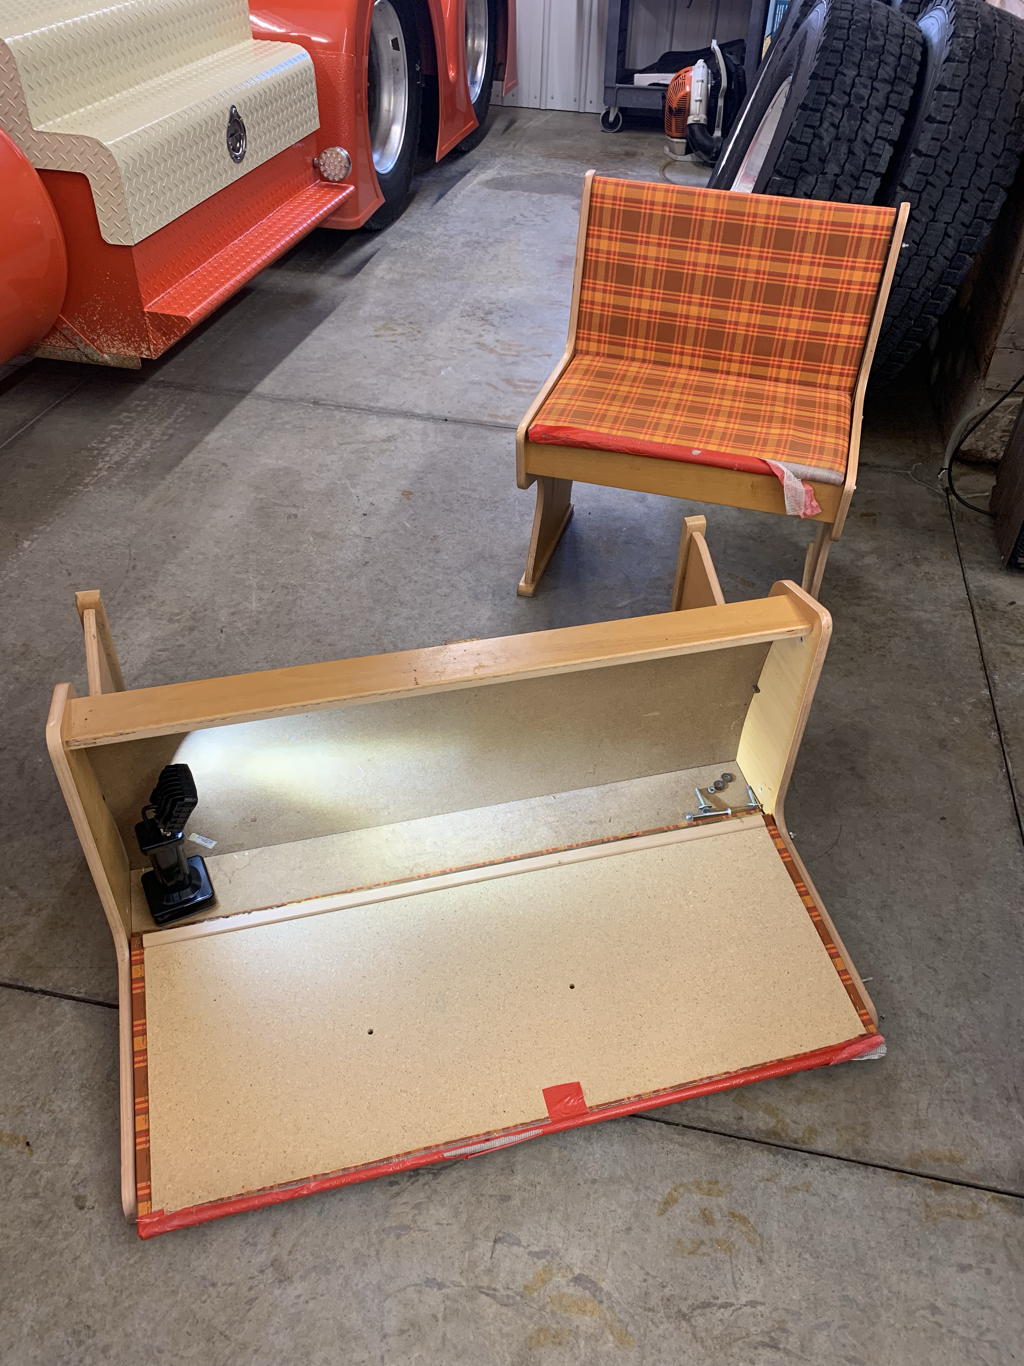  This is what you’ll need for this type of project:
So as I mentioned, deconstruction comes first. I had to take these benches completely apart to do this project. I used the flathead screwdriver and pliers to pull out the staples, utilizing the hammer as needed to get the screwdriver under the tough staples.  After this point, my parents stepped in. My mom is amazing with anything fabric. I couldn’t have done this without her. She did the measuring, I tried to comprehend. Me + Numbers = Disaster. Using the old fabric as the template, we cut the new fabric to size. After she cut, I reinforced the edges of the fabric by ironing them over, applying fabric tape as needed to the areas of the fabric that would get pulled at the most when someone sat down 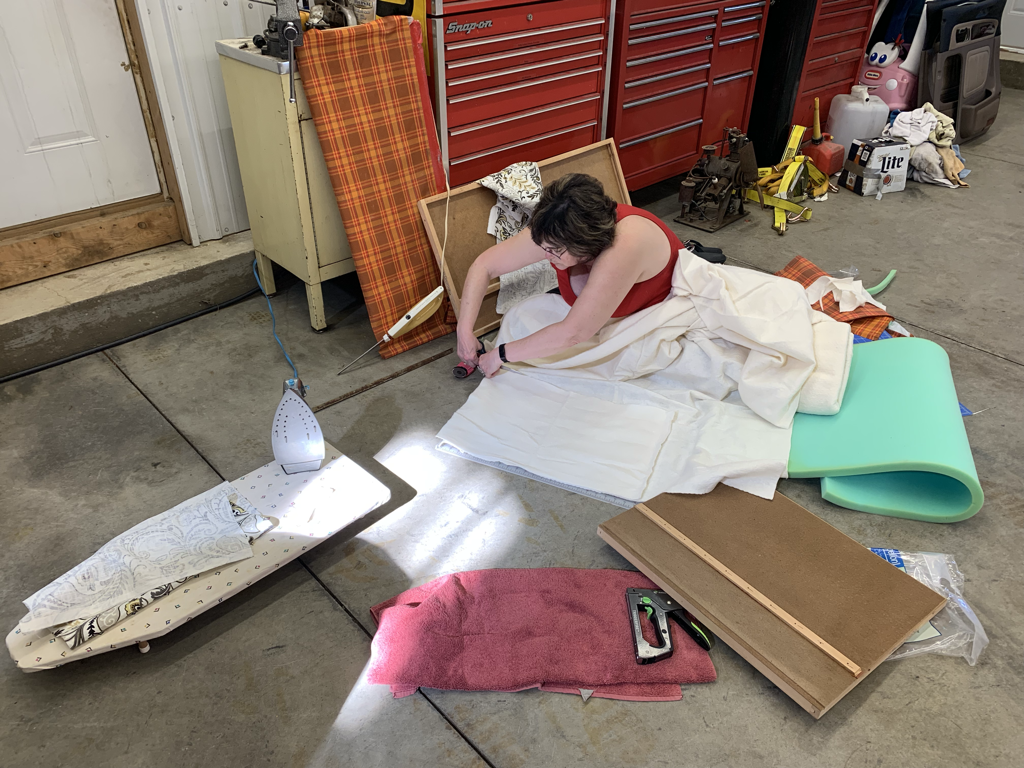 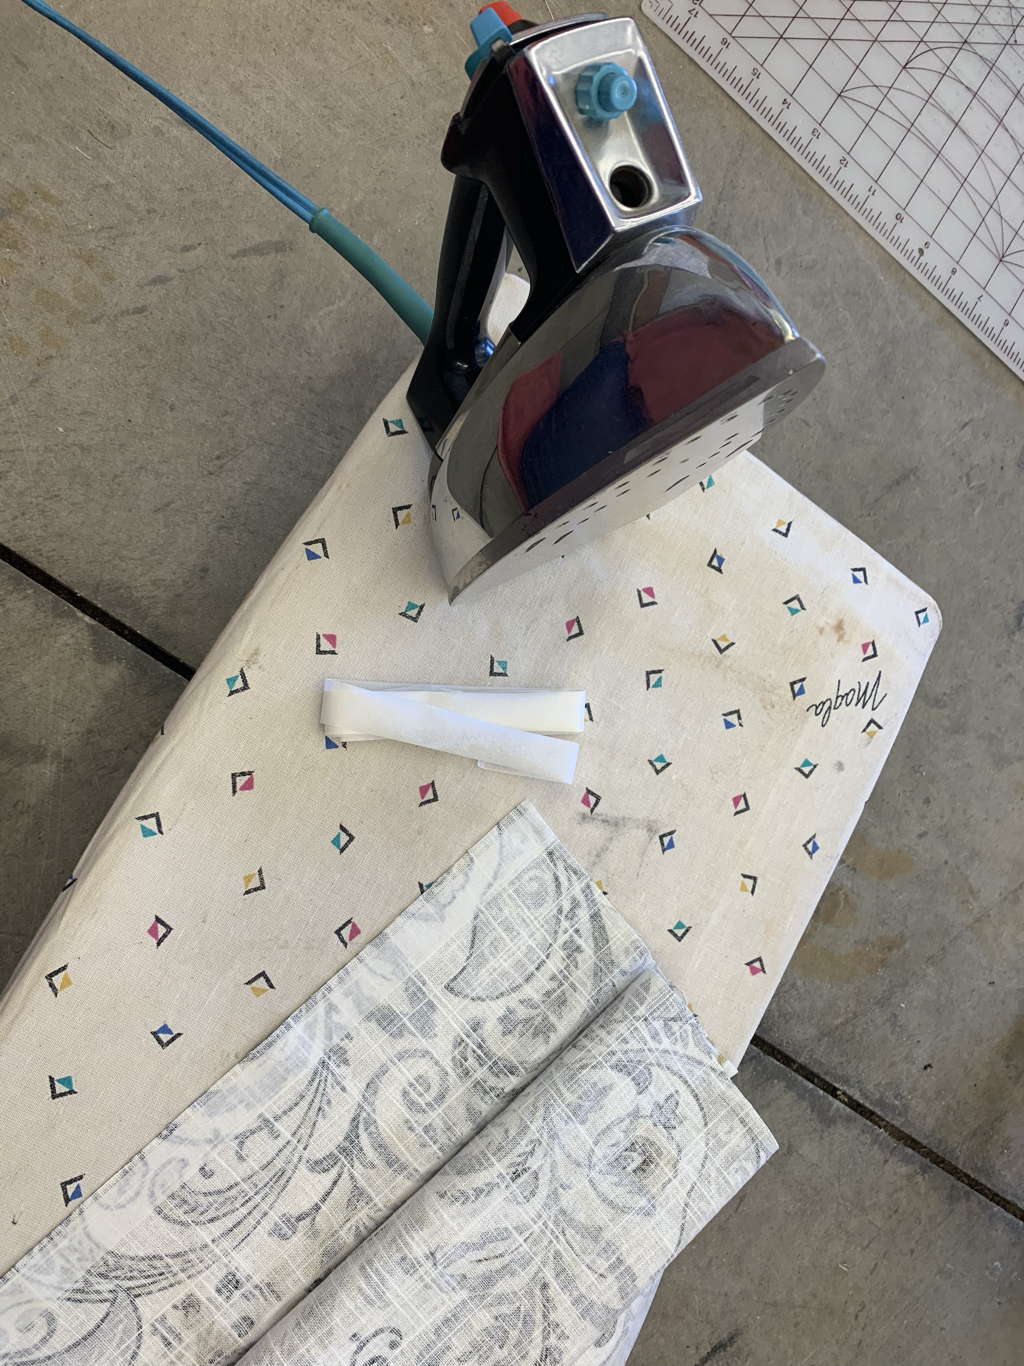 After we had the fabric ready, we measured the back and seat of each bench to cut the batting and foam. Using the electric knife, we rounded the edges of the foam all the way around.  Then it was show time! As my mom held everything together securely (bench back/seat, batting/foam, fabric), I came in with the staple gun to secure the fabric to the back/bottom of each piece. That was by far the easiest and fastest part of the project! After we stopped to admire our work, my dad jumped in to help me reassemble. It was tense, we had to get creative (because I didn’t take very good photos ahead of time…surprise, surprise), but we did it! Also could not have done this without my dad because he has the patients and tools to help get the job done. He helped me put better screws in the outsides of the benches as well so they feel completely solid when you sit down. 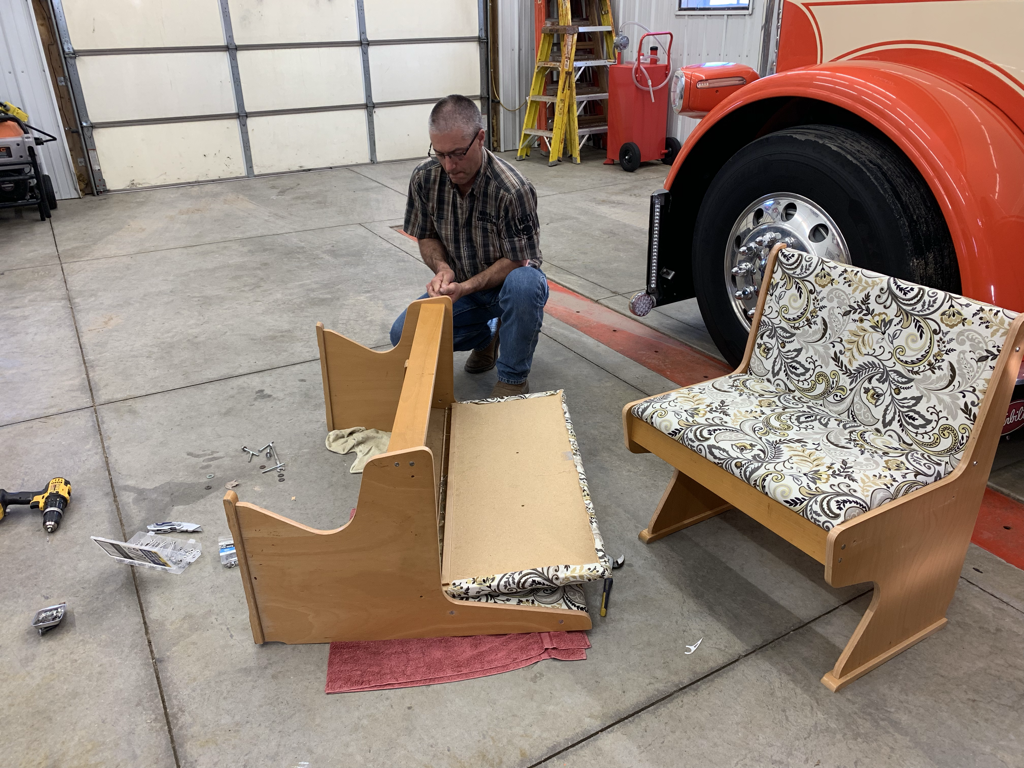 Here they are in our dining room, back with the table they came with! I’m. In. Love. The fabric was everything I needed to move forward with creating a specific feel for that space. It also inspired me to revamp our mudroom around the corner, which I’ll share in my next DIY post!  Check out my past DIY project to see the mattress spring frame light fixture I made to go above our dining room table. It goes together great with the new fabric and is just another piece that is helping me achieve a cohesive look in this room.
0 Comments
I love outdoor lighting. Solar lights. String lights. Tiki torches. Even campfires and fireworks if those count! There’s just something magical about it. I like the intimate vibe it adds to exterior spaces. My in-laws just purchased a camper and have enjoyed a summer full of adventures. I wanted to make my mother-in-law something for their camper/campsite for her birthday. She also enjoys outdoor lights, so I thought a colorful LED camping light to set outside their camper would be a great gift! Here’s what you need to make your very own:
Making this light is super easy and inexpensive. First, get your lights ready. The ones I purchased came with batteries and two large, double sided adhesive dots. Insert the batteries and stick an adhesive strip to the bottom of each light. Remove the lid of your container and secure the lights to the bottom. 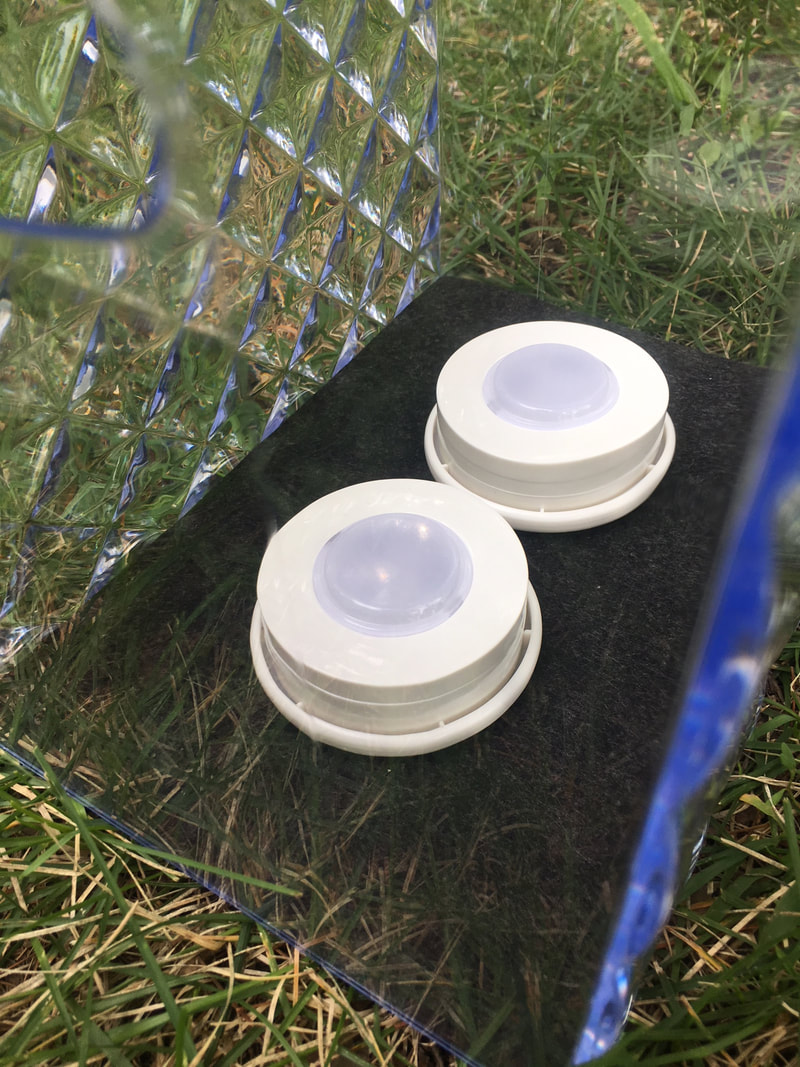 Test your remote to make sure everything works! Try turning the lights on and off, changing colors, and changing themes. I ended up making two camping lights and the great thing about the puck lights I used was that one remote could control all four lights, even though each set of two came with their own remote. 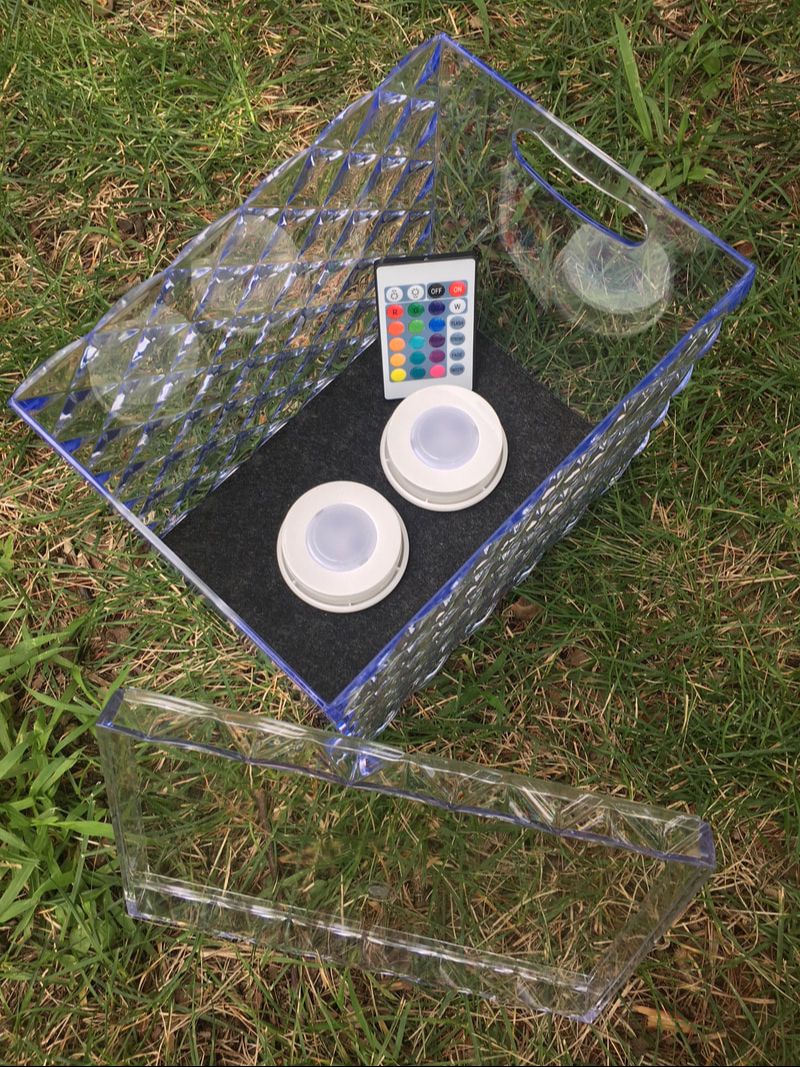 Once you have the lights in place and you know they work, place the lid back on the container. You’re done! It’s time to enjoy. These would be perfect for camping, outdoor décor at home, and even indoor décor if you want to add lighting to a small nook or vignette.  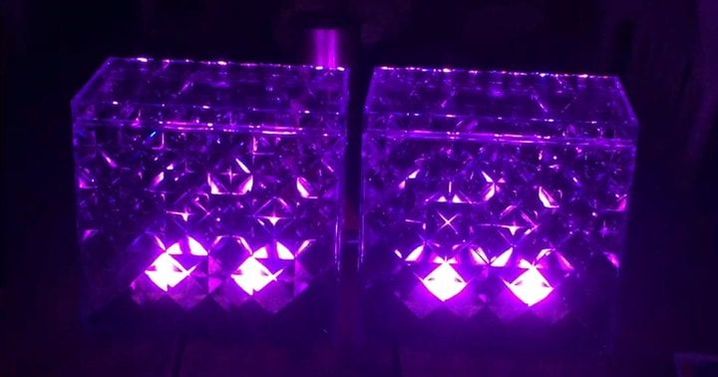 From the moment I bought an old baby crib last year at an estate sale, I’ve been dreaming about the light fixture I’d make out of the mattress spring frame. I used the sides of the crib right away as a cucumber trellis, I’ve now got the mattress spring frame hung, and still have a couple of pieces left to use for some home décor signs. One item, three different types of projects! Always consider the possibilities for what may appear to be “junk.” Here’s what you need for this project:
First, I sanded down any bubbling rust spots and other imperfections on the mattress spring frame. I then wiped it down with a wet cloth and let it air dry. Once it was dry, I spray painted two coats over the entire frame. I didn’t hang the frame for a few days after I painted it, so it had more than enough time to dry.  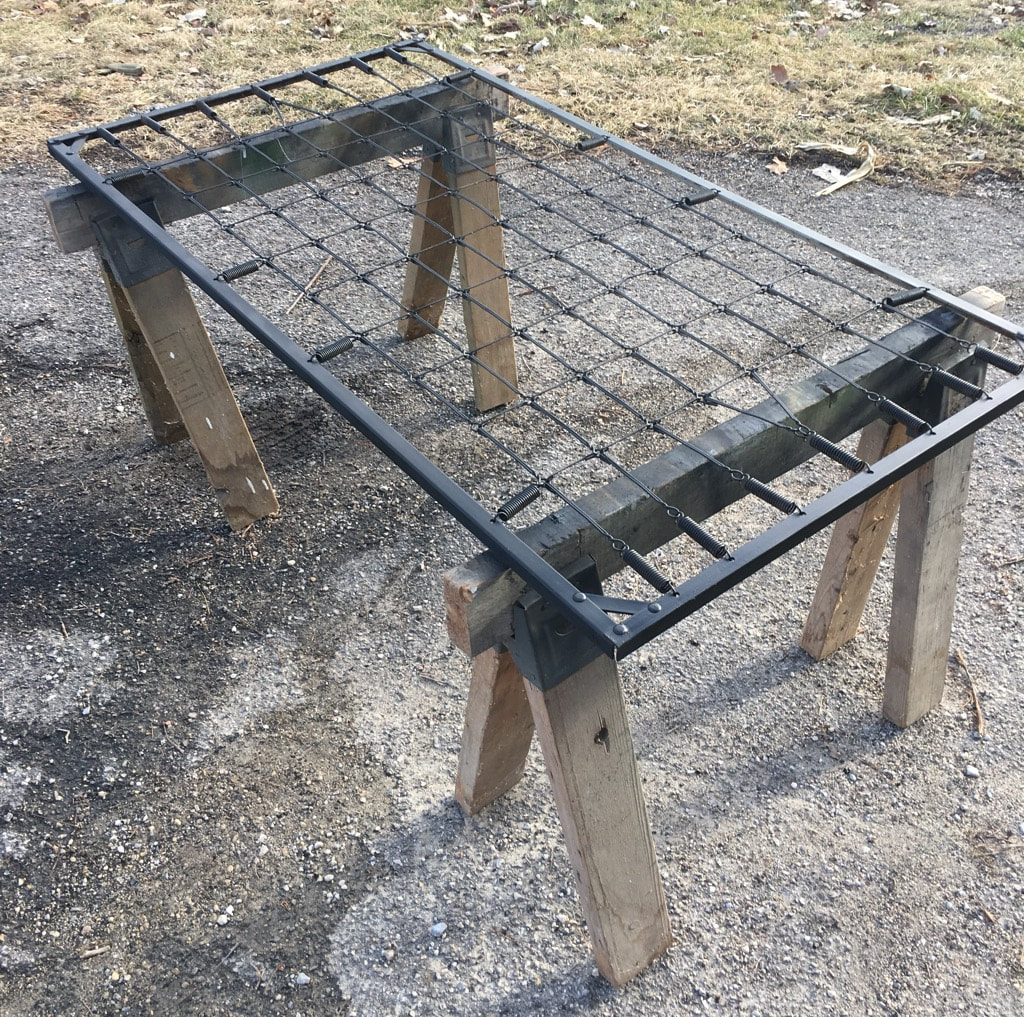 While I thought through the ideas I had for the full light fixture, I installed the light pendant. Unfortunately, the existing light fixture was placed in a poor spot that is very off center in the dining room, but this light fixture idea ended up working out well for where it was placed. Once I had a final plan in mind for where and how I’d hang the mattress frame, I measured out and marked where the swag light ceiling hooks would go. I determined where the marks would go by measuring the frame corner to corner. I didn’t have fancy tools like a laser level to guide me, so I did my best to eyeball my lines. My husband was there as a second set of eyes and we did pretty well! When my lines were marked, I placed the ceiling hooks by simply twisting them into our ceiling panels. 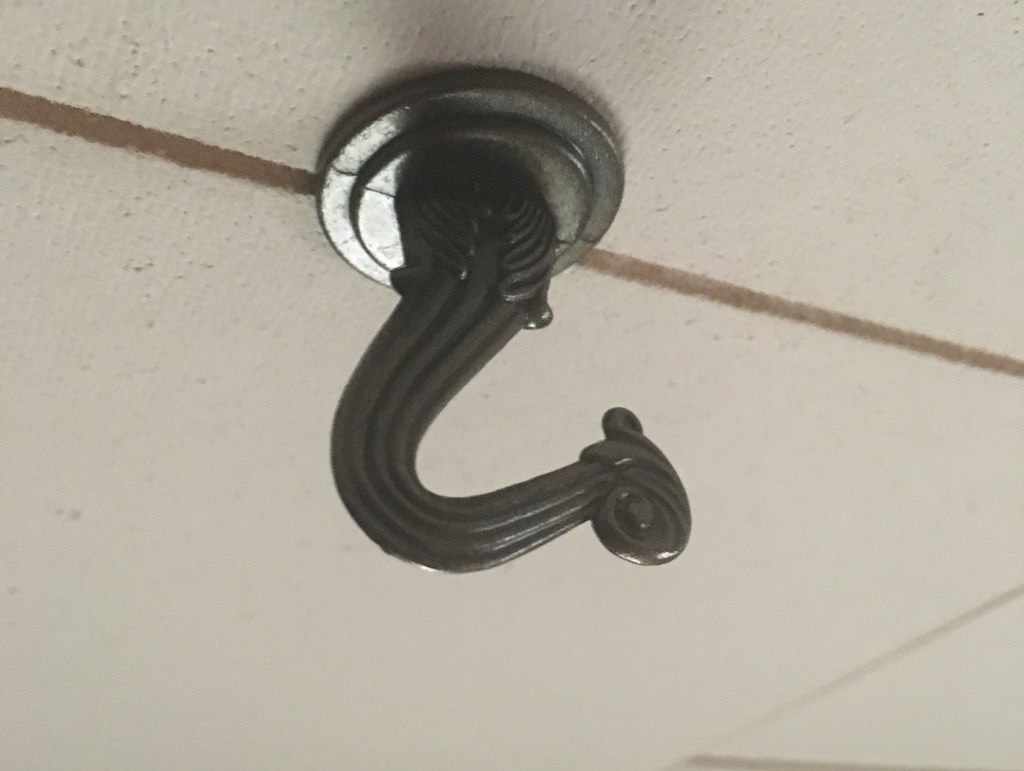 From there I attached loops of wire to the corners of the mattress frame and placed each corner loop over the ceiling hooks. You could also use small link decorative chain in place of the wire for a different look. I was in a hurry to do this (because I was excited) and strong wire was the only thing our small town hardware store had. I may replace it down the road. 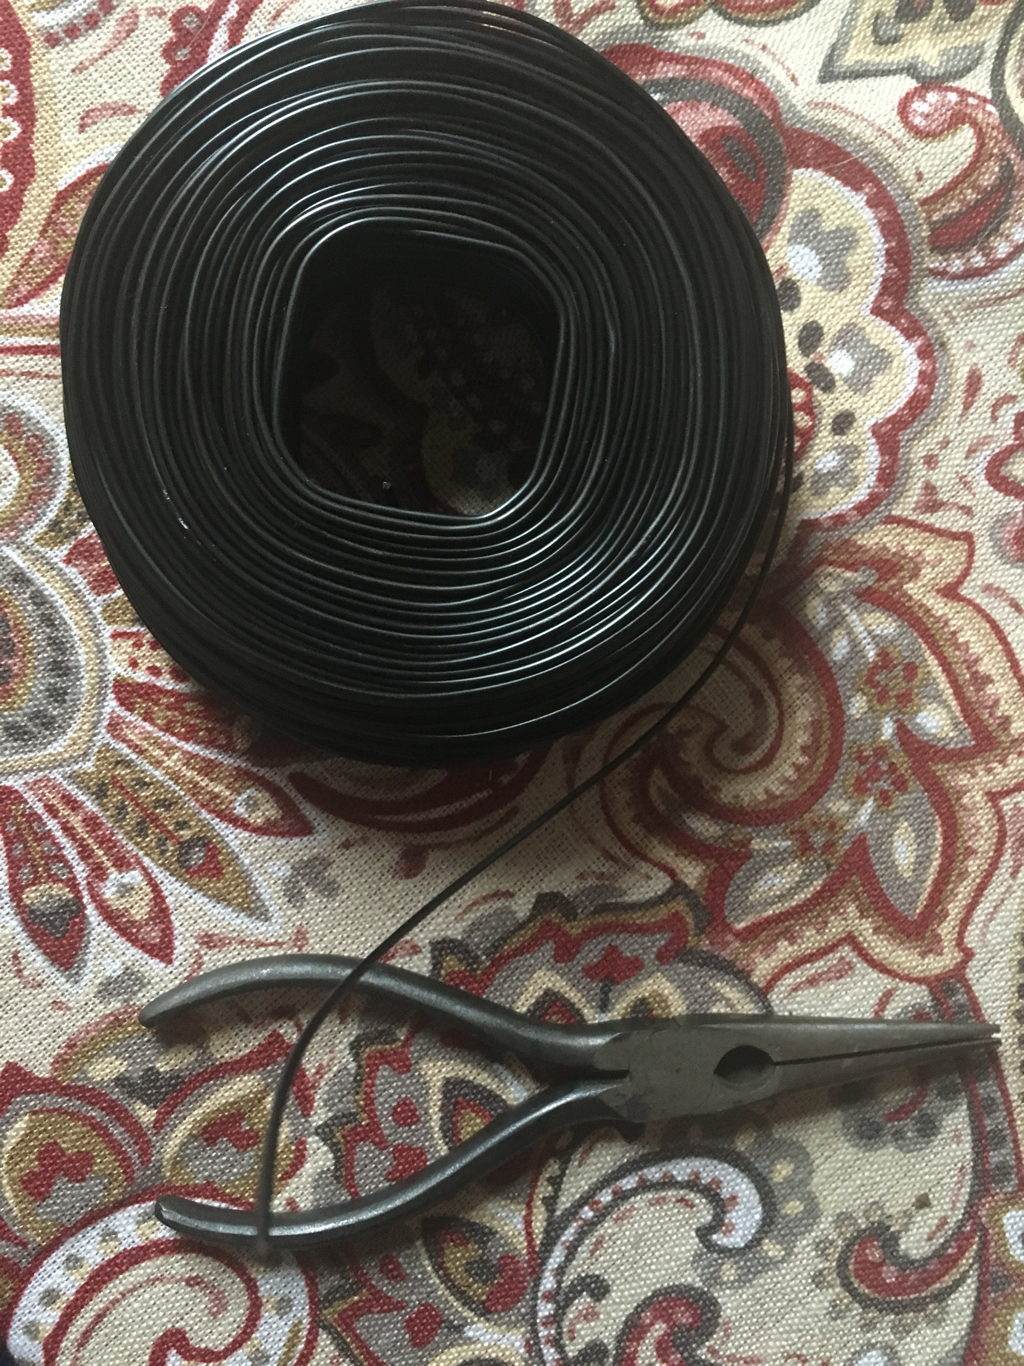 When the mattress frame was securely in place, I “styled” the light bulbs by stringing them through the frame.  The last step was to add Edison bulbs. I used three different styles of bulbs because I love Edison bulbs and couldn’t choose just one style when I had eight lights to fill! I love how this light fixture looks industrial and rustic at the same time. I plan to completely redo the seating in the dining room which will make the space come together even more.   Playing with electricity, especially in an old house, can be a little nerve wracking. But that didn't stop us from swapping out the light fixture in our kitchen! Expert details on how to install a light fixture can be found here. Who better than Bob Vila to walk you through this? We're definitely not experts, but I'll show you some visuals and a life hack we learned from our installation below. The first and most important step is SHUTTING OFF THE BREAKER TO THE AREA YOU'LL BE WORKING ON! Next, start to carefully remove the existing light fixture.  We chose to take out the plate that extended across the electrical box and utilize the new one. We did recycle the old screws because the depth of the electrical box was more than the length of the screws that came with the new fixture.  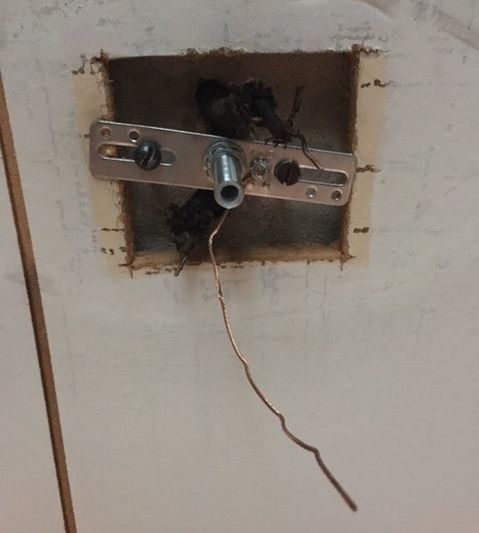 Before we began to install the fixture, we needed to trim and strip the wires at the top of the fixture where it would hang. We did not have wire strippers, so here's a life hack: You can use scissors (as long as you use them gently). I applied light and consistent pressure with the scissors on the casing of the wires until I was able to slide it off. The goal is to remove the casing without severing any of the wire. 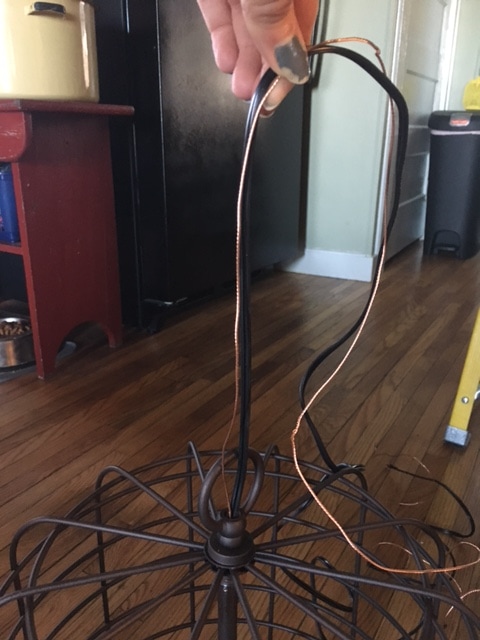 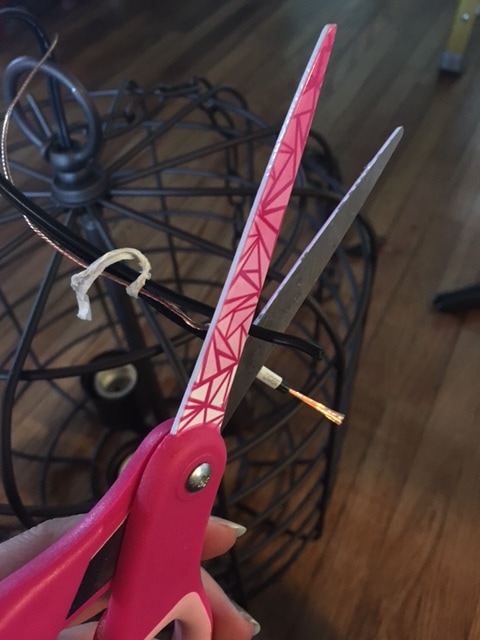 Once that was complete, we cut the chain to the desired length and wove the wire through it. 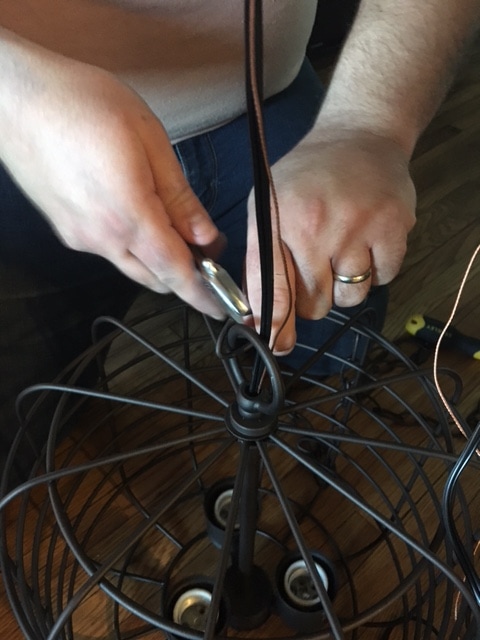 Following the instructions in the box, we connected the electrical box and fixture wires accordingly, securing them with wire nuts. The final step included fitting the fixture's base over the electrical box and securing it. 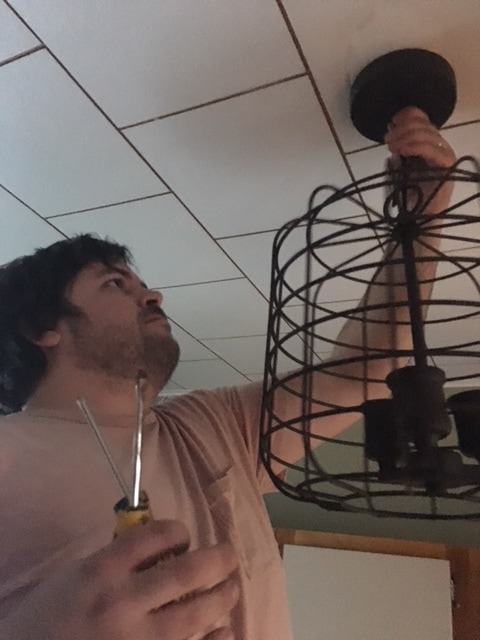 We love the warm glow of this fixture's Edison bulbs and its farmhouse style. We got this one from Menards if you're interested! 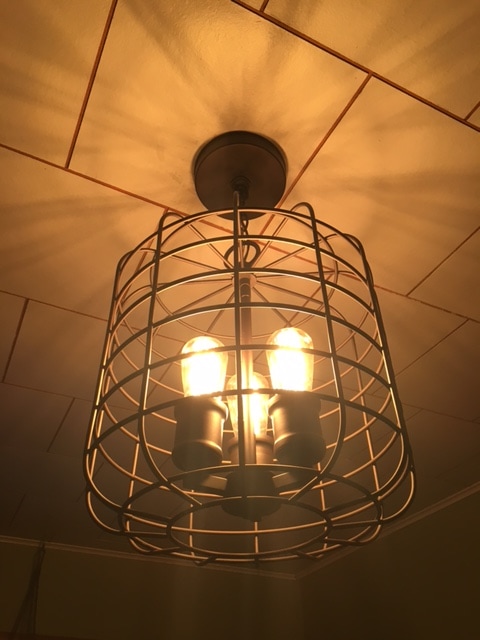 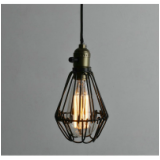 We all know industrial cage light fixtures are very popular right now. I love the look of this style along with the masses. We have an exposed light bulb in our stairwell to the basement that I thought a cage light fixture would look great on. Trouble is, it is at an odd angle near the ceiling, so I had to get creative by creating my own fixture. This is another inexpensive DIY light fixture option that cost me under $12 to create. What You'll Need:
I started off by cutting the cage in half. It was too big for me to use as it was due to the bulb's close proximity to the ceiling. This was fine with me, because I had envisioned 1/2 of a light fixture in the first place. If you are doing something similar, or like the look of hanging cage light fixtures (like the one pictured above) you could probably use the full guard cage and follow these same steps (without the cutting of course)! So as I said, first thing I did was cut the cage in half at the hinge using a razor blade. 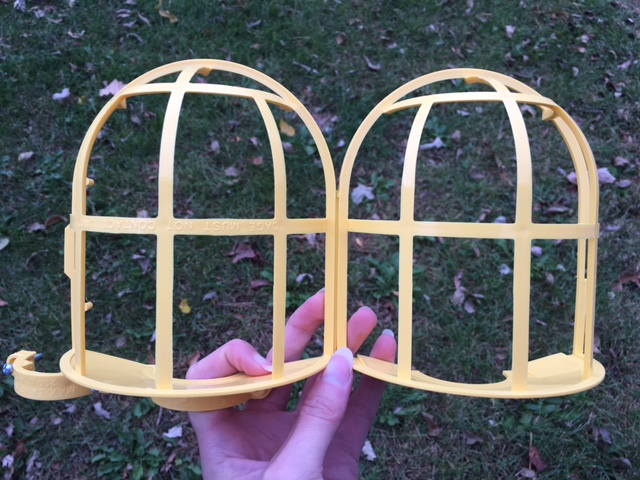 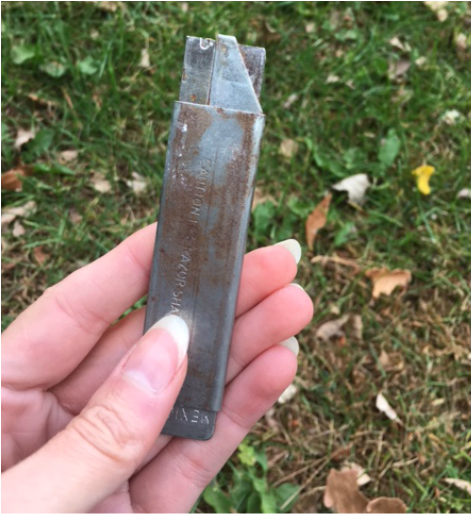 I realize this looks nasty, but I've had this razor blade for over 12 years and it's always good for a nice, clean cut! After I had the cage cut in half and removed the two screws that came with it, I spray painted it with the same oil rubbed bronze that I used for my clamp light lamp. 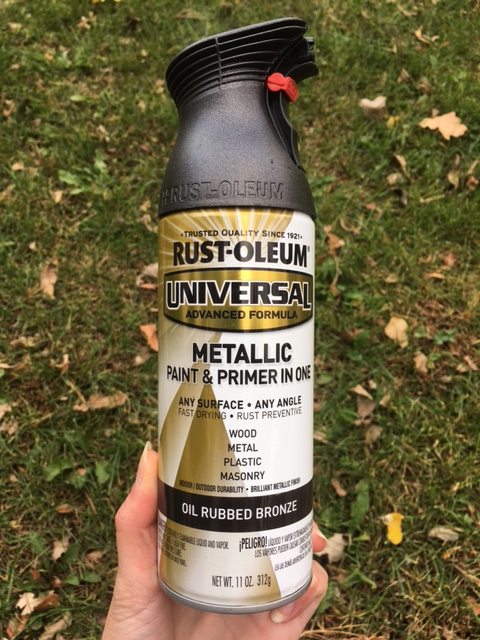 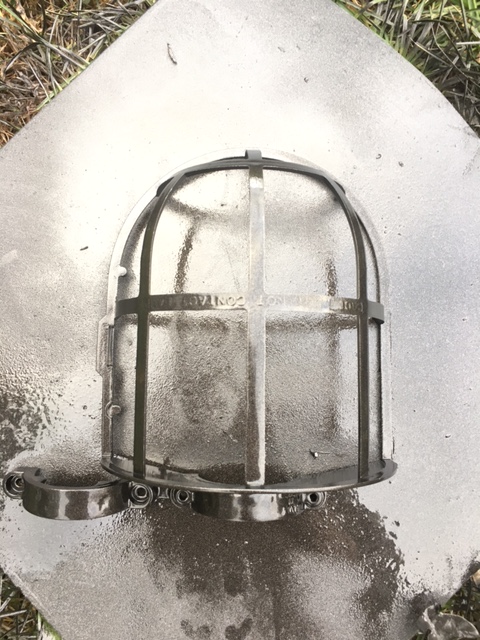 After allowing the cage to dry, it was ready for install! I swapped out the light bulb using a vintage-style Edison bulb and attached the cage to the base of the bulb using the two screws I mentioned earlier. See below for the before and after! 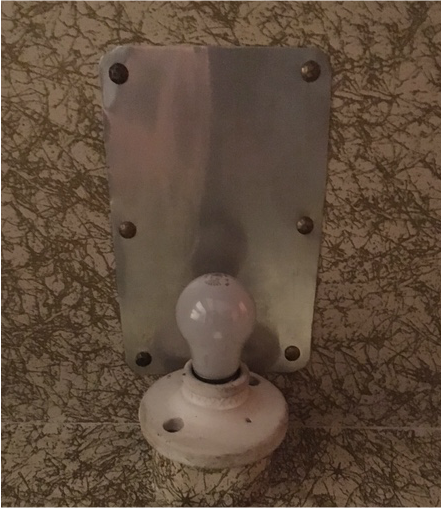 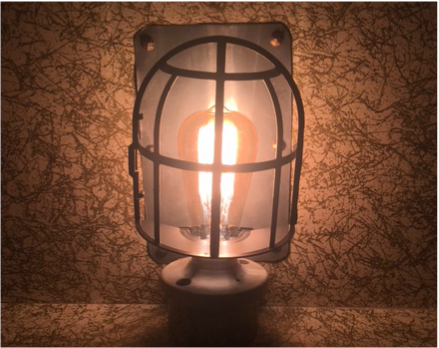 I've got an easy DIY project for you that can be completed in under an hour for less than $15! This project is perfect if you're looking to create a cozy corner in your home or need to add extra lighting to a room, but don't have a lot of cash to spare. All you need is:
I chose to spray paint my clamp light oil rubbed bronze to match my home decor. If you like the industrial look, I think leaving the light untouched would look just as great. That would cut this project down to under five minutes! The first thing I did was disassemble the clamp light so I could spray paint certain portions of it. I didn't want any of the electrical pieces getting goo'd up with spray paint... 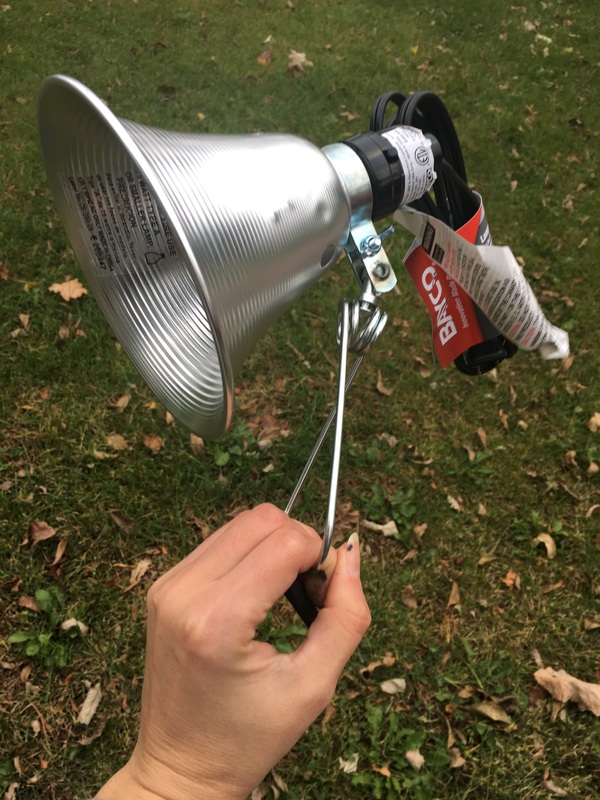 I painted the inside/outside of the "lamp shade" portion of the light, as well as the silver portions of the clamp. I applied two healthy layers of paint to both items, allowing for dry time in between. 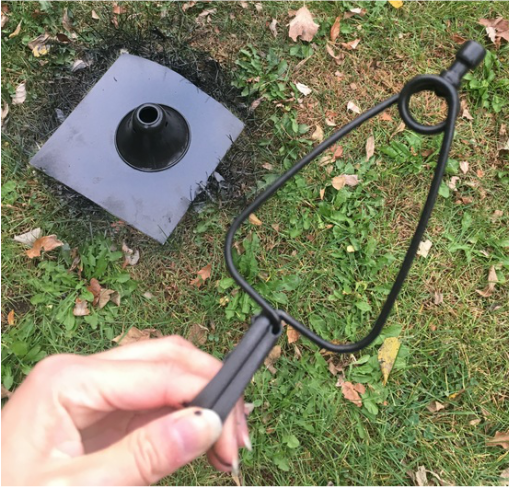 Once the pieces dried, I reassembled the clamp light and inserted the light bulb. All that was left to do from there was to clamp the light to the top of the driftwood and prop it into my chosen corner. See below for a few different angles of the finished lamp, including an evening view to show the amount of light it gives off. If you're looking for a brighter lamp, I'd recommend a higher watt bulb. The one I used was 60 watt. 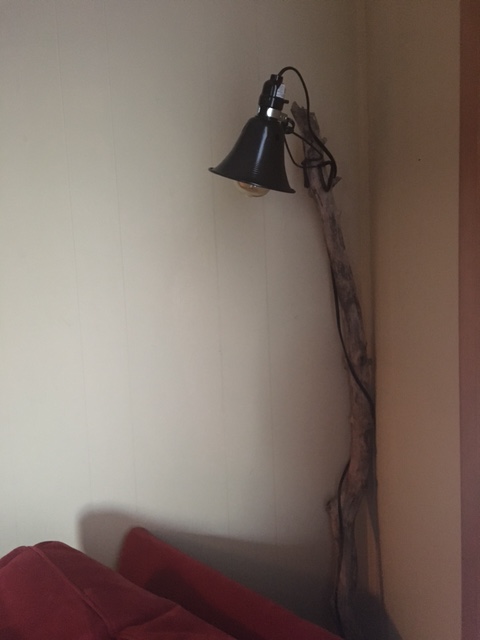 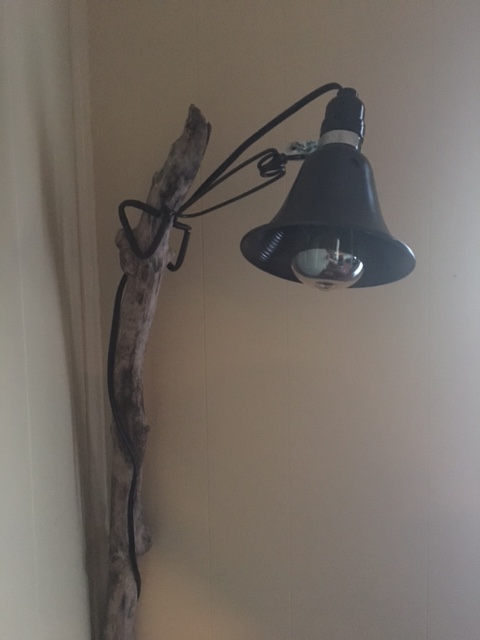  As you can see, the vintage bulb puts off a lovely warm glow in the far corner of our living room. This lamp is a piece I didn't know was missing until I created it.
Happy DIY'ing my friends! |
Archives
August 2022
Categories
All
|
 RSS Feed