Busy Hands, Happy Heart
|
Looking for an adorable DIY project for Easter? I’ve got just what you’re looking for! While browsing Dollar Tree for a few Easter/Spring décor items to freshen up what I currently have, I ran across inspiration for a project. One item led to another and I had a full vision for the vignette we have placed just as you pull in our driveway. I knew I wanted to put sticks with plastic eggs hanging from them in the wash bin. But then I found a felt bunny head that I thought would be cute peeking out from the bin as well! Here is my vision brought to life:  I mean, come on. That face! Here is what I used to create the bunny:
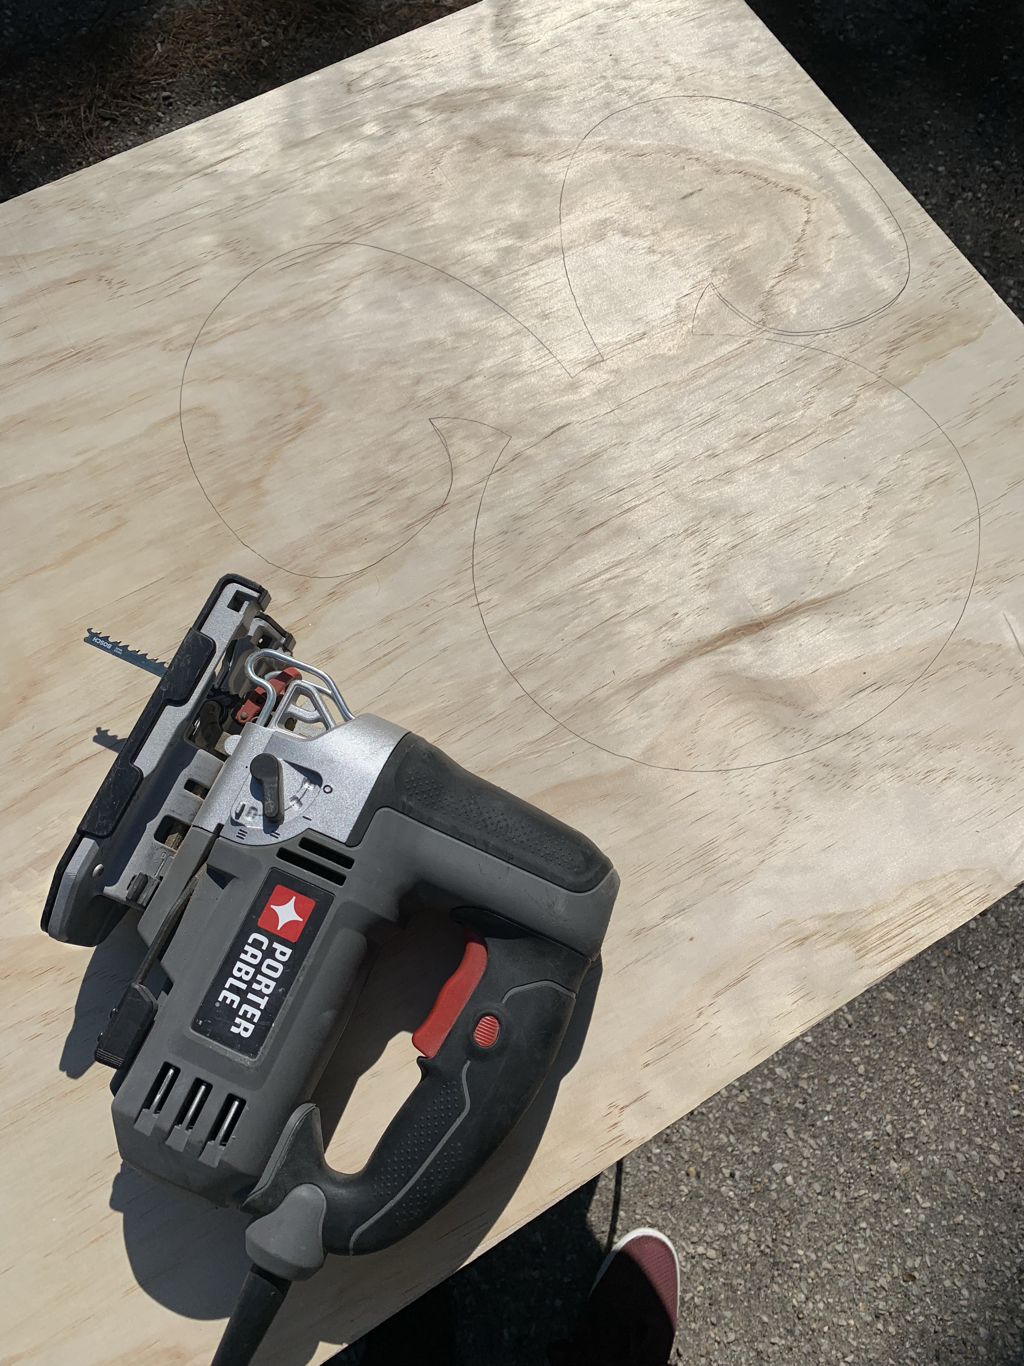  If you make any mistakes, that’s what the sander is for. I sanded the edges, smoothing out any unintended mis-cuts and bumps. I then sanded the flat sides of the wood, wiping them down with a cloth afterwards, so I had a good surface for the paint. I chose to connect the bunny head to the 2x4 before painting. I attached them together with two long screws through the face of the bunny. I did this because there are normally high winds where I put this piece of décor and I didn’t want it to fall apart. If you will be putting this on a porch or indoors, you could easily use wood glue or construction adhesive.  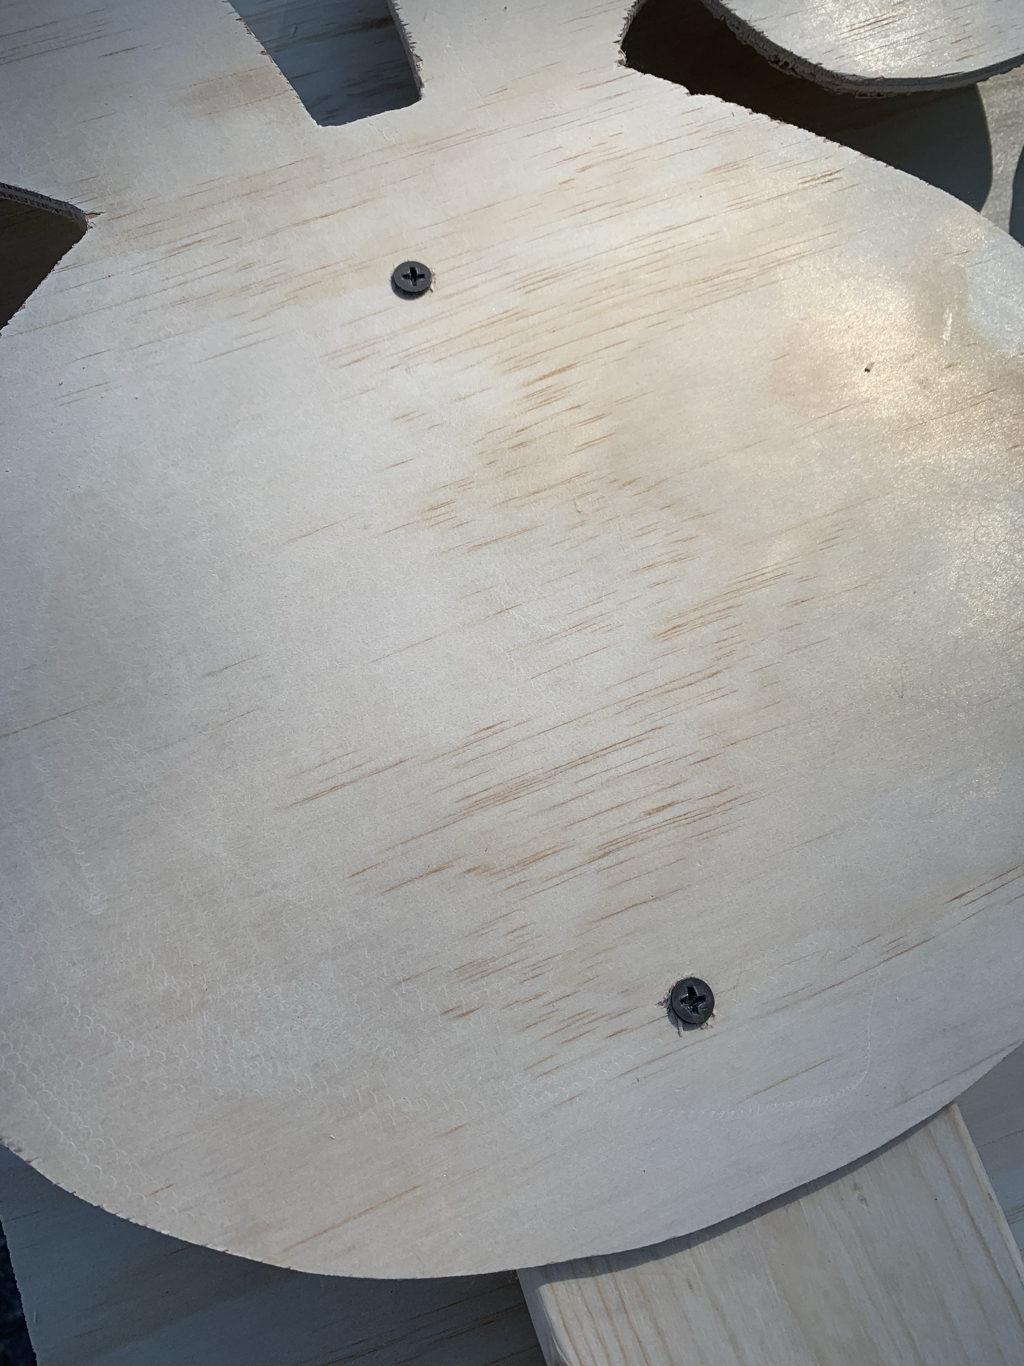 Once attached, I started to paint. I used white outdoor paint as the base and applied spray paint with a brush for the facial features (I work with what I’ve got at home!). I finished it off with a coat of clear poly spray paint to seal it up. I chose to paint both the back and front white because the back is visible from the road. I utilized the facial features on the felt bunny head to paint in the ears, eyes, nose, and mouth. I have to give credit to my husband for that idea!  I might cut the 2x4 down a little bit to lower the head a little more, but I can’t help but smile when I see this sweet bunny peeking out of the wash bin, welcoming me home! Here’s another angle for your viewing pleasure:  Happy Easter!
0 Comments
I went all out this year when it came to Christmas décor. I decked our halls inside and out in a day. I couldn't stop myself. I was that pumped to transition into the most wonderful time of the year! I felt a little silly though, because it was an abnormal 60 degree November day here in Iowa! I splurged a little bit this season and purchased a few new items to add to the decorations we've had for years. Much of what we have we 1) bought when we got married, 2) inherited when we bought our first home, or 3) inherited when we bought our second home! A lot of really great pieces, but many had seen better days... Although I bought some new items, some assembly was required. I rarely buy a completely ready-to-use piece. I normally buy the elements to make a ready-to-use piece. Here are just a few of the items I made or curated to make our home feel magical this holiday season! 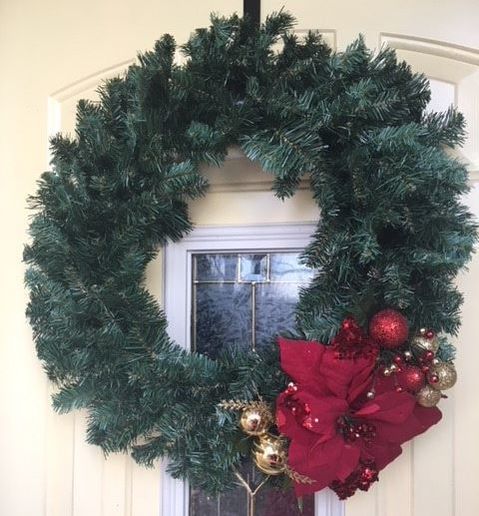 DIY Christmas Wreath I forgot how expensive pre-made wreaths are - $50-$100 plus! I was not willing to pay that much because I wanted a wreath for both our front and back door. I ran across some plain wreaths that were in the $10-$20 range, and they were 50% off. More my style. I then browsed a Christmas accessory isle that had small, festive items that could easily be clipped into or twisted into a wreath. Three small accessories was all I needed to create a simple yet elegant wreath. After discounts, this wreath cost me under $10 to make! I plan to carry this wreath into other seasons by simply swapping out the accessories. 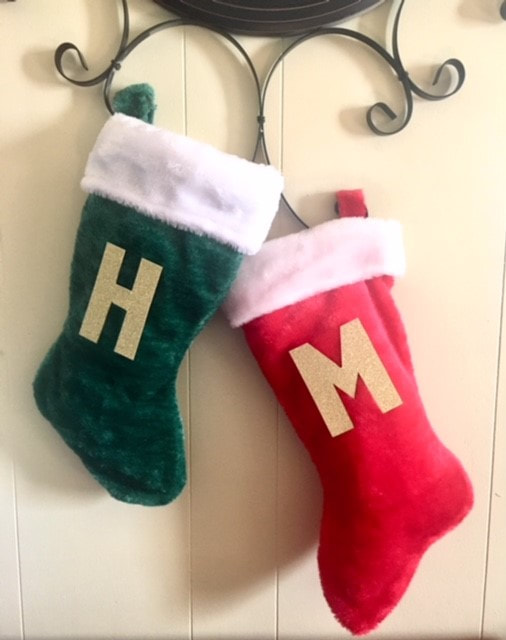 DIY Stockings I don't want to be misleading - I did not make these stockings, I just added the letters! Stockings are another item that can be pretty pricey. I found these stockings at the dollar store. I picked up a single piece of gold, glittery scrapbook paper for the lettering. Using a Sharpie, I drew out the letters on the back of the scrapbook paper. I'm getting better at hand lettering, you could certainly use stencils if needed. I then cut out the letters and glued them to the stockings! Easy as that. And by the way, we don't have kids...these stockings are for...OUR DOGS - Homer and Madison!! You could say we love them a little bit. 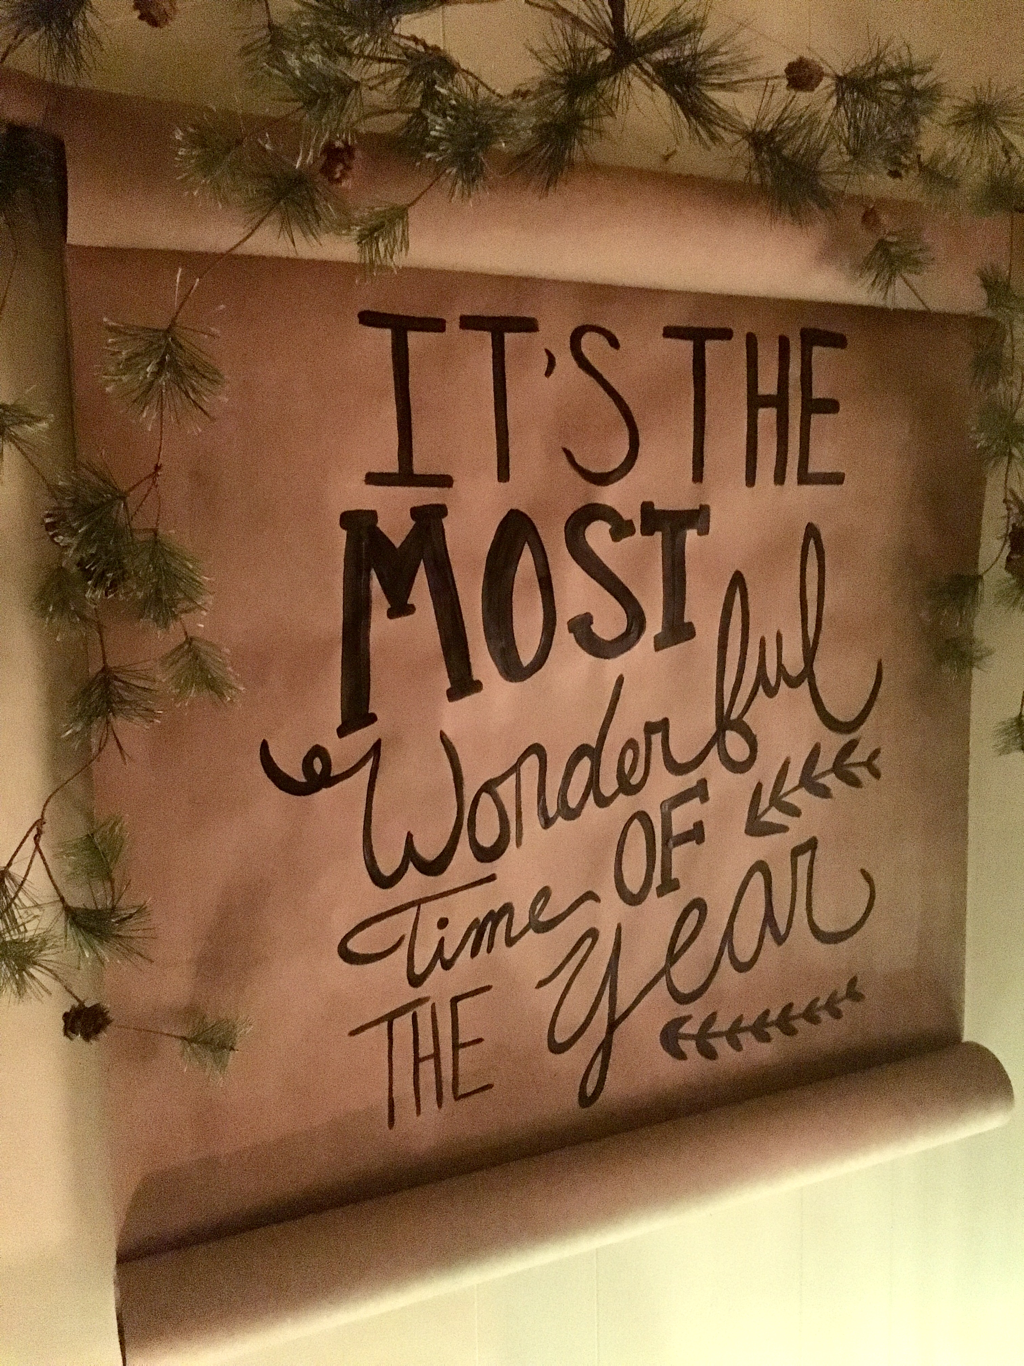  Curated Spaces I absolutely LOVE to shop my house. I shop my house before stepping a foot out the door to go to a store. I believe that if you can take a moment to look at what you have with fresh eyes, there are so many possibilities! The space above and the vignettes below are mostly pulled together from items I had. The only new items are the Poinsettia floral bouquets and the red/gold ornaments.  I upcycled this sled last Christmas. See how here.  I also tried incorporating natural items from our property, like the branches and sticks in this planter.  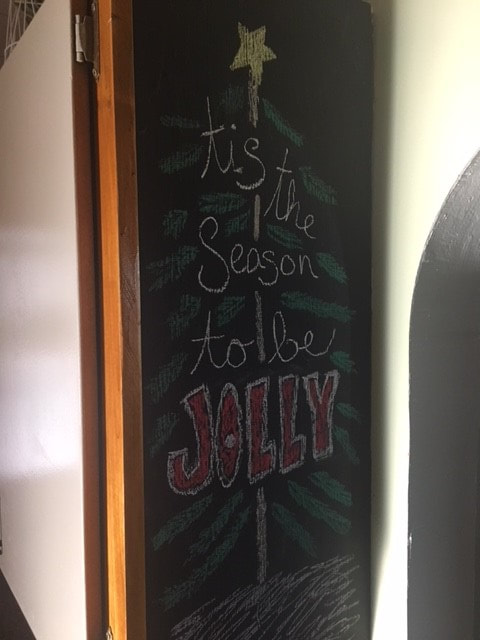 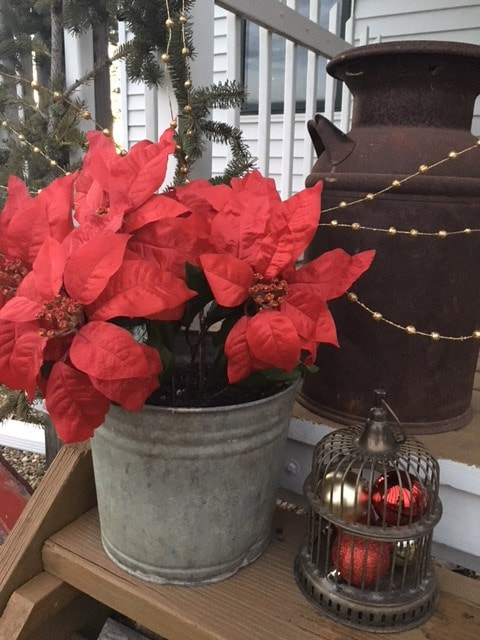  My Fall decorating routine is in full swing. Once September 1st hit and the temperatures started to dip, I was in the mood! When the mood struck, I also happened to be cleaning out our basement. It was great timing because I was able to "shop our house" for some décor pieces that I could use this Fall. I felt particularly inspired by these finds: 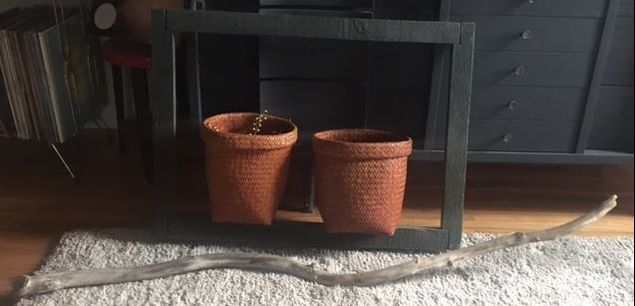 The frame and piece of driftwood were something I had hanging on the porch of our last house. The frame used to have a screen inside it, but it had come undone after being haphazardly shoved in the corner of the basement...which actually worked in my favor for this project. The baskets were finds I picked up at Gooselake Creations, but hadn't found the right spot for them yet. I played around with different ideas and really thought it would be neat to make a "3D" piece of art using the items mentioned above and some artificial flowers. Our dog, Homer, loved my vision and was interested in helping! 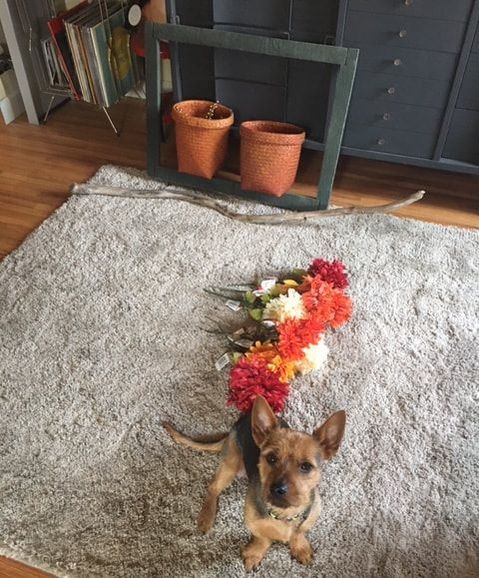 We had a large frame hanging in our entertainment center area already (see below), so I was able to utilize the existing nails for the frame. Because the baskets had some weight to them, I chose to nail them into the wall. A surprise I wasn't expecting was the outlet we added during our renovation in case we ever mount a TV to the wall. With the open frame, the outlet was not aesthetically pleasing! I chose to cover that with a piece of burlap. The burlap is optional if you do this project, it was a necessity for me! Once I had everything in place, I started arranging the flowers I purchased inside the baskets. I found some beautiful mums in cream, burgundy, orange, and yellow at Dollar Tree (one of my favorite places for artificial flowers). This project was as simple as that! See below for the finished product: 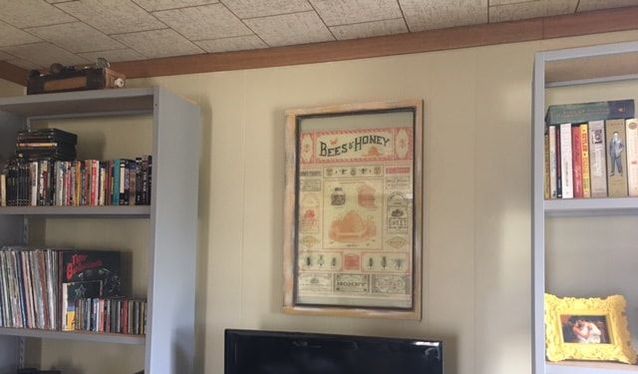 Area Before 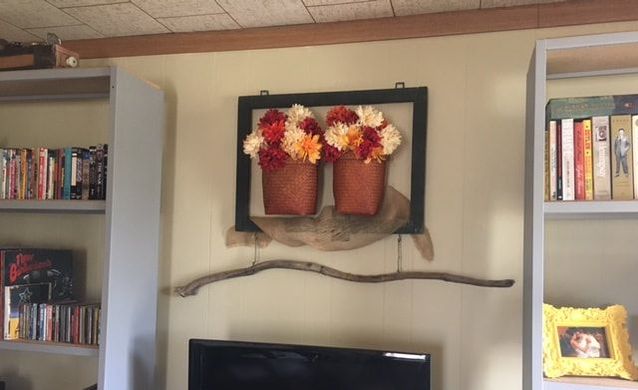 Area After 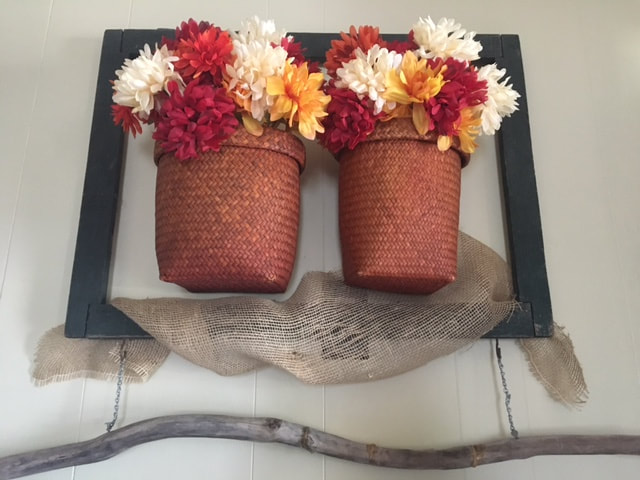 Although growing a fruit and vegetable garden has been extremely enjoyable and rewarding, one downside where we live are the critters. We have cats, birds, mice, wild turkeys, bunnies, woodchucks, bugs and deer - that I know of. They have been quite kind in leaving my plants alone for the most part, but I have had to put some measures in place to keep them away. 1. Cayenne Pepper Cayenne pepper is especially good to keep away rabbits. They can't take the heat! I sprinkle cayenne pepper on the leaves and around the base of each plant. I've been doing this for years, even when we lived in town, and it works every single time. 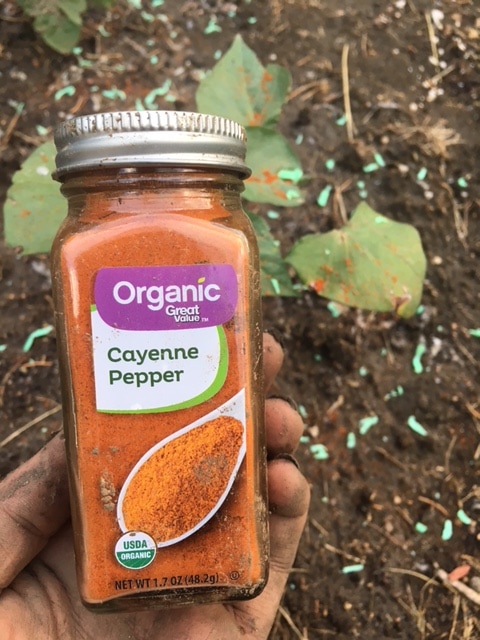 2. Irish Spring Soap This type of soap is good for keeping deer away. Deer HATE the smell of Irish Spring. We have one doe that lurks around in our garden area and it seems like this is effective in keeping her away. I use about one full bar each time I reapply in my garden, which is normally every 2-3 days or after it rains. An old cheese grater that I found in my attic has worked perfectly for grating the soap around each plant. 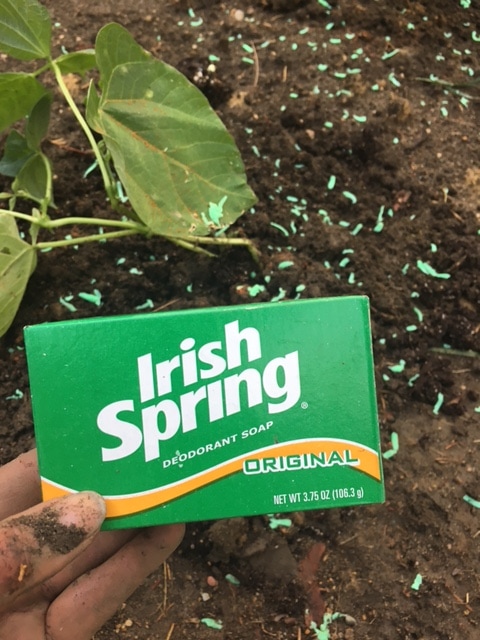 3. Pinwheels I read that having some type of "movement" in your garden deters animals from approaching. We placed pinwheels around the perimeter of the garden. They catch the slightest breeze and are rarely still. I found the ones we are using at Dollar Tree for $1 each and they've held up very nicely through some very strong storms. 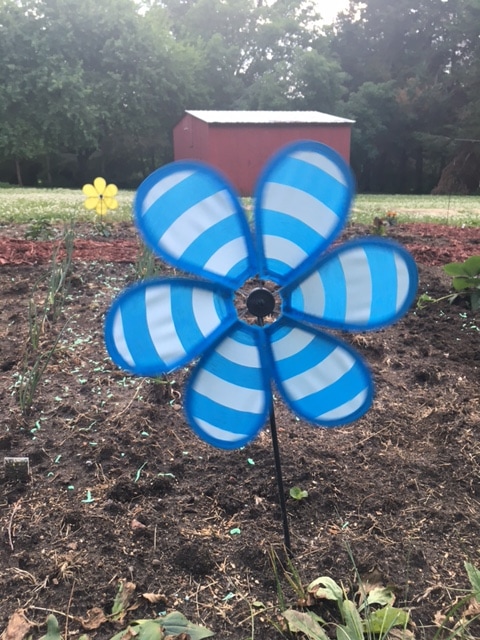 4. Wind Chimes I love the sound of wind chimes, so there is no shortage of them at our house! We placed small wind chimes around both my fruit/vegetable garden and wildflower plot. Animals are supposed to be frightened by the sound of the chimes and birds do not like items that are reflective. I was able to find both the wind chimes and stands for the chimes from Dollar Tree, again, for $1 a piece. 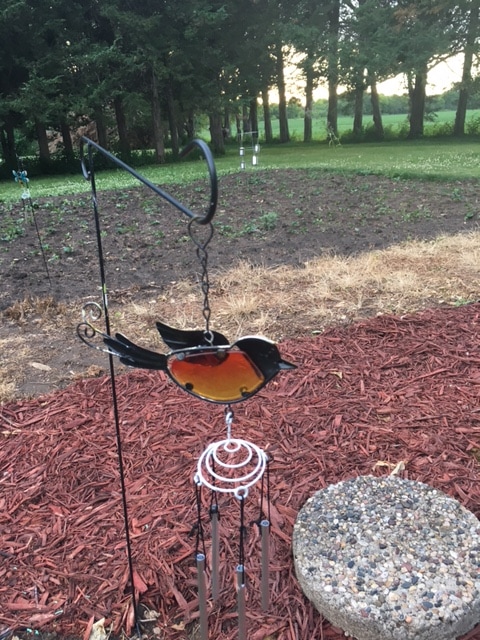 5. Marigolds Planting marigolds is a traditional gardening tip. Marigolds supposedly mask the sent of vegetables, confusing garden pests. We planted them around the entire fruit/vegetable garden. They must also be delicious, because the deer started nibbling on a couple. I fixed that by utilizing tip number two and sprinkled some Irish Spring around them, which did the trick! 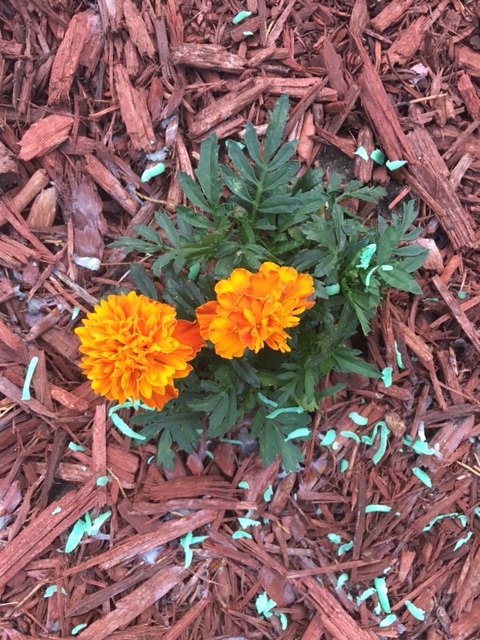 6. Tomato Cages + Tin Cans I planted two established perennials in my wildflower plot that will be good for attracting butterflies. What I didn't know is that they were also good for attracting deer! My solution was to place tomato cages around the plants, hanging tin cans from twine around the outside. I wanted the cage to block its head from the plant and for the cans to make sound to scare it away. I'm happy to report that this has worked and both plants are coming back! 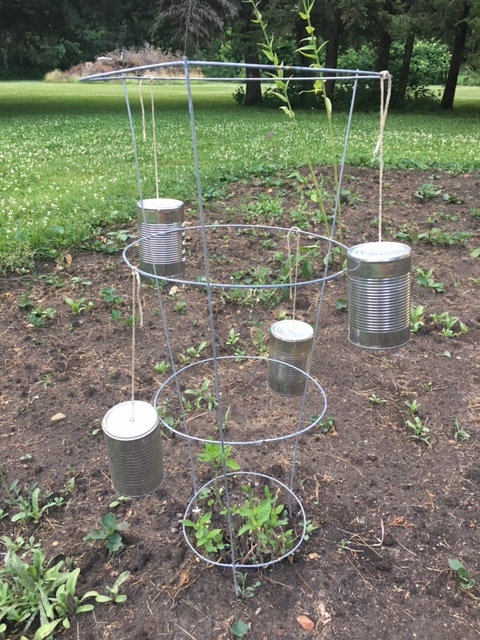 I hope these tricks help you keep critters out of your garden as much as possible! If you have any good tips for keeping wildlife from eating flowers and or fruits/vegetables from your garden(s), I'd love for you to share them in the comments below! I'm sure every gardener will agree, every "battle" with the wildlife has been worth it. Because this is what you get in the end: 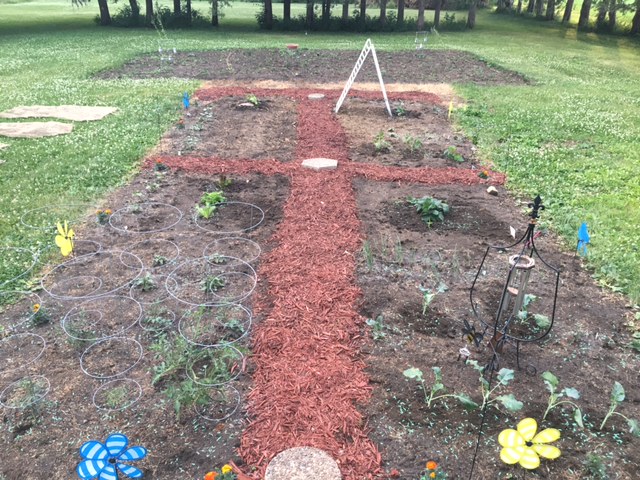 And this is how big your smile gets to be:  |
Archives
August 2022
Categories
All
|
 RSS Feed