Busy Hands, Happy Heart
|
You can count on me to be the over prepared one in almost every situation. This trait is the one upside of being a super anxious, “What if?” type of person. I was recently the Personal Attendant for my beautiful cousin, Maggie, at her wedding:  It was an honor to be asked and I took my role very seriously! Nothing was going to ruin her big day. Although I couldn’t control the weather or the lightning strike to their venue…I could make sure everything else ran smoothly. (BTW – all worked out, wedding proceeded as planned, there was just a brief moment of slight panic). Having a bridal emergency kit on hand was essential. I’ve pulled these together for other weddings and it always comes in very handy for the bride and her bridesmaids, and in this wedding’s case, was a life saver when we needed to rework a groomsman’s bow tie that was too small! Print out or take a screenshot of this handy checklist to create your own bridal emergency kit: 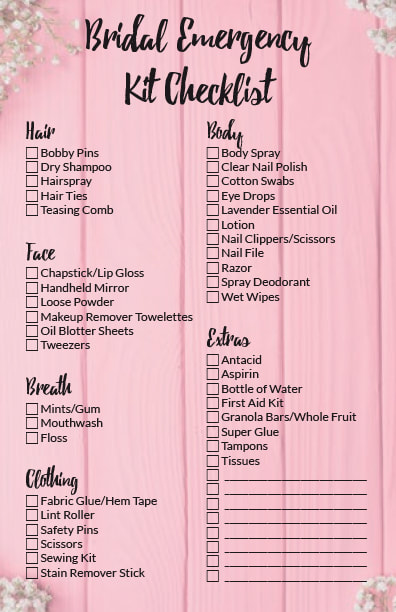
The top requested items I received at this wedding were the sewing kit, scissors, and safety pins! At one point, I just safety pinned the scissors to myself so they were easily accessible.  I kept all of the items (aside from the first aid kit, water, and food) in a multi-compartment make-up bag that rolls up into itself. Like this one. It has a hook at the top which was nice because I could hang the bag up so everyone could see what I had and use it as needed.
If there is a must have item you think is missing from the list, please let me know. Happy wedding season – so much goodness and love to celebrate!
0 Comments
I've been daydreaming about having a hammock since we moved to the country. And today was the day! We hung up a hammock for me in the backyard. The hammock I purchased is from Wish. I can't give a direct link because of how Wish is set-up, but it was called "Parachute Double Hammock Hanging Bed." There are tons of options to choose from. It appears to be very durable and came with two straps if you choose to hang your hammock in different locations. Since I just plan to hang up the hammock at home for use, we chose a more permanent option by screwing hardware into our trees. Here's what you need:
First, we measured how high up we wanted the hammock to hang. I read that five feet was a good place to start. Because I am short and we will have small nieces/nephews crawling up into it, we went just under five feet at 56.5 inches. I used the screw eye to make marks on the trees.  My strong husband was able to help me, so I did not need to drill a pilot hole for the screw eyes! He got the screw eye started and I finished it up by using the second screw eye for leverage.  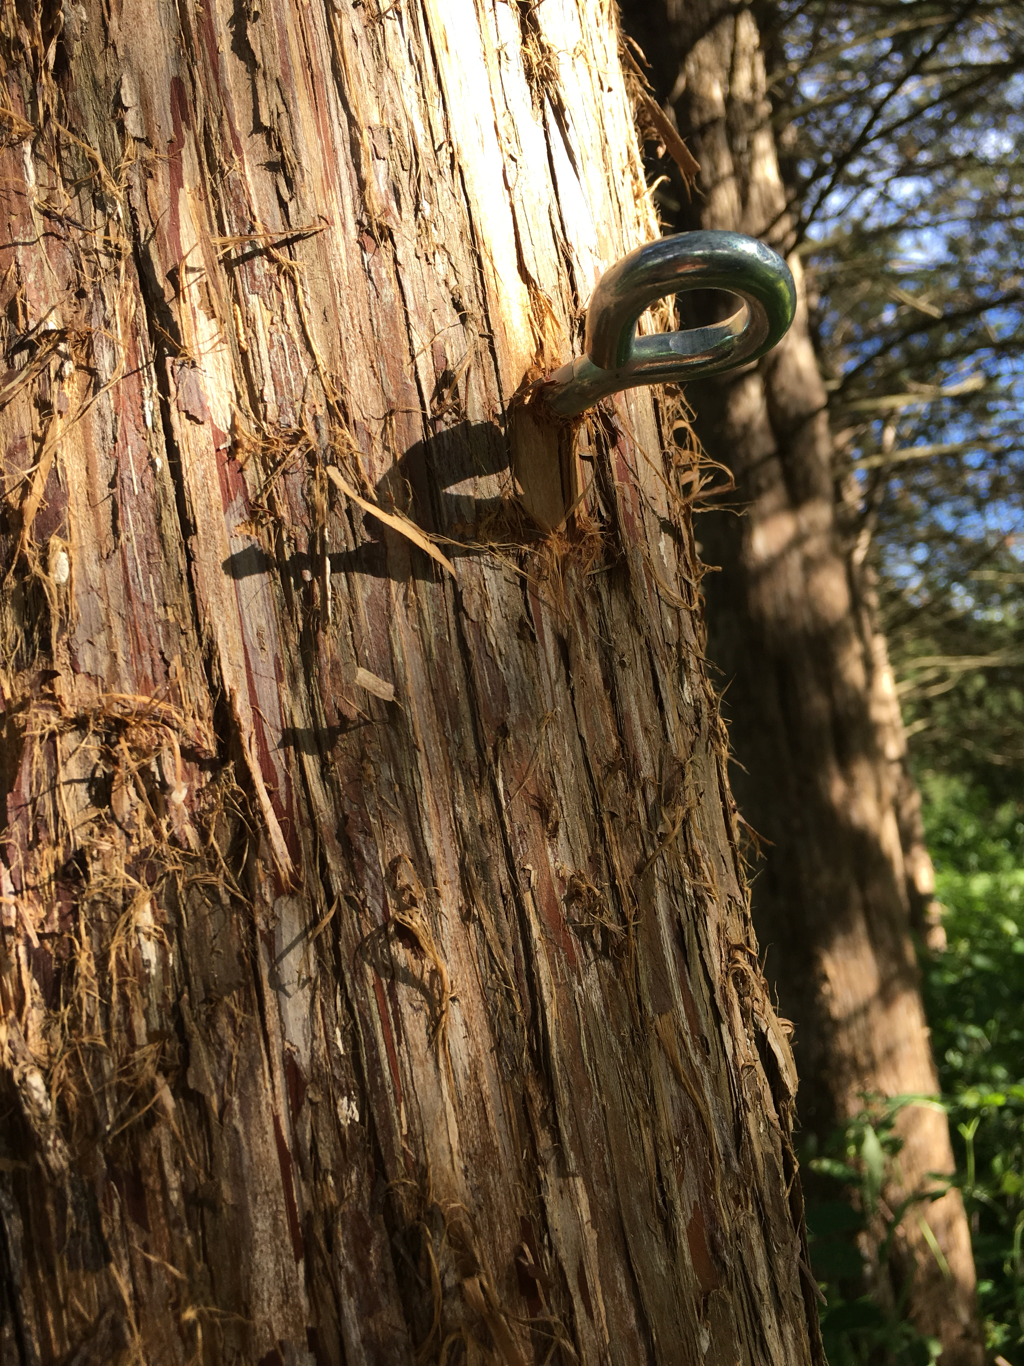 Because the hammock I purchased had carabiners on each end, we simply clipped them into place on the screw eyes! If yours doesn't, you could use the rope at each end and connect to a heavy duty s-hook that you hook into the screw eye. 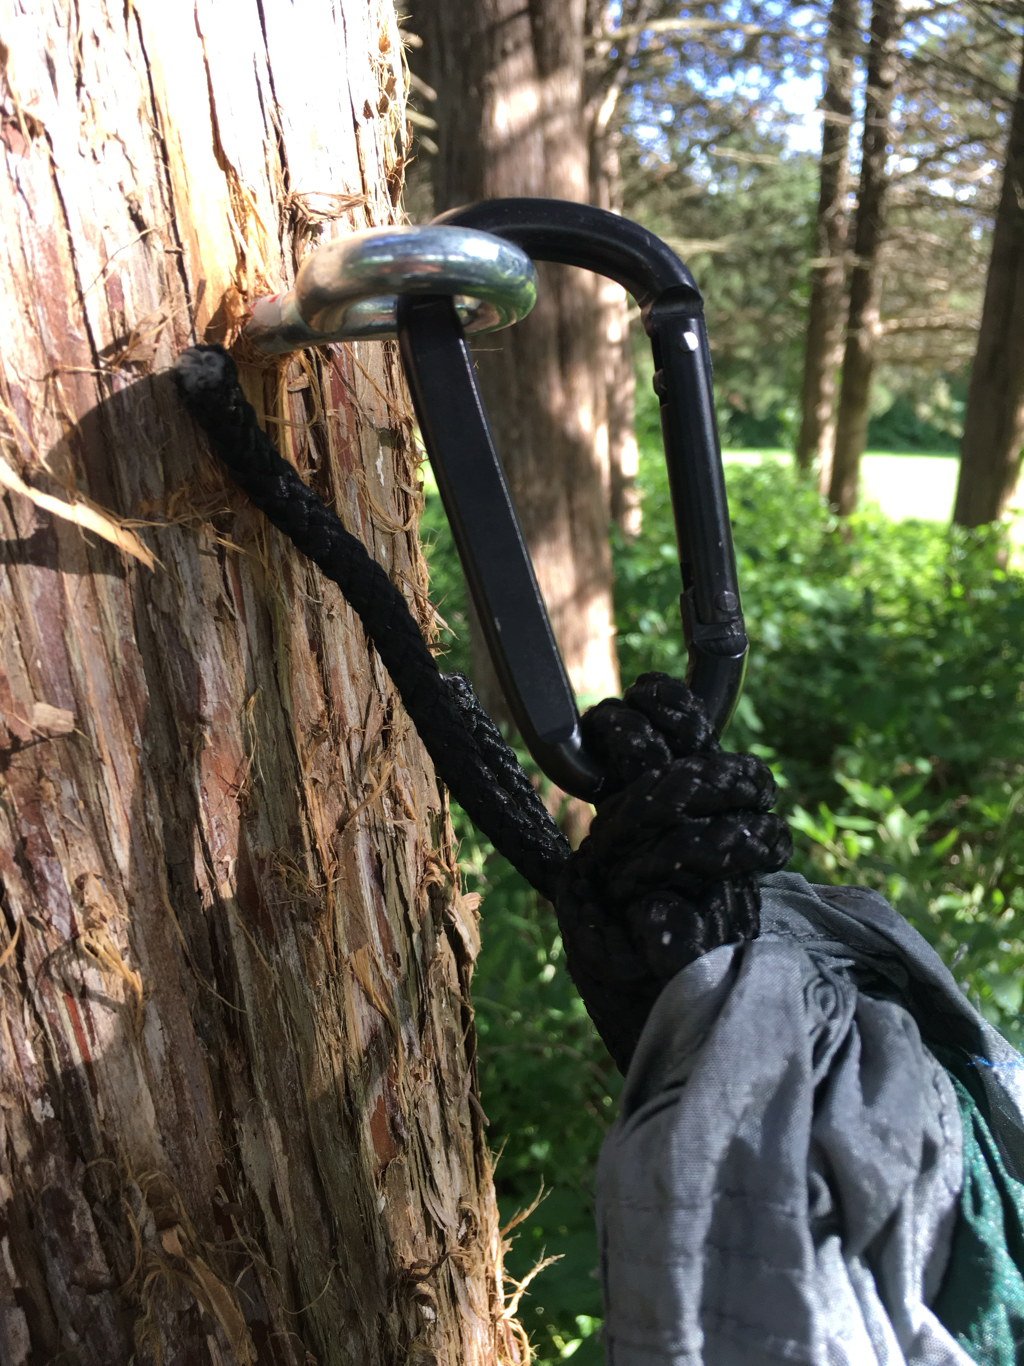 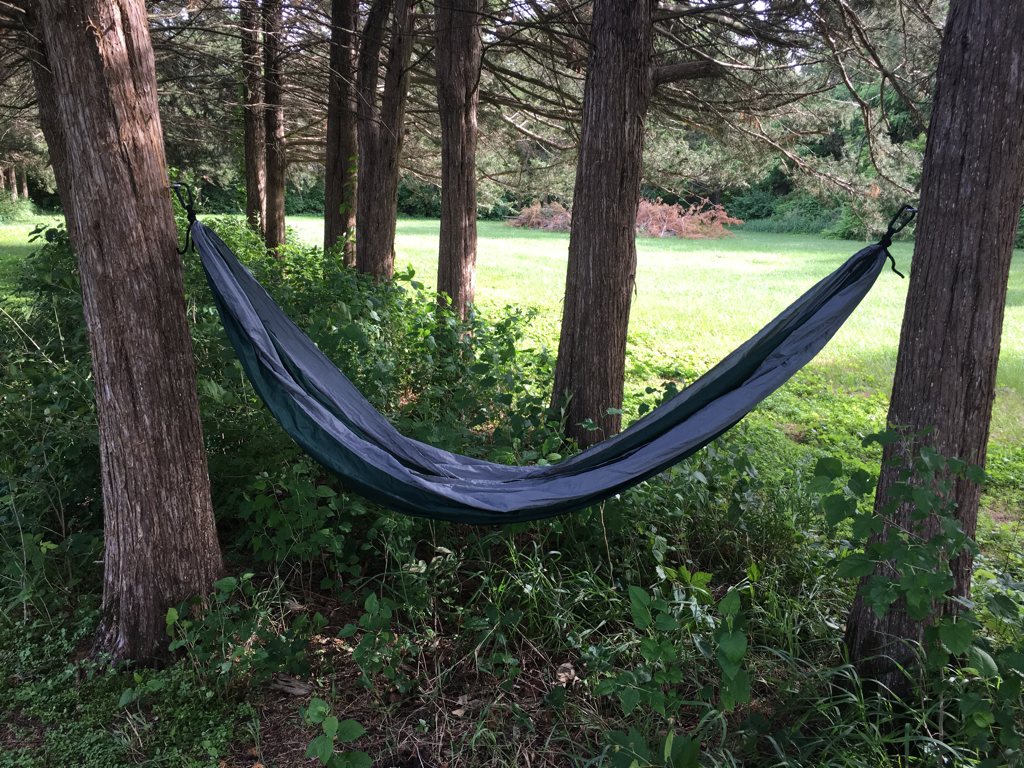 And there you have it! How to hang a hammock. There are a million different ways to do it, but this is our DIY solution. Happy Summer!  |
Archives
August 2022
Categories
All
|
||
 RSS Feed