Busy Hands, Happy Heart
|
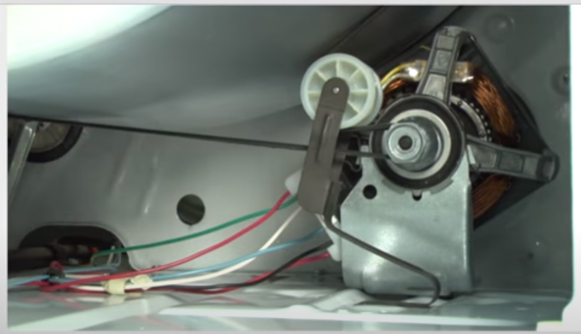
As our home ages, so do our appliances! We inherited our washer and dryer when we purchased our house in 2016, and who knows how long they've been here before that. Our dryer all of a sudden stopped working. It's old school, or "vintage," a Kenmore like this one:  The three things I knew were:
I started "diagnostics" from there:
Finding that we had a broken belt, I took the following steps to look into the problem further:

 
Overall, the total cost was $38 and a little bit of my time. Much better than paying for a service tech to stop by! Happy DIYing.
1 Comment
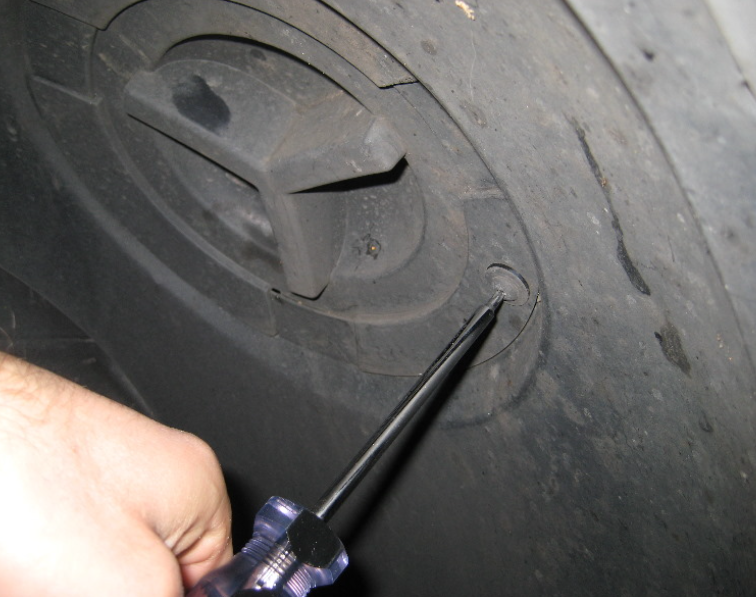
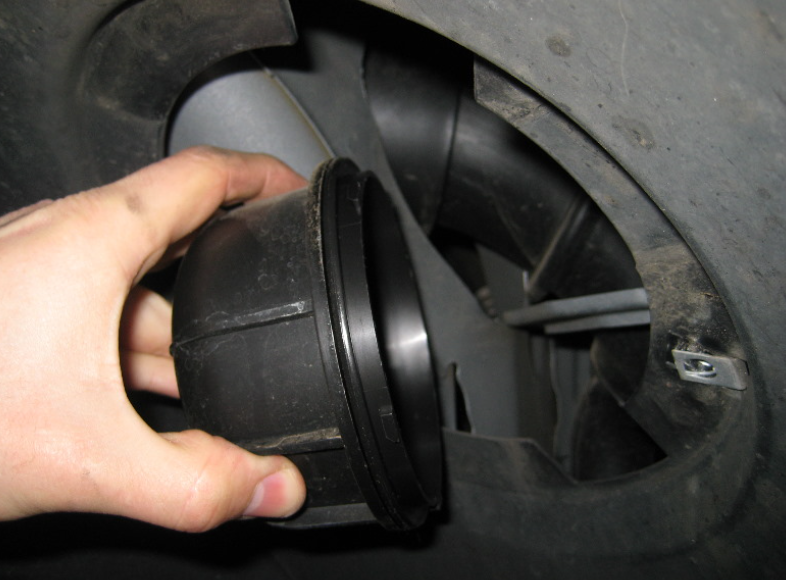
Doing it yourself is scary. Once you dig into a project, a lot of times it's hard imagine how things will end up. Will it match your vision? Will it hold up? Will it work again? Will you make things worse than they already are? I've had all of those worries time after time, project after project. One thing I've learned is you have to be brave enough to try. If you mess up, that's totally OK. Most everything can be redone, repaired, remedied. Whether you educate yourself more and give it another try, find a friend or family member to help, or have the means to hire out - it's going to be alright! I have enough projects (successes and failures) under my belt to be pretty fearless in what I choose to do myself. And I'm smart enough to know my limits. Not everything can be mine to do, which is frustrating, but field experts exist for a reason. The reason I encourage you to consider "doing it yourself" is because of the confidence it will undoubtedly bring you. And honestly, the money it will save you, specifically when it comes to home or auto related projects/repairs. I enjoy crafting, woodwork, assembly, all of the things - but the DIY tasks I enjoy the most are home improvement based. Probably because I get to use power tools most of the time. When I started doing DIY projects, power tools were so scary to me. Once I got going with them, I found that using them is one of the skills I feel most confident in myself about. Before starting anything (even during), I rely on the endless amount of education available to me for free online. YouTube is my favorite place to go, step-by-step articles being my second go-to. There is so much content out there, you can find the niche you're looking for. The specific instructions for your specific project involving specific A/B/C details. Most recently, our tub was leaking. My husband was convinced we'd need to take the shower apart - cut into the tiles, disassemble everything, etc. That freaked me out - until I did some research. Our specific type of shower handle (Delta) has a cartridge (pictured below) that is known to give out in certain areas over time. After pulling the handle apart, removing the cartridge, and comparing it to some information online, we determined all we needed were two tiny sets of $3 seats/springs. Our springs had stiffened up too much over time and needed more give to properly keep the water from dripping out of the faucet. We slipped the new parts in, put everything back together, and no more drip! 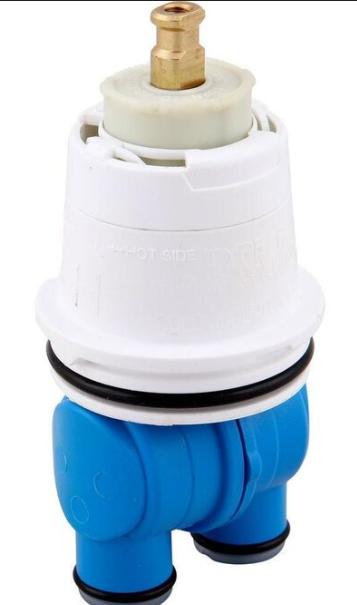 If we lived in the freak out zone over this, we would have spent hundreds of dollars on a plumber. It was worth doing a little research to determine everyday people can make this fix on their own. The other project I did recently was change a headlight on my car. I'm not great with cars, but I understand enough to be dangerous. I have a 2012 Chevy Equinox, an oldy but goody vehicle, that things go out on more often - including the headlights. Again, after doing a little research, I knew what I needed and what to do. Headlights on Equinox's are extremely easy to change, you unscrew two covers (pictured below), replace the bulb, and put the covers back on. There was no need to go to a shop and pay labor for this headlight replacement. It cost me around $30 for two bulbs and a few minutes of my time to do. Not an unclimbable mountain like I always thought it was.
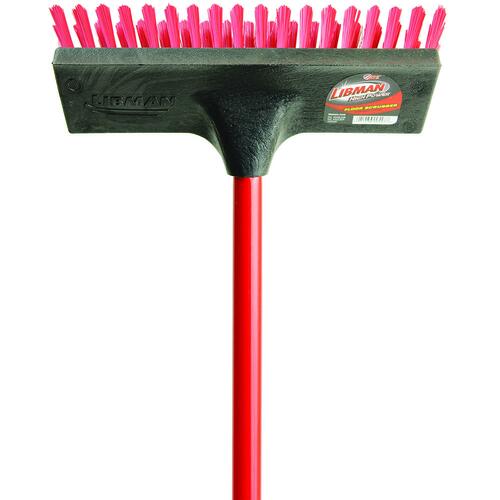
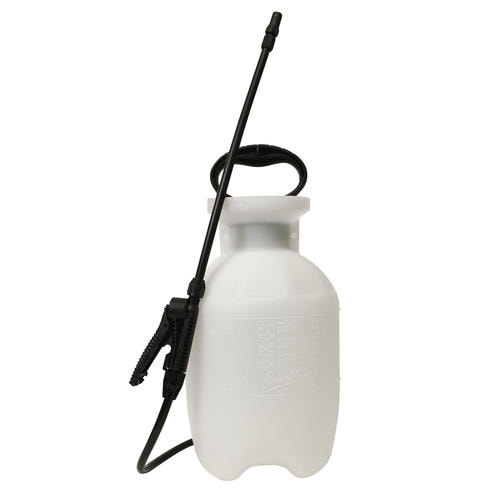
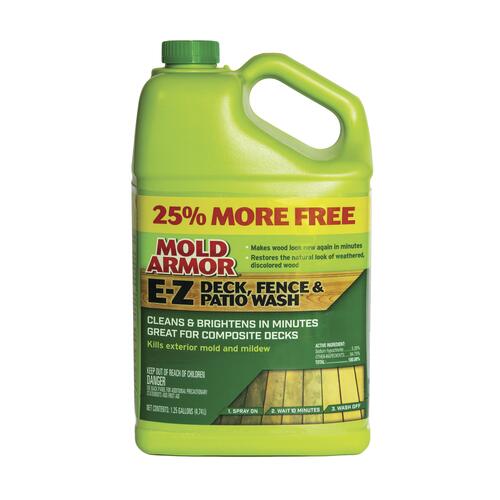
When there is a potential project in front of you, take a step back, consider the task at hand, and before defaulting to calling for help, maybe do it yourself. I BELIEVE IN YOU and hope this little pep talk helps push you into doing more projects on your own! 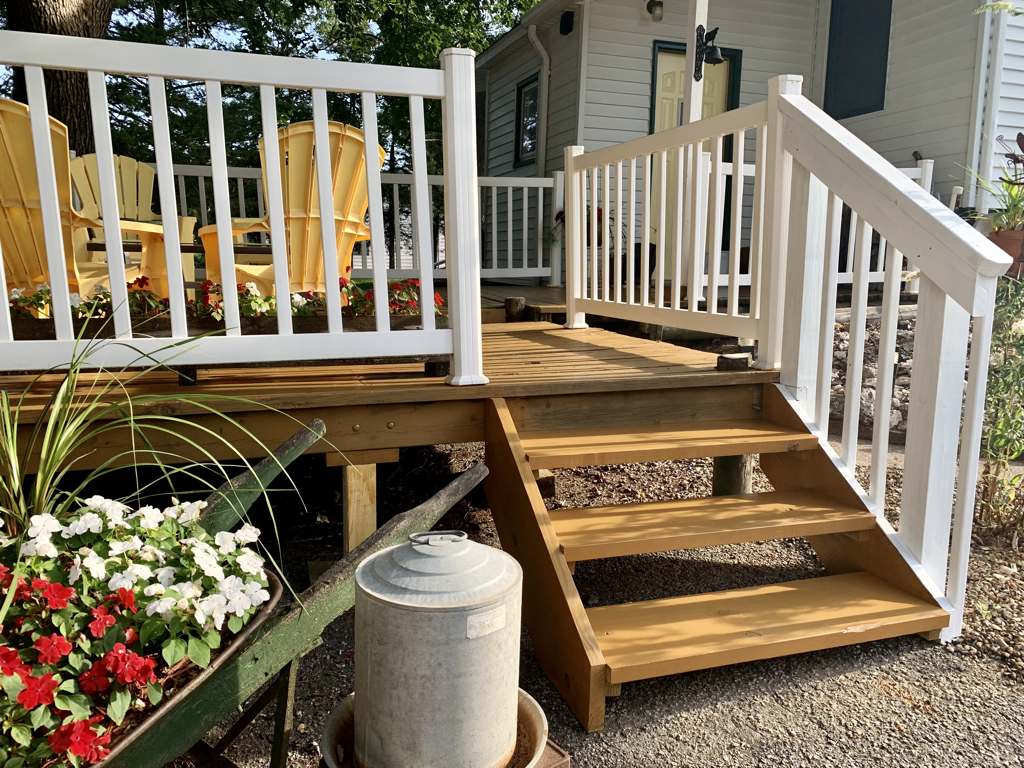 Staining our wooden decks is a task I've actually come to enjoy. I remember the first year I did it - it was so hot, I had never done it before, and I did not have the right tools. Fast forward to today and I am here to confidently tell you what you need (and what I recommend) to make your deck staining project a little easier than my past experiences have been. Very Important Notes: 1) I am not an expert; 2) Do in Spring or Fall if possible; 3) Make sure you wash the area and no rain is in the forecast for 48 hours before staining (so your deck gets fully dried out) and after staining (so your stain cures properly) to be safe. STEP 1: SCRUB, SCRUB, SCRUB - WASH THE AREA This can be done with a power washer or good old-fashioned elbow grease. We do not have a power washer, so I went with the latter. Supplies Needed for Elbow Grease Option:Process: I used a garden hose to wet the area and then sprayed on the deck wash. Let that sit a bit to cut through the grime. You should start to see the dirt/mold/mildew begin to run off/disappear. Grab the brush to go over the entire area, especially stubborn spots, before rinsing off the wash. Repeat as needed. I also took this opportunity to wash the house siding - definitely worth a few extra minutes. Allow deck to dry.  STEP 2: STAIN, STAIN, STAIN - KNOCK THIS SH*T OUT There are many ways you can stain something. I am sharing how I did it in a way that was best, easiest, and least messy for me. Supplies Needed for Staining:
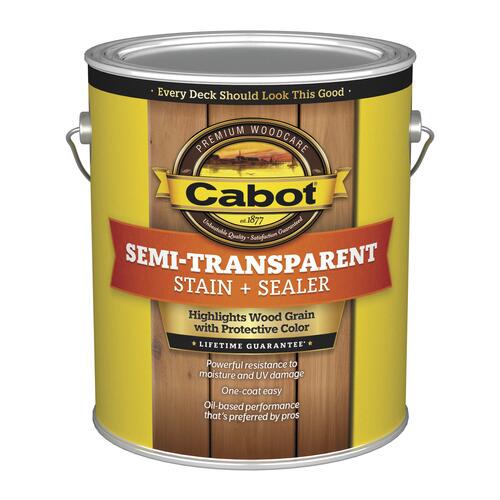
Use the pad painter to apply stain, making long, smooth motions, with the grain, up and down each board (that unintentionally sounds sexual - but I guarantee you it is not a sexy process). If you don't take anything else away from this post - remember to consider using Cabot deck stain. I swear by it. The semi-transparent kind provides enough color to hide ugly spots and brighten everything up, but is transparent enough that you can see the wood character/texture because it doesn't look like straight up thick paint. The color I used in project pictures on this post is New Cedar. After two coats, it gives the deck a nice semi-gloss look and water beads immediately - so satisfying. After I am done with the large area application, I use a small paintbrush to do detail work around our white railings and deck edges. You can evaluate and tape off areas beforehand if you'd like, but I'm over taping while painting. The small paintbrush is precise enough for me! You can also do this detail work before OR after. Our deck just happens to be low enough that I can do the outside edges from most all angles. STEP 3: WAIT, WAIT, WAIT - WATCH STAIN DRY I let the first coat dry for 24 hours and then applied a second. When the second coat was less tacky to the touch, I waited another day more and then put all of our seating/décor back in place. It's so tempting to put everything back in place immediately after you're done - but have patience, my dear. Supplies Needed for Drying:
IN SUMMARY | Rain = Bad, Wash, Dry, Stain, Dry, Stain, Dry, Enjoy
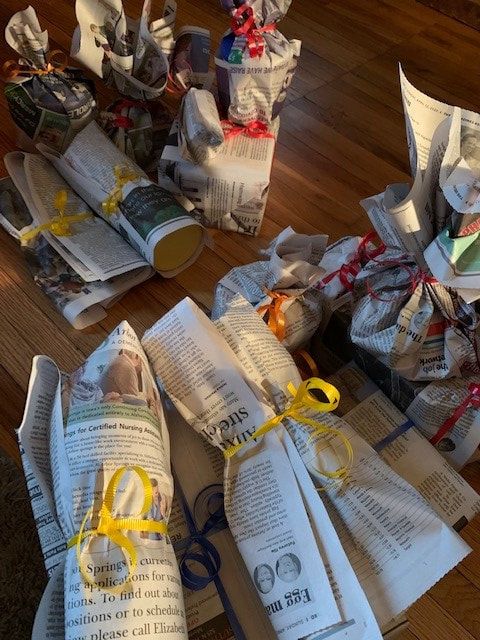
In celebration of our first hen laying an egg, I thought I’d share what we did to revive the chicken coop on our acreage. 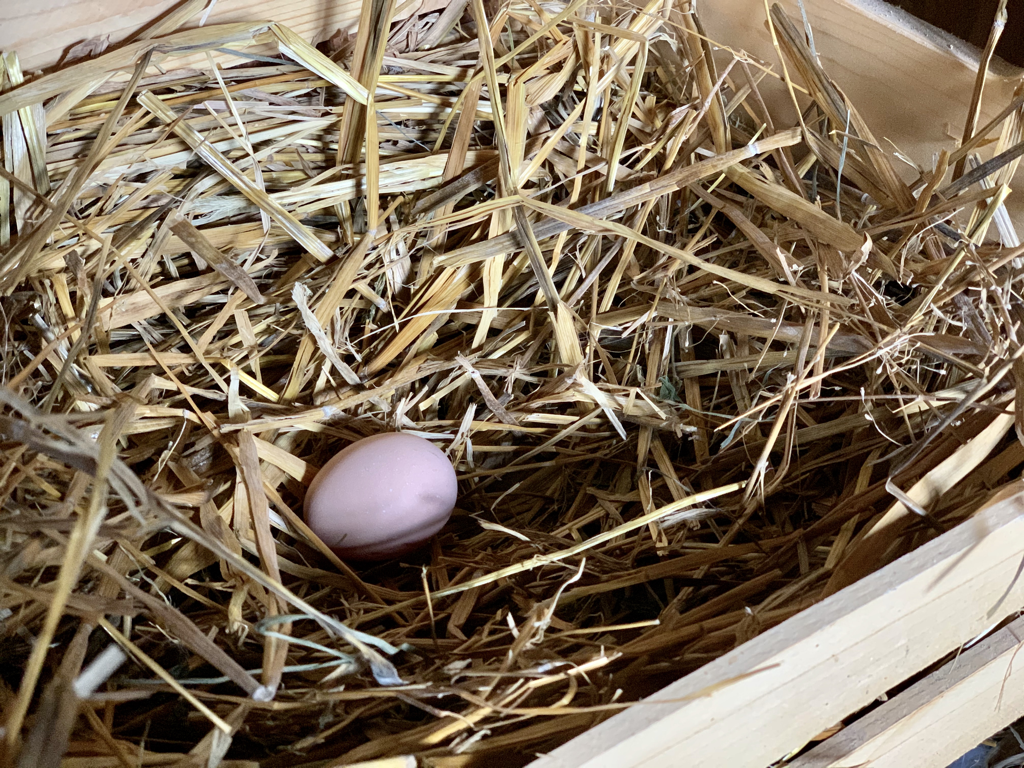 We are fortunate to have several buildings on our property that once served as shelter for farm animals. Though for many years, they have provided protection for a variety of wild animals passing through. Mice. Woodchucks. Possums. Cats. Toads. Who knows what else. We’ve had our fair share of battles ridding our place of these animals, mice and woodchucks, especially. The more we address needed repairs on the buildings, the more we’re able to protect them and our stuff from critters. What started as a simple ramp repair on the chicken coop turned into us fully transitioning it from storage to a comfy home for laying hens. The ramp was completely rotted out. We were one more trip into the building from it collapsing under our feet. Wood rot is one of my least favorite things and has haunted me at our acreage. Our buildings are old and impressively sturdy – but none are free from wood rot. As annoying as it is, I have learned a lot about what it is and how to repair it. I’m still working on the “how to prevent it” part… I tore away all the rotted wood to see what I was working with. I added a fresh 2x4 to rest the new boards on. I also found some bricks to put at the bottom of the ramp to keep the wood up off the ground, preventing it from getting and staying wet – leading to rot. Our home came as is with everything included, so most times I have a lot of supplies I need at my fingertips. In the case of the ramp, I had a leftover 2x4, there were three flawless, thick pieces of barn wood in the coop, and I used some bricks that were given to me from a torn down outdoor fireplace.   I cut the boards to size with my circular saw, screwed the 2x4 piece to the building and then the barn wood planks to the top of the 2x4. I used long screws throughout, two screws in each board securing them to the 2x4. To keep the slabs of wood together, I stapled three thin pieces of wood – looked like old moldings of some sort – horizontally across the three boards. I hoped this would prevent the wood from drifting away from each other and help the hens get up the ramp when it was slick. I left enough room in between the barn wood for a little air to circulate through, again, hoping to prevent rot.   Once the ramp was finished, there wasn’t much more to do to the building because it is in very good shape. I raked any tree debris off the roof, caulked and painted the windows, swept the floor, knocked down some spider webs, and caulked any holes (it has a metal roof and siding). We also ended up adding a turbine vent to the roof so there was a little bit more air circulation. The next item on the “to do” list was to outfit the building with all of the things hens need to live a content coop life. Nesting boxes, roosts, a feeder, and waterer. I received hand me down waterers from a family member, so just had to pick up a feeder. I chose the largest one because I’m lazy and want to refill it as little as possible! I chose to suspend both the waterer and feeder a few inches from the ground by hanging them from the ceiling using chains and S hooks I had. In Iowa, it gets pretty cold starting in the Fall. Beginning in October, we put up a heat lamp on a timer for the ladies and hooked up a heated drinker base so their water wouldn’t freeze. This is the base we purchased and really like it.  For the roosts, I placed some random items around to get me started – a ladder, some wooden pallet type things, a step stool, a blanket rack, a tiered plant holder. None of which I think the hens like, so I’m figuring out something new at the moment. One of the roosts they do like is one I put by the window. I used two curtain rod hooks and a broomstick. I placed it just under the window and I find one or more of them on it each morning.  The nesting boxes were something I researched quite a bit, but ended up doing my own thing (hoping it would work). For the most part, I used what I had that was just collecting dust in the coop. I affixed a large piece of plywood to the wall. To that, I connected four wooden crates with the top two wood strips removed from the front of each of them. Those came from Menards. I read that it is bad if hens start roosting in/on the nesting boxes, so I ended up using simple shelf brackets and boards to create 45-degree angle hoods over the boxes. The last thing I added was a little ramp for them to use. Not sure that they do, but it was something I had that fit perfectly, creating the cutest little corner in the coop! I have had no issues with them roosting in the boxes. I put hay and a ping pong ball in each one and they have been laying in the boxes. The ball is supposed to resemble an egg and help guide them to laying where you want them to.  As a side note, I chose to put hay down to make cleaning out the coop easier. I also wanted it for my garden to help the soil nutrient balance. I read chickens like to scratch at the ground, so sometimes I’ll hide mealworms around in the hay. I think of it as a fun little game for them. The last thing we did was put a fence up around the coop. I bought 7 foot heavy duty deer fencing and 8 foot t-posts to use. It worked for a bit, until a critter bit a hole through it. We ended up reinforcing just the bottom part of the fence with 2-3 foot tall chicken wire. That did the trick. Landscaping staples and zip ties are two of my favorite garden and décor supplies. We secured the fencing to the ground with the staples and to the stakes with zip ties. Super simple and easy to take down if we need to. The door connected to the fence so we can get in is crafted out of two tall fence posts that were chilling in the woods on our property and our old storm door. The posts were put into place using cement and we attached the door to the posts using its original hinges and long screws. I knocked the glass out of the door and covered the openings with deer fencing. We attached a couple of slide bolt locks to keep the door closed.  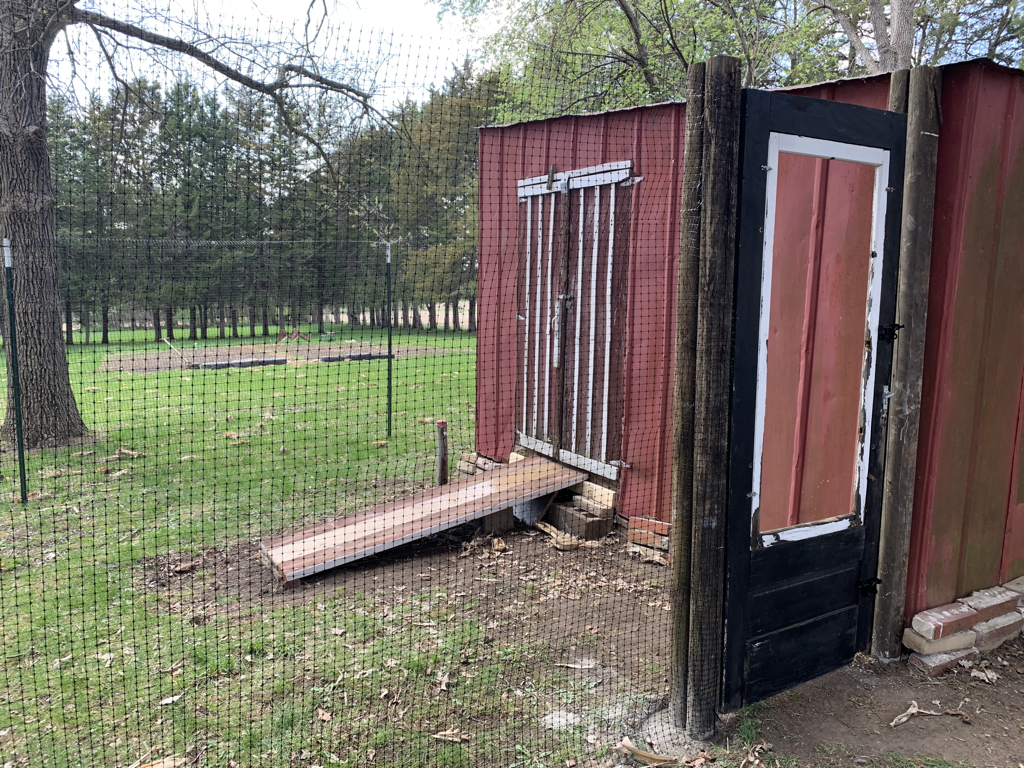  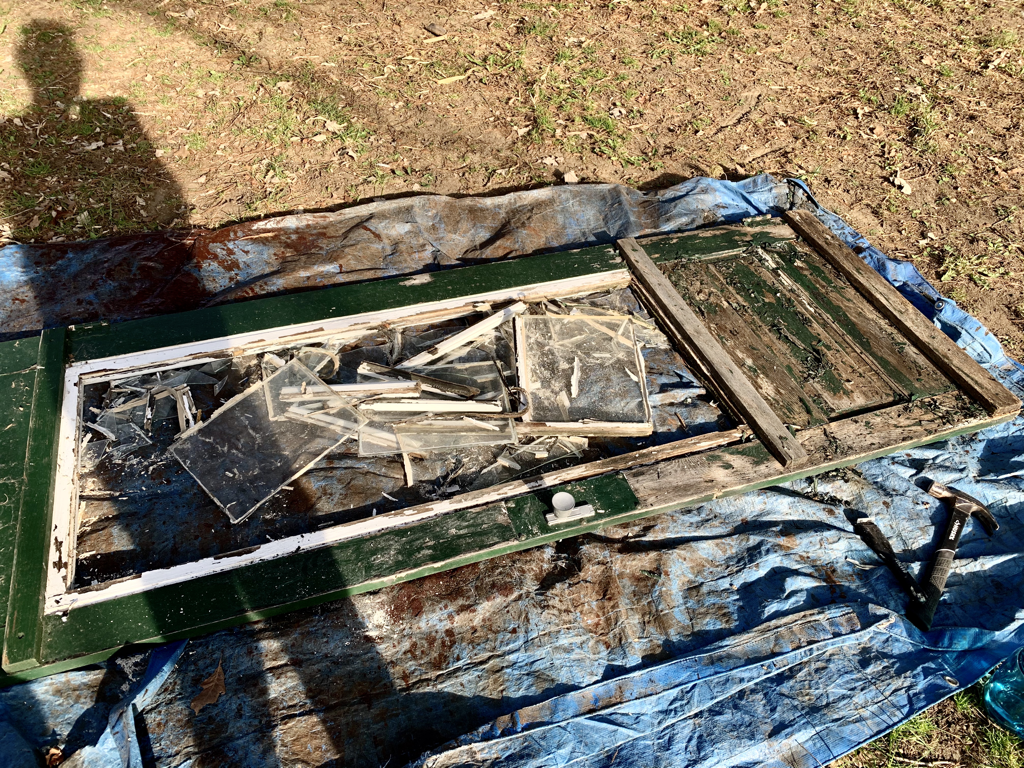 The hens are little rock stars. As of this post, all three are laying like crazy. We can get a dozen eggs over the course of a couple days. They seem happy in their space and we’ve enjoyed watching them. We’re not friendly with each other necessarily, but instead like to observe each other from afar! They’re great eaters. Produce doesn’t go to waste anymore. Anything close to spoiling is tossed into their pen and it disappears quickly – especially pumpkins! It’s turning out to be a very nice partnership overall, allowing us to live a little more sustainably and toss out less waste. It’s also nice to share eggs with our family, friends, and neighbors! 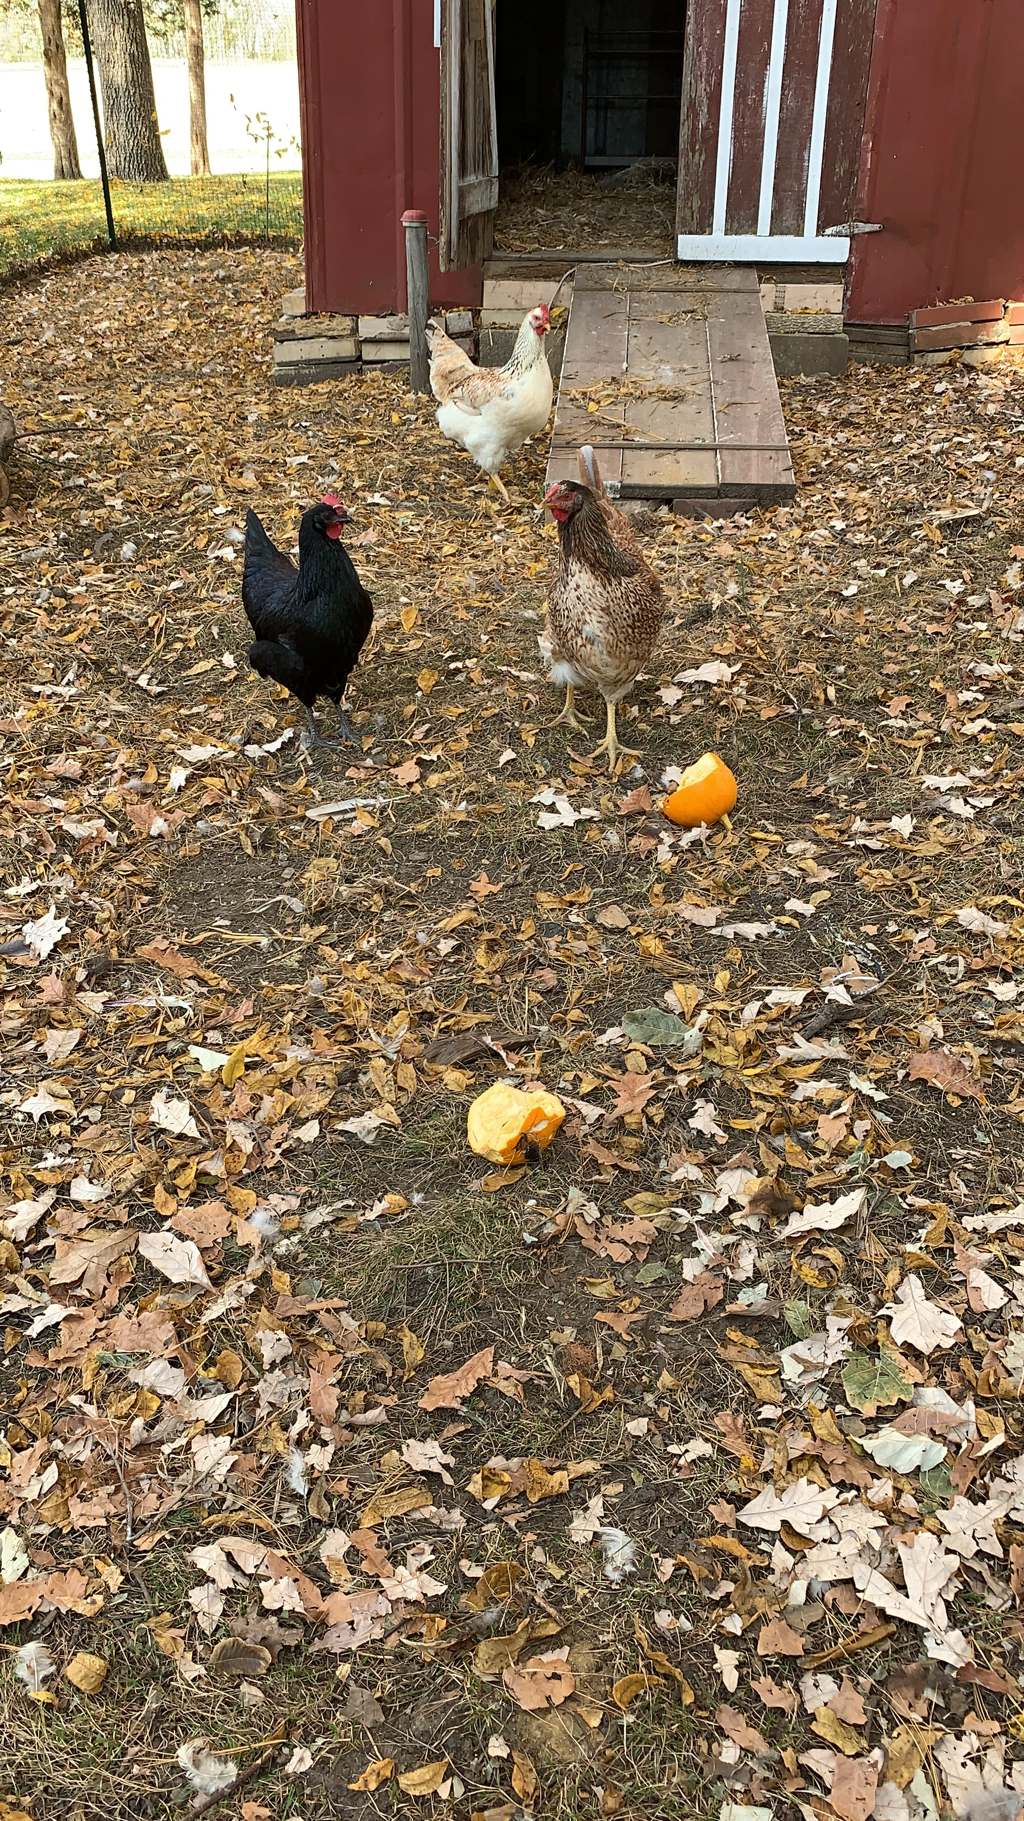 The COVID “quarantine” period has been a dream for me. I have been able to focus time and energy on projects that truly bring me joy. Giving our family cabin a facelift was one of those projects. For years I have wanted to tackle updating the mobile home style cabin my grandma has on the Mississippi River in Lansing. She had made major improvements to the exterior (siding/roof), plumbing, electric, completely renovated the bathroom, and had new ceilings and light fixtures installed. Huge things checked off the list, all worth it. The thing was, the décor throughout the rest of the cabin wasn’t matching with the updates that were made – distracting from all of the great work that had been done. Because I didn’t have to work every weekend this summer due to the pandemic, I had time to knock out the work I did over the course of a few consecutive visits up there. I knew that when I did it, I wanted to do it all of the way, all at one time. I didn’t want anything to be partially done – because when I do that – I have a tendency to leave it partially done…I’m also a control freak so I wanted to make sure the way everything was finished was the way I envisioned it! I ended up doing most of the work on my own, working 12+ hour days. My grandma jumped in to help me with removing wallpaper and final touches. Working on my own knowing I had full days with no interruptions to check things off my list made me very happy! I was focused and fueled by soda, sugar, and Mexican food. Heaven. All work was done on a tight budget. I used as many items I already had or from the cabin as possible, like paint and décor. I started with the guest bedroom. It had been wallpapered a VERY long time ago and was fully taken up by a set of huge, solid bunk beds. The mood was dark and dingy. The bunk beds were used quite a bit when we were younger, but as everyone got older, the person who drew the short straw got to sleep in that room. The beds needed to go. I was able to sell them on Let Go to a super sweet family who really needed the beds for their growing family. We said goodbye to them and got to work. Luckily, the wallpaper was done over wood paneling. In this room, removing it was pretty easy for the most part. I removed all paper and glue, filled holes, and caulked some big gaps in the paneling where water had gotten to it (making sure the cause was addressed beforehand – it was). To brighten things up, I taped everything off and painted it a very light grey and navy blue. Here are some before and after photos: 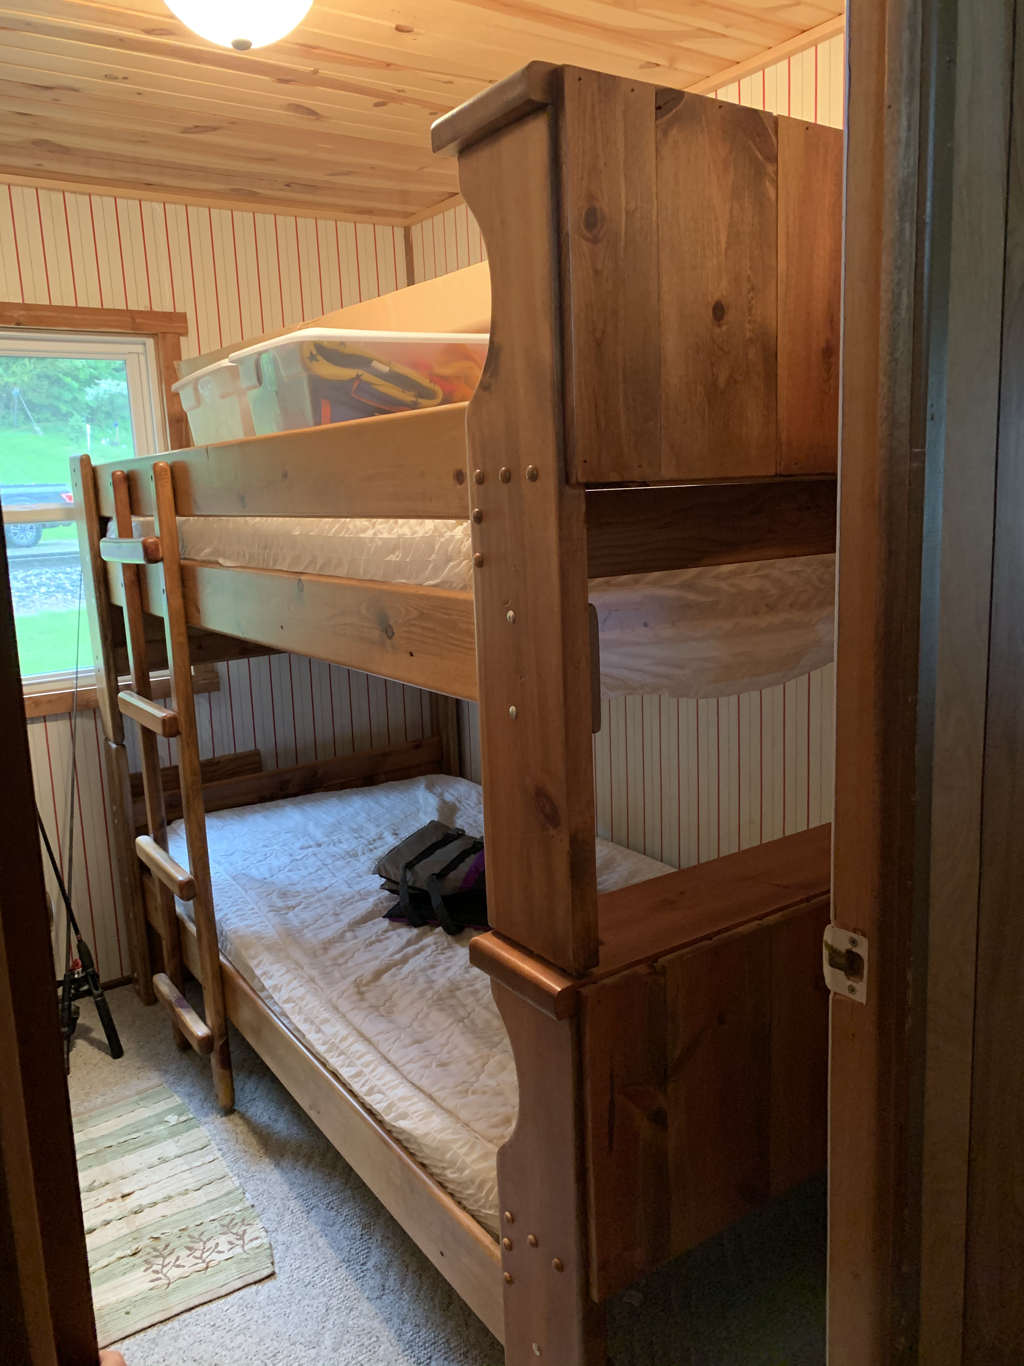  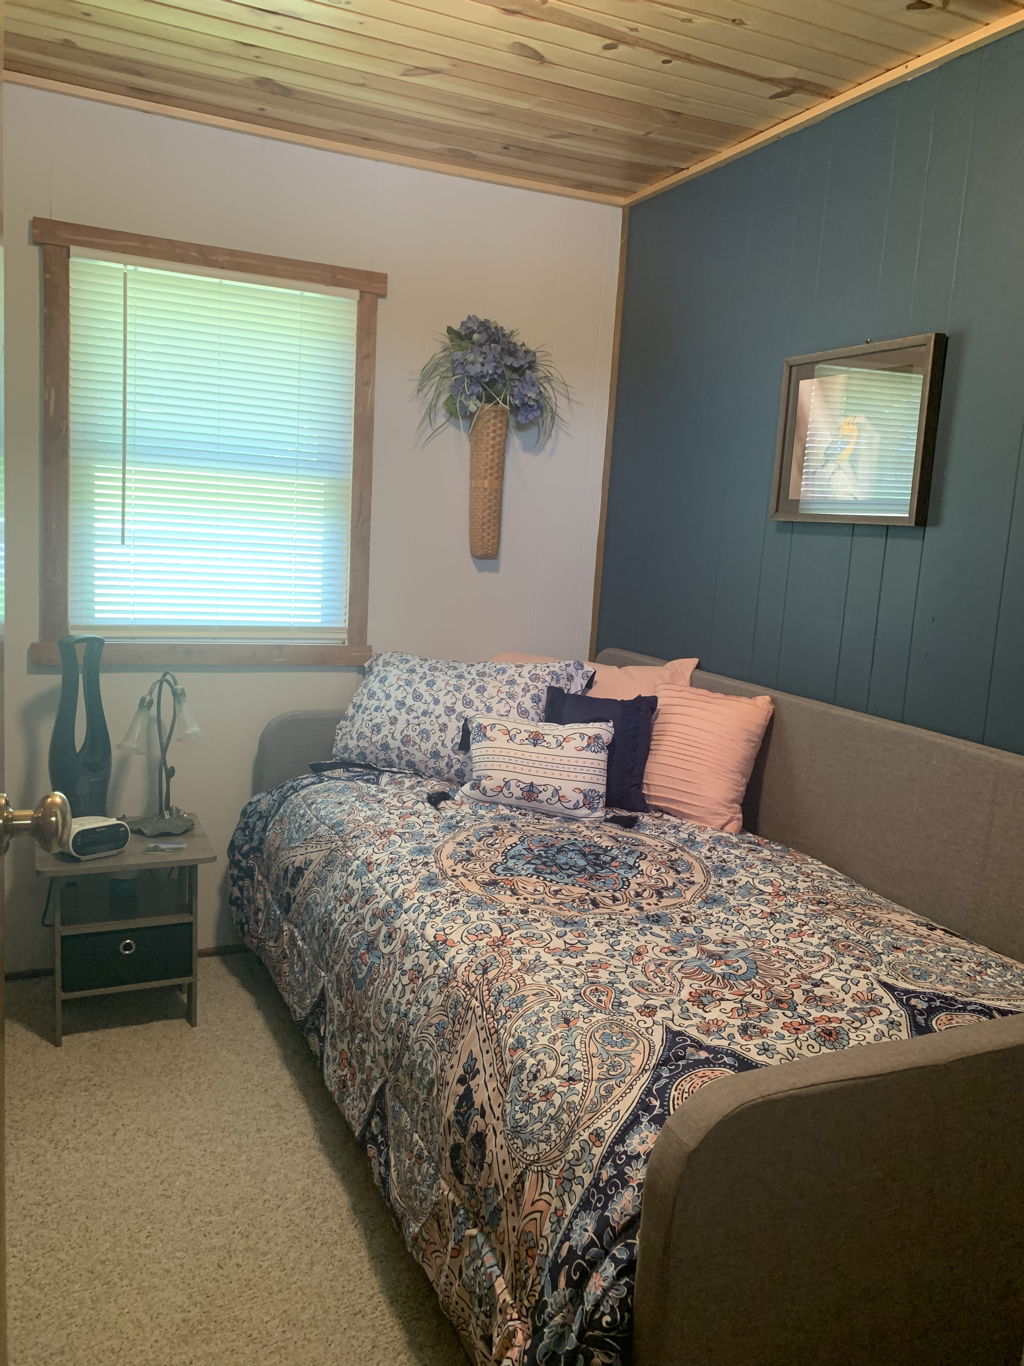 Much more welcoming now. Everyone, myself included, is in love with how it turned out. On a side note – all of the things I did really freshened things up as well because as I was making cosmetic changes, I was deep cleaning along the way. Next, I moved on to the master bedroom. This room was really just a mish mosh of random things. One of my goals was to give each room a “theme.” Grouping like items together so instead of looking messy/cluttered, the cabin looked clean/curated. It made a HUGE difference. This room became the “fishing room.” I took down wallpaper here as well, patched things up, and painted with a pretty light green. You’ll see in the photos below that we have fishing poles hung on the wall I painted. There was a rack on one side, not the other, so once the paint dried, I added a second rack so I could hang all of the fishing poles. I was able to use scrap wood I found in the cabin and bought some cup hooks to screw in. I then attached a fishing net to the wall behind the bed and assembled a nightstand to add. Here are some before and afters of this room: 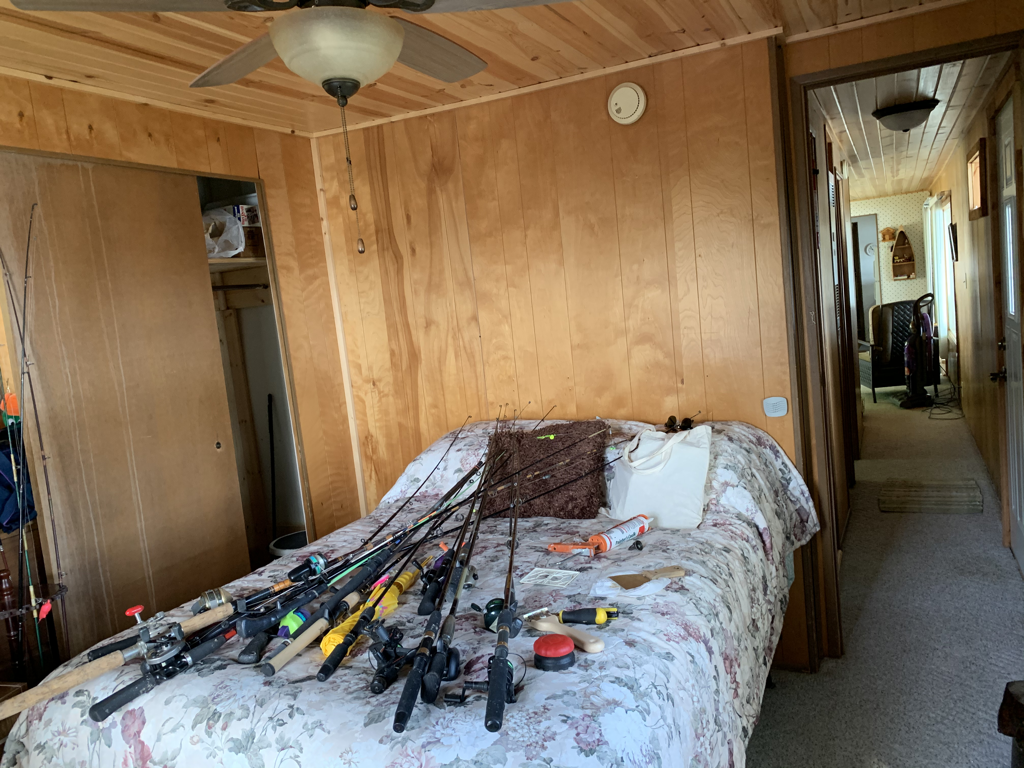 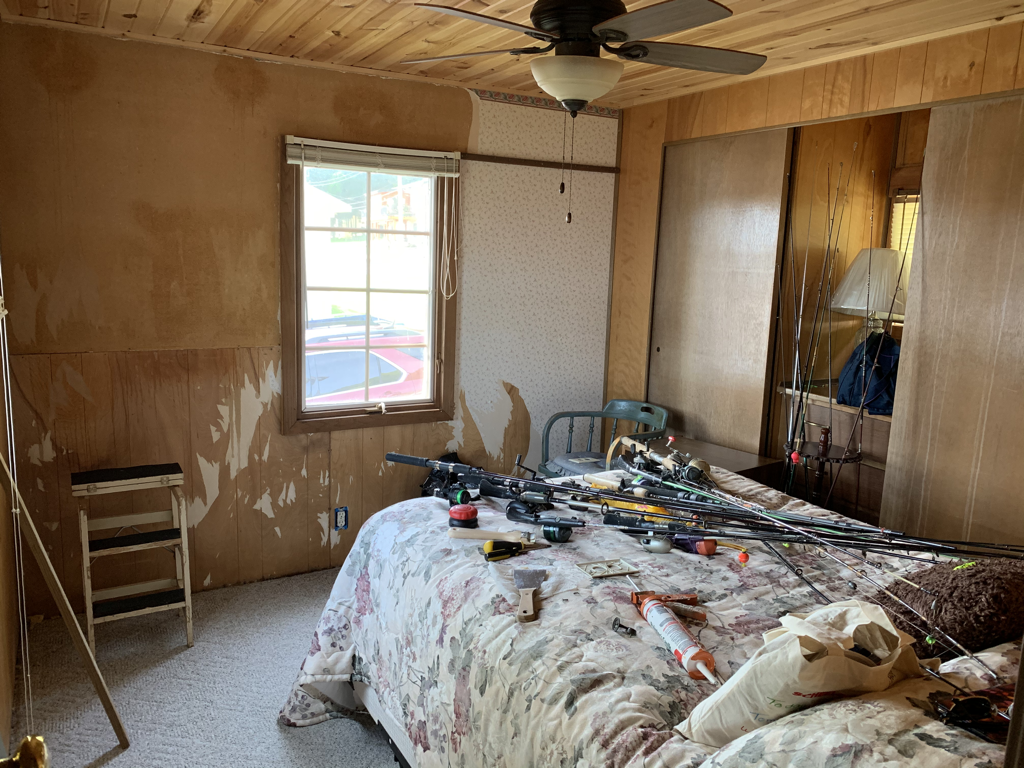 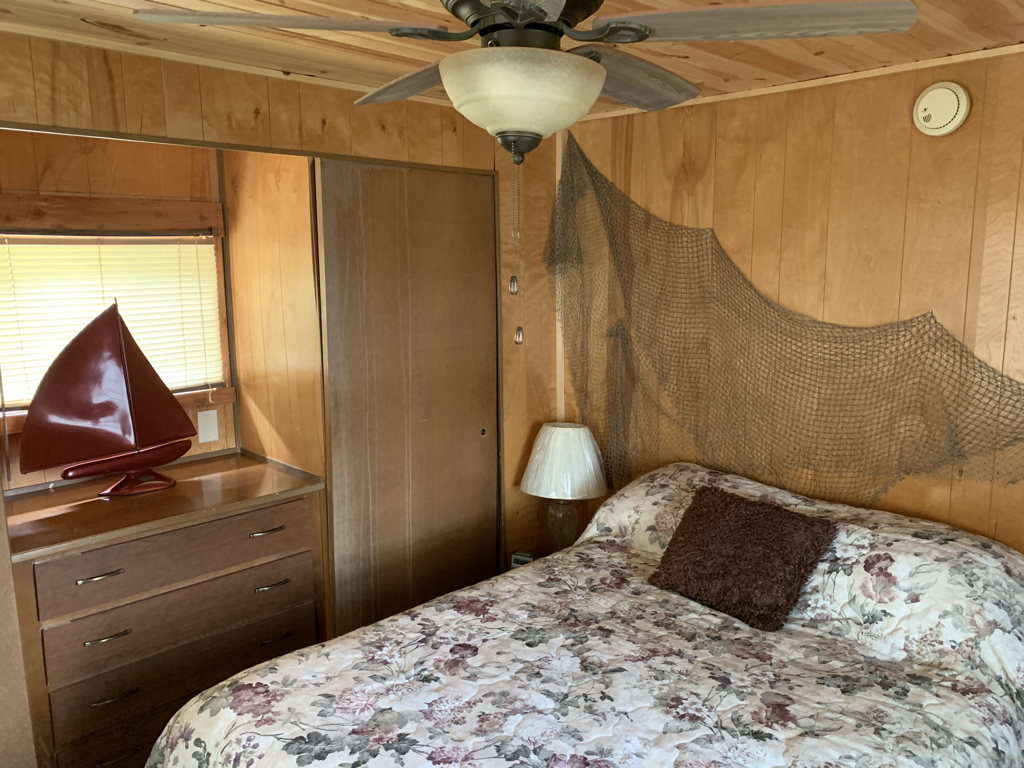 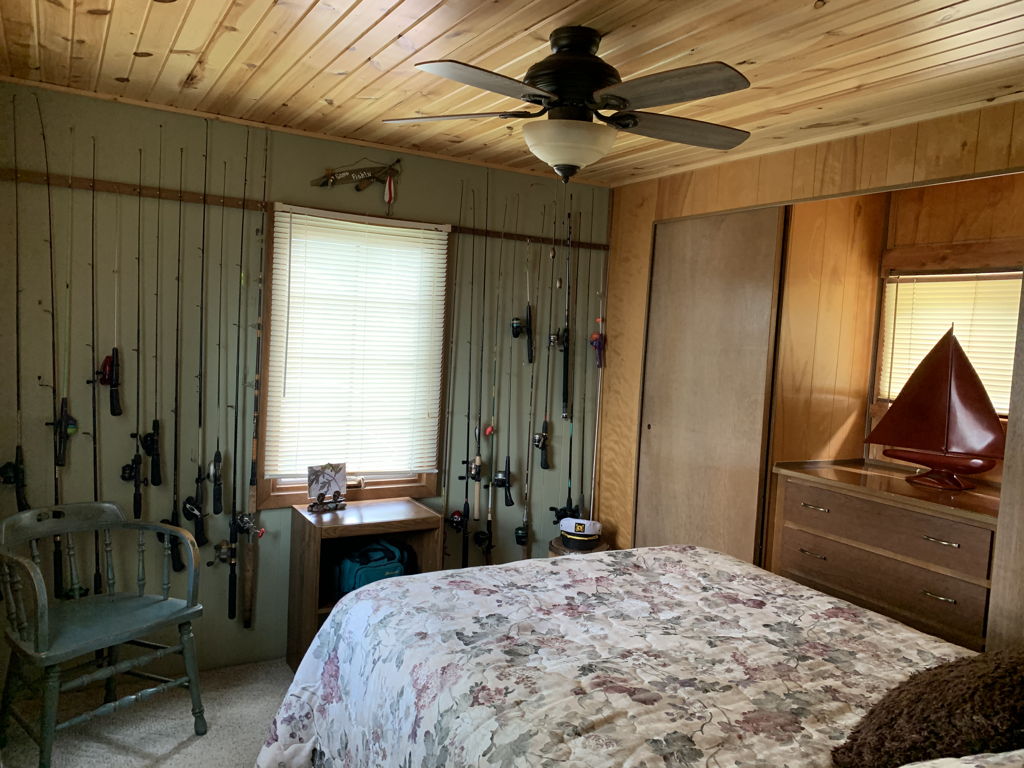 Wow – right?! The vibe is now much more welcoming and it definitely feels more cozy. The last place I did big changes in was the kitchen. Unfortunately…I’m terrible with before photos and forgot to take some of the kitchen! Please use your imagination to picture an outdated, grimy space with peeling wallpaper that was powder blue and white with a teapot pattern everywhere you looked. Some of the walls were partially painted white over the wallpaper – but it never got finished. This is the room I’m most proud of because it was the first time I used removable wallpaper. It was definitely the biggest challenge. I was extremely nervous to do it and of course, my grandma wanted to help that day, so I had an audience! But once I had the first piece up, I rejoiced, knew what do to, and was able to get it all done in a day. I applied a weathered wood wallpaper to the backsplash area of the counters and behind the sink. I painted the rest of the walls the same light grey as the extra bedroom. Cleaning was key in this area. I magic erasered every surface several times! It made an amazing difference. I also rearranged how some of the items were on the counters and bought grey kitchen rugs to bring the grey from the wallpaper into the room a little more. Here is an after photo of the kitchen: 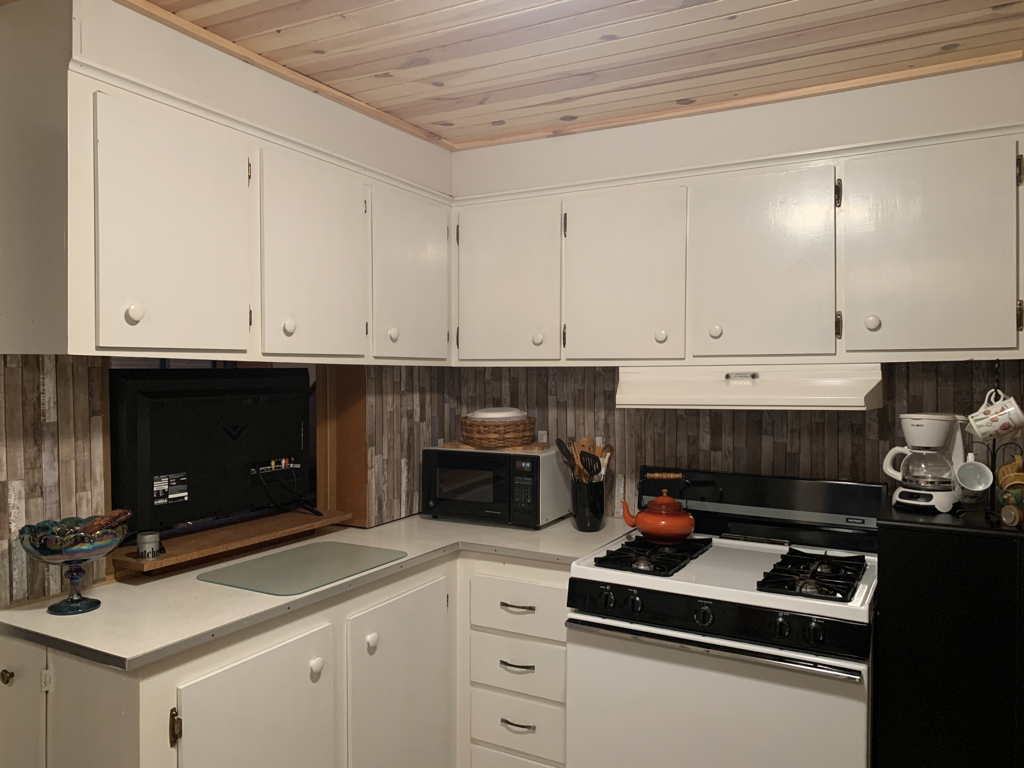 In case you are wondering, I found the wallpaper at Menards. I bought 3 rolls but only needed part of one. It cost around $30.00 – well worth it. I did a little facelift to the living room. Removed wallpaper, patched holes, rearranged the wall décor, and bought a new cover and throw pillows for the couch. Little things, but the room is now cohesive. 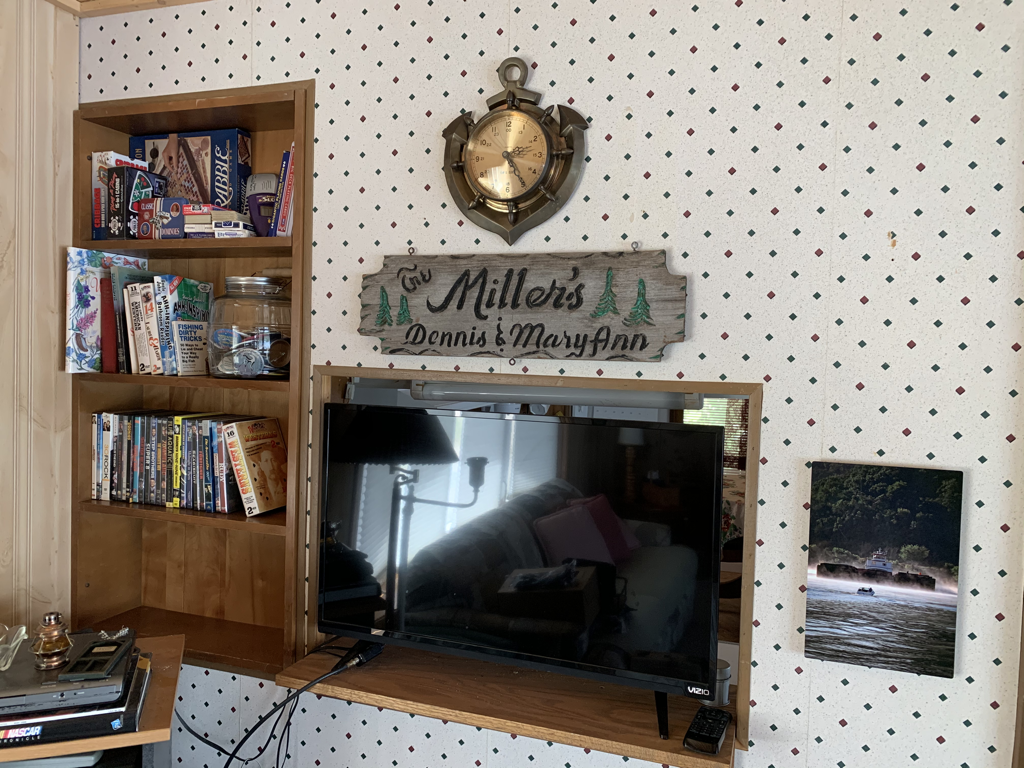 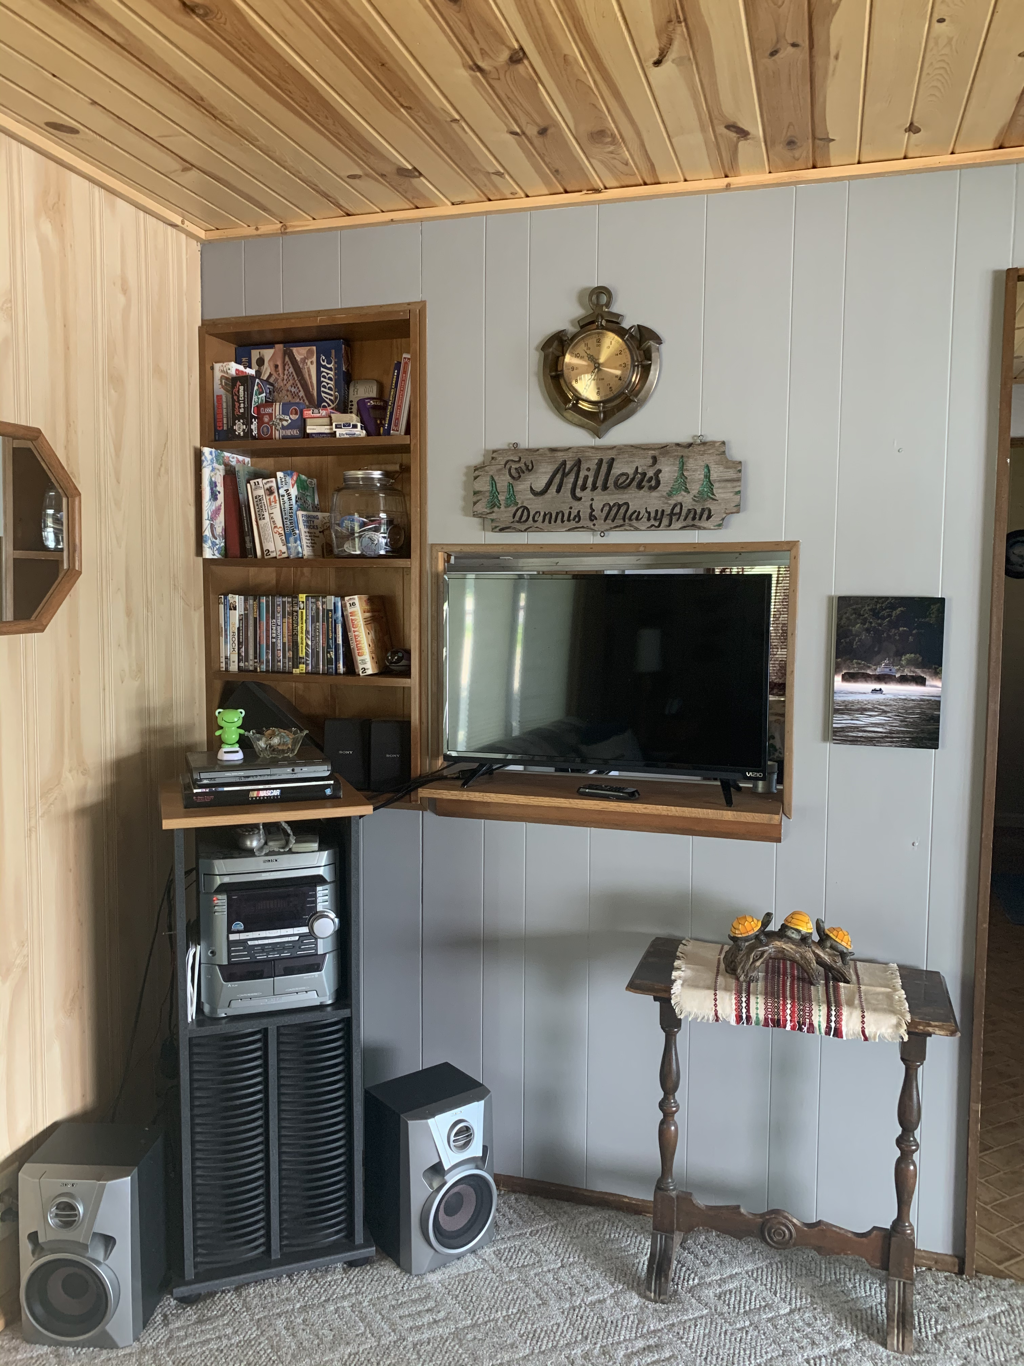  And lastly, I organized the crap out of the dining room. There is a buffet in there that has always been piled with miscellaneous items from years ago. My goal was to at least clear off the top and make room in the cabinets. Mission accomplished! I added a bright tablecloth to the dining table to inject some energy into this area and made the theme “bald eagles and wolves" using décor from throughout the cabin. I also displayed all of the buttons we’ve collected from past “Fish Days” (Lansing's town festival) we’ve been around for. We take a lot of pride in those.   For a quick, cheap update, I'm pleased with how everything turned out! I ultimately did it for my grandma. We are very fortunate that she allows us to enjoy the cabin, so it felt good to show her my gratitude through this work. She was extremely pleased with the results and that makes my heart feel so full. There are a lot of memories in that cabin, many tied to my grandpa. Seeing the cabin change from what it was when he was alive was hard for her, I know, but breathing new life into it has given her a renewed interest in spending time there. I'm so glad I could give her that gift.  When Coronavirus really started to get bad in the United States, mid-March or so and after, I joined everyone else in holing up at home and keeping an eye on the latest. I had a strange reaction to what I call the “quarantine times” we were in, and are still in to some extent. I got busy. I spent as much of my time doing things as my body would allow. House projects. Cabin projects. Personal projects. Work projects. You name it. If there was something to be done, it was on my list and I was working towards crossing it off. At one point, all I wanted to work on was cards and care packages. I spent two to three weeks planning and gathering (because it was a slow process with limited to no access to stores). The time I spent preparing, delivering, and sending out these items was the most optimistic I was during “quarantine time.” I look back on that period fondly. It seems like it was years ago at this point. My goals were to help people feel less isolated and make them smile. Fill their cup and mine at the same time. Because boy did we need some cup filling. Connect with Cards The first round of items I sent out were cards with a quick note and a cloth mask or two. These went to family and friends we hadn’t had contact with in a while, or were more isolated, like grandparents. It may not seem like much, but we received genuine expressions of thanks from everyone we reached out to. It meant a lot to them that someone was thinking about them. With COVID-19 still being a very real threat across the nation, there is still time to reach out with cards. I’m a huge card person anyway, but now is an especially good time to let people know that they matter to you.  Get Creative with Care Packages I’ve never really prepared or sent a care package before and now it’s all I want to do for others! We chose to do care packages for our friends who have children. The goal was to provide one to two things that the kids could do to give their parents a little bit of a break after non-stop togetherness. And of course, include some items for the parents to enjoy as well. I started by decorating the inside flaps of each box with a sunny message: I used yellow tissue paper to wrap all of the gifts so when they opened the box they couldn’t help but smile! Here are some examples of what I included for the kids:
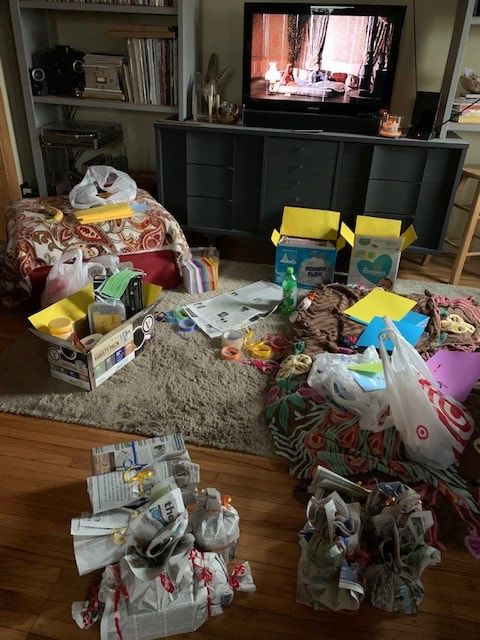 We were able to deliver some and needed to mail some. Again, this was a very well received gesture. It was so fun to get photos of the kids working on the activities! I will now forever be looking for an excuse to send a care package out because it just feels so good to do. It takes the card a step further, allowing you to help take care of others in a bigger way. Pirate Playtime Lastly, I wanted to do something special for our nieces and nephews. It was definitely really tough not seeing them. Again, I wanted to do something that helped keep them busy. In came the idea for a scavenger hunt! Here is what I did for each family: 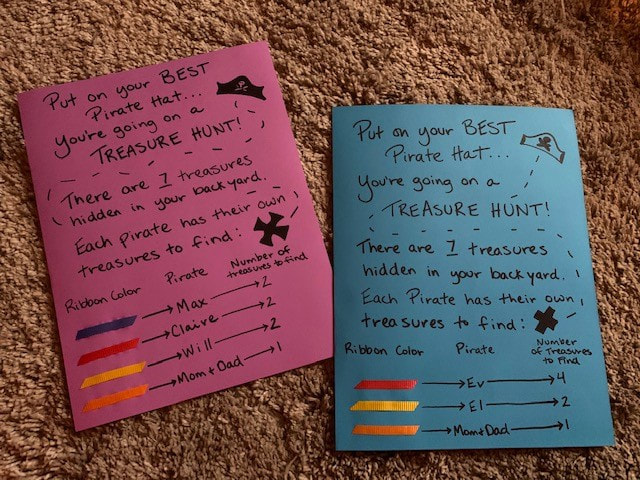 For the “treasures,” finding items that would give the kids something to do was what I was aiming for. Here are a few items I included:
 We ended up setting the scavenger hunts up in secret and our brother/sister initiated it with the kids. So Joel and I had a lot of fun hiding things in their yards, taping up the instructions, and getting out of there quick! It was a bit of an adrenaline rush. Don’t laugh – not much had been or is going on – so we take excitement where we can get it!
The kids loved it, and again, it was super fun to hear about what they were doing and/or receive pictures of them happy. I hope that during this time you have found ways to connect with others while physically staying apart for their safety and yours. It is definitely a challenging time – a challenging year – but I think it has shown all of us how important the relationships we have are (or are not) and reminded us to nurture them in any way we are able in order to stay connected. Garden season is in full swing on our acreage and so far Mother Nature has been good to us. Last year was a pretty devastating year for me as a gardener as I battled a number of barriers – the biggest being cucumber beetles destroying literally my entire plot. So in my opinion, I was due a fairly easy year this year. It’s been dry, but sunny and humid, and the garden has seemed to respond pretty well. Here’s a few photos of what I’m working with this year. These were taken just the other day – late July. 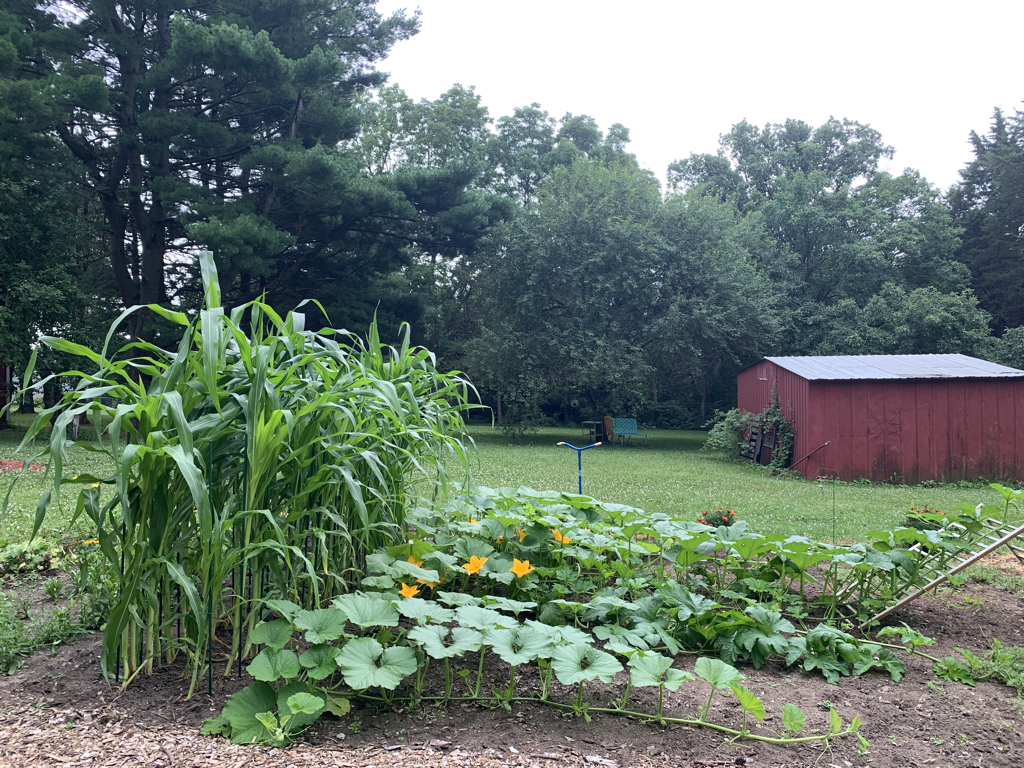 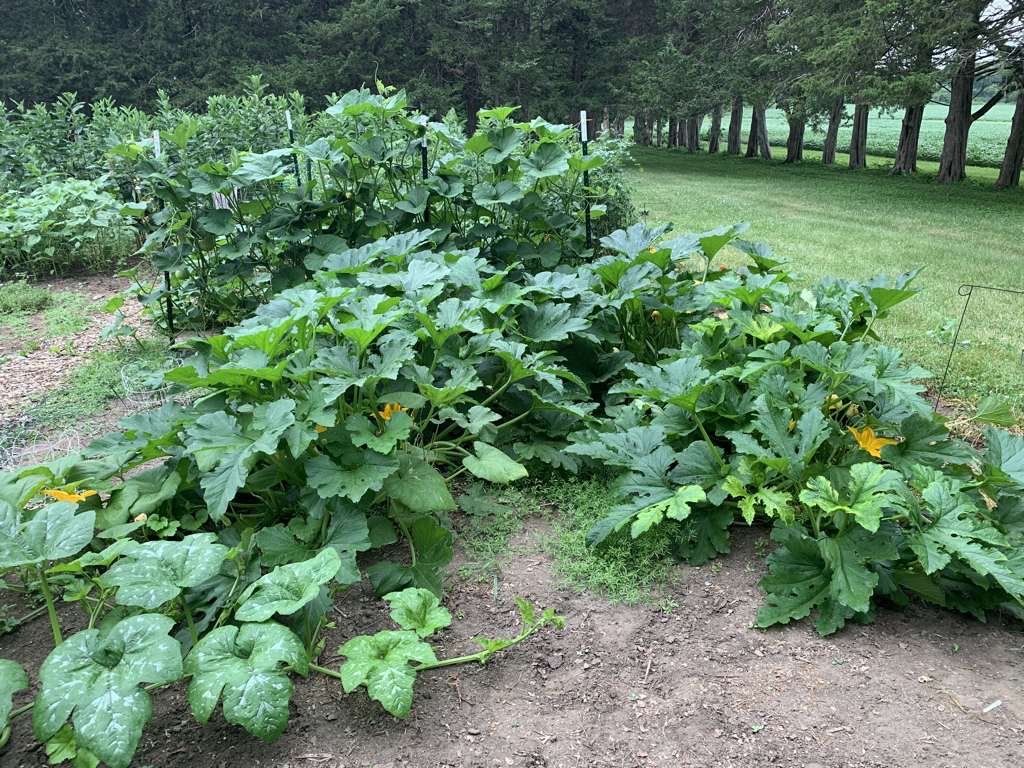  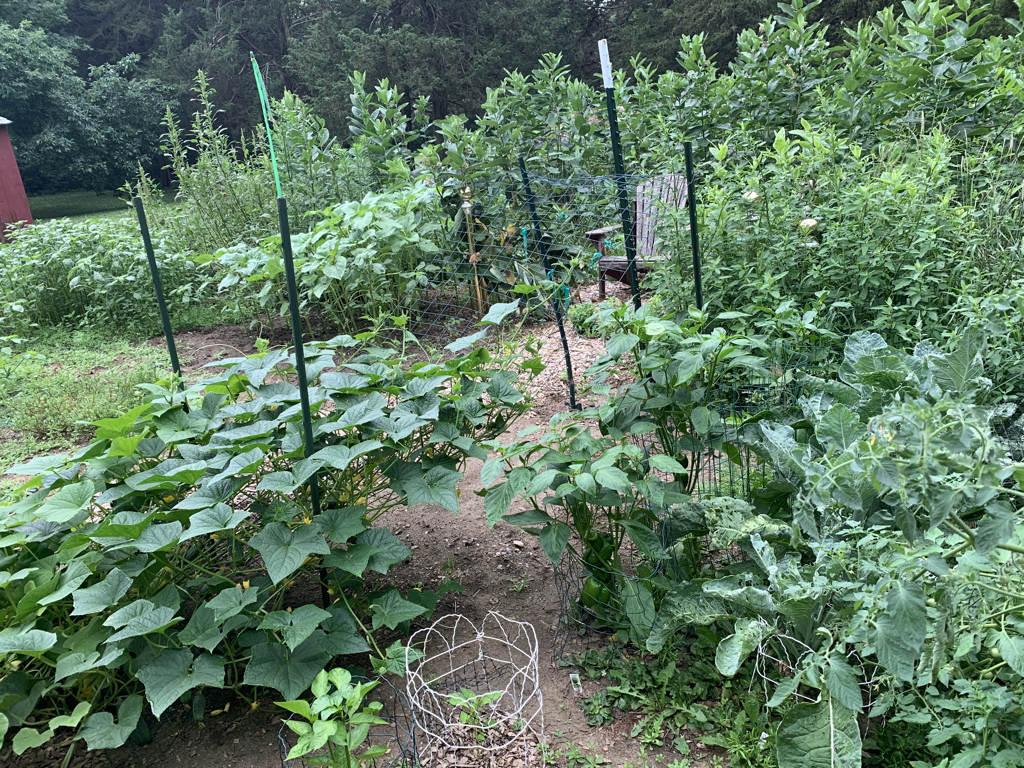 Because I’ve had a good harvest, I’ve been able to continue offering free vegetables at the end of our driveway for passersby. We live on a busy road and our wheelbarrow of goodies is normally gone in a few short hours. Earlier this summer, we received the nicest note from an anonymous person thanking us for the veggies we provide! It completely caught us off guard, but felt very nice to know people appreciate it.  The letter really fired me up and made me anxious to get fresh produce out for our neighbors ASAP. This also meant I needed to start working on the new “Free Fresh Produce” A-frame sign I had been thinking about making over the winter. The old sign I had was made quickly out of cardboard and pallet wood. It still stands, even after two summers, but I thought it was time for something more durable and permanent. I tried my best to be resourceful, using as many supplies that we already had as possible. If you’ve read my blog for a while, you may remember when I made a cucumber trellis out of the sides of a baby crib. I also made a light fixture out of the mattress spring from the crib. My goal was to utilize the whole thing, so guess what I made the A-frame sign from? The crib ends! For this project I used:
The lettering was hand drawn with pencil first, and then I painted in with white exterior paint. Once the paint was fully dry, I put two layers of clear coat spray paint over the entire sign to seal it from the elements. Lastly, we attached the small chain to each side of the A-frame near the bottom so the sign didn’t splay out and fall to the ground. Here is the finished product! We were quite proud of it in the end and it really pops, getting peoples’ attention. 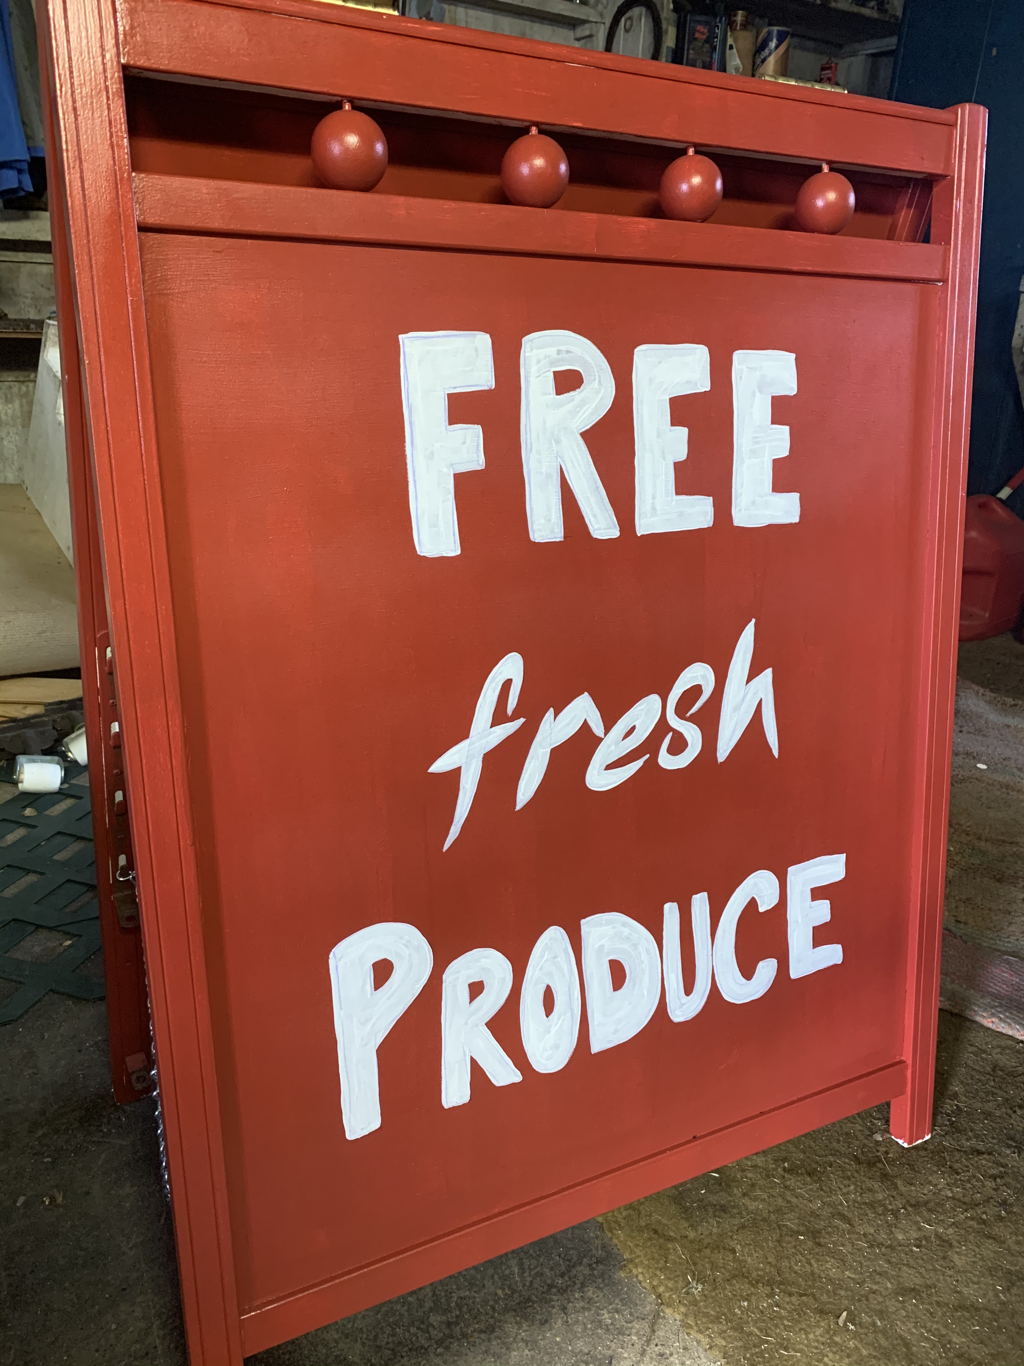  What have been some of your favorite DIY projects this summer?
 We spent the Christmas holiday in New York City. It was the best trip of our lives (so far)! If you’d like to read about our experience and see photos, that post will be linked here when I have it ready. For some reason, writing about the logistics of travel flowed out of me before stories from the trip did! We learned A LOT of traveling hacks along the way and I wanted to share them here in case they could be useful to anyone planning a trip to New York City (especially if you’re on a budget). I’m just going to dive right in covering the resources we used from the beginning of our trip to the end.
  So here’s the thing. Since I was a little girl, I’ve always wanted to be FOX! Where did this obsession start? I know the exact moment. It’s when I fell in love with Disney’s fox version of Robin Hood and wished so hard I was Maid Marian. It literally made my heart ache knowing that wasn’t possible. He was my first love! Over the years, I’ve wanted to dress up as a fox multiple times, but just never did. It’s the last minute planner in me – I didn’t have enough time to pull the details together. But this year was different. Joel and I visited a Halloween store just for fun, and I ended up finding some fox accessories that I could easily combine with items I already had to make a cute costume. I left without them because I couldn’t justify the purchase. When I found out I had some Halloween events to dress up for, I went back and got them. Luckily, I had a couple of opportunities to wear my costume this year! Once for a Trunk or Treat event Joel and I went to on behalf of the clinic I work for, and a second time at work the next day. They take Halloween very seriously and it’s actually really fun to get dressed up in a professional setting. Lightens everything up. I had a leadership meeting that day and it was fun to see superheroes, animals, and other characters sitting around the room. To create my “Modern Day Maid Marian” costume, I wore the following:
 To “paint my face,” I used the following:
 I’m not a make-up artist at all…so it turned out looking a little cat-like vs. fox-like, but the accessories helped tell the story. The kids at trunk or treat and patients at the clinic guessed what I was right away for the most part.
I hope you get playful during Halloween and give creating a costume a try! Become what you’ve always wanted to be. I’m in my 30’s and had so much fun dressing up. You’re never too old to let loose and channel your inner child! Spending time with our nieces and nephews is one of our favorite things! We have chosen not to have kids of our own, which gives us a wonderful opportunity to spoil our siblings’ children every chance we get. Our oldest nephew, Max, is six. We have been on a few fun adventures with him over the years. He is a special little guy who is a joy to be around. We try to do one big activity with him every year, and hope to eventually do this with all of our crew when they are each old enough. We really enjoy this one-on-one time to create special memories just between us. This year, we did a sleepover at our place. It wasn’t just ANY sleepover. It was a HARRY POTTER themed sleepover! I wanted to share a few of the things we did to give you some ideas about how to create a magical experience for your kids or other loved children in your life. You don’t have to take a big trip or spend a lot of money to wow them – get creative with what you have! Imagination is key. I didn’t get home from work until after Max got to our house, so Joel kept him busy with a BB gun. I still have the Red Ryder BB gun my grandpa purchased for me as a kid. He said he had one like it and it was the best one you could get. I burned the buns of a lot of squirrels back in the day. When I got home, watching Max enjoy this activity brought back a lot of good memories and I was surprised to find out my shot is still pretty good! SAFETY FIRST! We made sure we had safety goggles and kept him a safe distance away from the targets.  While Joel stayed outside with Max, I ran inside to prepare the Harry Potter sleepover kick-off. A visit from the man himself, Albus Dumbledore! I was a Harry Potter fanatic as a teenager. The collection of memorabilia I have is quite large. The thing is, it’s all just sitting in my parents’ basement gathering dust. I want to start sharing the collection with the kids if they show interest so the items are enjoyed. I selected a lunchbox, cup, and broom to give to Max during his stay. I sat a little note next to the treasures for him to find. 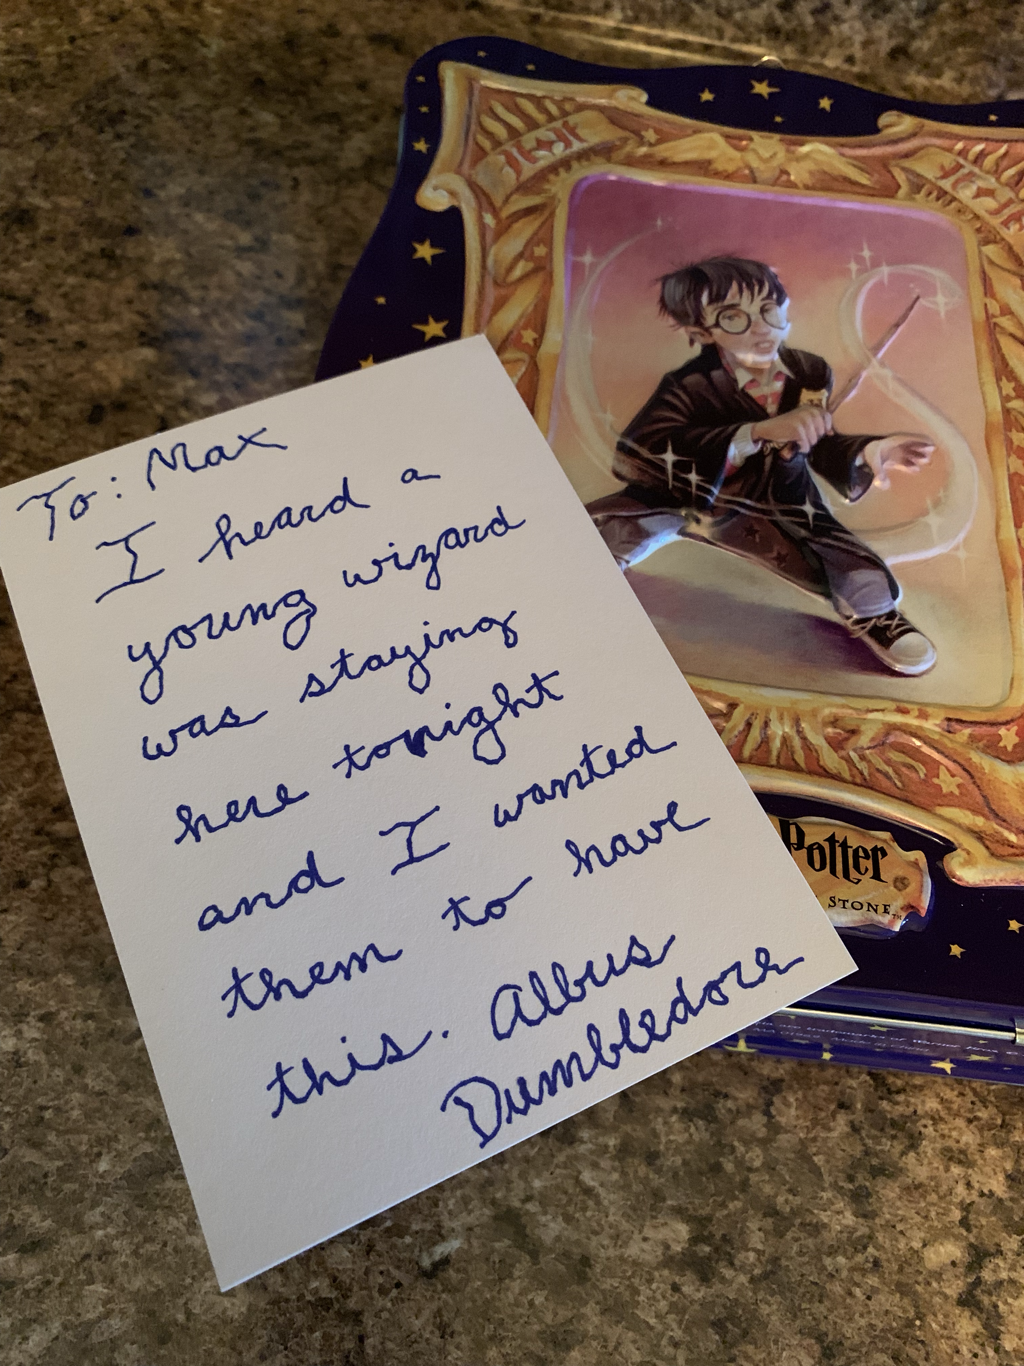 When he came inside, the excitement on his face was priceless. After we read the note together, he dug in. The lunchbox blew his mind, we filled the cup up right away, and he hopped right on the broom – zipping around the living room! He immediately wanted to play Quidditch, so we found ourselves a Snitch and Bludgers before making our way to the backyard after supper. The Qudditch match was action packed! We made wands out of sticks and took on the roles of our Max-assigned characters. I dipped out early, claiming an injury, to get the next part of the Harry Potter weekend set-up. I’m a Pinterest fanatic and had a few things I’d always wanted to try, so took advantage of the opportunity. Outdoor movie night was on. We had bought an outdoor projector and screen awhile back. After I got that set-up and tested, I started inflating a little pool that would act as our cozy movie viewing nook for the evening. A few bed pillows and warm blankets later, and we had the movie viewing nook of my dreams!  I think Max liked it. I can’t even with this photo. So. Cute.  As we waited for the world to get dark, we started a fire and sugared him up real good with s’mores. 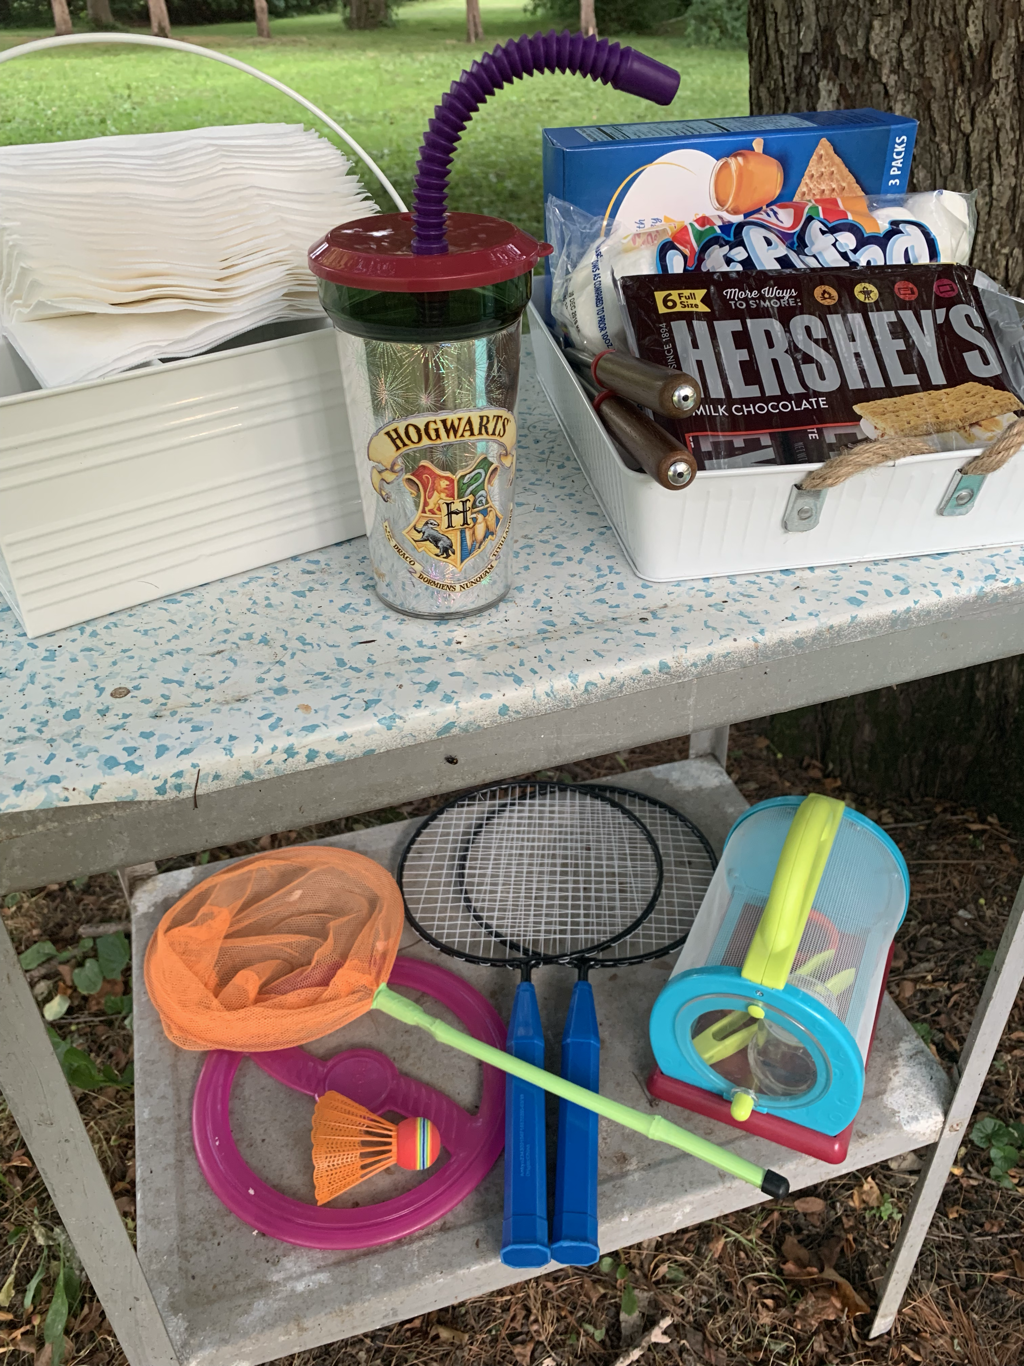 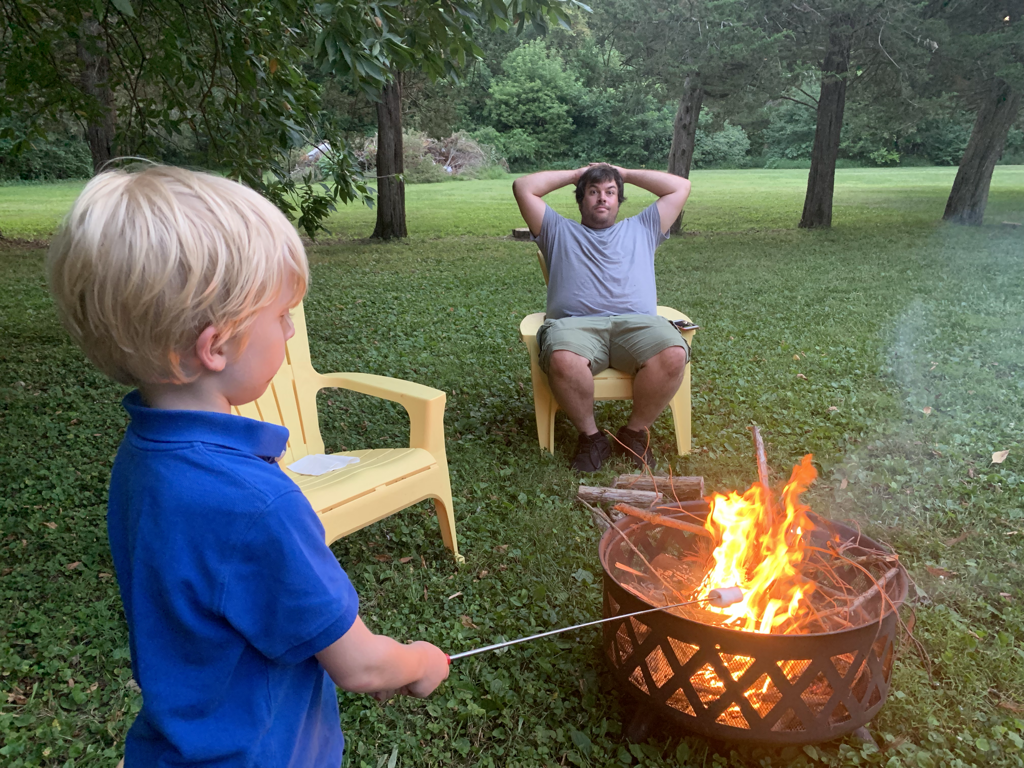 Before we knew it, the sky was dark enough for us to get things rolling. Max selected Harry Potter and the Goblet of Fire (one of our very favorites as well). The evening was just perfect. I curled up next to Max and he snuggled right in. 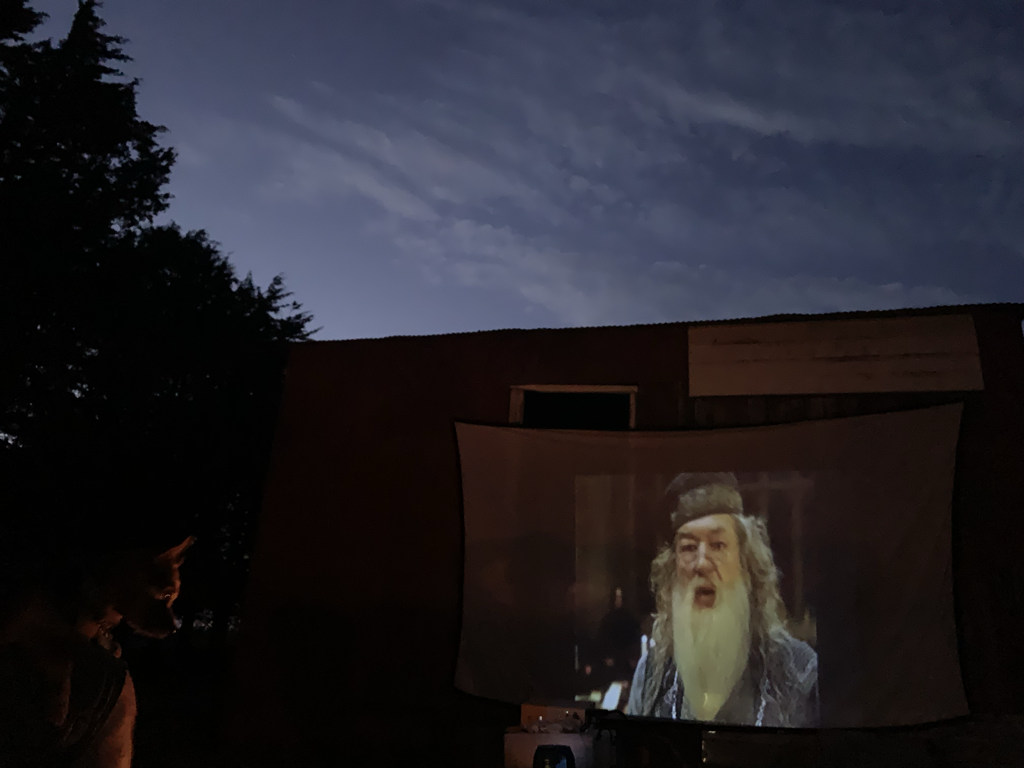 The next morning we had pancakes with all of the fixings. Max’s creation looked delicious!  What surprised me the most about Max during his time with us is how much interest he took in the garden! He LOVED helping me. He liked watering, whispering encouragement to the plants, and even kissing some of the flowers. The green beans pictured below were his favorite and he ate them ALL!   After a board game, tending to the garden, a little more Quidditch, and teaching him how to play Badminton in the backyard, we went bowling per his request. We then came home, played with the toys he brought, and too quickly it was time for him to go. Before I close, I have to share what he packed. It melted my heart.  We had a great time together and his mom said he was playing Harry Potter ever since he got home! That made us consider the sleepover as a successful one. Sparking his imagination is priceless. We can’t wait to plan for the next one!
|
Archives
August 2022
Categories
All
|


 RSS Feed