• The Country Wren's Nest
  • Wandering Wren
  • DIY
  • Fashion
  • Wren Picks
  • About
  • Contact
The Country Wren's Nest
Busy Hands, Happy Heart

Building a Vertical Herb Garden

4/5/2017

0 Comments

 
As I planned our garden for this year, I wanted to figure herbs into the equation. I don't cook a lot with herbs right now, but want to start. I have also seen some neat ideas where dried herbs can be used in candles, something I'd like to try as well.

When I saw a Do It Herself workshop for a Vertical Herb Garden at Home Depot I signed up right away! I wanted to grow three of the primary herbs I'd like to use more of near the house. This project was my solution!

I've provided some photos from the workshop I attended below, but you can find the full tutorial here: How to Build a Vertical Herb Garden.

A few tips I'd recommend for this project that we learned while working through the steps outlined by Home Depot in the video linked above:

  1. Pre-drill holes for the steps that require screws. It will make your life much easier!
  2. Measure the shelf brackets you place at the bottom for stability. If they are different dimensions than what Home Depot recommends, you'll have to adjust where you place the three horizontal boards along the vertical boards.
  3. If your shelf bracket requires three screws vs. two, you'll need 10 screws instead of the recommended eight - three per bracket and two to secure the feet to the back.
  4. The stainless steel clamps that held the pots were very difficult to screw in. We used a painters tool to widen a slot on the clamp, twisted the screw in and then drilled it into the wood. It is also helpful if you can have one person holding the clamp while one person drills.

A few items I'd recommend you take to these workshops so you can move along faster and safer:
  1. Work gloves
  2. Pencil
  3. Tape measurer
  4. Safety glasses

At this workshop, all three attendees were able to build their own herb garden.
Picture
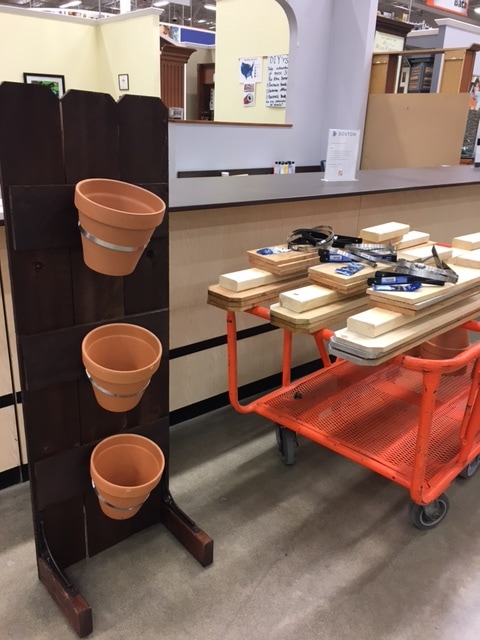
The wood was pre-cut for us. Home Depot supplied the tools and supplies we needed, including a screwdriver, nail gun and power drill.
Picture
Picture
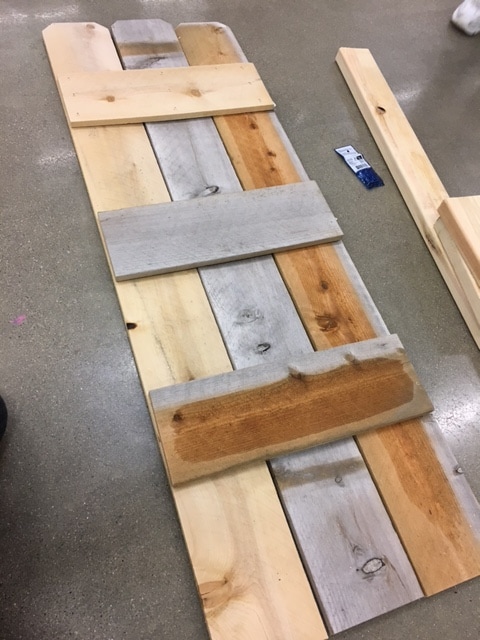
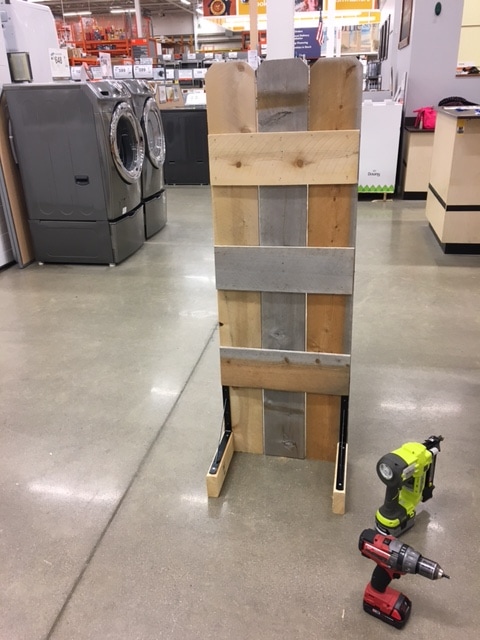
The hardest part about this project was getting the clamps drilled into the wood to hold the flower pots. See my recommendation above for what we ended up doing.
Picture
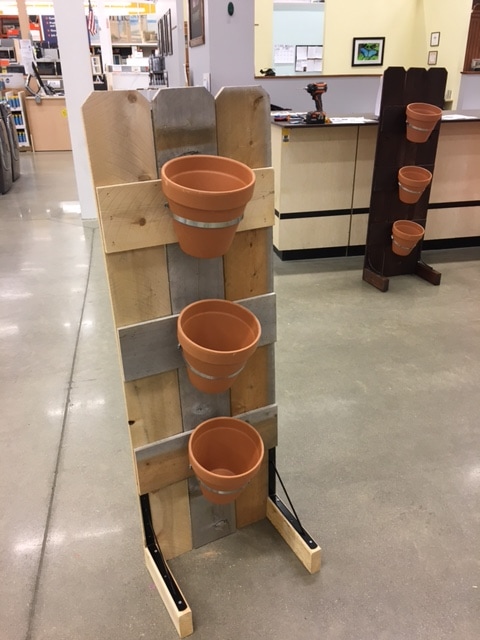
Here's the finished product in its new home! It's still a little too chilly to plant anything here in Iowa, so for now I've filled the pots with artificial floral décor.
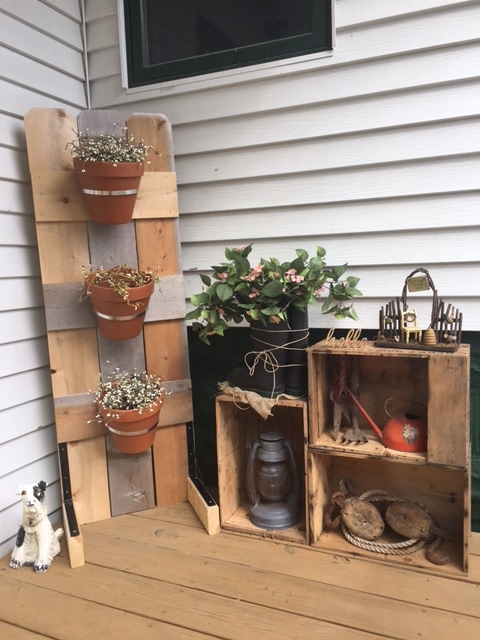
Picture
0 Comments


Leave a Reply.

    Archives

    November 2020
    August 2020
    July 2020
    February 2020
    November 2019
    September 2019
    August 2019
    July 2019
    June 2019
    May 2019
    April 2019
    March 2019
    December 2018
    October 2018
    July 2018
    June 2018
    April 2018
    February 2018
    January 2018
    November 2017
    October 2017
    September 2017
    August 2017
    July 2017
    June 2017
    May 2017
    April 2017
    January 2017
    December 2016
    November 2016
    October 2016
    September 2016
    August 2016
    July 2016
    June 2016
    April 2016
    March 2016
    December 2015

    Categories

    All
    Chickens
    Christmas
    Date Night
    DIY
    Dogs
    Dollar Tree
    Gardening
    Gift
    Hobby Lobby
    Home Decor
    Home Depot
    Interior Design
    Landscaping
    Light Fixture
    Menards
    Modern
    Paint
    Renovation
    Rustic
    Target
    Travel
    Woodworking

    RSS Feed

Proudly powered by Weebly
  • The Country Wren's Nest
  • Wandering Wren
  • DIY
  • Fashion
  • Wren Picks
  • About
  • Contact