Busy Hands, Happy Heart
|
I've discovered the free DIY classes offered at The Home Depot and my life has been changed forever! I attended my first class where I learned to build a "Drawer Nightstand." I was fortunate enough to be the only student that showed up...so I got a lot of one-on-one attention. The class was completely free, and because I was the only student, I got to keep the nightstand I made at no cost! Normally, they would show you what to do, give you some hands-on training, and then you would buy the supplies/materials to do the project at home. I was certainly spoiled for my first time! I won't go through a DIY step-by-step because The Home Depot already did it for me! To instructions on how to build the nightstand pictured below, click here. I highly recommend these classes. It was fun and I got to use some power tools I hadn't had exposure to yet! They offer them at the Waterloo Home Depot on the third Thursday of each month. You can do a search online or stop into the store to see what they have coming up. Happy DIY'ing my friends! 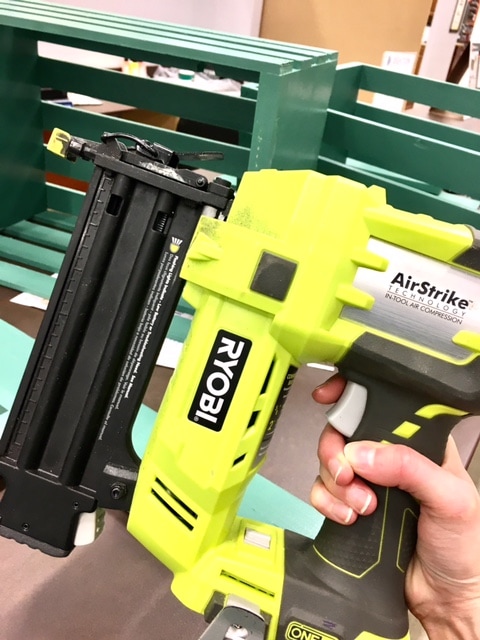 My first time using a nailer. Loved it! 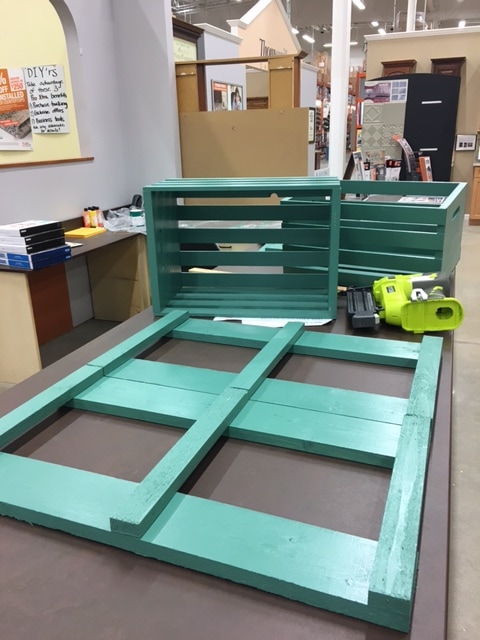 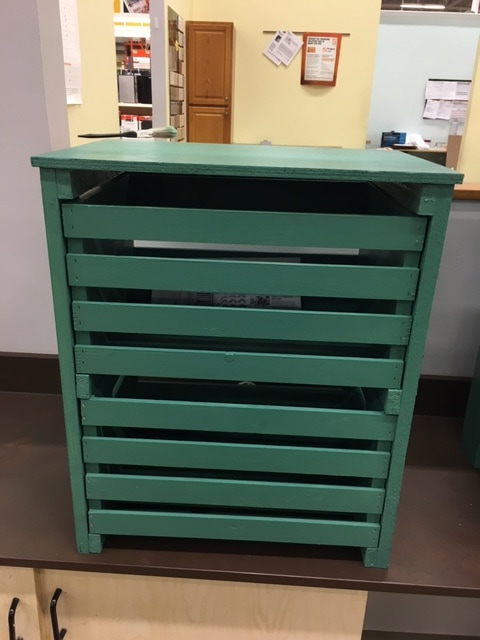 The finished product! 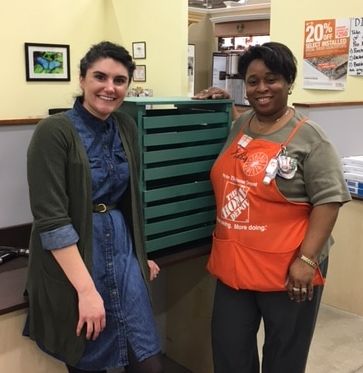 Ms. Pam was my instructor and she was fabulous!
0 Comments
 My motto is undoubtedly: "I'd rather be decorating." Indoor, outdoor, home, work, you name it, I'd prefer to be visualizing and executing the design ideas that are constantly running through my mind.
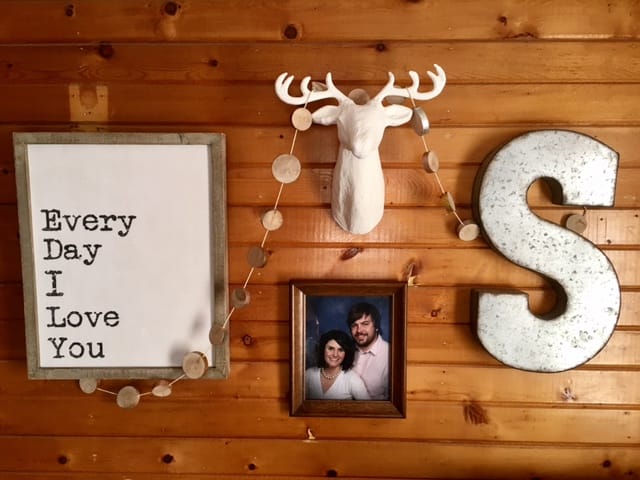
In this post, I'll share details about the wall decor I hung at our house during my Christmas break from work. I wanted to do something on the large feature wall in our dining room. As a person comes up the stairs from our mudroom, it's the first thing you see. We had some records hanging in frames which was a good place holder, but not very appealing. Thanks to some good after Christmas sales and imagination, I was able to pull together something that has impact and gives the type of first impression I want to leave when we have new visitors. I also like that this wall mixes pieces I already had with new items for a more modern look than I normally go for. I based everything around the deer head. I found this piece for 50% off at Target - final price of $15. Once I had the head centered and in place, I started holding various pieces up to the wall to see what would look best where. I knew I wanted the "Every Day I Love You" saying to be in position that it could be seen from the mudroom. I got this piece for 50% off at Hobby Lobby - final price of $20. After hanging the saying, I positioned the 'S' so it fell around the same general area on the other side of the deer head. The 'S' was gifted to me several years ago and is from Hobby Lobby. The photo of Joel and I is one of our favorites from a few years back. We look like real grown-ups in it! The finishing touch was the wooden garland. These were 50% off at Target - final price of $6 for 6 feet. I secured each end of the garland on nails hidden behind the saying and the 'S.' From there, I draped the garland as pictured. I felt like draping the garland across the decor pieces tied everything together. For hanging I used a level, small nails and a hammer. Everything was light enough so I didn't have to use any heavy duty equipment. Here's some food for thought before your next decorating project: What pieces do you already have that could be reimagined by mixing them together with other pieces you have or new items you purchase? What angles will your decor be seen from? Think about how you want your decor to be seen from every corner of your home. The approaching Christmas holiday inspired a few decor ideas in our household. The project I'll talk about in this post could be used for decorating your home or as a gift for someone else! What you'll need:
I salvaged a piece of wood that is around 36 inches long for this project. 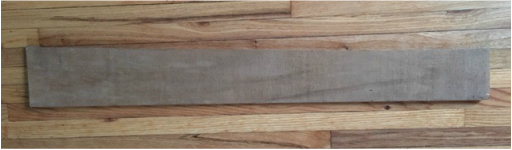 I chose a phrase that was not holiday specific so leaving it up throughout the winter wouldn't be an issue. I like winter decorations vs. Christmas decorations when I can help it to give the decor longer life. I wrote the phrase I chose out with pencil on the piece of wood before I began painting to ensure the spacing and positioning turned out right. 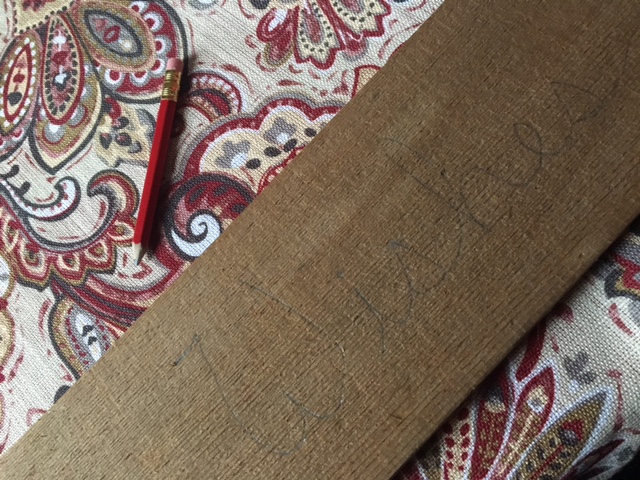 Once I had the phrase as I wanted it on the wood, I used a small paint brush and white paint to trace the pencil lines. After letting the paint dry, I hung the sign up with 3M adhesive strips with Velcro so I didn't damage the wall/create unnecessary holes for something I knew would only be up for a few months. This project took me less than 10 minutes to complete and cost me $0 because I had the supplies I needed on hand. If you needed to purchase supplies, it would easily run under $15, much less than what you would pay for an already completed sign like this in a store. Doing it yourself allows you to choose the saying, create the look, and have a personal connection to the piece - which makes it even more special if you choose to give something like this as a gift to someone you care for! Here's the finished product in its wintertime space, just below the "clothespin line" I will hang our Christmas cards from: 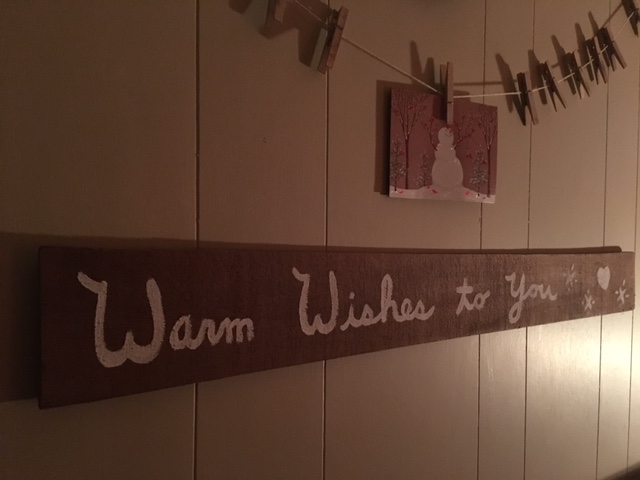 Over the past few weeks I have been working on some exterior painting projects as I've had time and as the weather has cooperated. I really didn't want to wash out trays, brushes, and rollers each time, not knowing if I'd pick up the project again the next day or in a week from then. Here are some helpful painting supply storage tips if you have a project that is ongoing. Both of these tips came in very useful during our renovation and continue to be part of my painting process. Store paint brushes and/or rollers in Ziploc baggies in the refrigerator until next use: 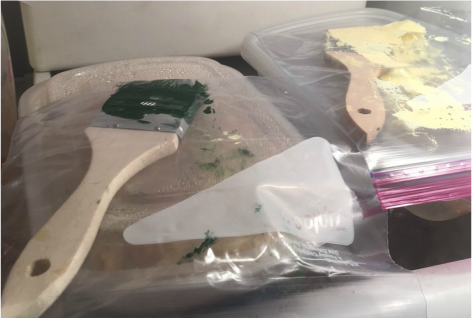 Place paint tray (I also keep rollers with the tray) into a plastic garbage bag and close: 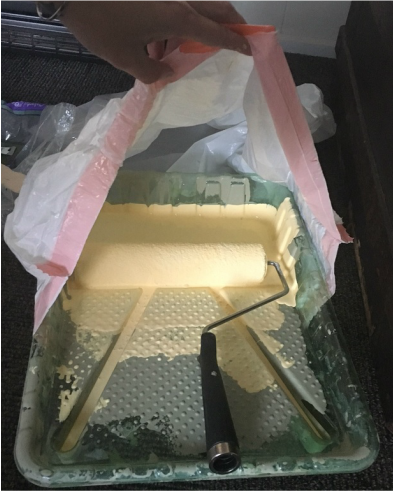 These methods preserve both the supplies and the paint for quite a long time. It's really a handy go-to when you don't want to keep cleaning, putting away, and then bringing back out your painting supplies. Here's what we've been working on. We finished painting the exterior trim, doors, and foundation of the house. We're ready for winter...and for focusing on landscaping next year! 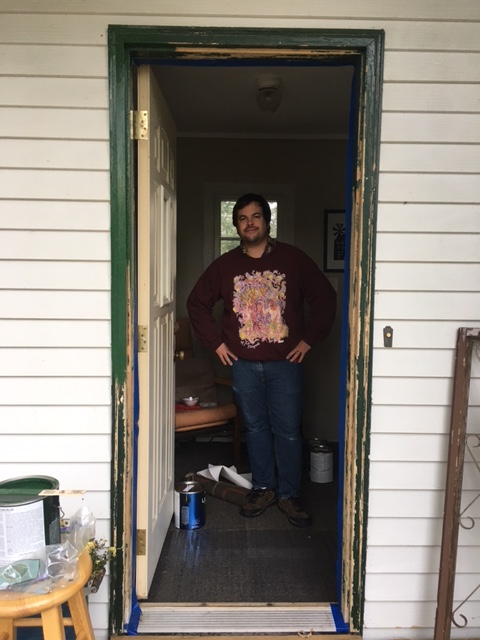 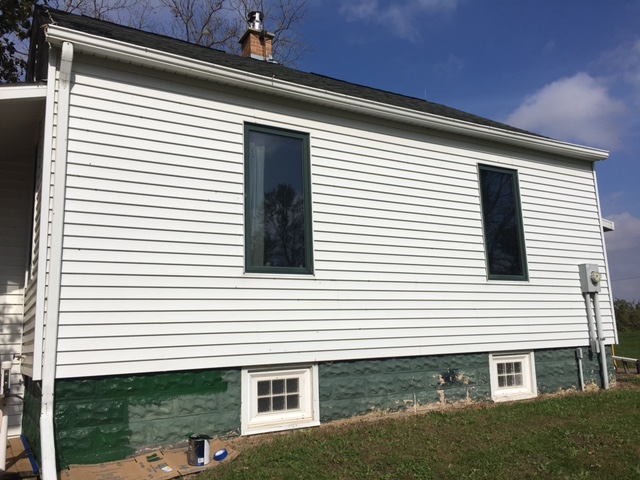 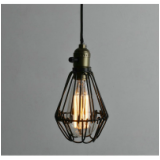 We all know industrial cage light fixtures are very popular right now. I love the look of this style along with the masses. We have an exposed light bulb in our stairwell to the basement that I thought a cage light fixture would look great on. Trouble is, it is at an odd angle near the ceiling, so I had to get creative by creating my own fixture. This is another inexpensive DIY light fixture option that cost me under $12 to create. What You'll Need:
I started off by cutting the cage in half. It was too big for me to use as it was due to the bulb's close proximity to the ceiling. This was fine with me, because I had envisioned 1/2 of a light fixture in the first place. If you are doing something similar, or like the look of hanging cage light fixtures (like the one pictured above) you could probably use the full guard cage and follow these same steps (without the cutting of course)! So as I said, first thing I did was cut the cage in half at the hinge using a razor blade. 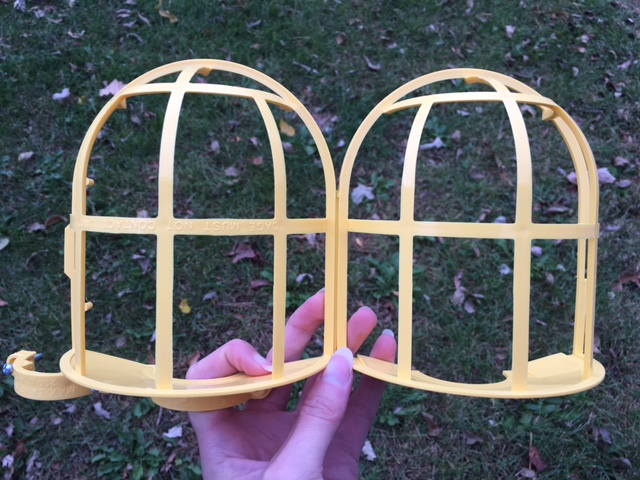 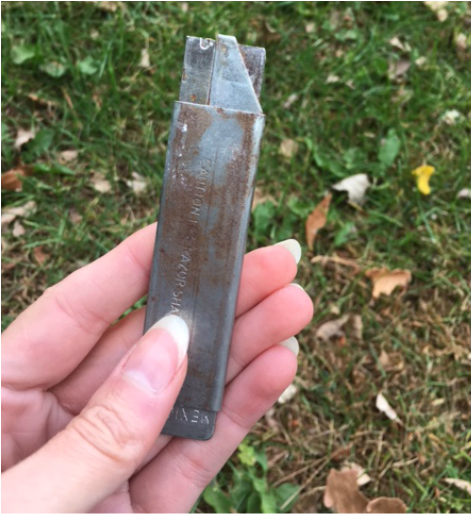 I realize this looks nasty, but I've had this razor blade for over 12 years and it's always good for a nice, clean cut! After I had the cage cut in half and removed the two screws that came with it, I spray painted it with the same oil rubbed bronze that I used for my clamp light lamp.  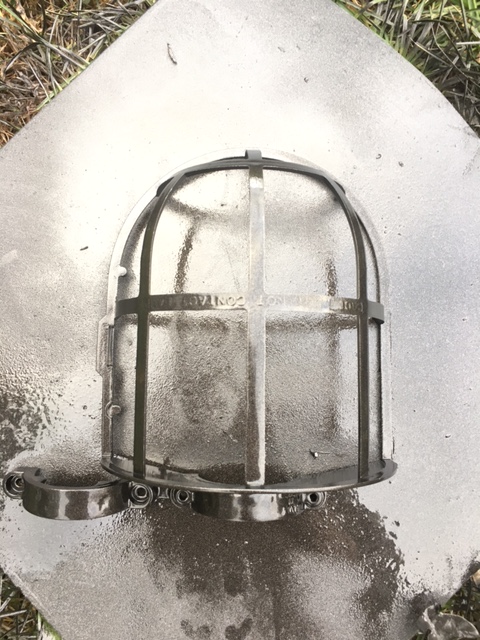 After allowing the cage to dry, it was ready for install! I swapped out the light bulb using a vintage-style Edison bulb and attached the cage to the base of the bulb using the two screws I mentioned earlier. See below for the before and after! 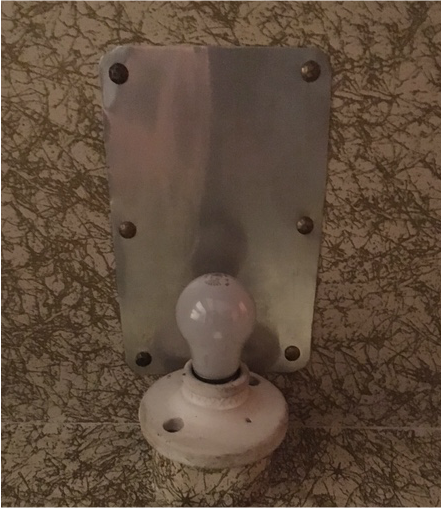 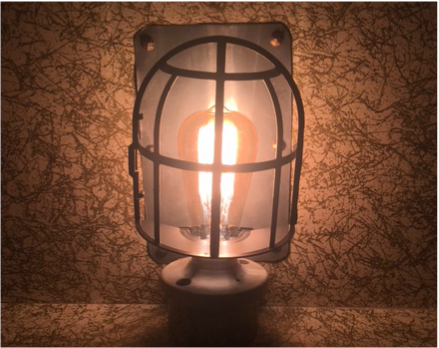 I've got an easy DIY project for you that can be completed in under an hour for less than $15! This project is perfect if you're looking to create a cozy corner in your home or need to add extra lighting to a room, but don't have a lot of cash to spare. All you need is:
I chose to spray paint my clamp light oil rubbed bronze to match my home decor. If you like the industrial look, I think leaving the light untouched would look just as great. That would cut this project down to under five minutes! The first thing I did was disassemble the clamp light so I could spray paint certain portions of it. I didn't want any of the electrical pieces getting goo'd up with spray paint... 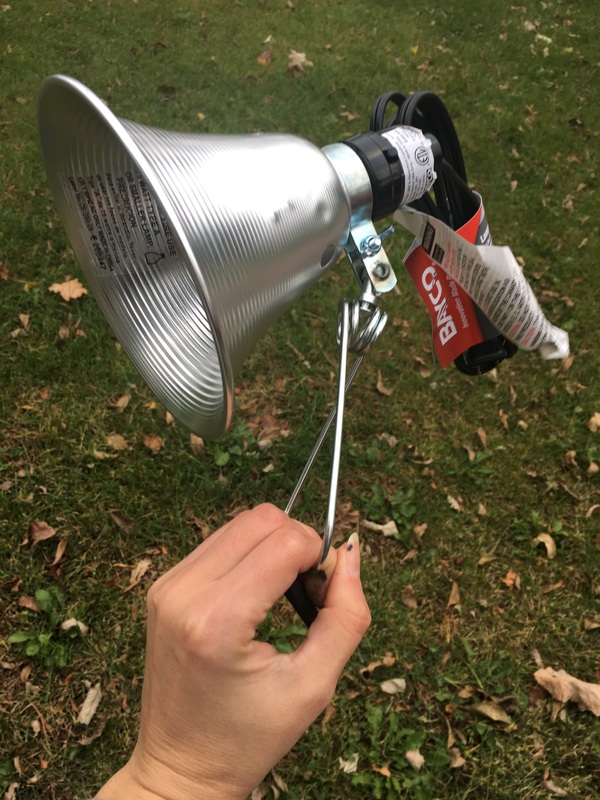 I painted the inside/outside of the "lamp shade" portion of the light, as well as the silver portions of the clamp. I applied two healthy layers of paint to both items, allowing for dry time in between. 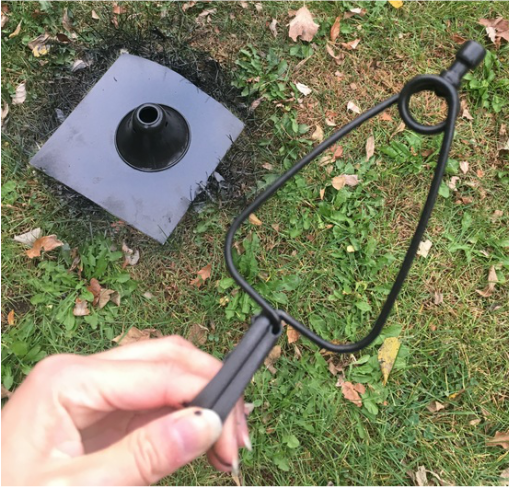 Once the pieces dried, I reassembled the clamp light and inserted the light bulb. All that was left to do from there was to clamp the light to the top of the driftwood and prop it into my chosen corner. See below for a few different angles of the finished lamp, including an evening view to show the amount of light it gives off. If you're looking for a brighter lamp, I'd recommend a higher watt bulb. The one I used was 60 watt. 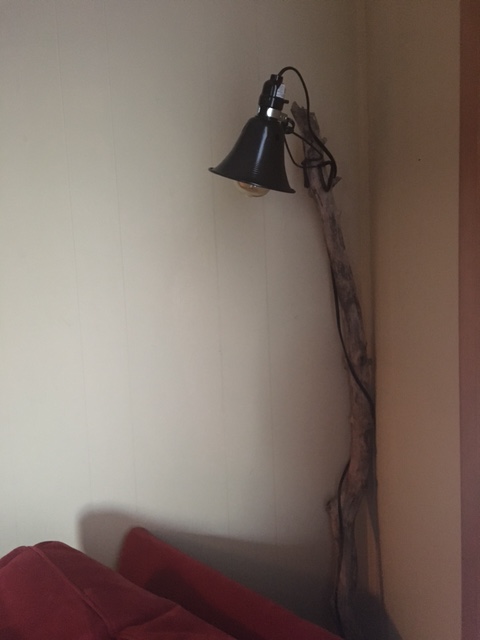 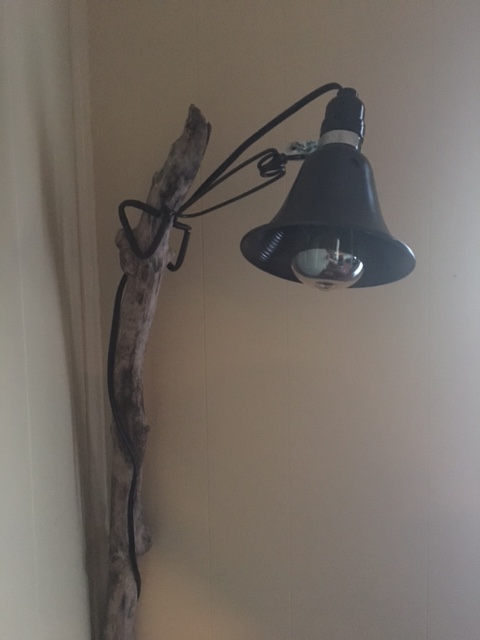  As you can see, the vintage bulb puts off a lovely warm glow in the far corner of our living room. This lamp is a piece I didn't know was missing until I created it.
Happy DIY'ing my friends! This may seem like a silly DIY project to post about...but mounting something as simple as a towel bar is something I have never done on my own! There were several steps and power tools involved, so I felt like it was a legitimate project to include on the blog. I placed this particular towel bar in our kitchen next to the sink. I'll start with the supplies you'll need (because I kept having to run downstairs to get more stuff):
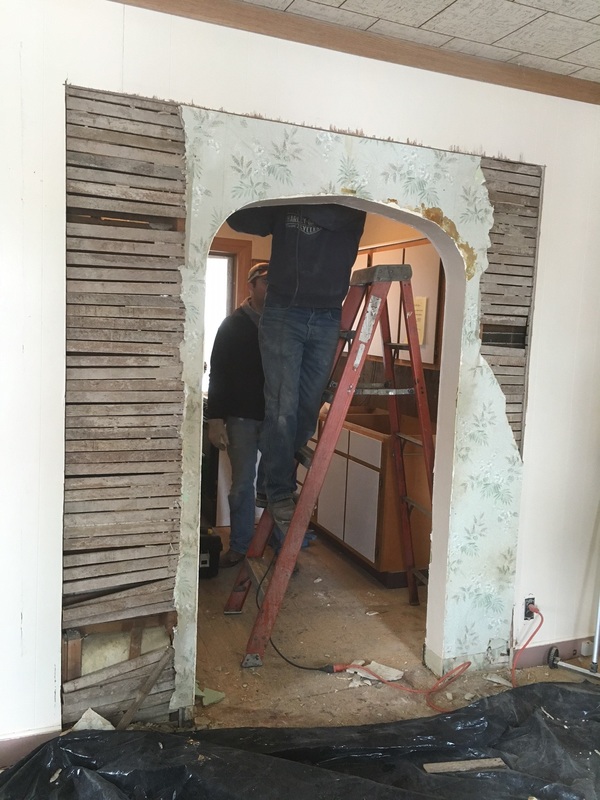
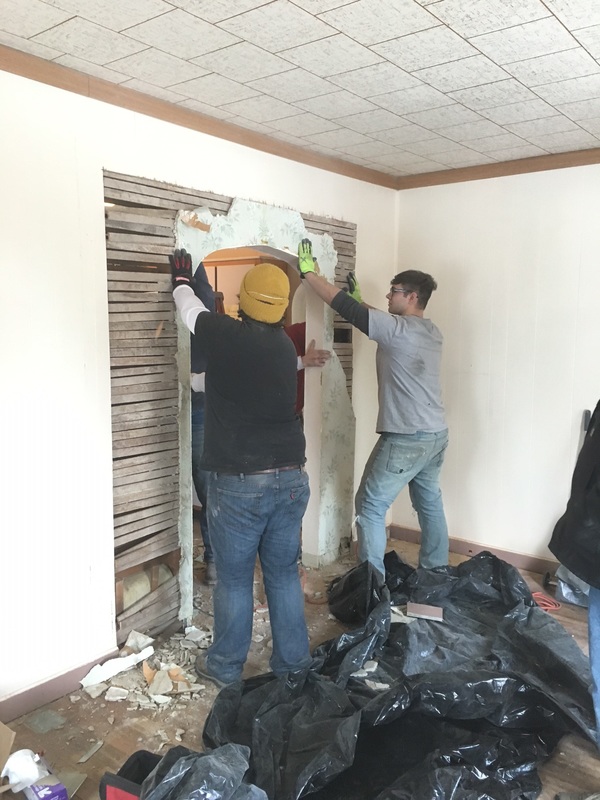
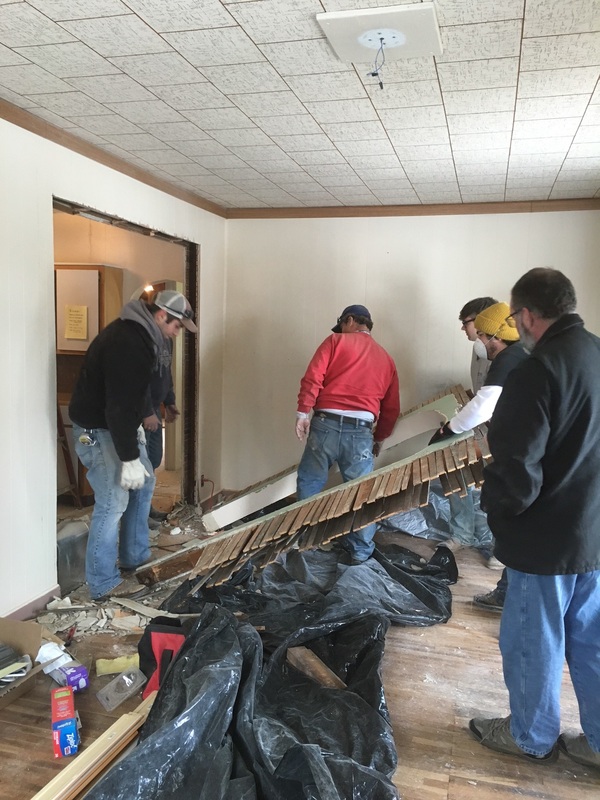
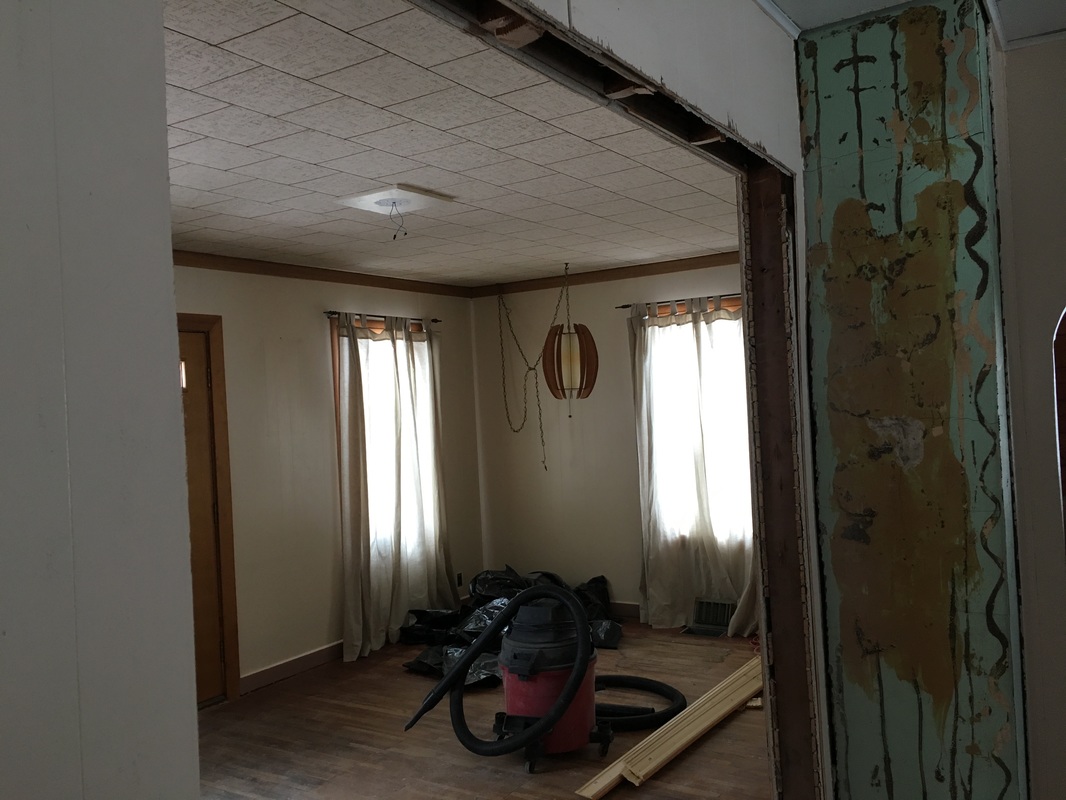
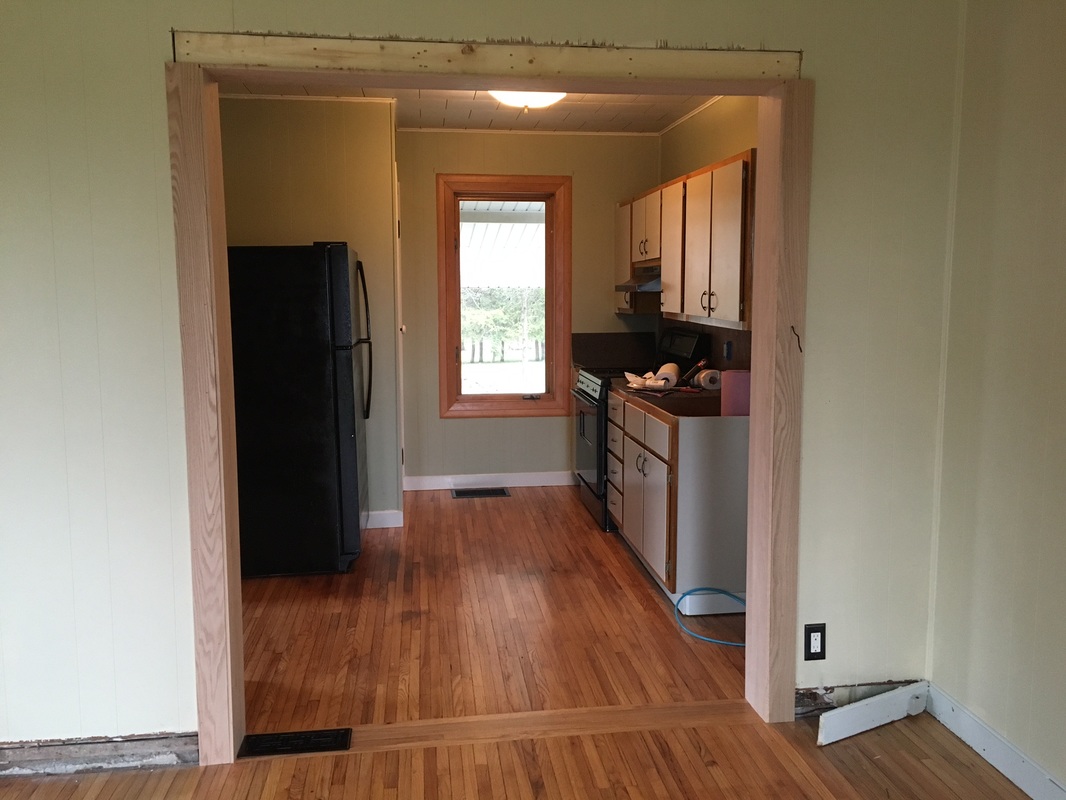
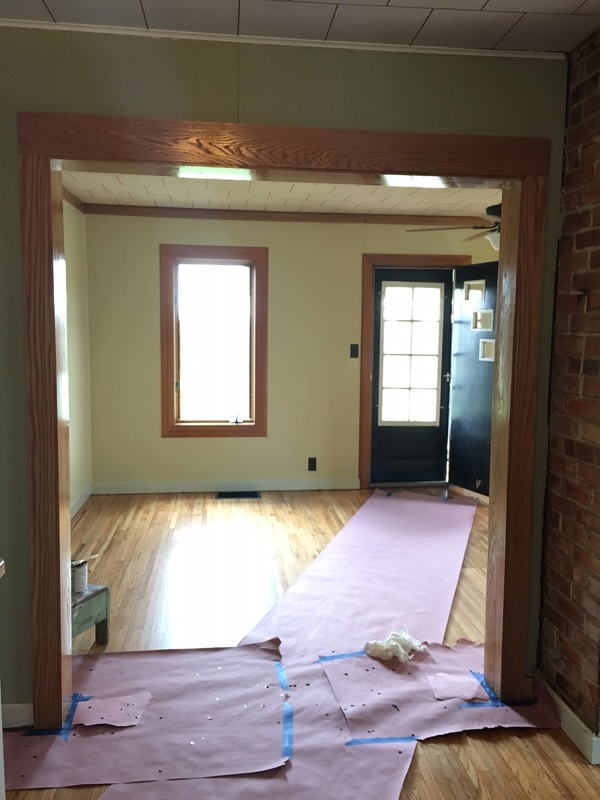
I started by holding up the bar to the cabinet and using the level to make sure it was positioned correctly. Holding the bar firmly in place, I traced a light pencil line around the base of each side of the towel bar. 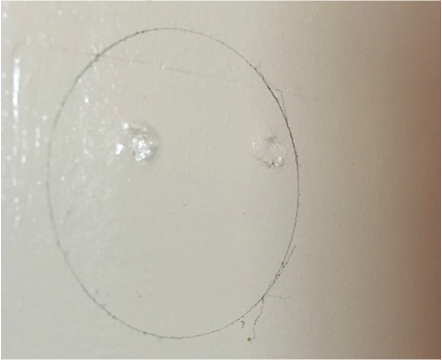 Once I had the outline traced, I held up the mounting brackets so they were centered in the middle of the circle. I made light pencil markings in each opening of the bracket so I knew where to pre-drill my holes. 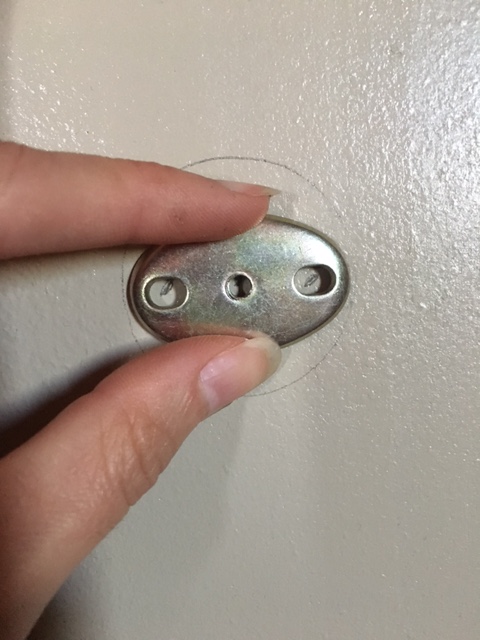  I used my drill and 1/4 inch drill bit to drill into the cabinet over my pencil markings. Because I was mounting this to wood, the instructions did not recommend the use of anchors, so I did not insert anchors before the screws. Using my drill again with a Phillips head drill bit, I screwed in the outside screws required for the mounting bracket. 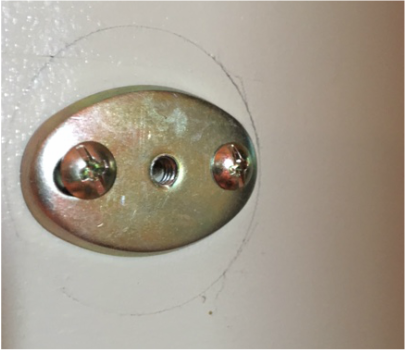 After the mounting bracket was in place, I placed the long screw provided with the kit through the two bases of the bar. This required popping off the top of the bases, which I later placed back on the bases upon finishing. 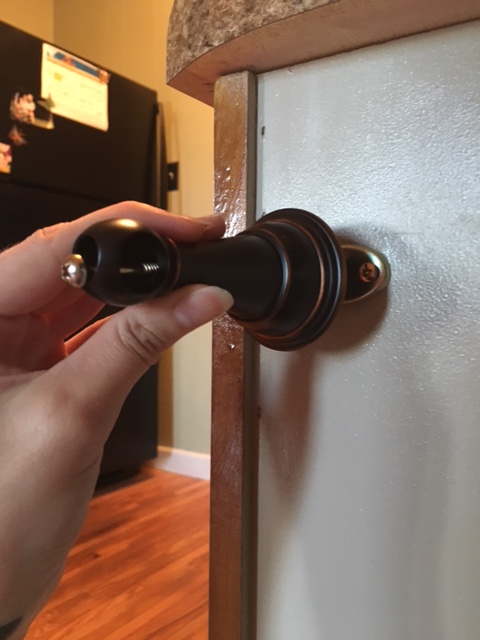 Here's where you'll use your handheld Phillips screwdriver to screw the long base screw into the middle hole of the mounting bracket. Turn screw until base is tight against the cabinet. Make sure to pay attention to the positioning of the hole the bar will be inserted into. Ensure it is facing inwards. 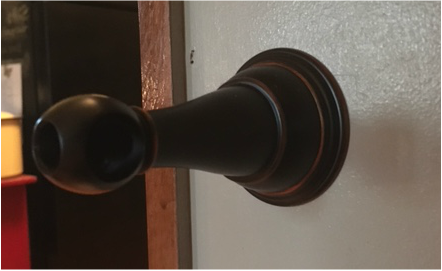 You'll do the same thing on the other side. The only difference will be is that you should have the bar inserted into both of the bases before screwing the second base in. The bar rotates and has notches in it so that you can turn the bar until there is an opening and then screw in the second base. 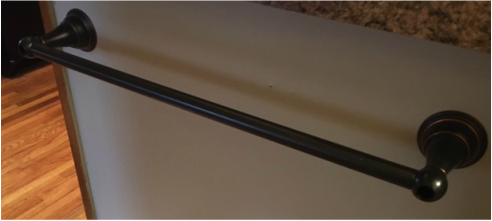 After both bases are secured, you can replace the tips of the bases that I mentioned needed to be taken off before you could insert the base screw. 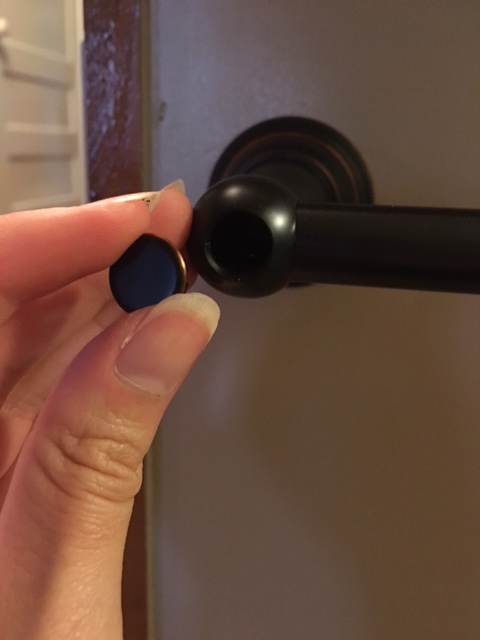 There you have it! A beautiful, functional, mostly level towel bar. I need to purchase towels that go better with our decor, but for completed project photo purposes, I pulled together a little Cowboys and Indians towel combo. 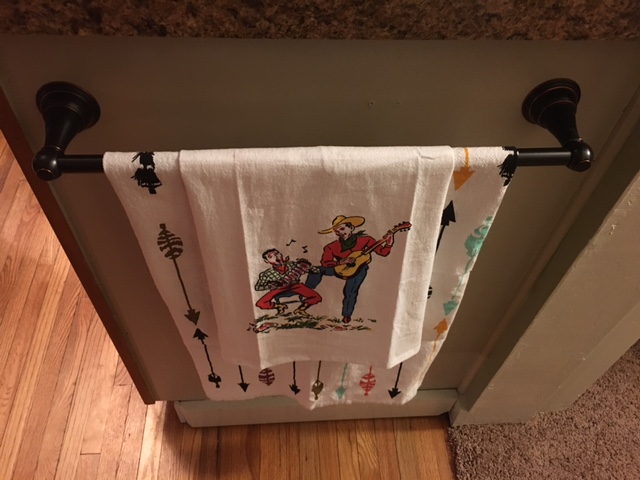 Creating a unique headboard for our master bedroom was one of the most satisfying projects I've completed thus far. I knew I wanted to do something unique. After looking around at different ideas, and changing my mind several times, I settled on using salvaged barn doors. I am lucky my dad is a hoarder of old items like I am. He always has a vision for what he finds and keeps, just like I do. In his corn crib, I found two halves of a barn door that worked perfectly for what I needed. To start, we needed to cut off the handle on the side of the door facing the wall so the door was flush when it came time to hang it. We used a Cutoff Saw to get the job done.  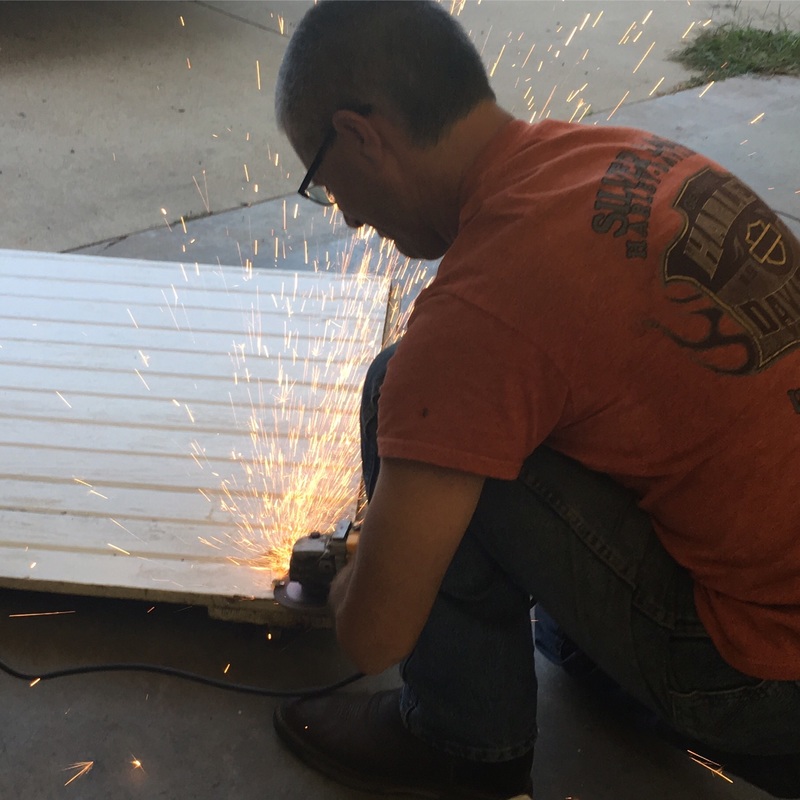 Next, I stained the doors with a stain/poly mix in the color "Honey Pine." I used the same stain that I used on our kitchen cabinets and the wood trim of the new opening to our living room for consistency in wood color throughout the house. 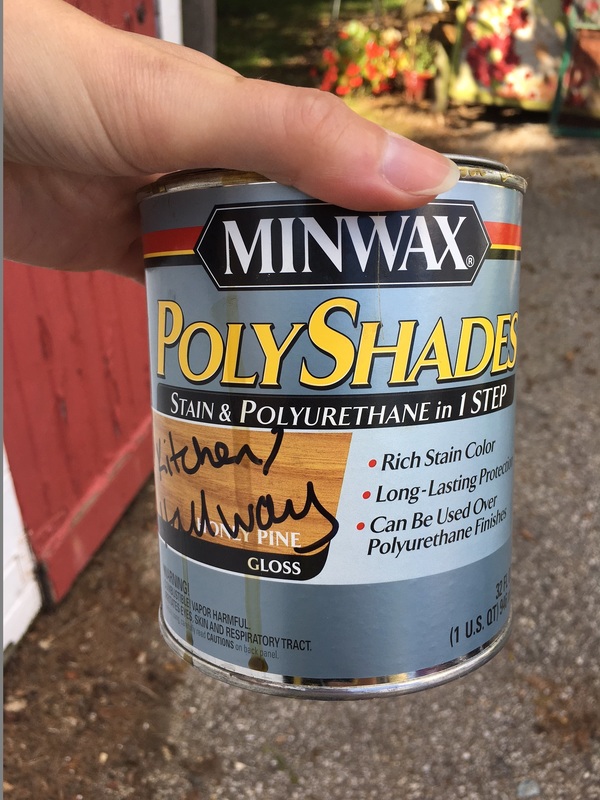 A trick I learned on HGTV is that you should wipe down the wood with a damp cloth before staining because it allows the wood to better absorb the stain. 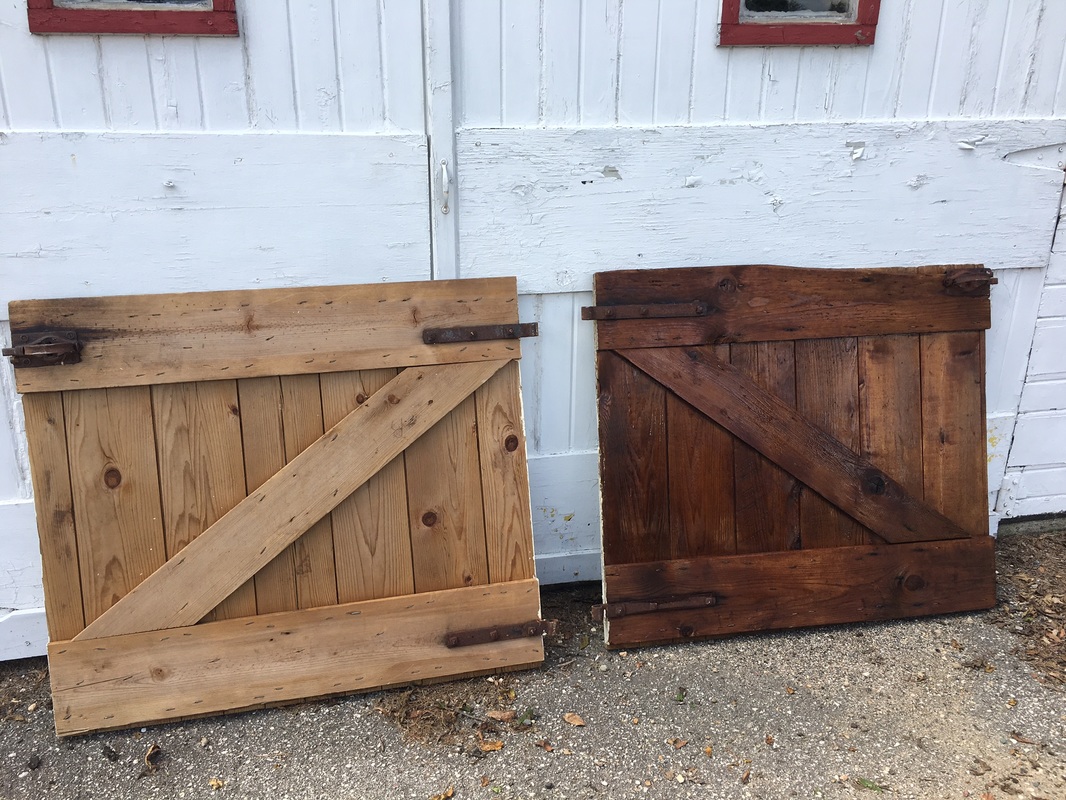 The door on the left is unstained, the door on the right is stained. 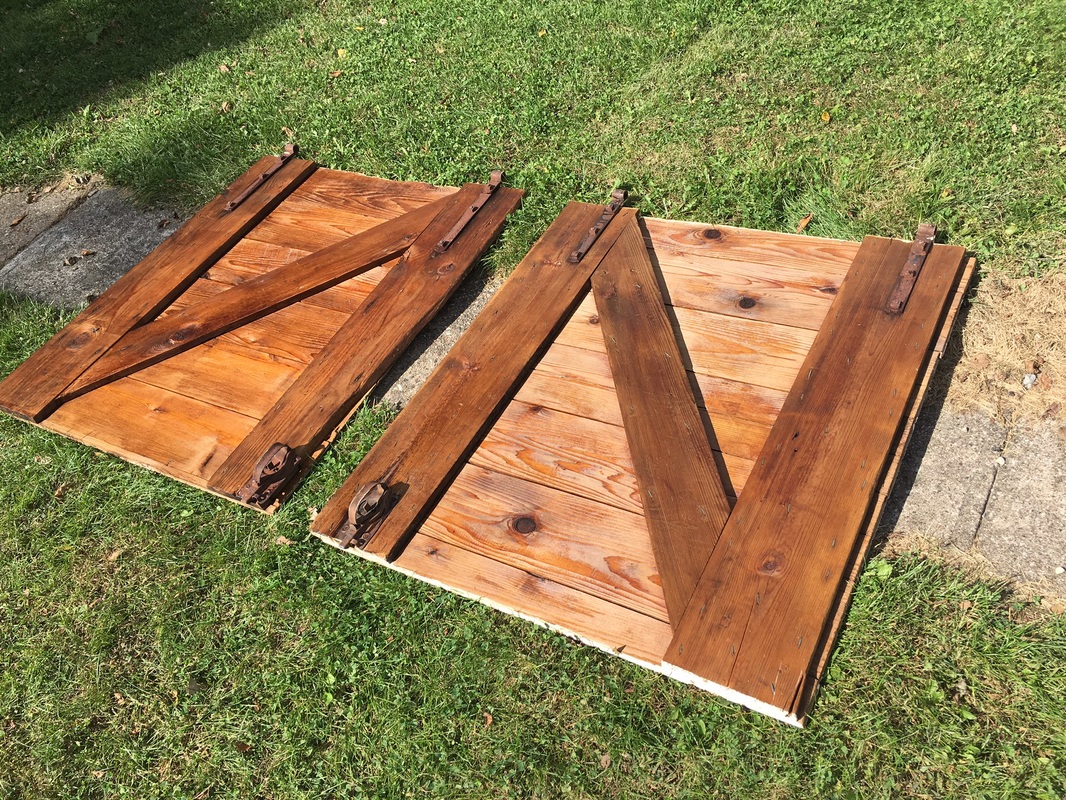 Both stained and ready to hang! Joel marked out the studs in our bedroom with our new handy, dandy stud finder. Because the weight of the doors was a bit heavier than the artwork we were used to hanging, we wanted to make sure to secure them to studs in the wall for better stability. The blue tape indicates the studs we were working with. After positioning and leveling, we started placing the long screws. (SIDE NOTE: This is a three person job! Two people holding the doors, one person placing screws.) 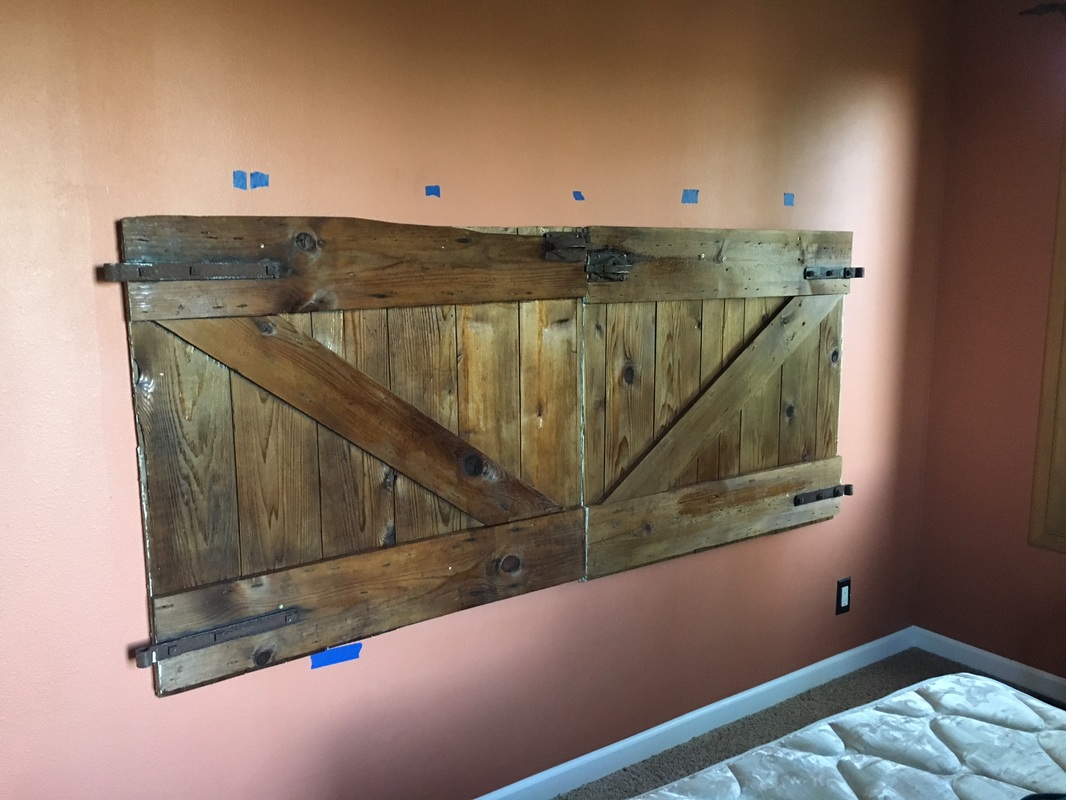 We ended up putting two screws on the top half and two screws on the bottom half, screwed into the studs. Before I moved everything back into place, I hung some screen artwork I created with leftover black paint and a salvaged screen.  When that was done, I got everything back in order and marveled at how great everything turned out! If you have any questions, feel free to reach out. My contact info is under "Contact" on my blog. Here's the final product: 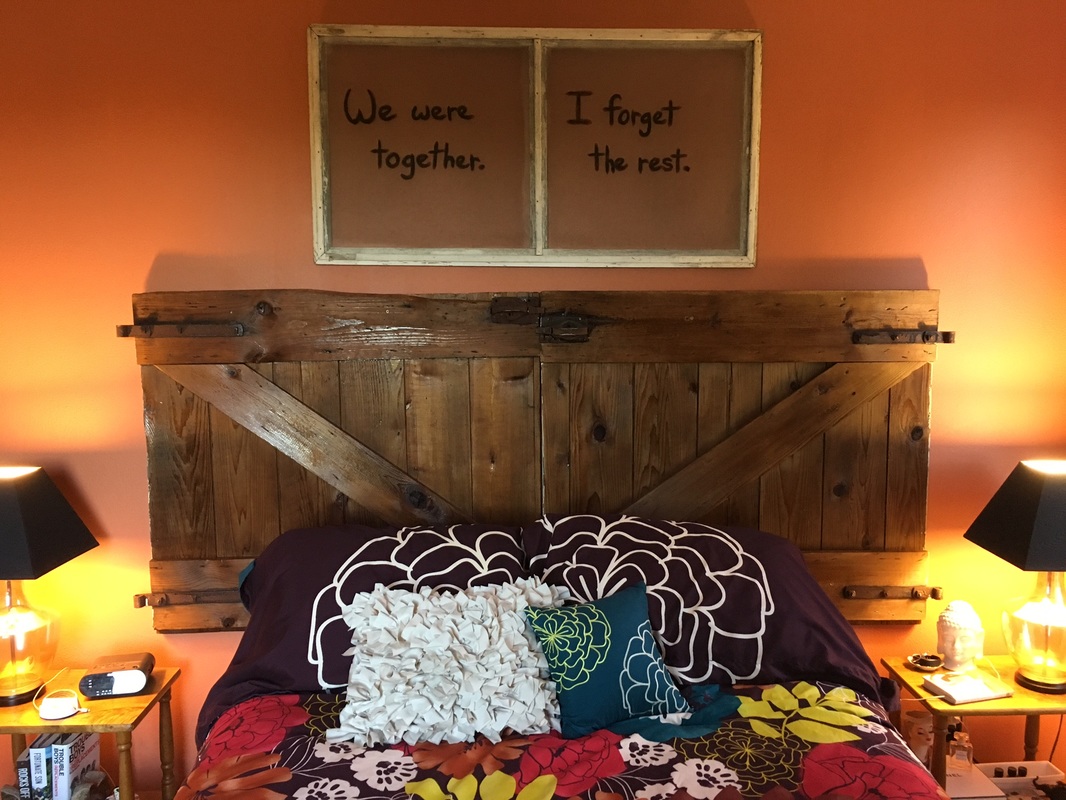 At some point in the life of our house, the owners made three of our small door openings even smaller by rounding off the top (pictured below). I'm sure it was very "of the time" and deemed a good idea at the moment, but for us, one opening in particular was a little too small. I wanted a clear sight line from the kitchen into the living room. The existing door opening would not have worked...so we knocked it out! 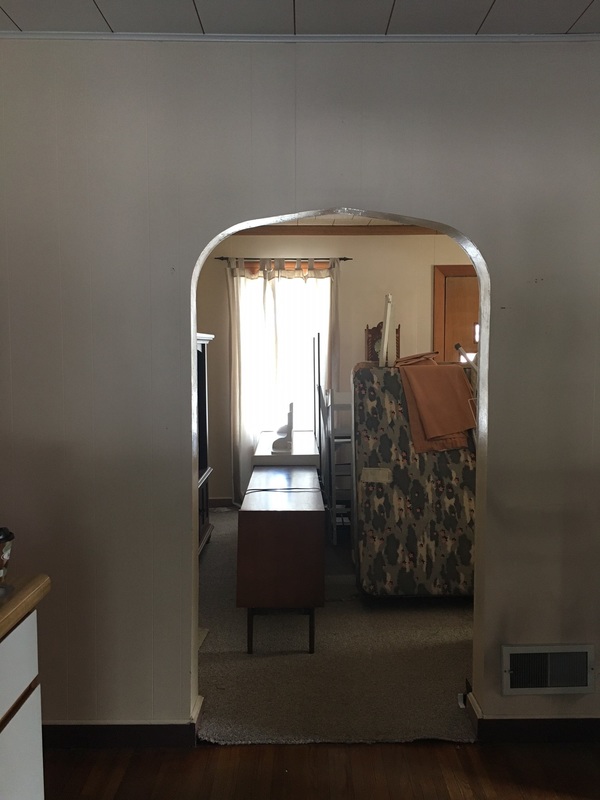 The first thing we did was tear away the wood paneling and floor molding to see what we were dealing with underneath. Luckily, there was no electrical running in this area. The only item we had to address later was the heat vent that you can see in the photo above. This vent became a floor vent vs. a wall vent. Once we knew we were in the clear and had drawn out our lines for the opening, out came the Sawzall! From there, it was a pretty fast process. Once we had the larger hole in the wall, and after a few more things in the house progressed, we reinforced the vertical edges of the opening because this is a load bearing wall. We then wrapped the edges of the new opening with oak wood trim. My final step was sealing the oak wood trim with a stain/poly finish. The end result was magnificent. The finish on the trim ended up matching exactly with our newly finished hardwood floors, the sight line is much improved, and it really makes the whole area feel bigger! Below are photos from both angles of the finished opening - first, looking into the living room; second, looking into the kitchen. The photo below gives you a closer look at how well the trim matched our hardwood. You can also see where we relocated the wall vent into the floor. That process was also easily done by disconnecting the existing section of duct work and (after the floor was patched in/finished) placing a new vent cover over the trimmed down duct. 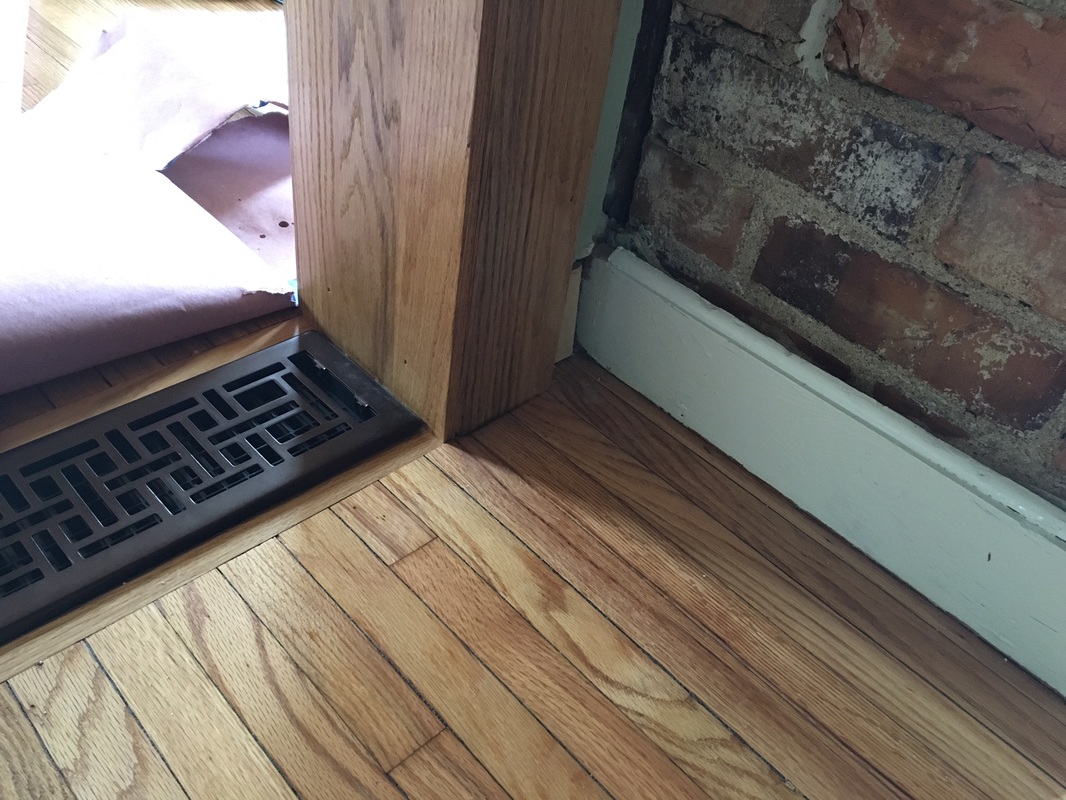 Because I like side by side comparisons...below is the before and after! As we continue to decorate our new home, I've had fun pulling together pieces that are ours and pieces that were the previous owners', making some unique pairings. The photo below is from our master bedroom, just as you walk in the door. The previous owners had a charming "Good Morning" framed embroidery piece that I knew I just had to keep and use. I got the rusty, metal shelf from a thrift store in Mason City awhile back. The cheese grater (yes, that's a cheese grater!) and small milk bottle were from the previous owners. And finally, the mason jars and artificial flowers were items I had left over from centerpieces at past events I planned. I wanted wall decor for our bedroom that was welcoming, simple, and carried a touch of "country." I feel like I accomplished what I was aiming for, all at no cost, just thinking creatively about the items we already had!  |
Archives
August 2022
Categories
All
|


 RSS Feed