Busy Hands, Happy Heart
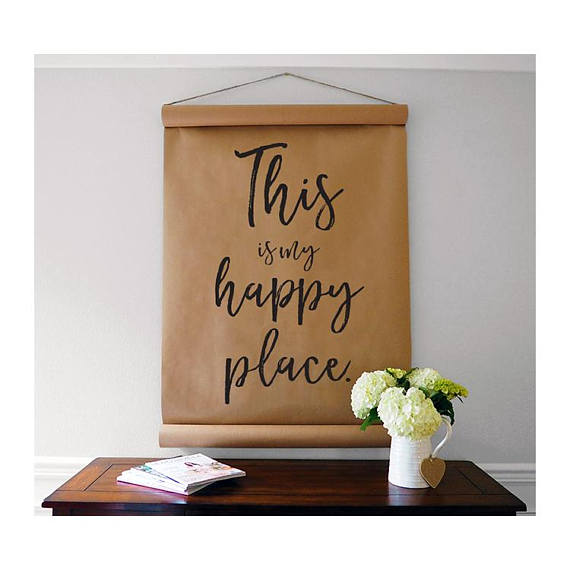 I've been obsessing over kraft paper scroll signs for a year or two now. I don't know why it never occurred to me to make one until this year...I continue to see them in the homes of some of my favorite home décor bloggers and just had to at least give it a try. I'm really glad I did. Here's what you'll need:
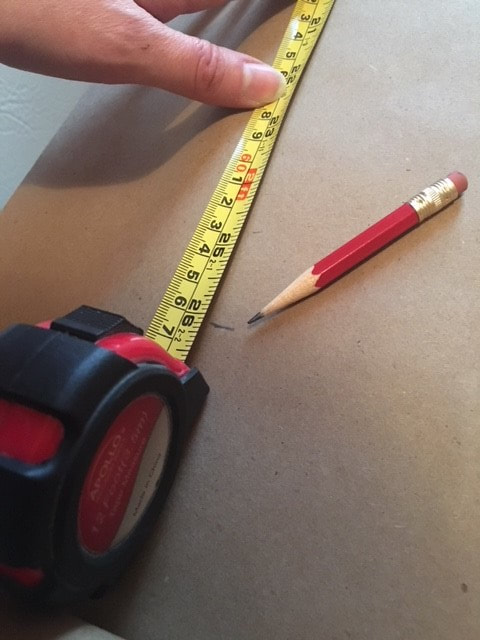 First you'll want to measure the wall space where the scroll will hang. Figure for an extra two inches on both the top and the bottom where the paper will be rolled. I had 30 inches of wall space to work with: two inches for the top roll, 26 inches for the hand lettering area and two inches for the bottom roll. Unroll a section of your paper, allowing the free end to roll up as desired. Measure and mark the area you will do hand lettering on. 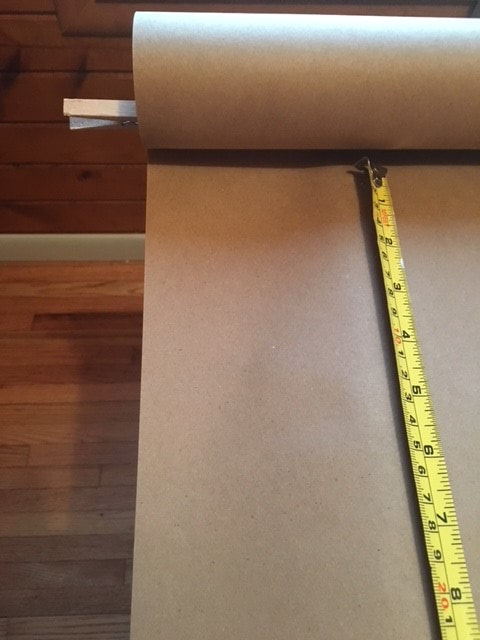 Secure the free end of the paper with clothespins. Determine how much rolled paper you want at the other end of the scroll and cut free from the whole roll of kraft paper. Secure this end with clothespins as well. 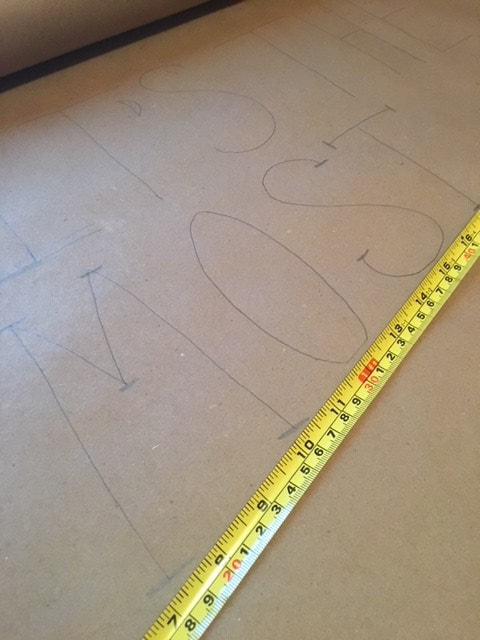 Once I had everything measured and the ends secured, I started hand lettering! I used my pencil to trace out the saying I chose. For the angled lettering, I used my tape measurer as a guide. 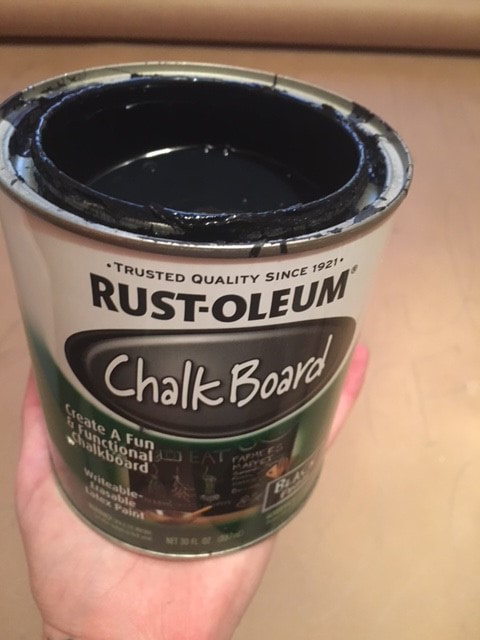 I'm really cheap, so I just used paint I already had. I wanted to do black lettering, so chose to use some leftover chalk board paint that seems to be a bottomless can! 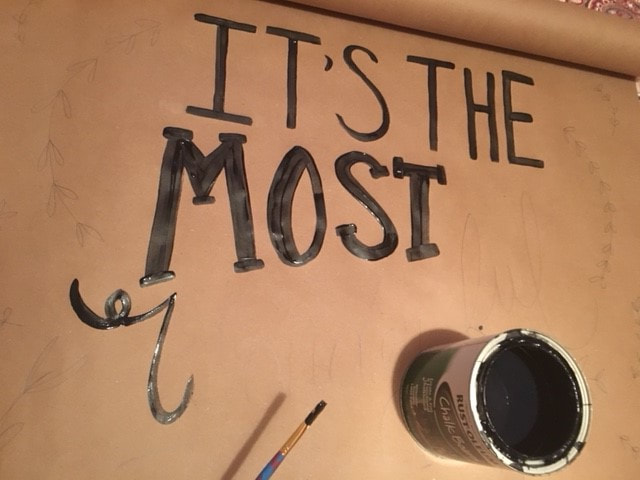 I used a small paint brush to trace over my pencil lines. I mixed fonts and strokes to give it a playful look (and to disguise any mistakes I made!). 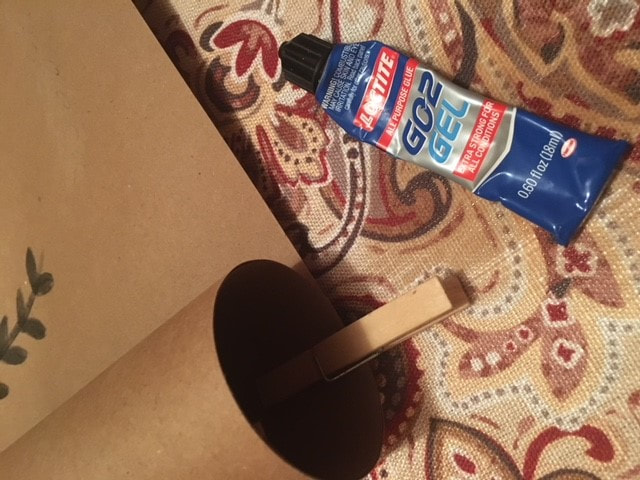 After the paint dried, I placed some glue under the rolled up paper to secure. I also added some staples later on to add extra reinforcement, because - gravity. 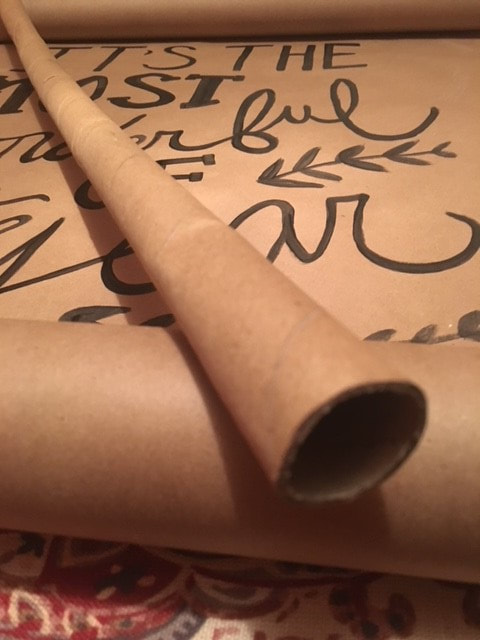 Next came the wrapping paper roll to hang the scroll from.  I tied my string to a pencil and looped it through the paper roll. I then inserted the paper roll into the top roll of the scroll.  Once the paper roll was through, I pulled the string to my desired length and tied/knotted the ends.  Here she is, in all of her glory! For being a beginner in hand lettering, I have to say I was pretty proud of myself. And just to give you an idea of what I was working from, here's the image that inspired me! 
1 Comment
I went all out this year when it came to Christmas décor. I decked our halls inside and out in a day. I couldn't stop myself. I was that pumped to transition into the most wonderful time of the year! I felt a little silly though, because it was an abnormal 60 degree November day here in Iowa! I splurged a little bit this season and purchased a few new items to add to the decorations we've had for years. Much of what we have we 1) bought when we got married, 2) inherited when we bought our first home, or 3) inherited when we bought our second home! A lot of really great pieces, but many had seen better days... Although I bought some new items, some assembly was required. I rarely buy a completely ready-to-use piece. I normally buy the elements to make a ready-to-use piece. Here are just a few of the items I made or curated to make our home feel magical this holiday season!  DIY Christmas Wreath I forgot how expensive pre-made wreaths are - $50-$100 plus! I was not willing to pay that much because I wanted a wreath for both our front and back door. I ran across some plain wreaths that were in the $10-$20 range, and they were 50% off. More my style. I then browsed a Christmas accessory isle that had small, festive items that could easily be clipped into or twisted into a wreath. Three small accessories was all I needed to create a simple yet elegant wreath. After discounts, this wreath cost me under $10 to make! I plan to carry this wreath into other seasons by simply swapping out the accessories.  DIY Stockings I don't want to be misleading - I did not make these stockings, I just added the letters! Stockings are another item that can be pretty pricey. I found these stockings at the dollar store. I picked up a single piece of gold, glittery scrapbook paper for the lettering. Using a Sharpie, I drew out the letters on the back of the scrapbook paper. I'm getting better at hand lettering, you could certainly use stencils if needed. I then cut out the letters and glued them to the stockings! Easy as that. And by the way, we don't have kids...these stockings are for...OUR DOGS - Homer and Madison!! You could say we love them a little bit.   Curated Spaces I absolutely LOVE to shop my house. I shop my house before stepping a foot out the door to go to a store. I believe that if you can take a moment to look at what you have with fresh eyes, there are so many possibilities! The space above and the vignettes below are mostly pulled together from items I had. The only new items are the Poinsettia floral bouquets and the red/gold ornaments.  I upcycled this sled last Christmas. See how here.  I also tried incorporating natural items from our property, like the branches and sticks in this planter.  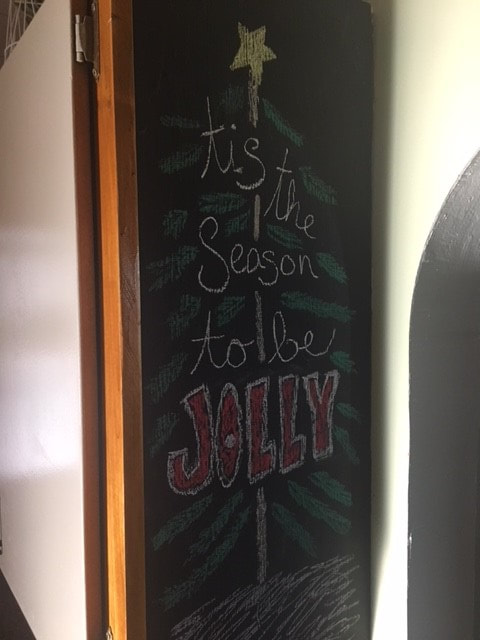 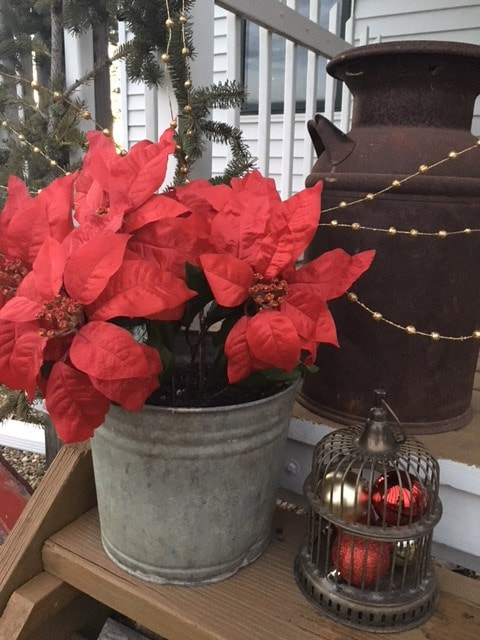  I have been seeing cute little pumpkins made from cloth everywhere this season. I decided not to purchase any because I knew there had to be a DIY option. After some planning on my own and Pinterest searching, I compiled my ideas and created my own version of a no sew cloth pumpkin! What you'll need:
Start by cutting the sleeve off your chosen sweater or t-shirt. 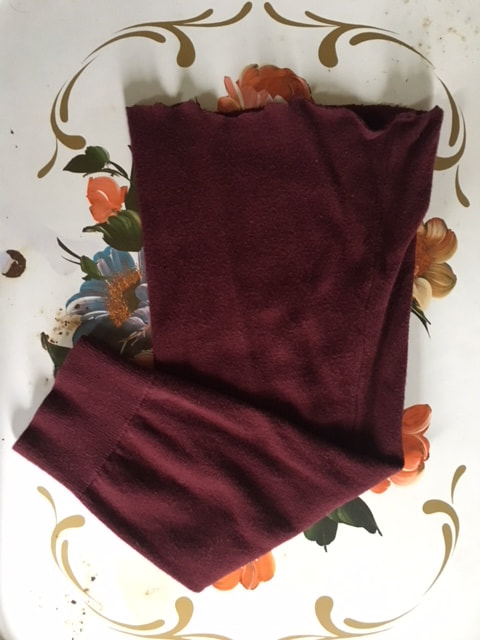 Flip the sleeve inside out and secure a rubber band at one end. 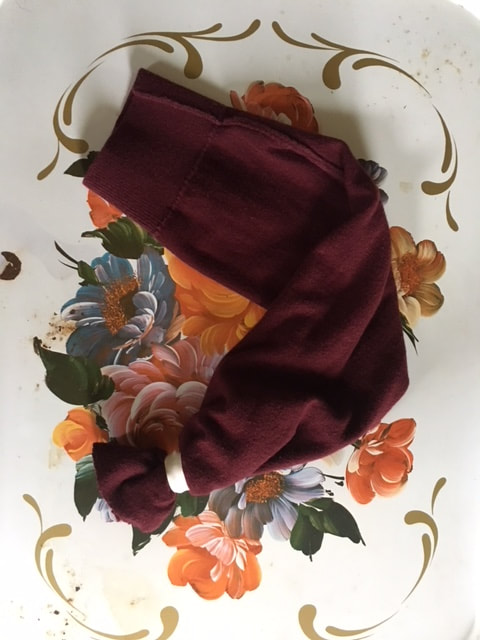 Flip the sleeve right side out and pour rice into the open end of the sleeve. Keep adding rice until you reach the desired shape of your pumpkin. (Good luck not spilling!) 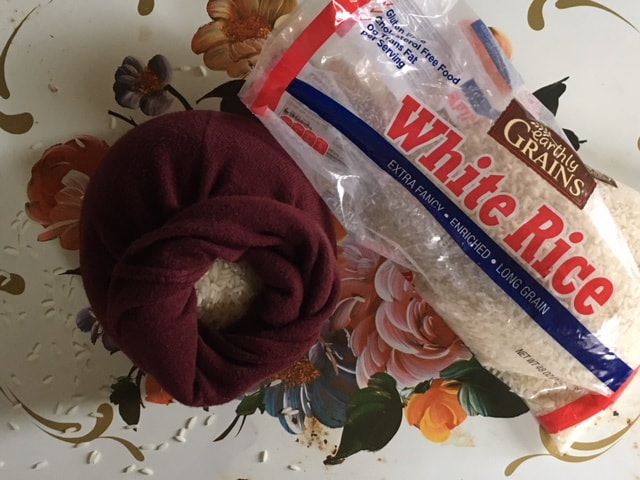 Once you're pleased with how your pumpkin is shaping up, twist the cloth at the top of the pumpkin and secure with another rubber band. 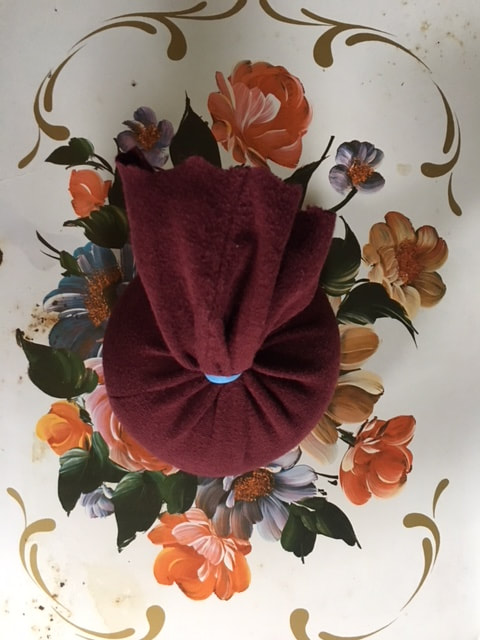 Next, you'll start creating the stem. Starting at the bottom of the rubber band you just put on, start winding twine around the rubber band and fabric, twisting the cloth as you wrap the twine tightly around it.  Once you get to the top of the stem, wind the twine back down to the bottom and secure the end with all purpose glue. 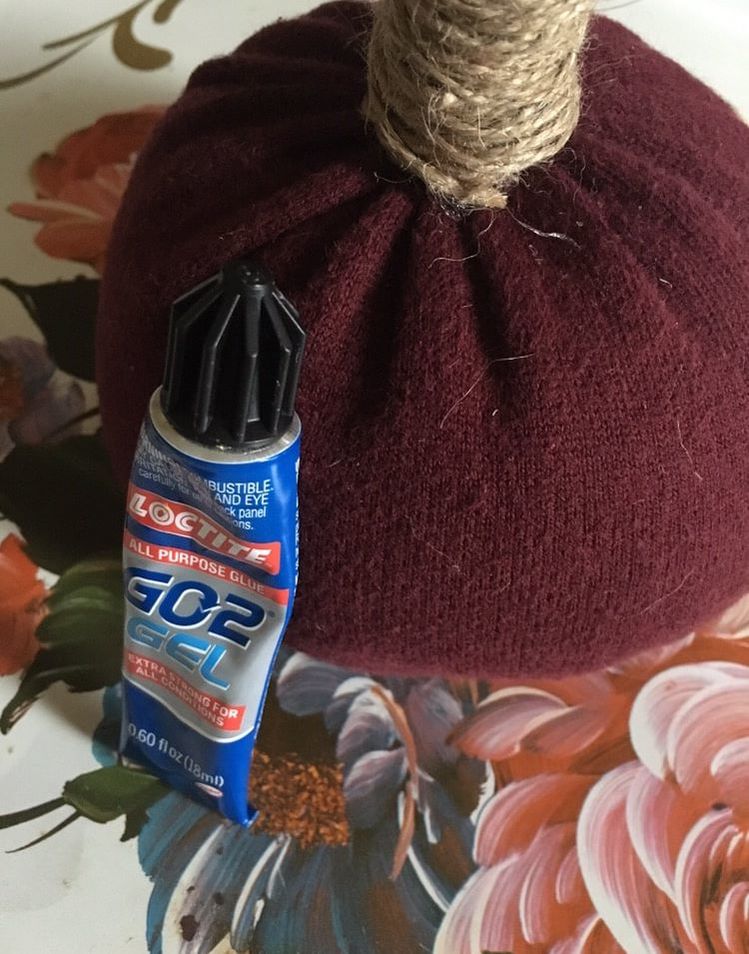 The last thing you'll do is trim the extra fabric from the top of the stem.  I used a men's sweater, a women's sweater and a men's t-shirt (all pulled from our closets) for my pumpkins. The different sizes and fabrics of the clothing pieces created three unique shapes that I liked equally! 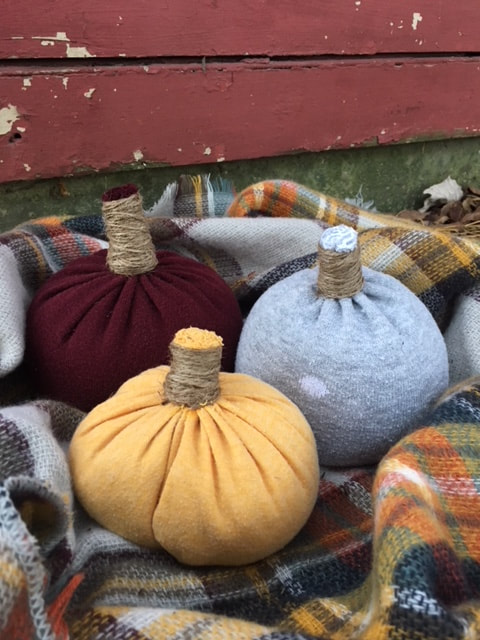 The rice gives these pumpkins nice weight and allows you to shift their shapes so you can style these a little easier than if you were to use Fiberfill for stuffing (which is a technique I ran across a lot for these). It literally took me minutes to pull these together and I loved that this project allowed me to repurpose a few pieces of old clothing!  I'm preparing myself for the day frost kills off my flowers and garden, which will be sooner than I think, and a sad day...So to fill the space my outdoor plants took up in my heart this year, I'm attempting to hoard a few house plants to hold me over until next Spring. I've always wanted to start a terrarium, so gave it a shot. It was super simple and turned out so pretty. I now understand why they're such a popular way to grow and display plants. Here's what you'll need:
Start by cleaning the inside of your terrarium. 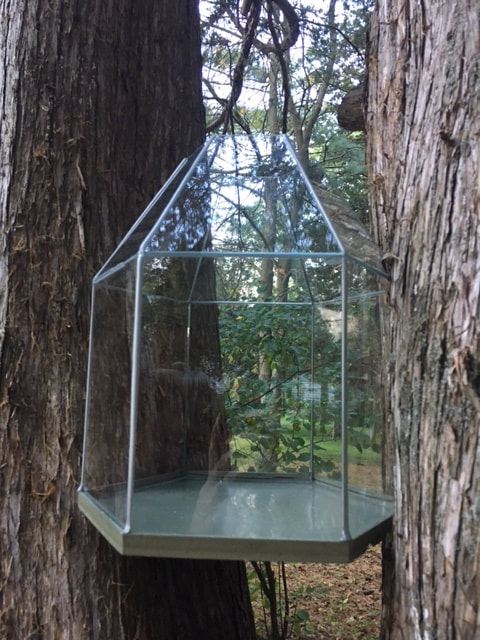 Next you need to establish your drainage layer, filling the bottom with small rocks. I laid down a little over an inch of rock.  I then put in a thin layer of activated charcoal. This helps ensure excess water doesn't stay in the soil and cause root rot. 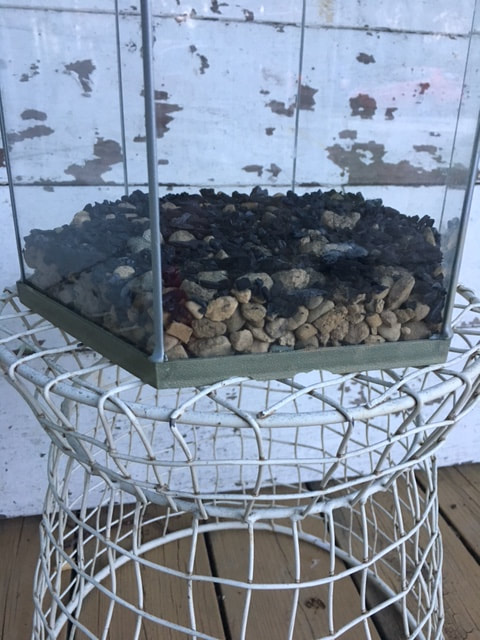 Once I had the drainage layer in place, I started adding potting soil. I put a think layer in, a little over 3 inches, expecting it to settle as I began to water the plants. I also wanted enough dirt to place the plants into! 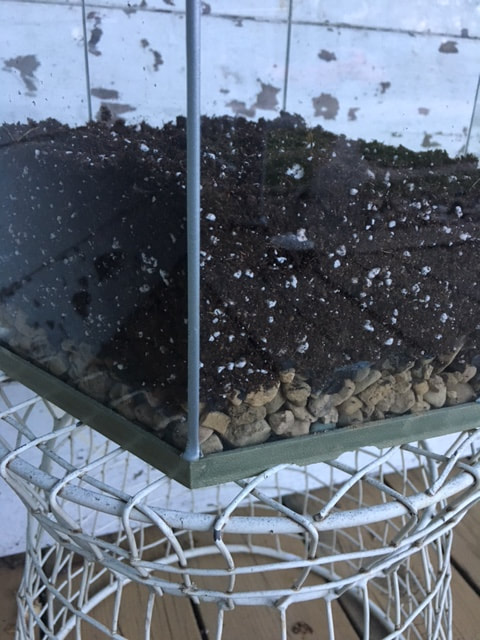 The final step was adding the plants! I selected four small plants of different varieties from Treasures on Main in Westby, Wisconsin. Three will be a little taller, one is more of a ground cover. 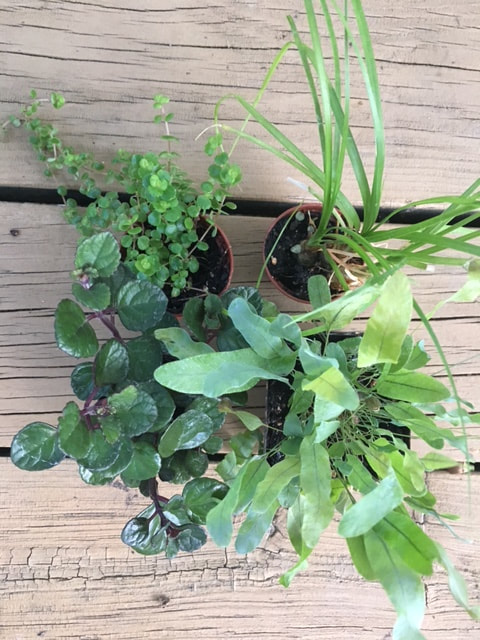 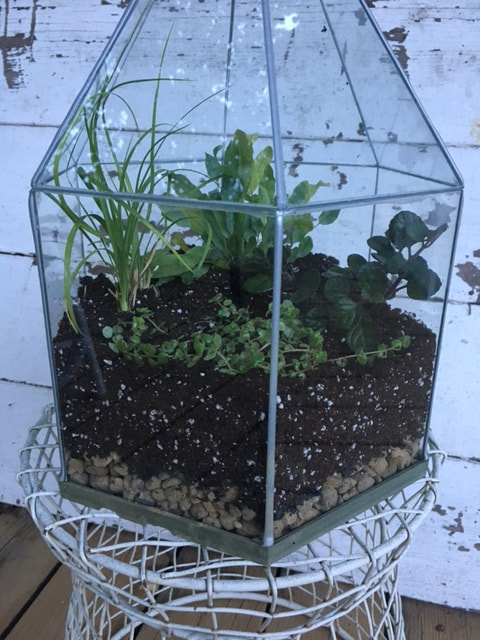 There are so many things you can do with terrariums. A quick search on Pinterest will reveal image after image of cool ideas! Get creative! I plan to add some colored rocks and small figurines to mine once I see how the plants grow in.
Over the summer months we completed a really fun project at our family cabin - a fishing pole photo display showcasing the Miller side (my mom's side) of our family.  Here's what you'll need:
We started by marking out where we wanted to secure the pole on the wall. We used one screw between the handle and reel, and one screw at the tip of the pole after determining how far we wanted the pole to bend above the doorway. From there, we added fishing line by tying it to the loops located on the pole itself. We cut the lines to various lengths depending on where we wanted the fishing lures and photo frames to fall. Once the line was in place, we started attaching the fishing lures and photo frames. The fishing lures have small hooks that pop out of the top, so we were able to easily secure them to the lines. To make sure the photo frames stayed on the line, we placed one thin poster mounting square on the back of each photo - pinching the fishing line between the mounting square and the back of the frame - so they dangle freely vs. being stuck to the wall. Here are some close ups of this project:   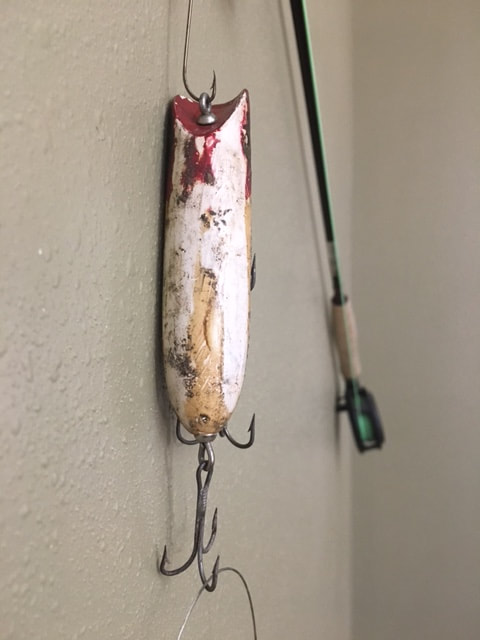 And here's my cute grandma with the finished project. We have her to thank for so many good memories at the cabin! 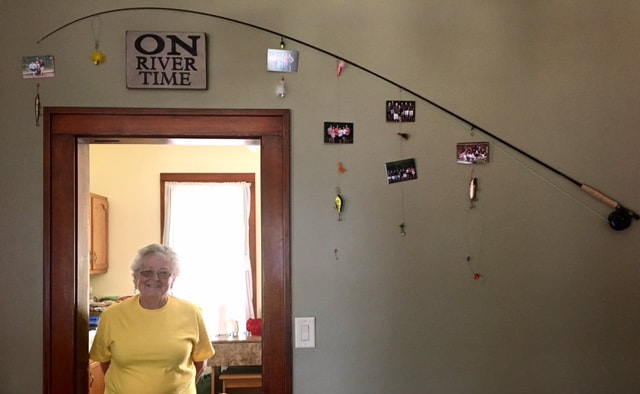 My Fall decorating routine is in full swing. Once September 1st hit and the temperatures started to dip, I was in the mood! When the mood struck, I also happened to be cleaning out our basement. It was great timing because I was able to "shop our house" for some décor pieces that I could use this Fall. I felt particularly inspired by these finds: 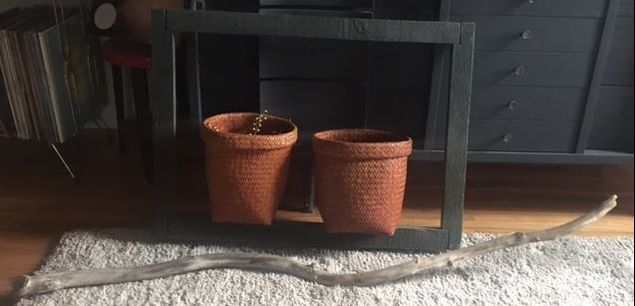 The frame and piece of driftwood were something I had hanging on the porch of our last house. The frame used to have a screen inside it, but it had come undone after being haphazardly shoved in the corner of the basement...which actually worked in my favor for this project. The baskets were finds I picked up at Gooselake Creations, but hadn't found the right spot for them yet. I played around with different ideas and really thought it would be neat to make a "3D" piece of art using the items mentioned above and some artificial flowers. Our dog, Homer, loved my vision and was interested in helping! 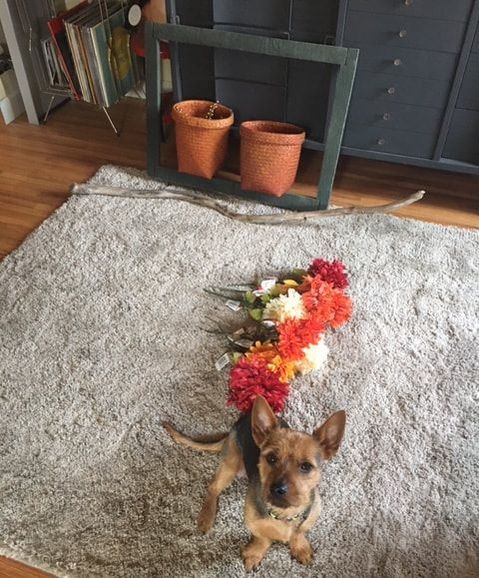 We had a large frame hanging in our entertainment center area already (see below), so I was able to utilize the existing nails for the frame. Because the baskets had some weight to them, I chose to nail them into the wall. A surprise I wasn't expecting was the outlet we added during our renovation in case we ever mount a TV to the wall. With the open frame, the outlet was not aesthetically pleasing! I chose to cover that with a piece of burlap. The burlap is optional if you do this project, it was a necessity for me! Once I had everything in place, I started arranging the flowers I purchased inside the baskets. I found some beautiful mums in cream, burgundy, orange, and yellow at Dollar Tree (one of my favorite places for artificial flowers). This project was as simple as that! See below for the finished product: 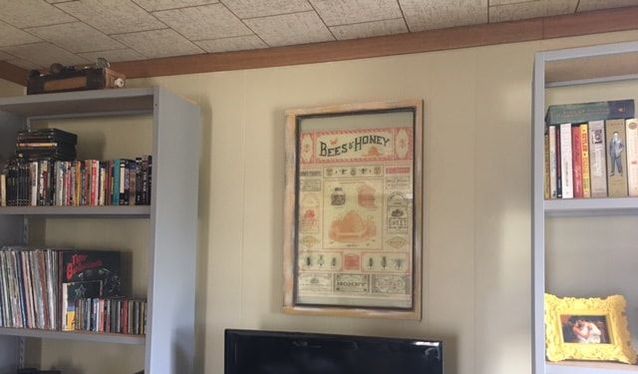 Area Before 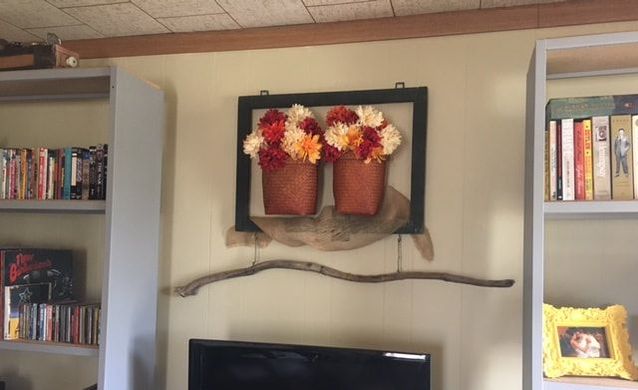 Area After 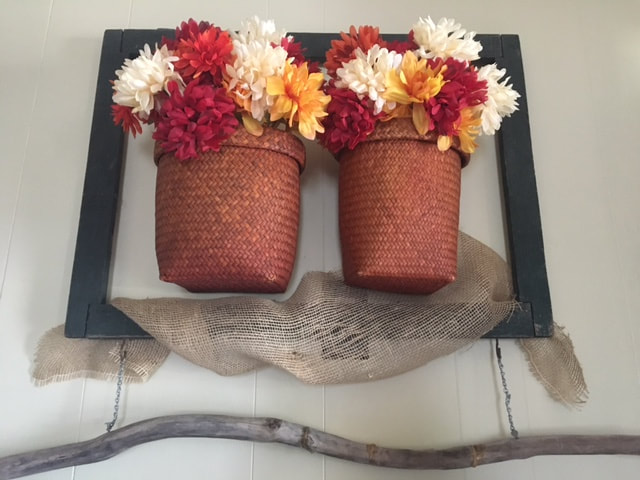 I really enjoy looking at homes when I'm driving to wherever I'm going. I like to look at the exterior styles, love when I can catch a glimpse of the inside (not in a creepy way, I promise), and am always looking at outdoor decor. There are just so many ideas out there to draw inspiration from! I'm a big fan of porches. I recently drove by a home that had colorful pennant banners hanging from the ceiling of their large, wraparound porch. It looked so adorable, I couldn't get it out of my head... We're tight with our budget right now, so I wanted to find a cheap option to execute this idea ASAP. Without any luck finding pre-made banners at discount stores, I decided to make my own with two items I already had at home: twine and burlap. Here are all the supplies you'll need:
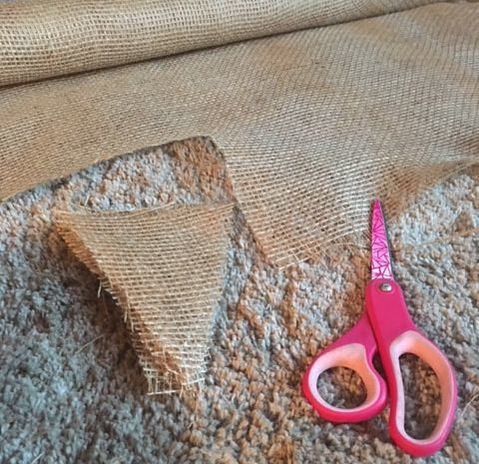 I knew I had two, eight foot strands of twine to fill with pennants, so I cut quite a few to start and then started laying them out along the twine I had measured out. Once I had all of the pennants cut, I started weaving the twine through the top of the pennants: 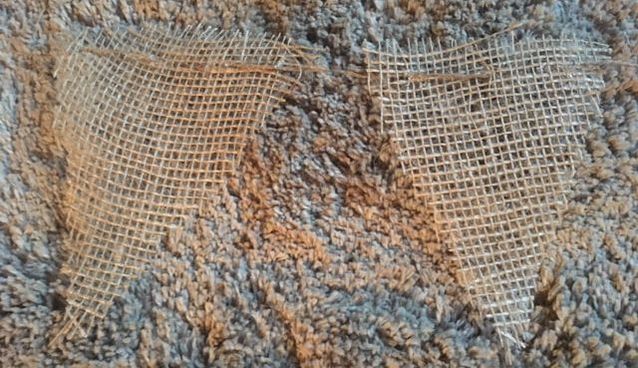 After I had all of the pennants on the twine, I put a dot of all-purpose glue where the twine and burlap intersected. 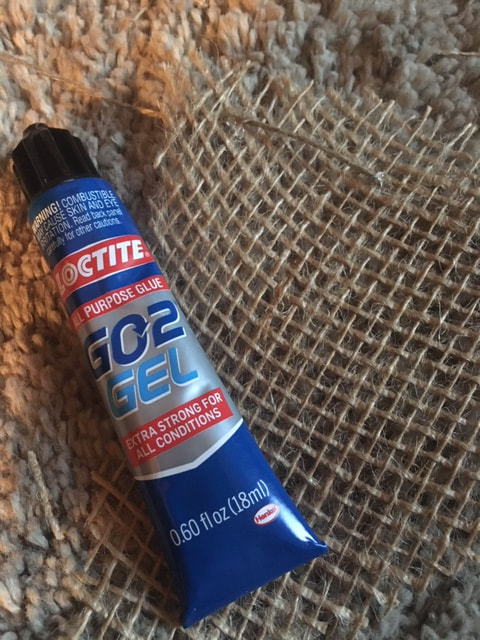 When the glue was applied to every pennant, I hung the banners up to dry:  And here's the final product on our front porch: 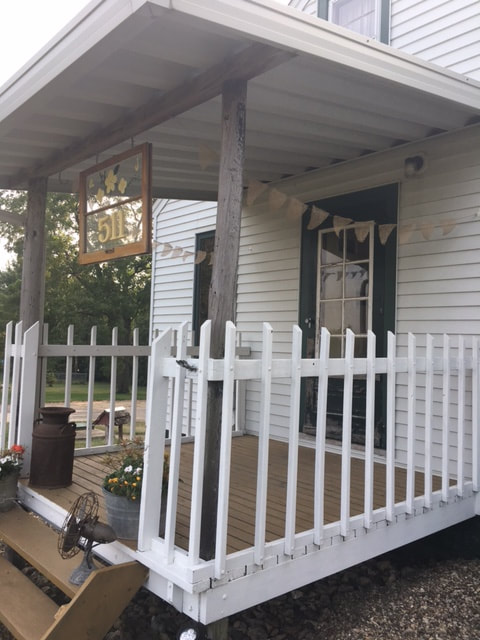  I think these turned out so cute and because they are plain burlap, they will definitely look good with my Fall decor, but will also look good during other seasons throughout the year! They would also work well indoors.
Playing with electricity, especially in an old house, can be a little nerve wracking. But that didn't stop us from swapping out the light fixture in our kitchen! Expert details on how to install a light fixture can be found here. Who better than Bob Vila to walk you through this? We're definitely not experts, but I'll show you some visuals and a life hack we learned from our installation below. The first and most important step is SHUTTING OFF THE BREAKER TO THE AREA YOU'LL BE WORKING ON! Next, start to carefully remove the existing light fixture.  We chose to take out the plate that extended across the electrical box and utilize the new one. We did recycle the old screws because the depth of the electrical box was more than the length of the screws that came with the new fixture.  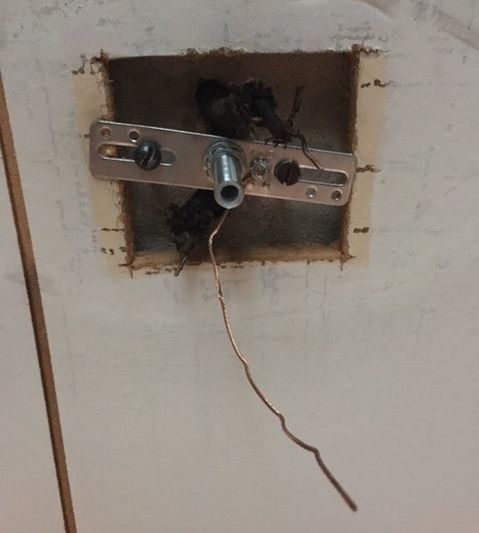 Before we began to install the fixture, we needed to trim and strip the wires at the top of the fixture where it would hang. We did not have wire strippers, so here's a life hack: You can use scissors (as long as you use them gently). I applied light and consistent pressure with the scissors on the casing of the wires until I was able to slide it off. The goal is to remove the casing without severing any of the wire. 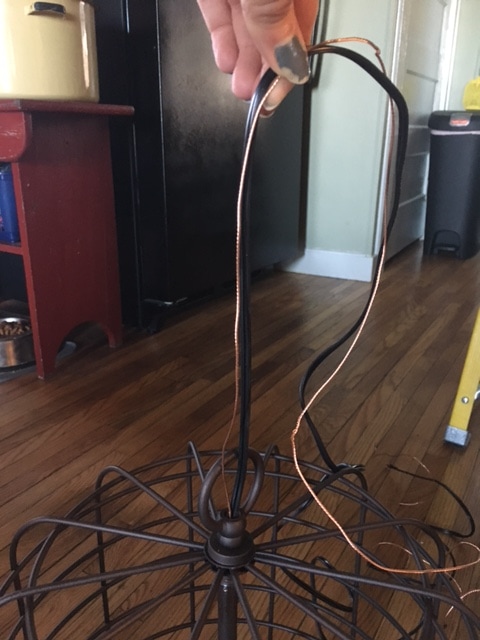 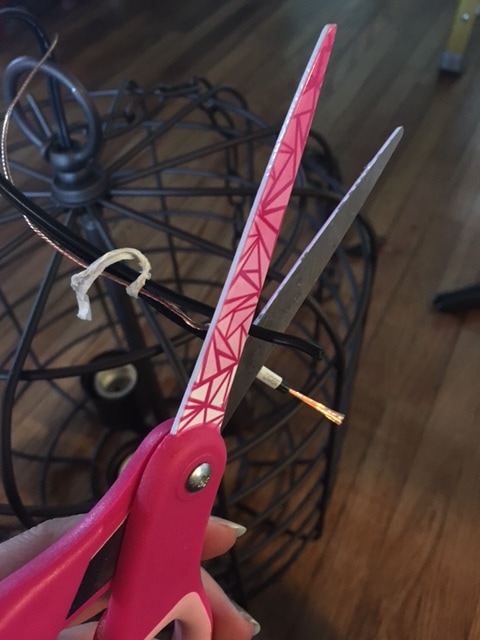 Once that was complete, we cut the chain to the desired length and wove the wire through it. 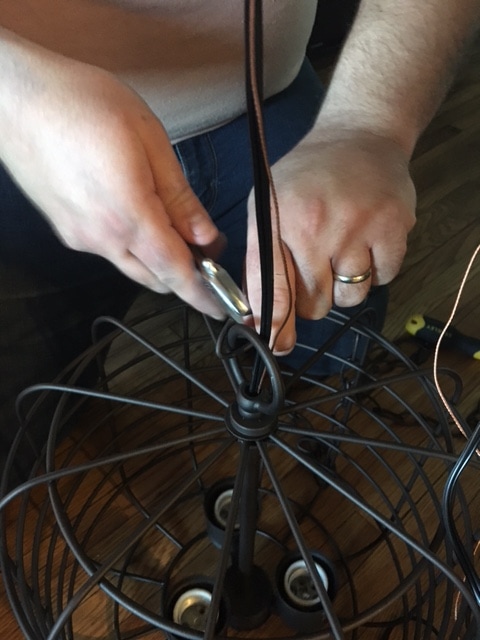 Following the instructions in the box, we connected the electrical box and fixture wires accordingly, securing them with wire nuts. The final step included fitting the fixture's base over the electrical box and securing it. 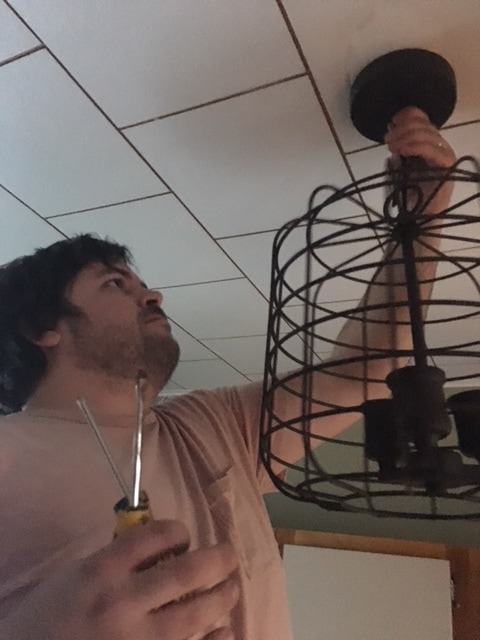 We love the warm glow of this fixture's Edison bulbs and its farmhouse style. We got this one from Menards if you're interested! 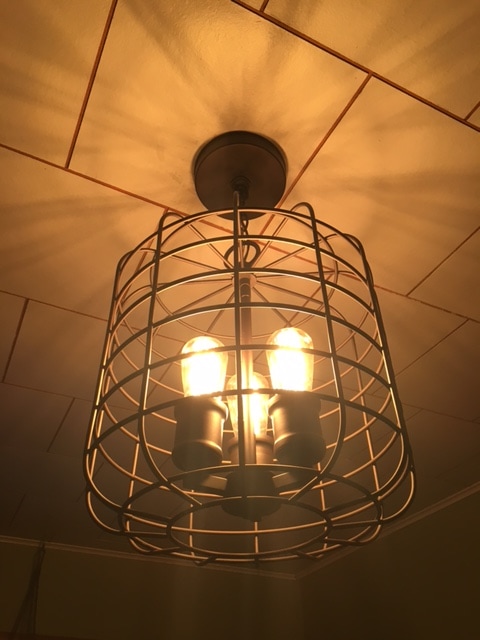 Once I see a DIY project I like, it's hard for me to wait long before executing it myself. On a recent trip to Cedar Rapids, Joel and I drove through a neighborhood of large homes that we have frequented over the years. One house that always catches my eye has the cutest outdoor décor for every season. They had added an address marker sign on their front porch made from an old window and wooden numbers. The day after seeing their sign, I was searching for the supplies I needed to make one for our home! I was able to complete this project in under two hours and $20. Here's what you'll need:
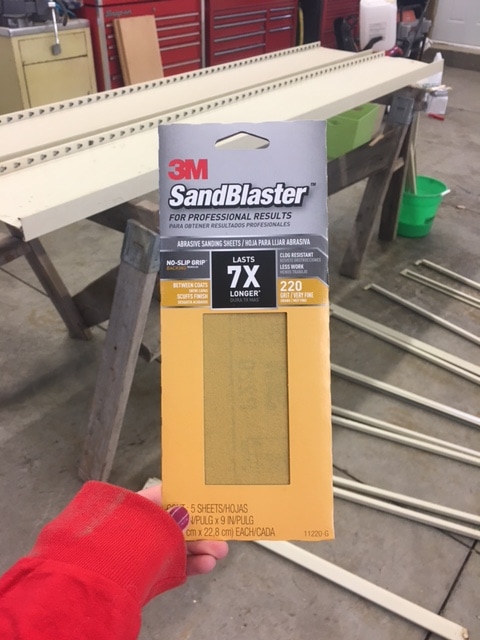
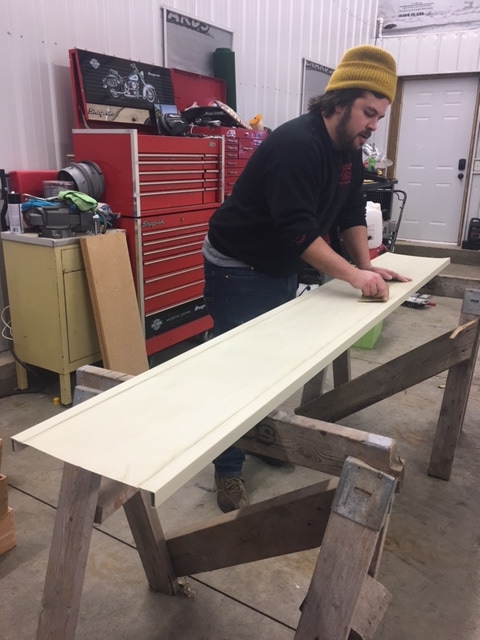
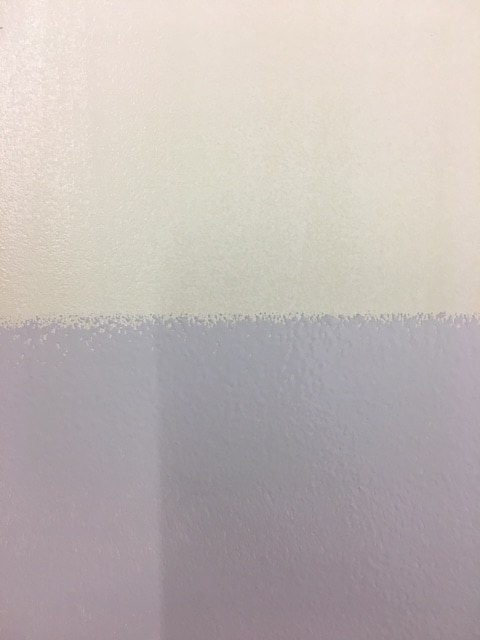
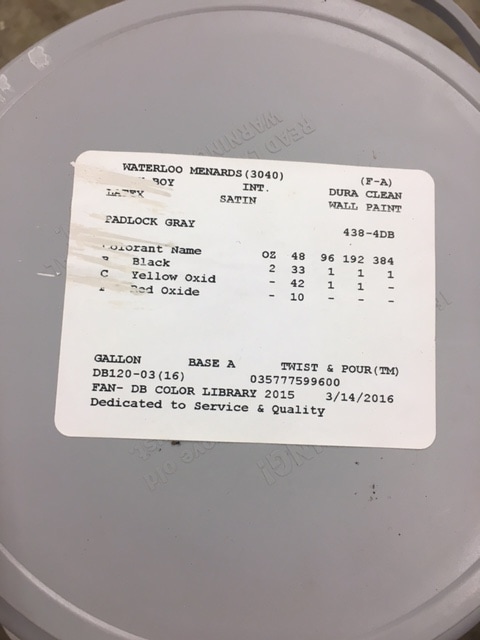
I found a great old window at Habitat for Humanity ReStore in Waterloo for $5.00. 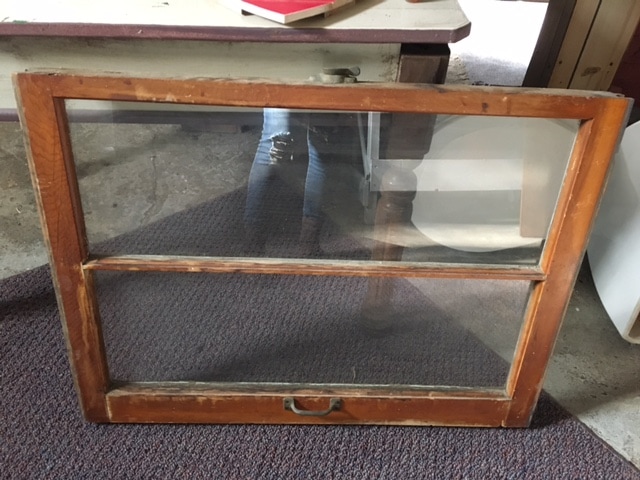 After cleaning up the window, I started working on the numbers. The numbers I found are from Menards and they cost around $3.00 per letter. I started by sanding each number with a sanding block. 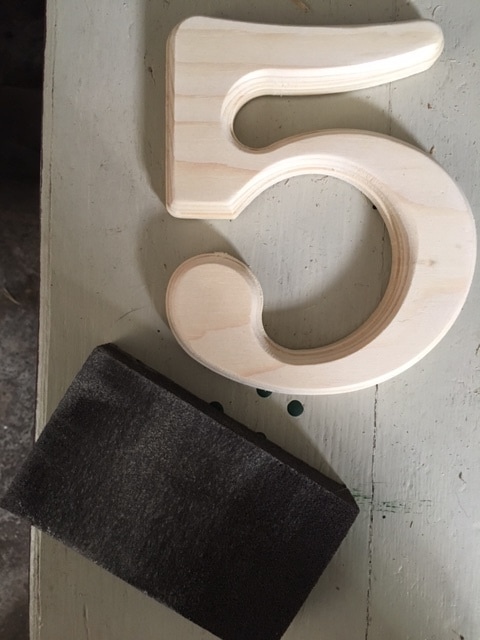 From there I started painting. I used the same yellow outdoor paint that I used on my front and back doors so the sign would match my set color scheme. 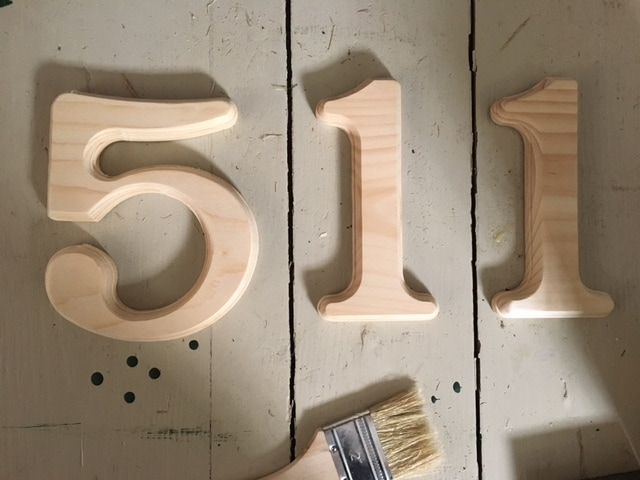 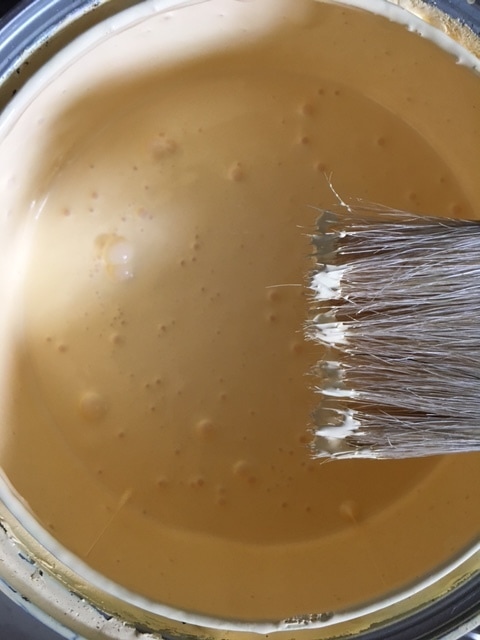 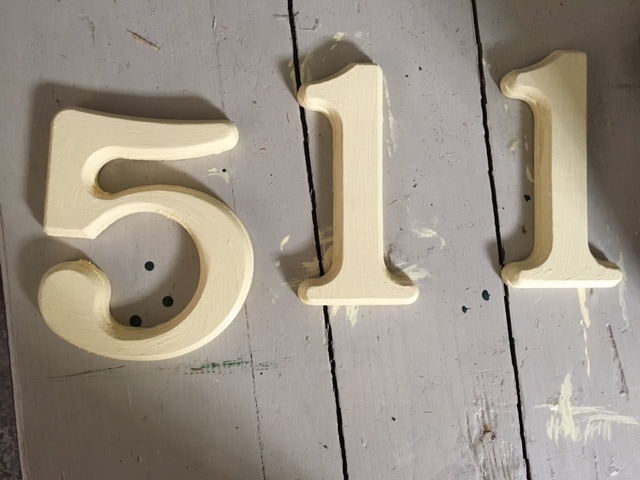 While I let the letters dry, I started painting a design on the upper portion of the window. This part is optional and depends on the type of window you find. The original idea I saw utilized a window frame with four small sections that ran side-by-side horizontally, big enough for one wooden number in each section. Because I couldn't find that type of window, I got creative! 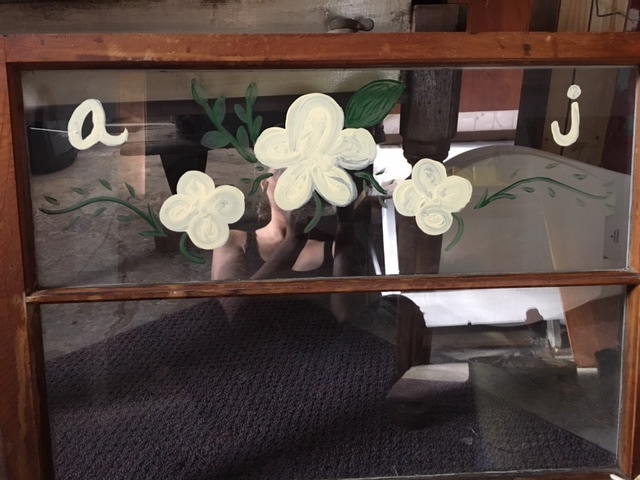 Once I finished painting the upper portion of the window, I started gluing the numbers to the lower portion. I started by using Gorilla Glue, shown in the photo below, but it did not hold up in our cold Iowa weather. I also don't think it's the best for use on glass. For my second attempt at gluing on the numbers, I used Power Grab adhesive. Power Grab requires a caulk gun. Once I had the tube in the gun, I applied a narrow line of adhesive down the middle of each number. 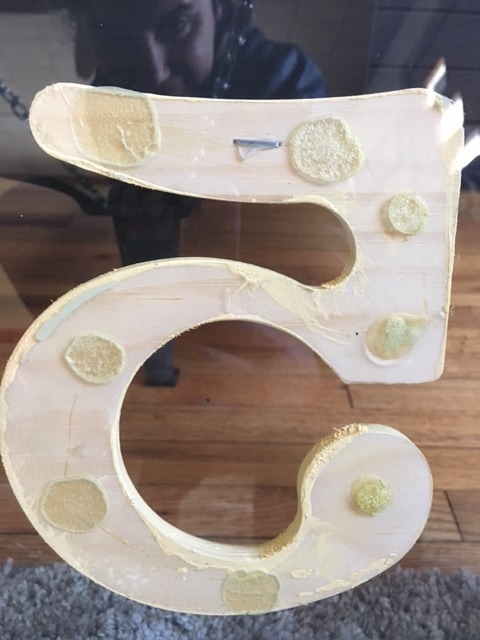 I let the paint and glue dry overnight. Here's what it looked like before I started adding the hardware to hang it up. 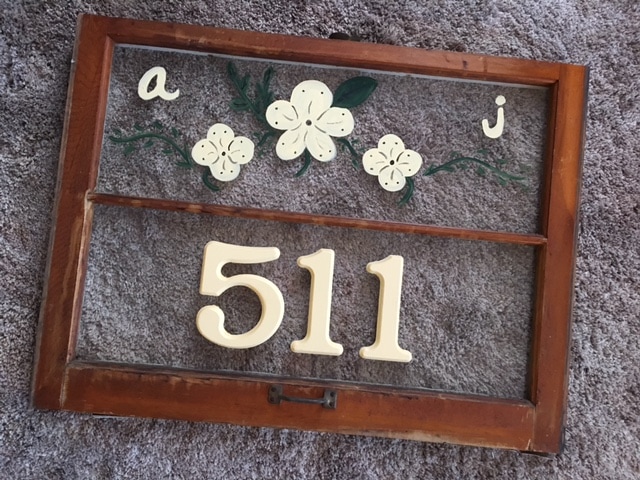 The hardware I used are called screw eyes. I placed two screw eyes on the top of the window and two screw eyes into the wooden beam I chose to hang this piece from.  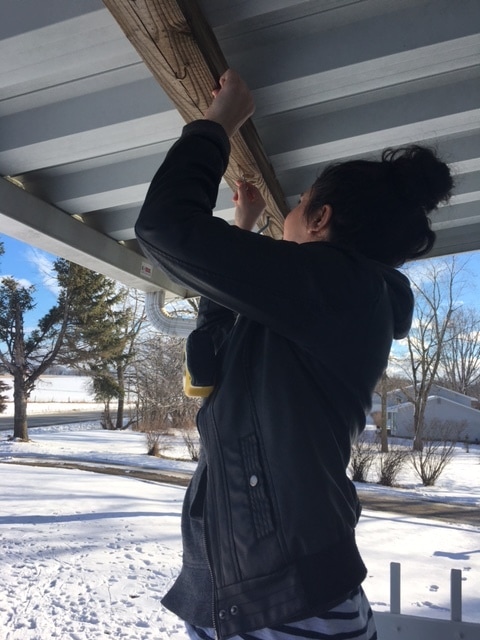 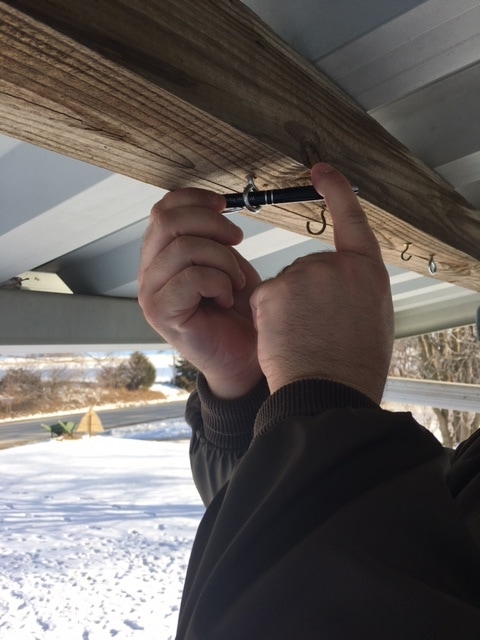 PRO TIP Courtesy of Joel - To help drive in the screw eyes, you can use a screwdriver or pen to twist the screw eye into the wood after you have it started. When it came time to hanging this sign, I used my old friends: zip ties. I love zip ties. You could go a more heavy duty route by using S hooks (which I eventually will), but to get this hung up (due to my excitement of seeing this project finished) I used zip ties. To ensure it was reinforced until I get S hooks, I used three zip ties per side. 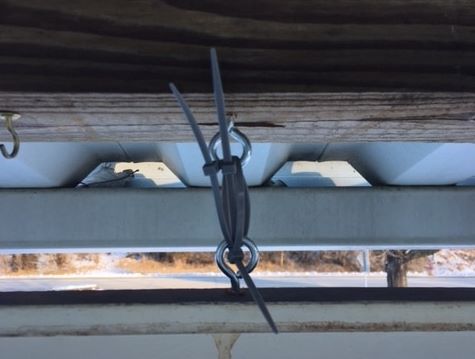 When everything was secure, we stood back to admire our work. This turned out really great and is a nice piece to have hanging when we don't have seasonal décor on the front porch. Here's the finished project: 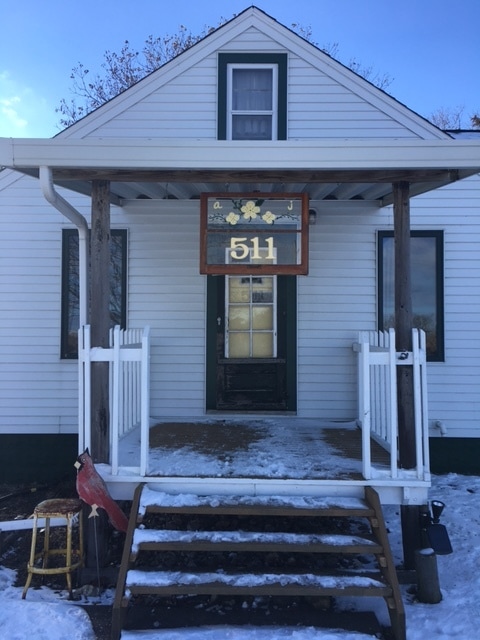 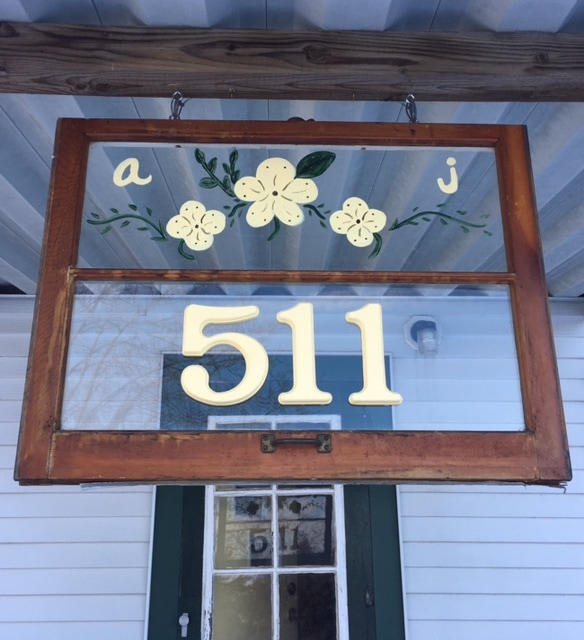  The project I'm sharing today may be my favorite DIY project so far! Creating faux built-ins in our living room completely changed the look and feel of our home. Our house is small, so storage is key. We have a large living room that we weren't utilizing to its full potential. We pieced some items together as temporary filler, but I knew we could do better. After several months and three different design plans later, I completed the project outlined below. The built-ins give us the additional storage we needed and look 100% better than what we had going on before! Step 1: Find, prep and paint shelving. Originally, I planned to buy shelving. Then I wanted to build shelving. Then, by talking to the right people, I found a balance between the two - prefab shelving that could be assembled in whatever way I wanted. My dad had two large shelves he wasn't using that were from a medical office. They held medical charts so are very solid shelving units (which I needed, especially for Joel's records). 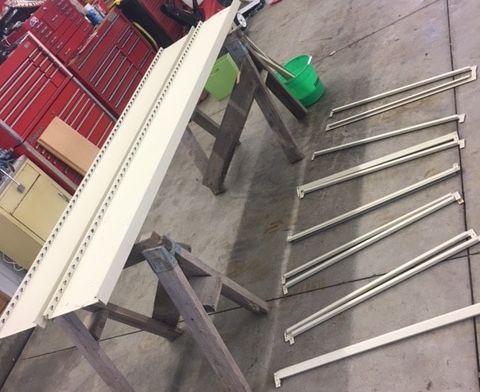 The shelving consists of a metal frame with compressed wood panels for the shelves. I did some online research and decided I'd paint the metal and leave the compressed wood panels as they were. First, we sanded the frame and the bars that hold the wood shelves. We then washed the metal materials with warm water and household cleaner. 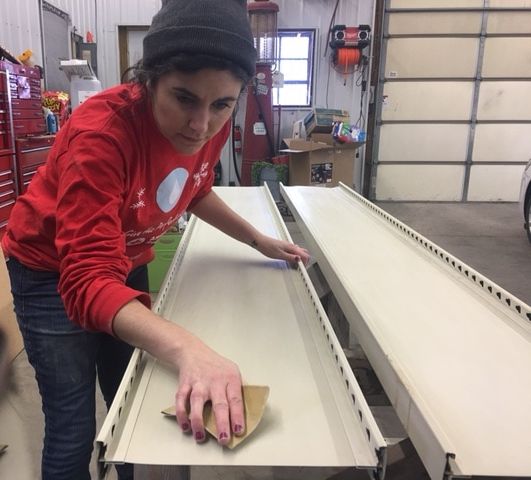 After the metal was sanded and cleaned, I painted everything with two coats of latex paint. I used a roller for the large parts and a brush for the nooks and crannies. I had half a gallon of medium dark gray (called "Padlock Gray") paint left over from painting our guest room that I wanted to use up vs. going out and buying more. 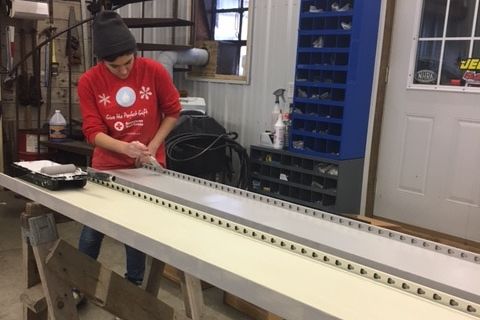 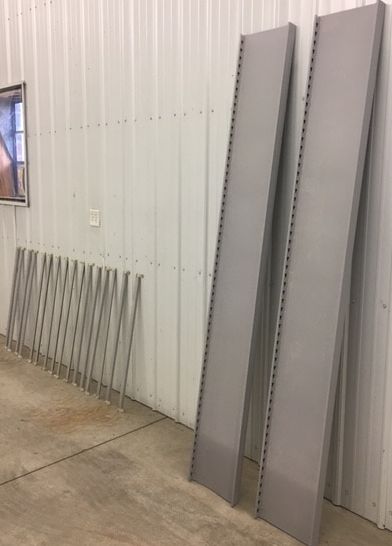 The last thing we did on the shelving was cut 30 inches from the bottom of the "inside" panels. We didn't have enough wall space to put a shelf, dresser, shelf - so our solution was to have the inside of the shelves braced on top of the dresser. Step 2: Find, prep and paint dresser. In total, this project only cost us $75. The one thing I paid for was the dresser that we used as the centerpiece of our built-in. I found a great vintage dresser on the buy/sell app "Let Go." I bought it from a nice woman who was not creepy in any way. It was a positive buying experience! She had already painted it with black chalk paint, which I liked. The only thing I did was paint the top of the dresser with the same gray as the shelves to make the separate pieces look like one unit. 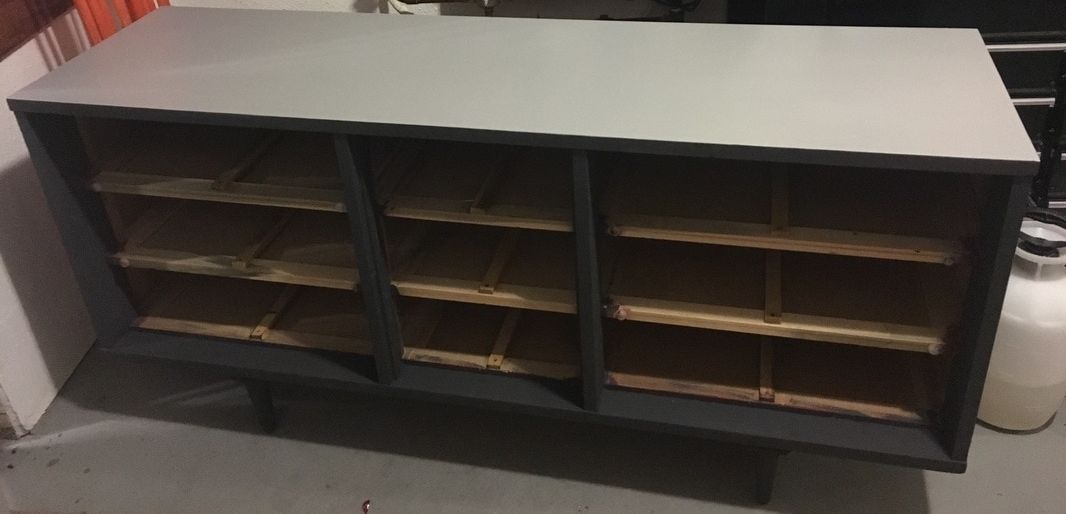 Step 3: Installation! I was anticipating installation day like a kid anticipates the arrival of Santa. Projects are life in my world. Before I could start putting the pieces together, I needed to add some protection to the bottom so they didn't scrape our hardwood floors. I used adhesive felt squares for the bottom of the dresser legs. For the shelves, we used an industrial tubing used on semis to protect various parts from damage. See below for what this tubing looks like. 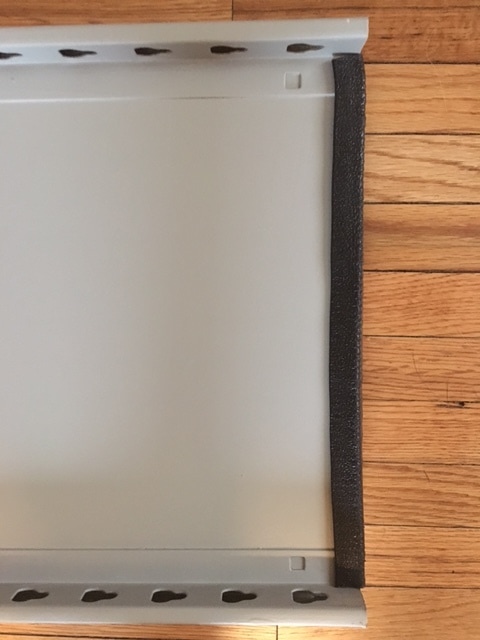 After I knew my precious floors would be protected...we started putting the pieces together! 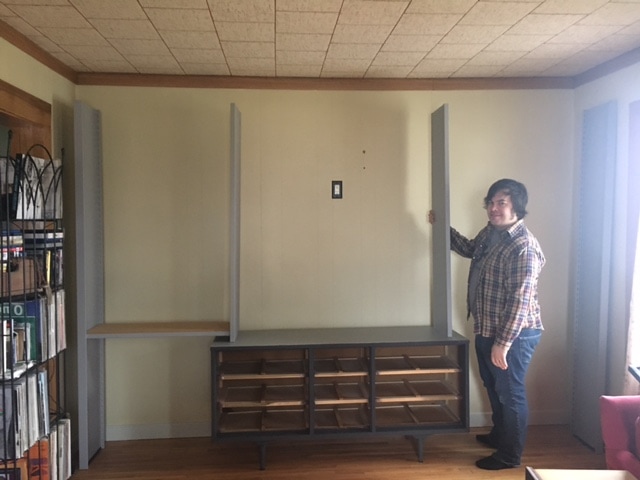  The shelves were super easy to put together. No tools necessary. The bars snapped easily into the sides. From there, we simply set the compressed wood panels onto the ledges of the bars. 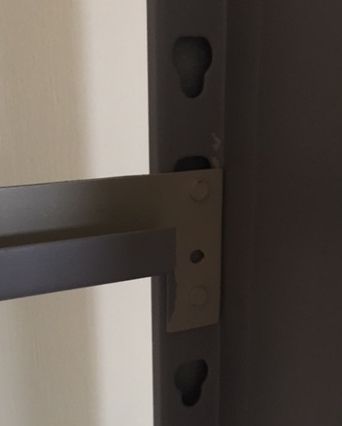 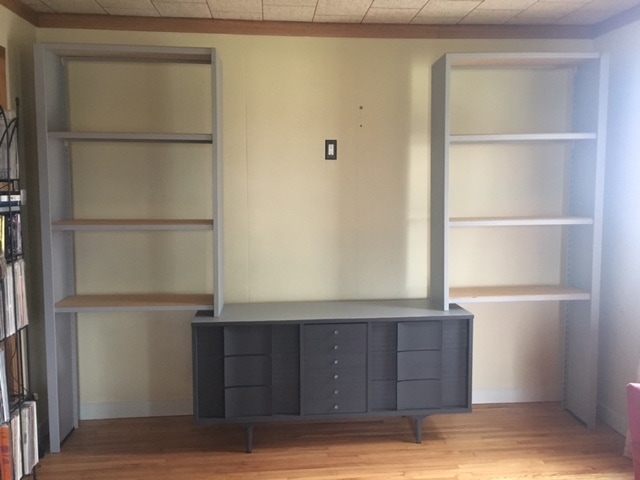 I was thrilled with everything once it was all in place. It was very sturdy, looked attractive, and was going to help solve some of our storage issues! I loved it even more after I took a look at what the space looked like before. I'm a little embarrassed that we had people over with the space looking so disheveled...Take a look for yourself! 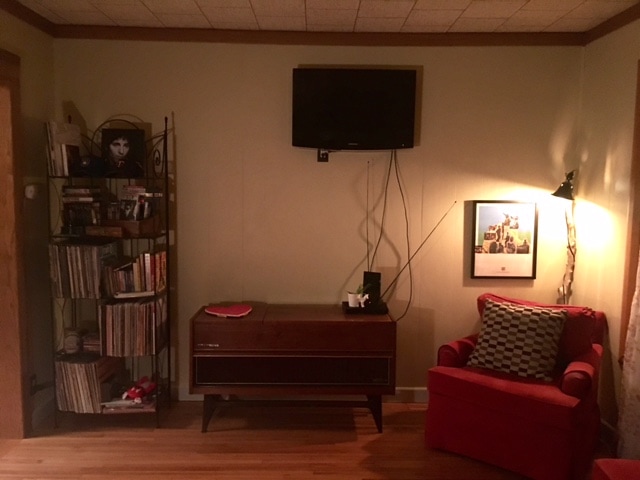 Before (so embarrassing!!) 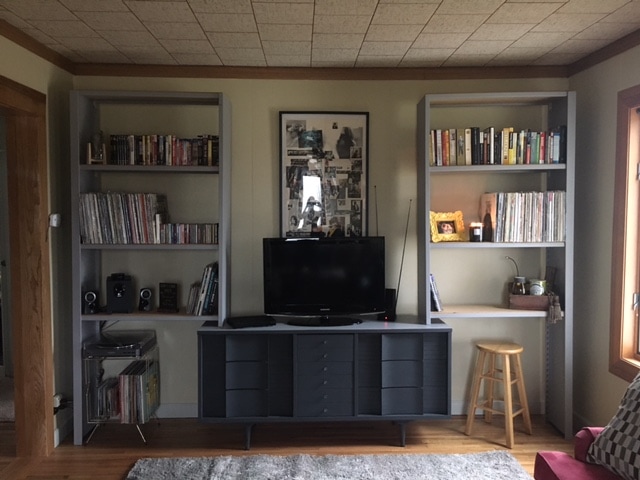 After (so much better!!) I was able to add storage for DVDs, books, CDs and records. I dedicated a space on the left to Joel's record player (it is hard to believe that we went almost one year without having this baby set-up) and a space on the right for a little desk to keep my planner/laptop.
You can do this! All you need is two bookshelves, a dresser, and a little imagination! |
Archives
August 2022
Categories
All
|


 RSS Feed